Introduction
2D animation has been around for over 100 years. Since its inception, this entertainment type has gone through quite a few different evolutions, each time becoming more and more complex. Now, in the latter part of the 20th-century to the present time, 2D animation is a huge part of video games – with thousands of games using characters and environments solely constrained to two dimensions. I personally like the look of a 2D game more than its 3D counterpart.
In this tutorial, you will learn how to take a 2D character, rig it, and use it in your own 2D game. You will learn Unity’s sprite rigging system, along with how to use the Unity Animator for 2D characters. No previous knowledge of the Unity Animator will be necessary, however, I suggest you check out our Unity Animator Tutorial – Comprehensive Guide tutorial, which goes more in-depth with the Unity Animator. Some experience of Unity itself (how to navigate, how to toggle the 2D and 3D view, how to import assets, etc.) is going to be necessary, however.
Assets
You can get the assets for this project here: 2D Adventurer. This is a character from kenney.nl. I separated the limbs and head in photoshop as separate layers, then I exported it as a .PSB file. You can do the same thing to characters you want to use. For the full source code files, you can download them here.
Importing the packages
Create a new Unity 2D project and then go to Window -> Package Manager.

Here we need to import the “2D Animation,” “2D IK,” and “2D PSD Importer” packages.

If you cannot see these packages, then you need to click “Advanced” and then “Show Preview Packages.”

The 2D Animation package is where we will get the sprite rigging tools, 2D IK will help us in animation, and 2D PSD Importer will recognize our .PSB file and each individual character layer. Once these are done downloading, we are now ready to import our character!
Importing the Character
Open up the assets folder and drag the “Adventurer” folder into the project tab.

Once it is done importing, you will notice the .PSB file has been imported with the PSD Importer Package.
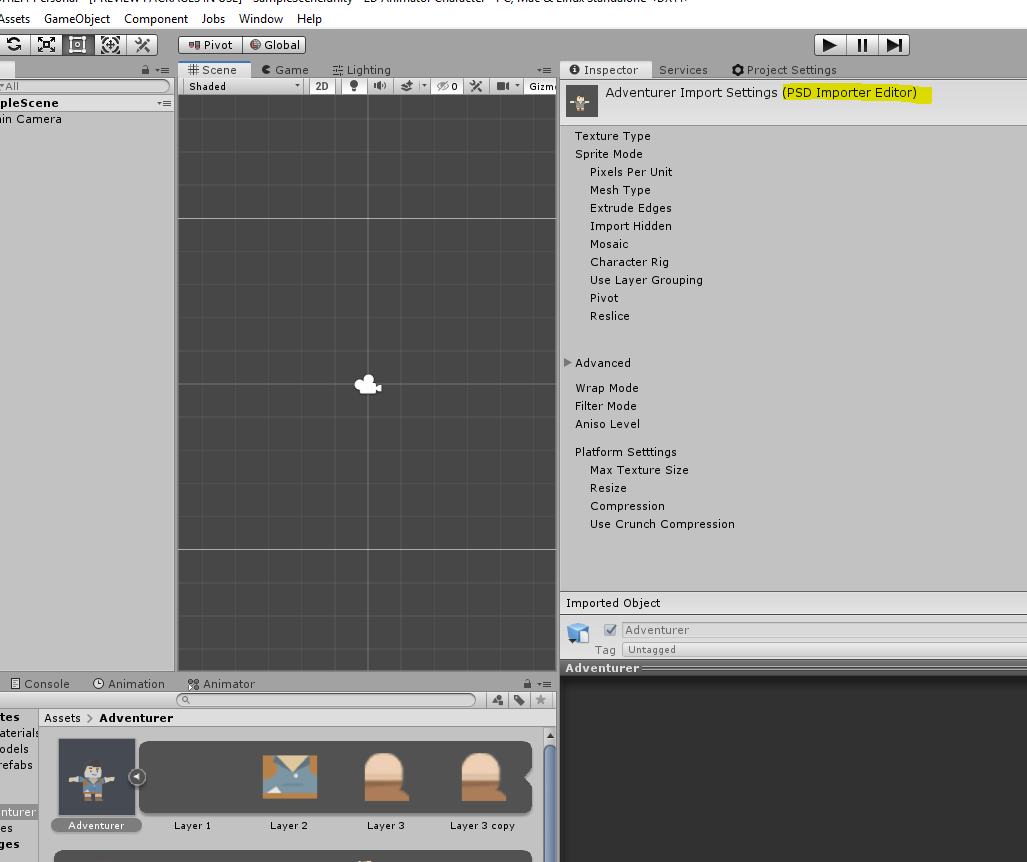
Now, we need to configure a few things in the import settings.

Change the Sprite Mode to “Multiple”; this will tell the Unity Editor that there is more than one sprite in this file and that we would like to use them. It will also recognize each limb layer in the .PSB file. The final thing we need to do here is to check “Character Rig.” This simply tells the Unity Editor that we are going to be rigging this sprite. Now, let’s hit apply and click “Sprite Editor.” This will open up the Sprite Editor and, as you can see, it has taken each layer in the .PSB file and sliced it into its own box.

Here we can tweak the sliced sprites if we see anything that isn’t quite right. It all looks good, however, so we can move onto rigging our sprite!
Rigging the Character
Go from the Sprite Editor to the Skinning Editor.


Here, we will create the armature that we will use to pose our character. On the left side of the editor, you will see a list of buttons. “Preview Pose” simply is for when we want to test our rig by posing the character. “Edit Joints” allows us to change the position of the bones without affecting the mesh. This is useful if we find that, for instance, an arm bone isn’t quite in line with the arm sprite. “Create Bone” is self-explanatory, let’s go ahead and use this right now.

You will see that you can click once to place a bone point, and then again to place the final bone point. Let’s go ahead and add one bone near the lower portion of the torso,

then another halfway up right before the head,

and finally, one that will serve as the head bone.

Now, we need to create the arm bones. We could have made all the bones connected, however, because of the way the layers are separated, it’s best to give each layer it’s own independent armature. Right-click, and you will see that we are free from the created bone chain. Before we create the bone armature, however, we need to parent our new bones to the torso bones. Hover over the origin of the second torso bone, and left-click.

This will create a semi-transparent line from the torso bone to our bone point. Now, create two bones for one arm then repeat the process for the other.

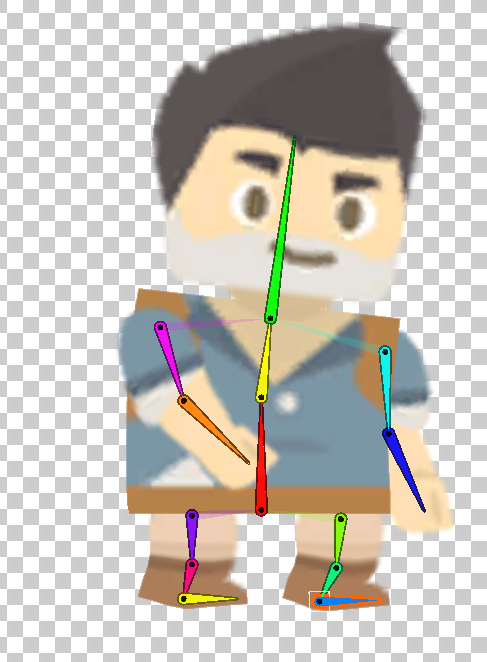
Next, we need to create the leg bones. These need to be parented to the origin of the lower torso bone and this will have a bone for the toe.

Repeat the process done on the arm bones.
Now that the armature is complete, let’s have a further look at the tools in the toolbar.

“Split Bone” will split (or subdivide) a single bone into two bones. “Reparent Bone” allows you to see exactly how bones are parented to each other reparent if necessary. “Auto Geometry” will automatically create the geometry that will be used by the armature. If you select this,

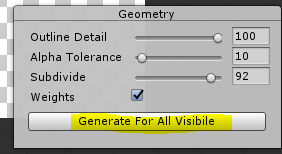
you will see that it brings up a window in the lower right corner. “Outline Detail” determines how accurately the mesh will stick to the edge of the sprite. I found that a value of about 100 works best for this project. “Alpha Tolerance” means that a pixel will be counted transparent if it’s alpha value is less than this slider. We don’t have any alpha on our character so leave this set to default. “Subdivide” is how many vertices will be generated within the mesh. I found that we need a fairly high value of 92 in order to get the best results. And finally, “Weights” will automatically assign parts of the mesh to a bone if we have created one already. Go ahead and leave this checked and hit “Generate For All Visible.”
You will see that Unity generates a mesh with lots of colors.
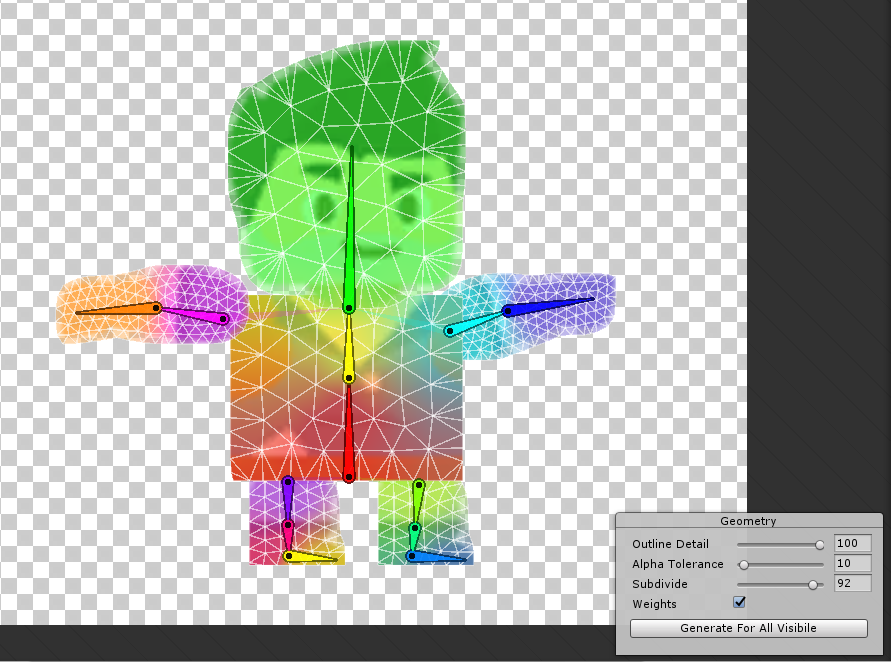
The colors on the mesh signify which bones are going to affect that portion of the mesh. If you select a bone and try moving it, you’ll see a couple of things that should be fixed. An obvious one is in the arm and leg bones. If you test the arm and leg bones,
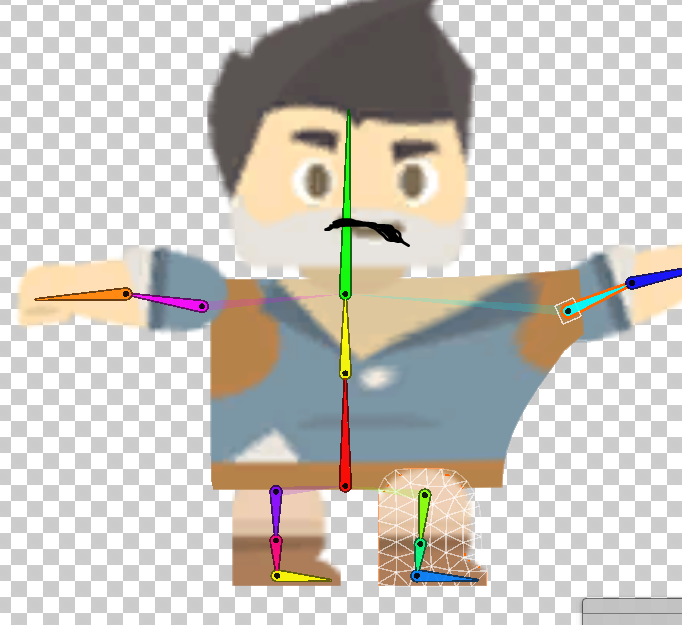
the left arm (relative to the character) is moving a portion of the torso. This doesn’t look right so let’s fix this. Under the “Weights” toolset,
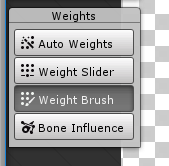
the “Auto Weights” does essentially what “Auto Geometry” did for us, “Weight Slider” allows you to use a slider to define which part of mesh a bone will influence, and “Weight Brush” uses a brush tool to edit how the bone affects the mesh. We are going to use Weight Brush to correct the arm and leg problem. Select this tool and double click on the torso.
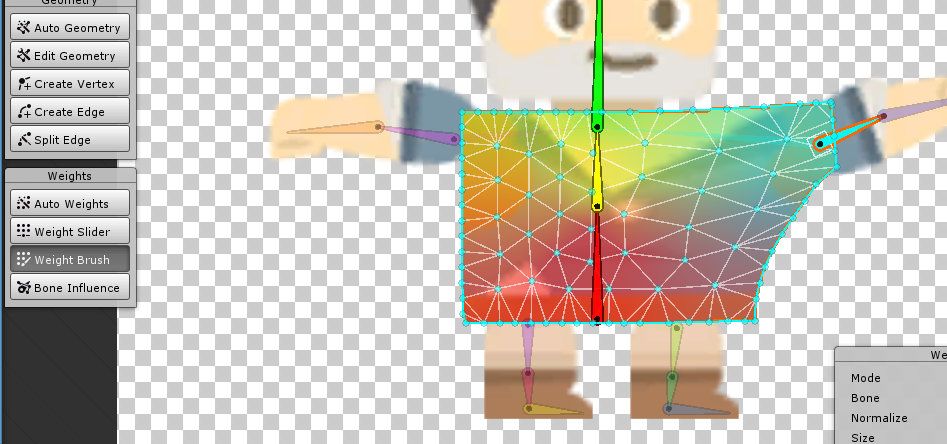
As you can see, the color of the left corner of the torso is the same color as the shoulder bone on the left arm. This means that the arm bone is influencing part of the mesh. To get rid of this, click on the top torso bone and paint out the arm portion on the torso.
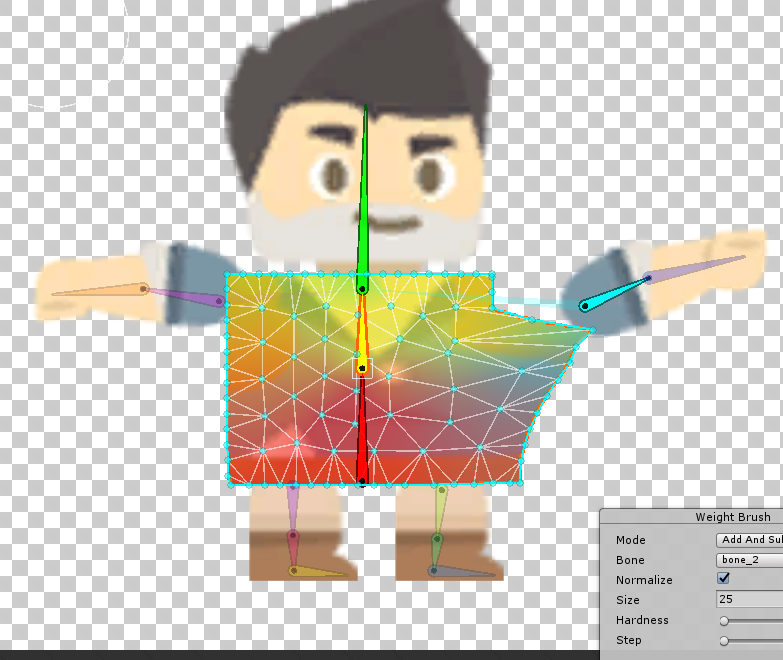
If you increase the hardness, the brush will paint one color faster and stronger. You can select the arm bone and rotate it to see if we are close to removing its influence.
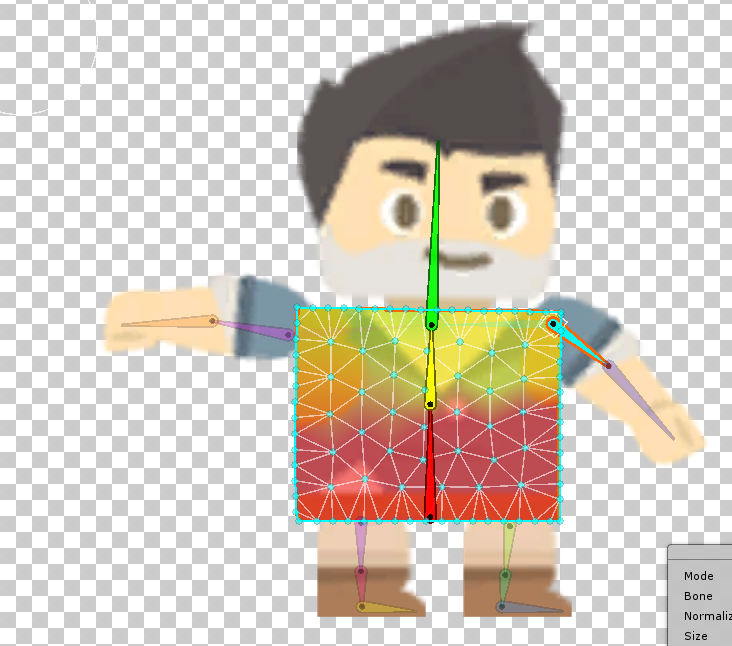
Select the lower torso bone and paint out the leg bone’s influence on the torso.
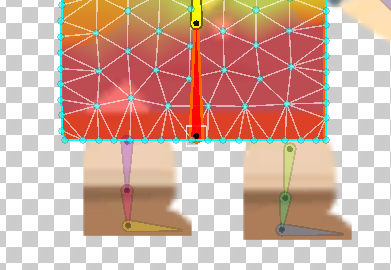
Now that we have corrected our bone influence problem, there is one thing we need to do to the torso in order for this to look right. You’ll notice that portions of the torso bend properly while others look too rigid and strange.
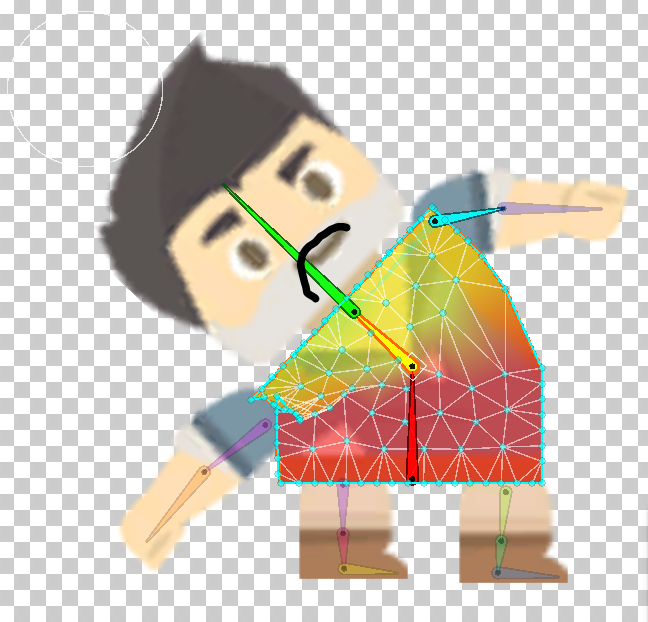
A really easy way to fix this is to rotate the top bone, bring the hardness down to 1, set the size to 5,
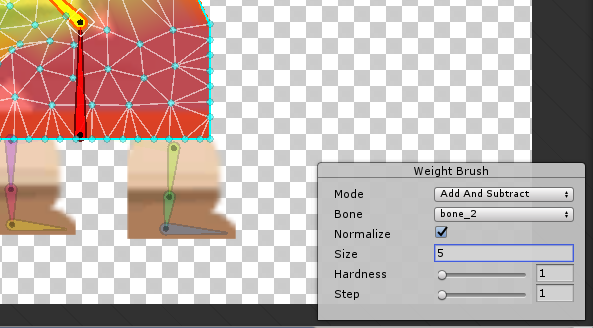
and then paint on the problematic side. It may take a couple of tweaks to get the right influence painted, but this is how we correct any strange looking armature problems.
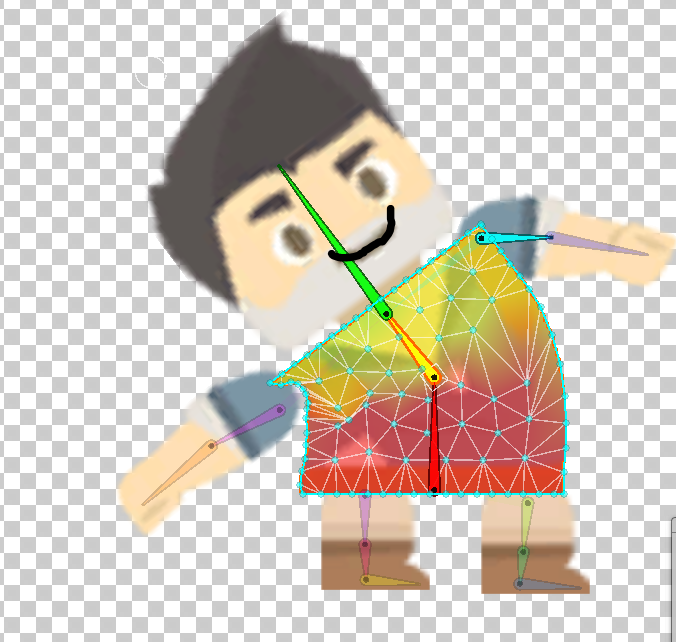
Alright! Now, let’s go into Preview pose and give our character a final look over.
Move every single bone to see if there is anything that looks strange. I noticed that the head was influencing portions of the torso,
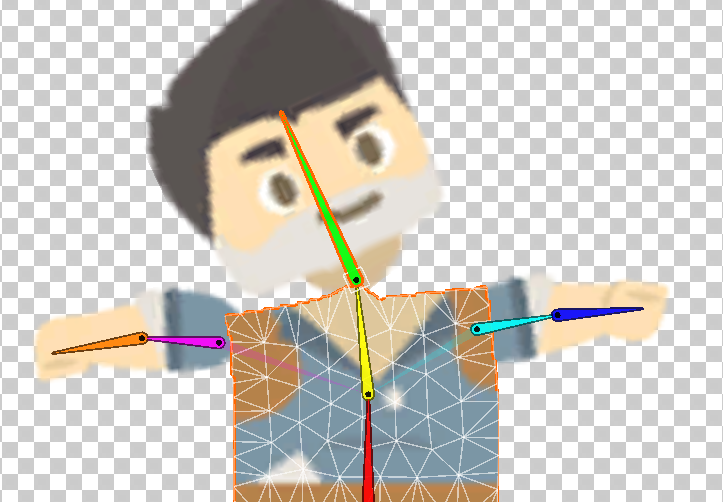
this looked wrong so I corrected it by using the Weight Brush to assign that portion to the top torso bone.
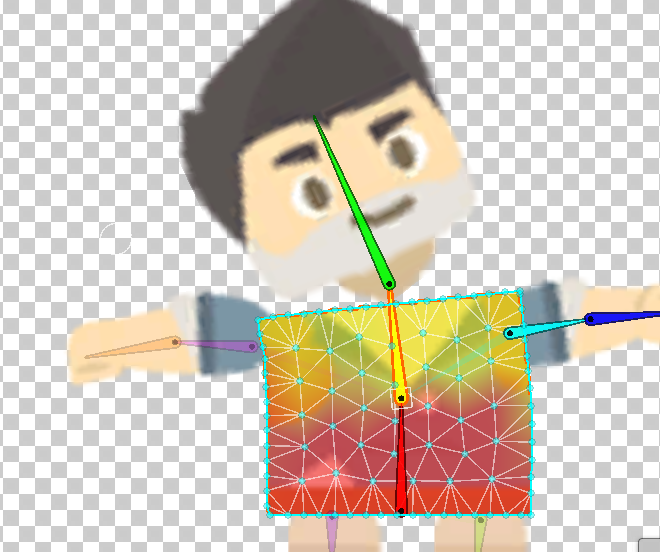
I also had to use the Reparent Bone tool to fix my arms that were parented to the head bone.
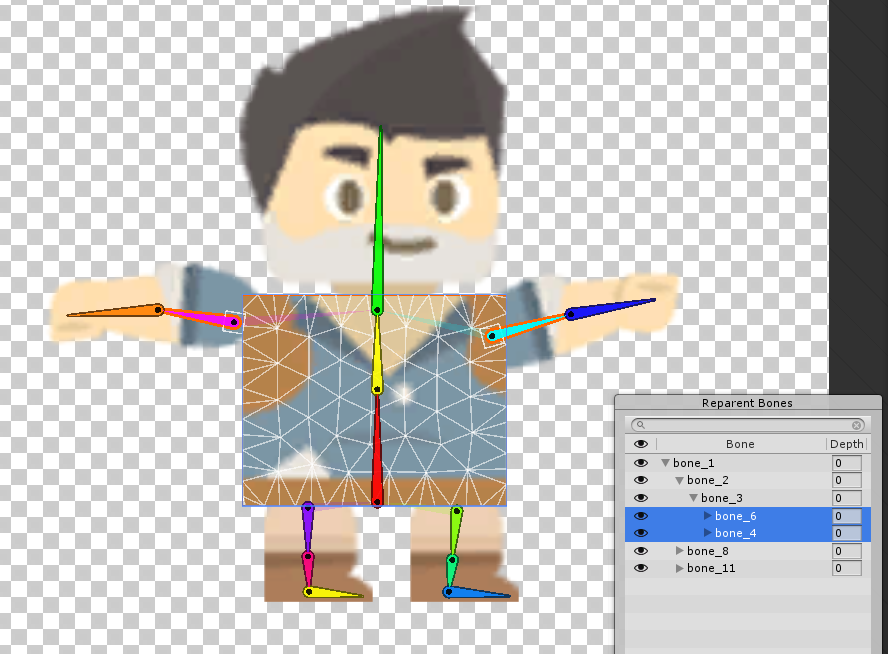
before
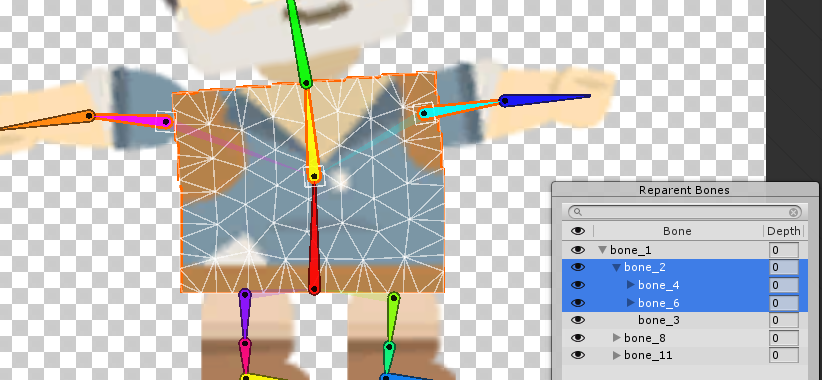
after
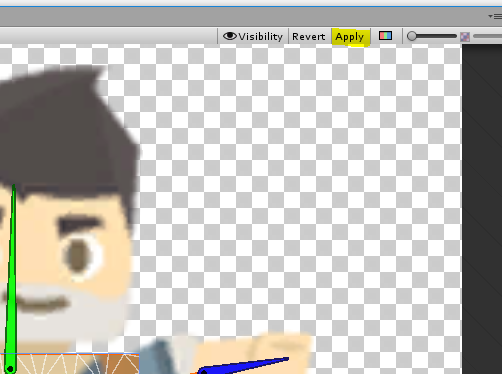
Okay, everything looks good so hit apply.
Setting up IKs
Arm IKs
Drag the Adventurer character into the scene.
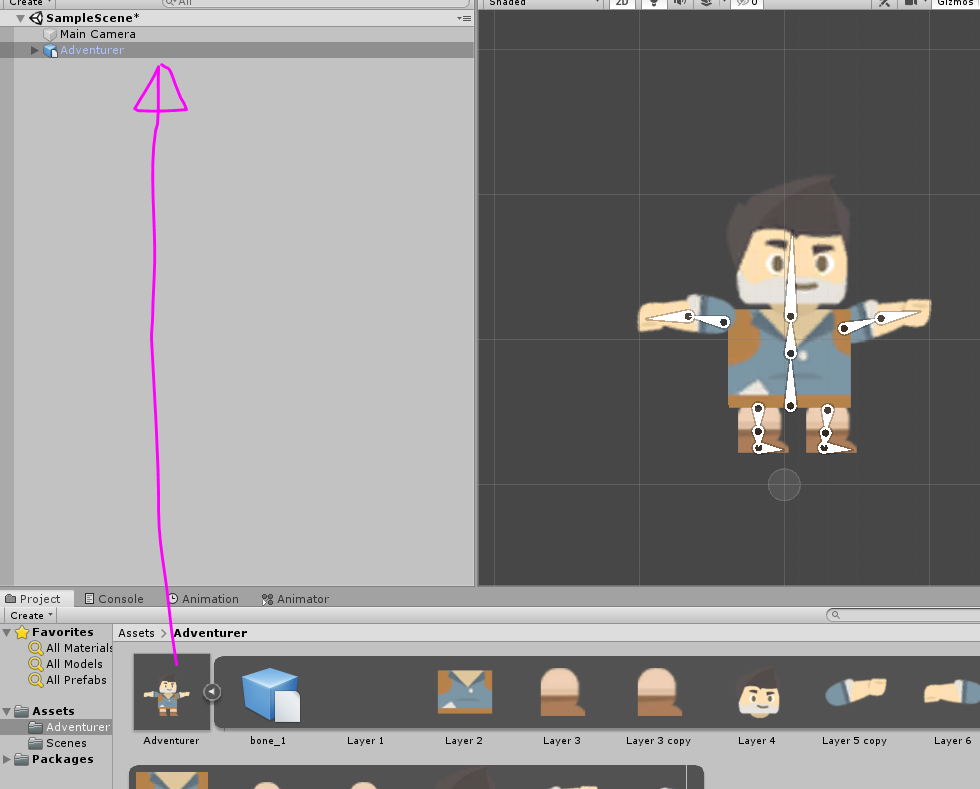
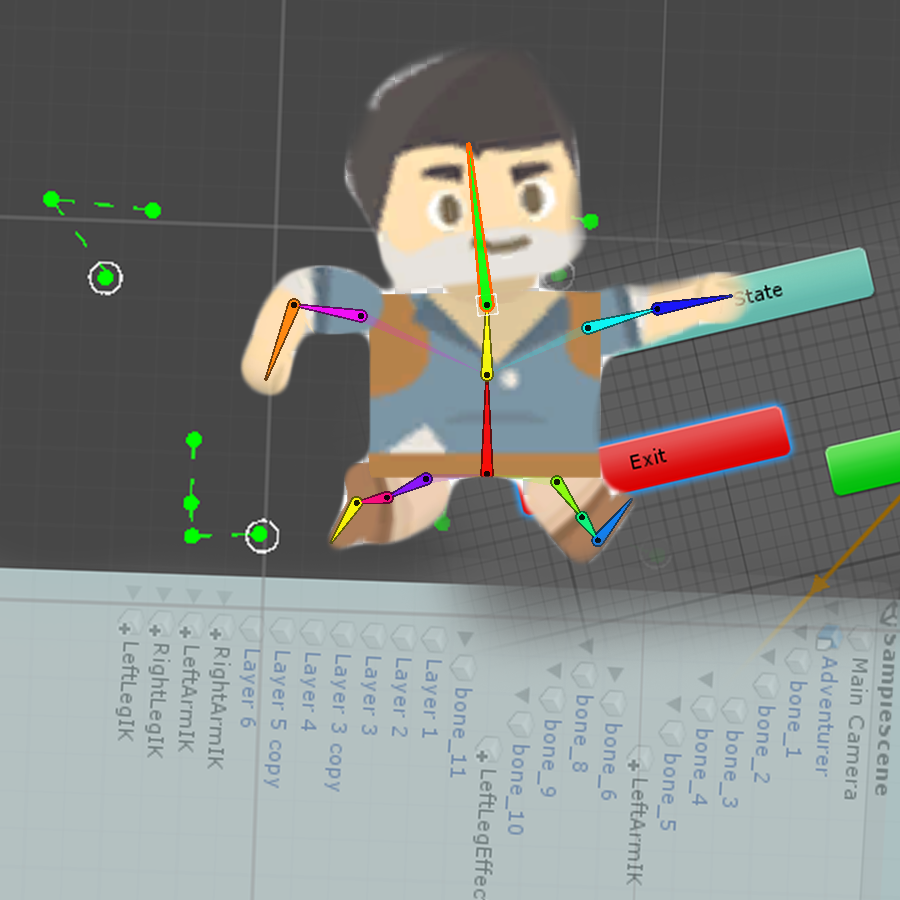
You’ll see that the bones show up and we can rotate and manipulate them. We are now animation ready but we are not animation optimized. Our rig needs “Inverse Kinematics.” Inverse Kinematics is when the computer predicts the position and rotation of a series of bones based on the position and rotation of a single “target” bone. This is useful for creating a realistic arm and leg rig. Click on the Adventurer character and add an “IK Manager 2D” component.
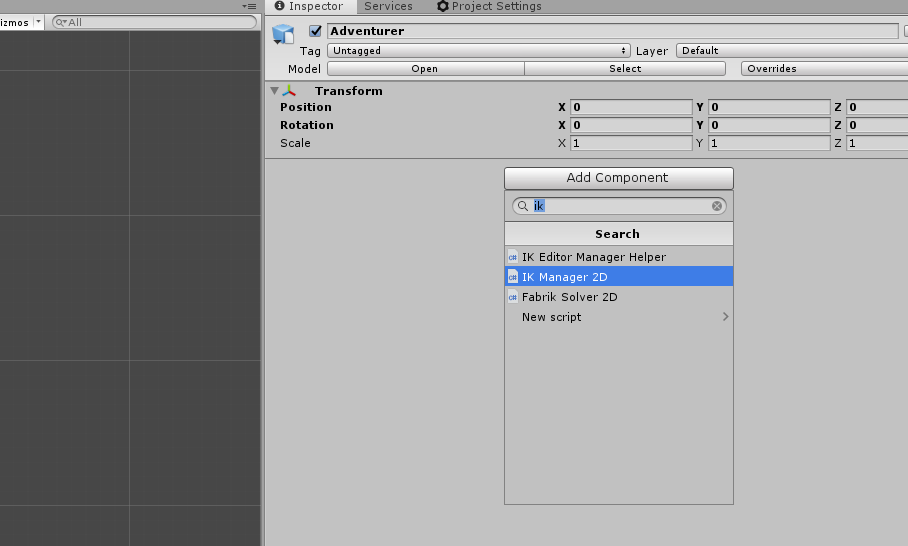
Hit plus icon and you’ll see that it gives us three options;
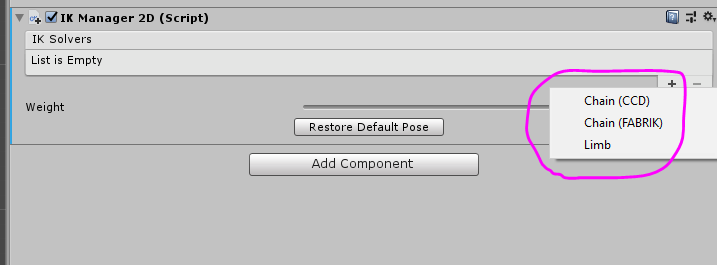
“Limb” is for any bone that has two bones in its chain. The other two, “Chain (CCD)” and “Chain (Fabrik),” are for any bone chain with more than just two. For the arm, we will be using simply “Limb” so go ahead and create it. When you do that, you’ll see that it created a new object within the Adventurer game object. This will be our right arm IK so rename it “RightArmIK.” 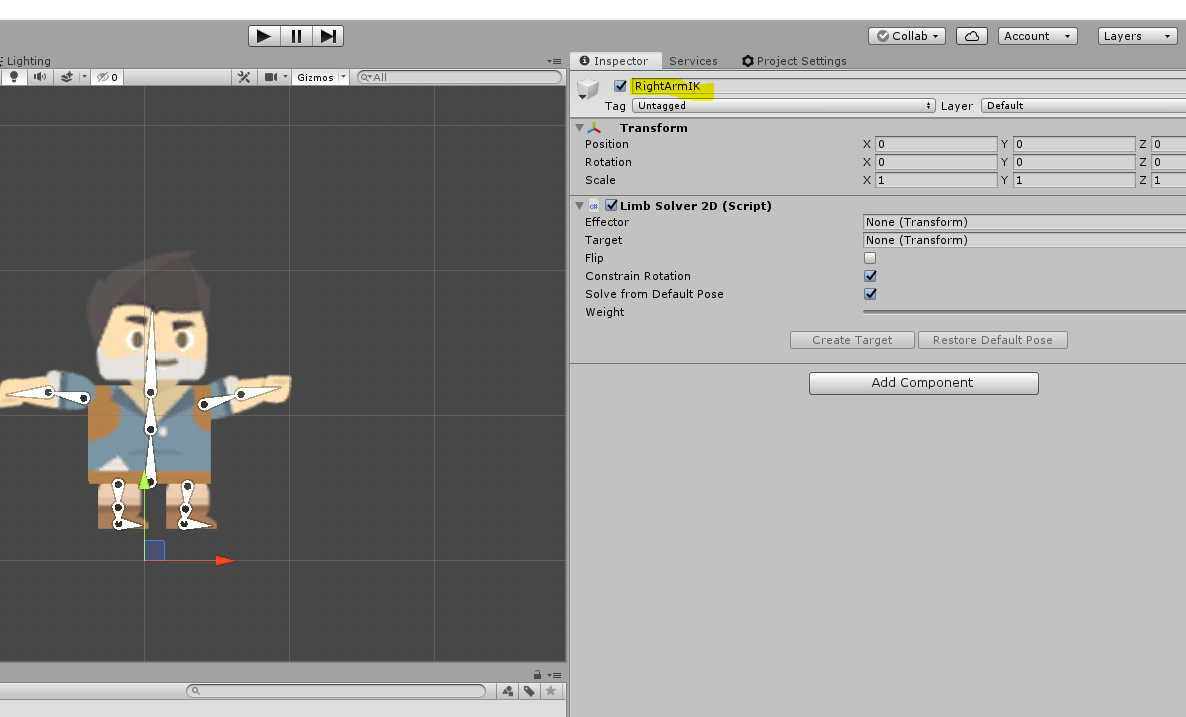
Now, as you can see, we need an effector and a target in the Limb Solver 2D. Click on the right arm forearm bone and create a new empty game object called “RightArmEffector.”
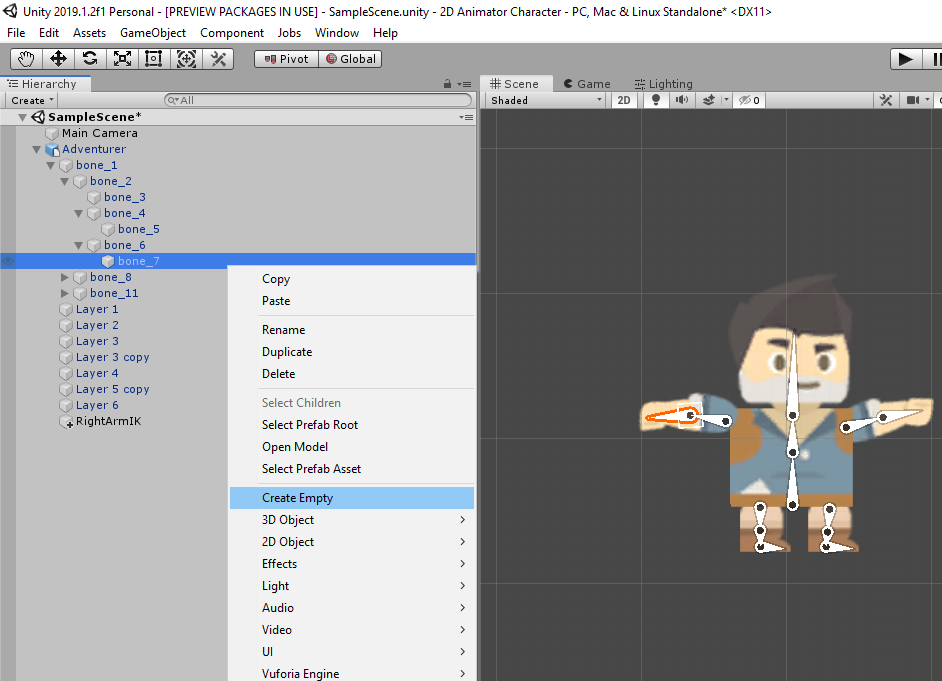
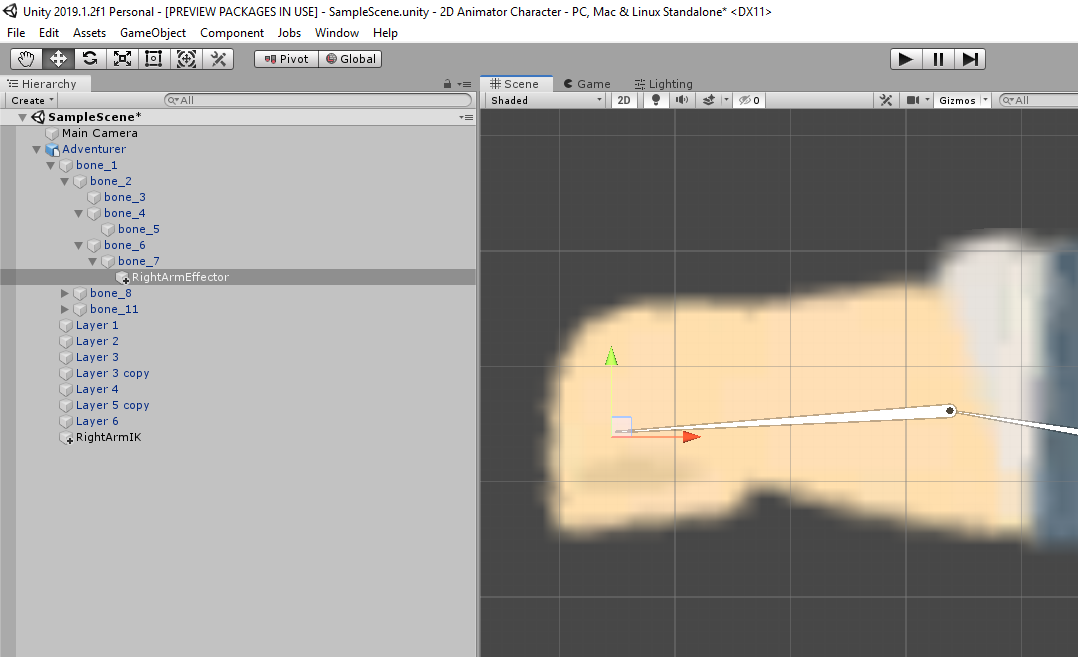
Drag this to about the position of the hand and then drag this into the “Effector” in the Limb Solver 2D on the RightArmIK.

Now, hit “Create Target.” You’ll notice that when you drag the RightArmIK around (that’s the little circle at the end of the arm bones), the elbow is in the wrong position.
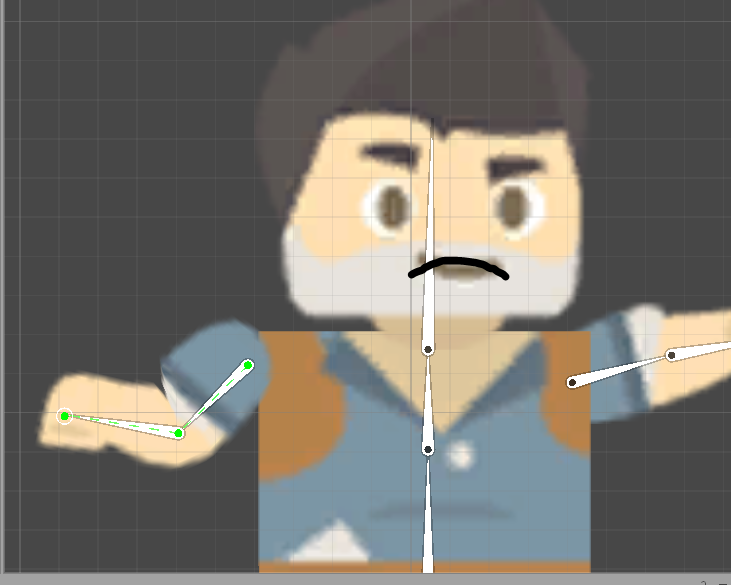
We can fix this by simply hitting “flip” in the Limb Solver 2D.
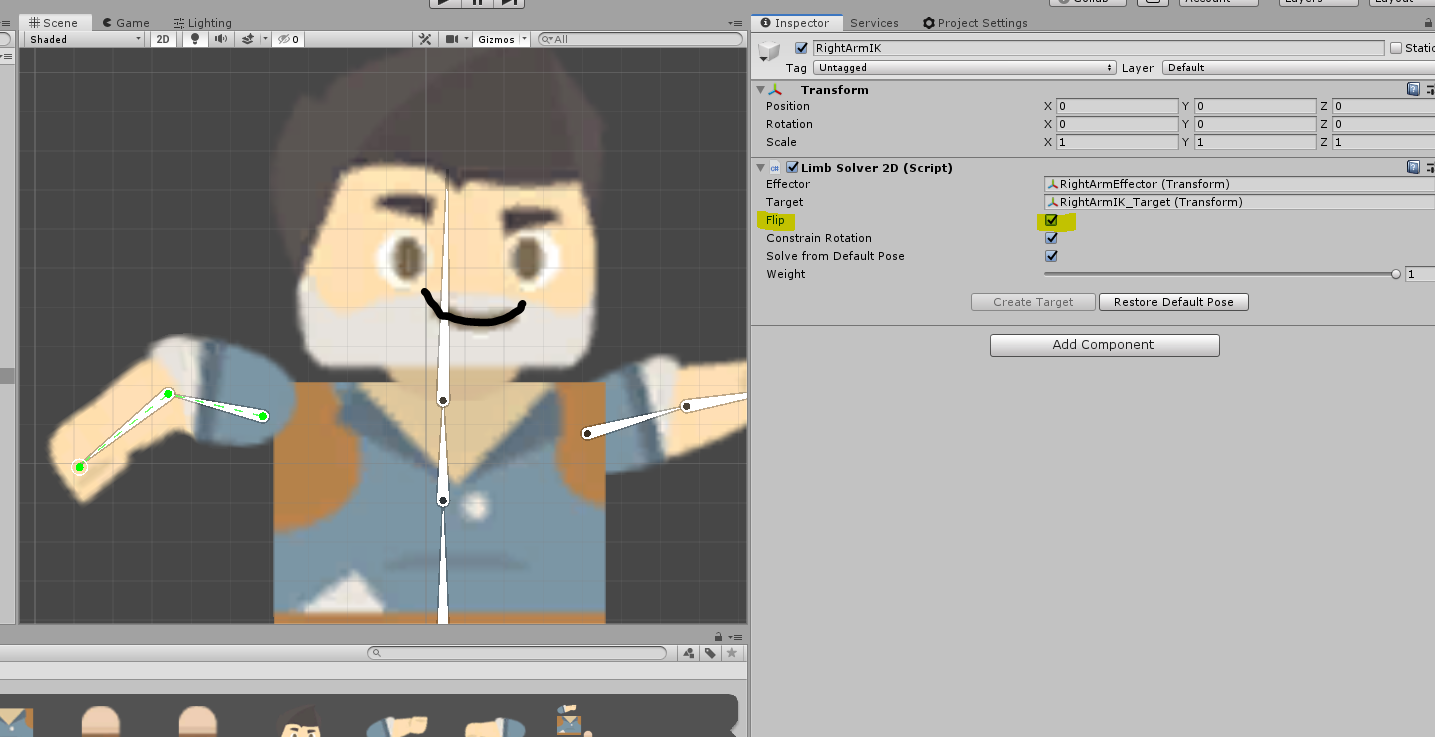
As you can see, this fixed our problem! The other settings here do not really affect our project.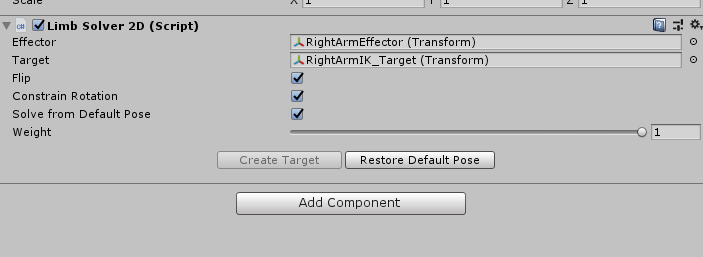 You can tweak the “Weight” slider which will change how much the IK will influence the other bones. “Solve from Default Pose” will calculate IKs from the default pose of the character and not what the current pose is. Leaving this checked or uncheck doesn’t seem to affect anything in our project. “Constrain Rotation” is speaking of the rotation on the IK. Leave this checked even though we aren’t using the rotation of the IK for anything. Now, we can do the exact same process for the Left Arm. Create a Limb IK, name it LeftArmIK,
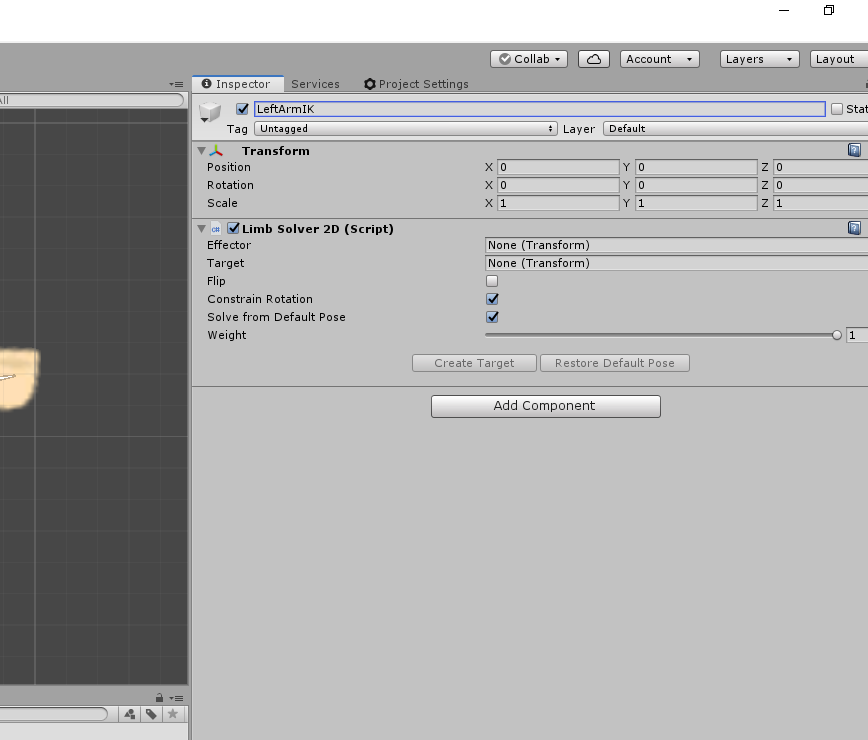
create an effector at the left-hand position,
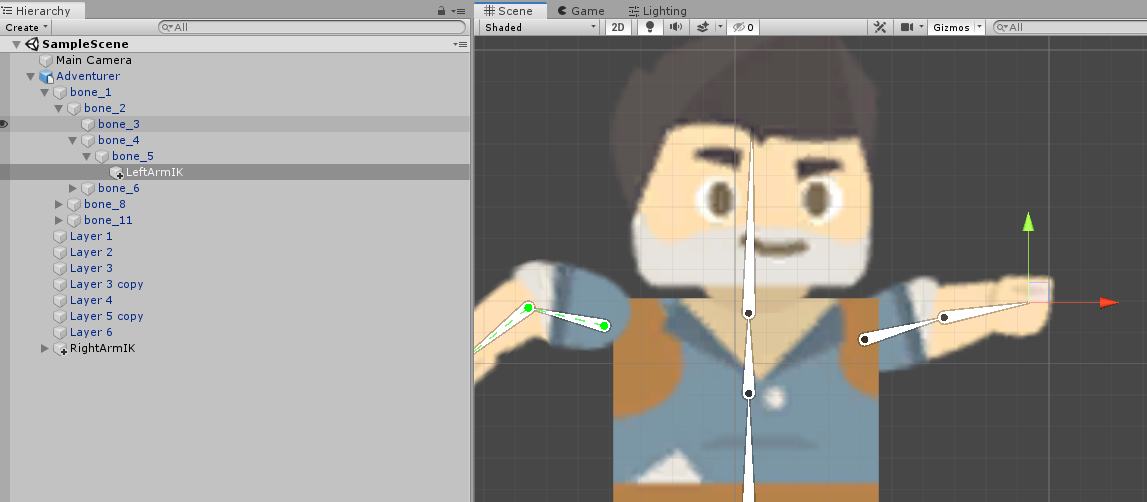
drag it in on the LeftArmIK, hit “Create Target,”

and enable “flip” if it is necessary.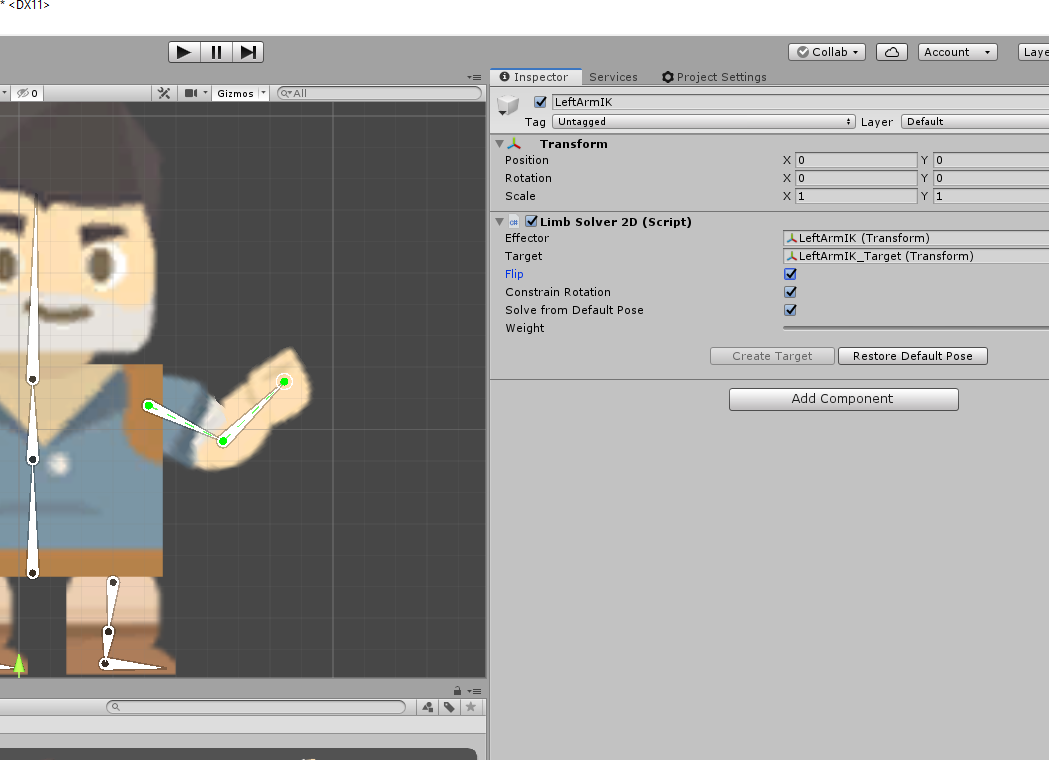
Leg IKs
The final thing we need to do for our character rig is to create the Leg IKs. In this case, we are going to have one IK control the entire leg rig. Because this is more than two bones, we cannot us the Limb solver method. Instead, go to your IK Manager 2D script and create a Chain (CCD) solver.
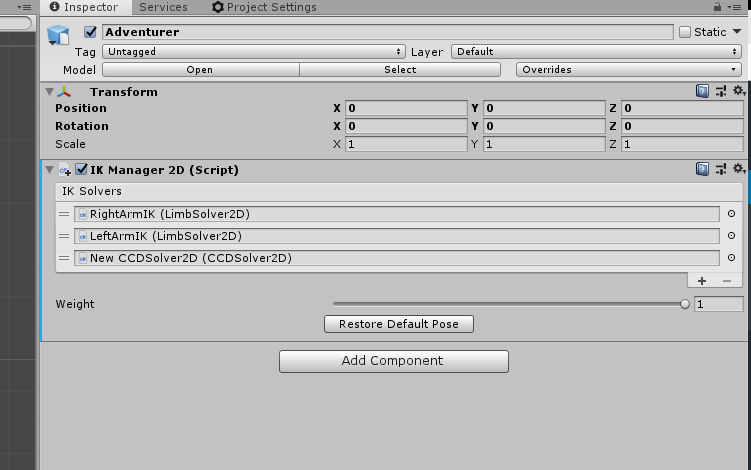
Rename this to “RightLegIK” and then select the toe bone on the right leg. Create an empty game object called “RightLegEffector” and place it at the end of the toe bone.
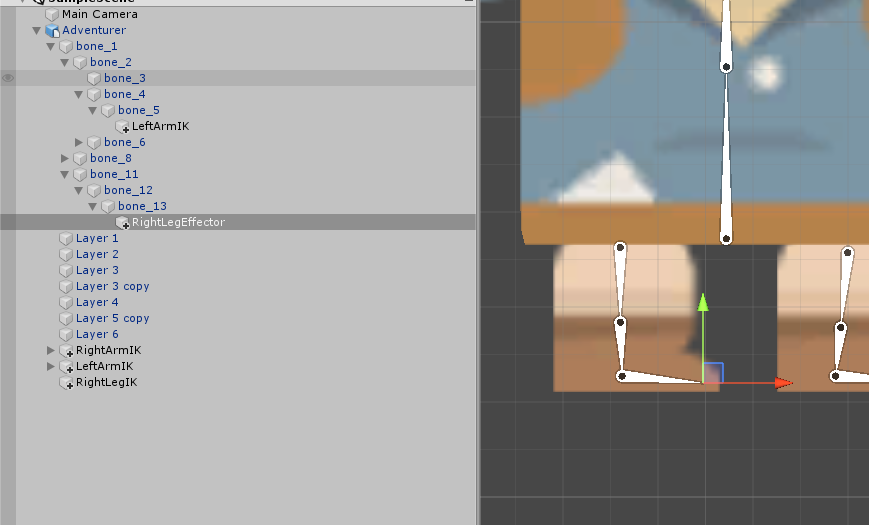
Drag this into the Effector field in CCD Solver 2D on the RightLegIK.
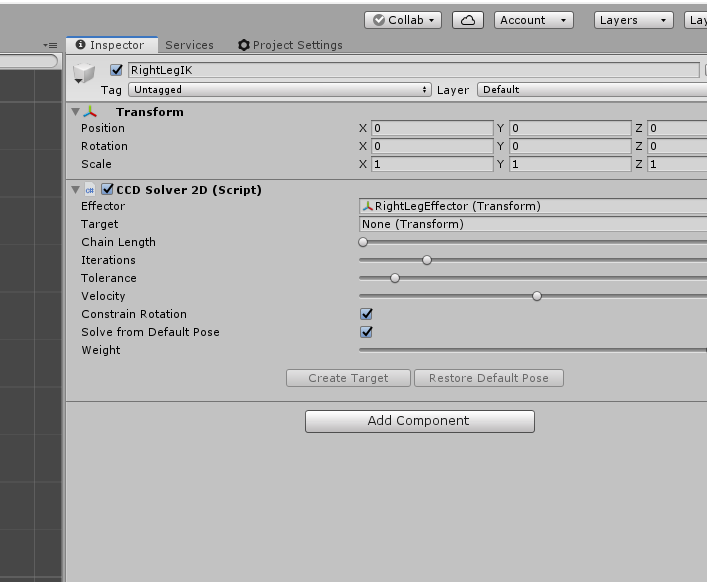
Now, we need to specify a chain length, basically, how many bones are going to be involved in the IK calculation. As you can see, if you drag the “Chain Length” slider up,
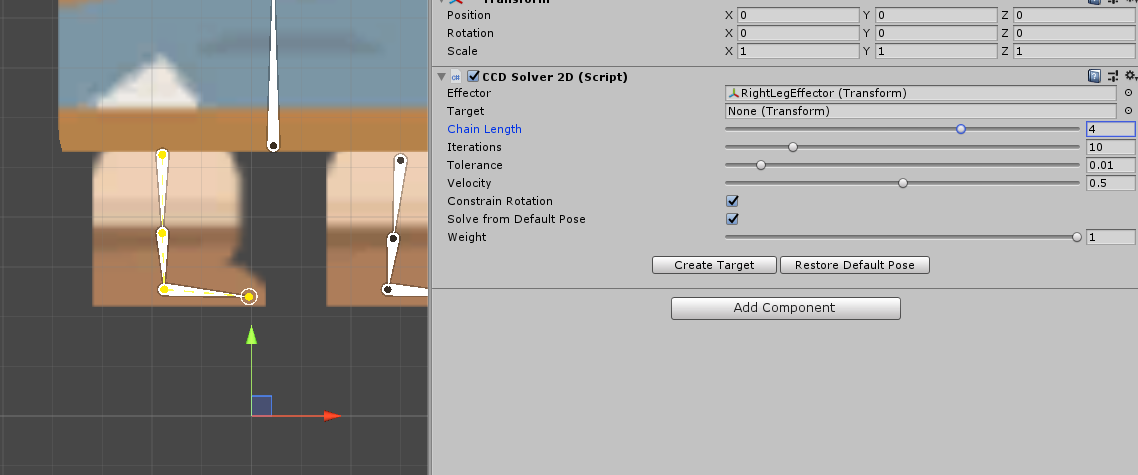
the active bones turn yellow. Therefore, a chain length of 4 is what we need. Let’s have a look at the other settings before we press “Create Target.” “Iterations” is the number of times per frame the IK algorithm will be run. Because our rig isn’t that complicated, a value of 10 is fine. “Tolerance” is basically how precise the IK calculation will be. A lower value will be more precise. And finally, “Velocity” is basically how fast the bones will move to the effector. We don’t need to change this value much because it is just a four bone chain. Now that we’ve had a look at the settings, hit “Create Target” and we’ll see what we’ve got.
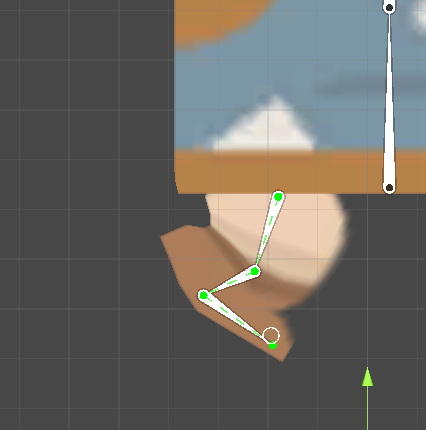
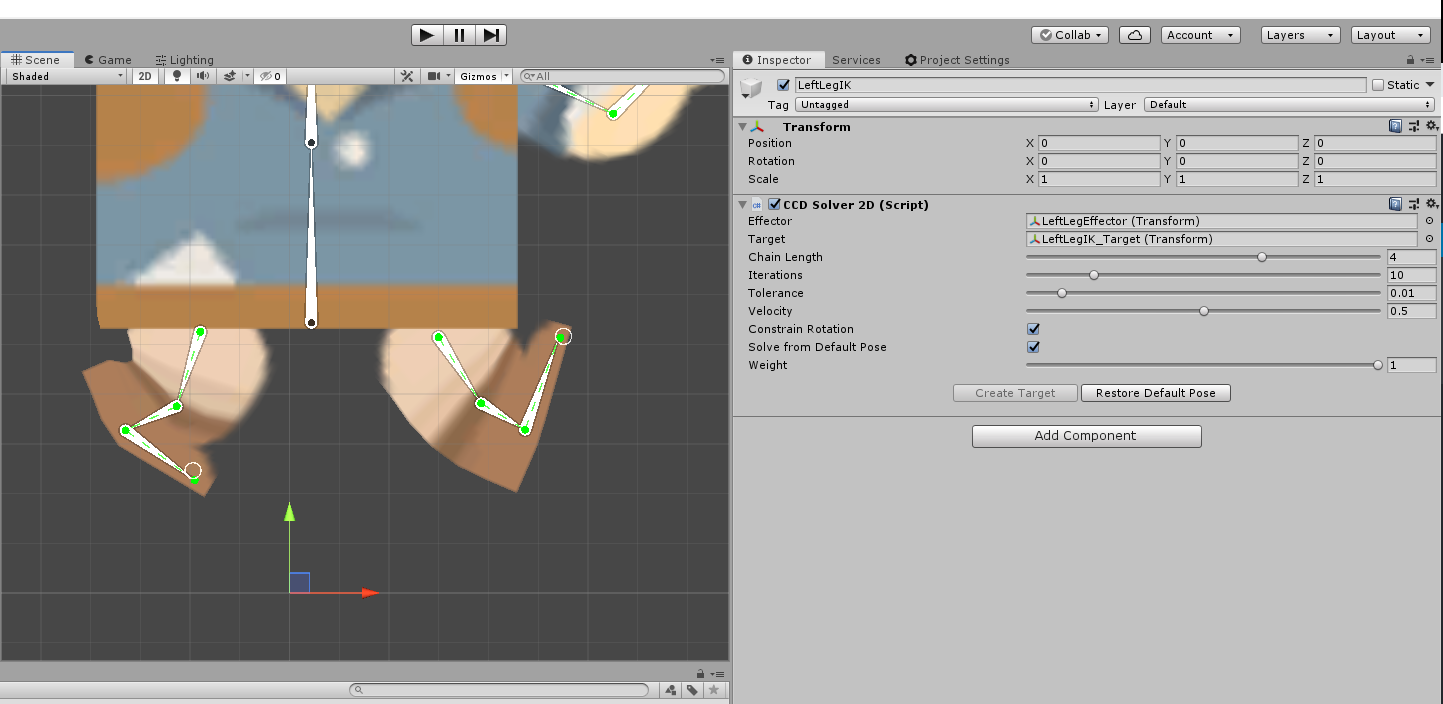
As you can see, we are now able to control the entire leg from this one IK. This is important, as you will see later when it comes to animating a run or walk cycle. We now have toe and knee control all in one effector! Now, just duplicate this process for the left leg.
Conclusion
Congratulations! You now know how to rig a 2D sprite, plus how to optimize that rig for animating by setting up IKs. This is a very important thing to know when it comes to 2D games. As I mentioned before, if you would like to do this to your own character, simply separate the limbs in Photoshop as different layers, and then export it as a PSB file. And now that we have a rigged character, we can animate it and script its controllers. All of this we will cover in a separate tutorial.
Keep making great games!
