You can access the full course here: Applied Computer Vision with Unity and Azure
Part 1
Introduction
In this course, we’ll be creating an app that will allow you to take a picture and send that to an API, where the text in the image will be extracted and returned to you. With that text, we’ll then send it up to a text to speech API to have the app speak the text to us.
What will we be learning?
- Microsoft Azure Cloud Computing
- Using Microsoft’s cognitive services which are a set of machine learning APIs we can use.
- Computer Vision and Speech APIs.
- JSON
- Learning what a JSON file is, the info we’re going to be accessing and how we’re going to access it inside of Unity.
- Unity Web Requests
- Unity’s pre-made web request system.
- We’ll be using this to send requests to the API and download the resulting data.
- Unity’s UI System
- We’ll be using the built in UI system to create the image for the device camera to project onto and the text to display the text.
- Webcam Textures
- Unity’s pre-made system to render what your device camera sees to a texture. We’ll then be applying this texture to the UI image to display it to the user.
Part 2
Creating our Free Account
The first thing we want to do is go to the Microsoft Azure website. Here, you want to click on the Sign In button. Either sign in or create a new Microsoft account.
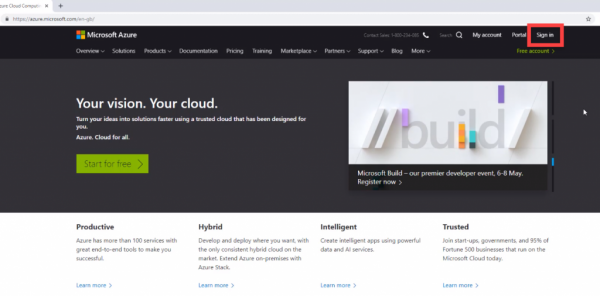
Once you’ve signed in, let’s go to the Cognitive Services page (Products > AI + Machine Learning > Cognitive Services).
Cognitive Services are machine learning solutions we can use in our apps. If you scroll down, you’ll see a list of the different cognitive services. For our project we’ll be using two of them:
- Vision – is an API that will take in an image and extract the text from it.
- Speech – is an API that will take in text and convert it to speech.
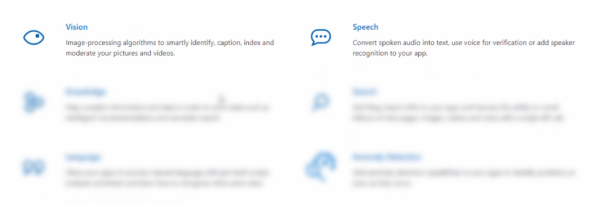
To start creating these APIs (known as resources), let’s click on the Portal button in the header. This will take us to our Azure Portal.

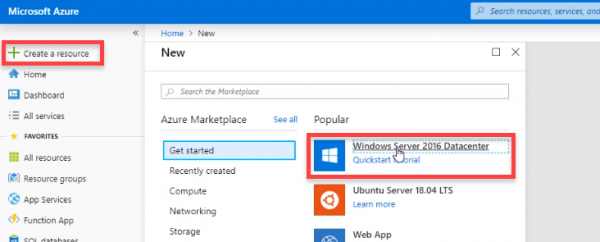
Here, let’s click on the Create a resource button and choose any resource. We’re doing this in order to sign up for the free trial (select any resource for now, it won’t matter what you pick).
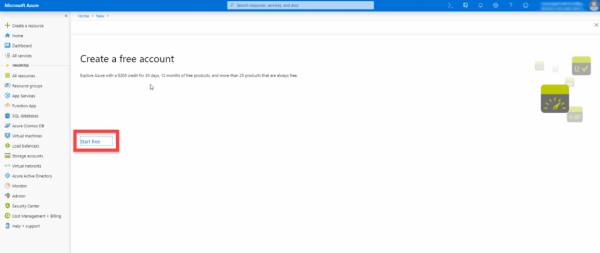
This should toggle a page asking you to create a free account. You’ll get $200 credit for 30 days for free. Click on the Start free button. This will take you to another page – just click on the Start free button on that page also.
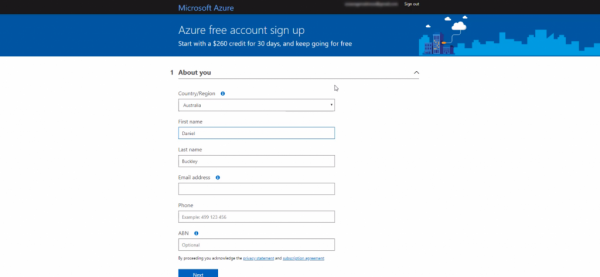
Go through the form and fill in your information. Do note that you will need to have a credit/bank/debit card. You won’t be charged, it just needs it to confirm who you are and have it on file if you wish to use the paid options in the future. As long as you either don’t use the service after 30 days or remove your card from your account, it should be all good.
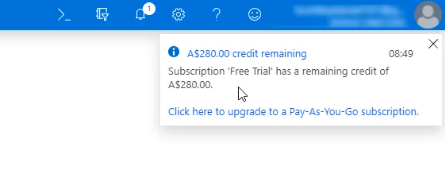
When that’s done, you should be redirected back to the portal. Here, a notification will pop up, saying your trial is active with a remaining credit.
In the next lesson, we’ll be setting up our Computer Vision resource.
Part 3
JSON Files
In this lesson, we’ll be creating our Computer Vision resource. This will allow us to send an image to the API and in return, get the extracted text. This text will be returned to us in the form of a JSON file.
A JSON file is a text file which contains objects and properties. In the example below, we have a list of users and an object for each user. A user has a name (string) and an age (int). You can tell an object by it having squiggly brackets { } and lists (or arrays) by the square brackets [ ].
Creating the Resource
We left of in the Portal last lesson. Click on the Create a resource button.
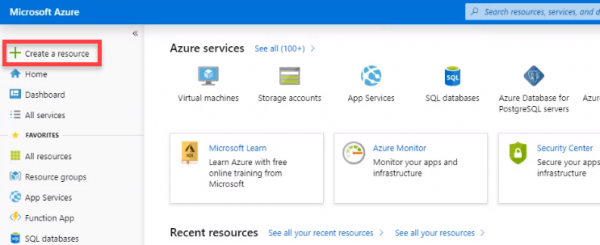
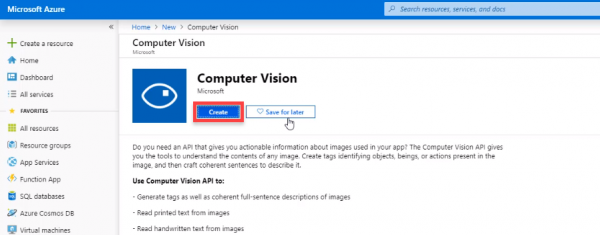
Search for “computer vision” and select the Computer Vision resource. With that open, click on the Create button.
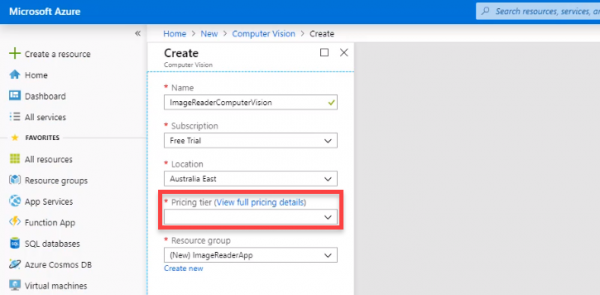
Here, we want to fill in the properties.
- Name – what we want to call the resource
- Subscription – set this to Free Trial
- Location – set this to your location
- Pricing Tier – set this to F0 (the free tier)
- Resource Group – you can create a group for this app to which will just categorize the resources (not needed, but it is a good practice)
Once that’s all filled in, click on the Create button at the bottom.
This should take you back to the main page of the portal and there should be a notification saying that your resource is deploying. When that’s completed, there should be a button saying Go to resource. Click that and it will take you to the resource.
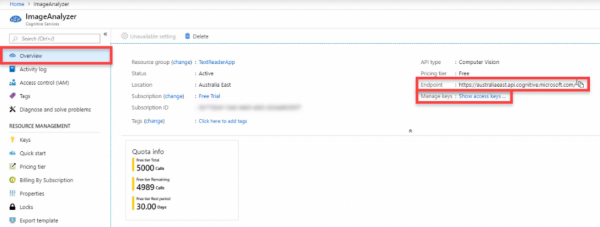
To view the resource info we need, click on the Overview tab. Here, copy or take note of the Endpoint. This is the API we’ll connect to and send info to. We also need a key, so click on the Show access keys… link.
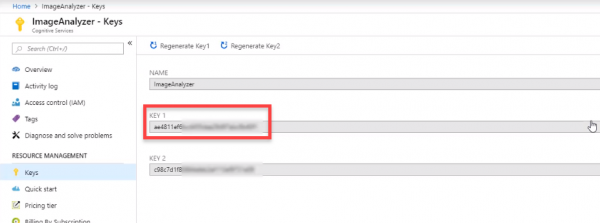
Here, we want to copy / keep note of the Key 1. This key identifies us when connecting to the API.
In the next lesson, we’ll be setting up the Speech resource.
Transcript 1
Hey everyone, my name’s Daniel Buckley, and I’ll be instructor for this course. We’ll be making an app that will allow you to take a picture through your camera and then have that picture sent up to an API, where the text of that picture will be extracted, sent back down, and then converted from text to text to speech through another API.
The first thing we’re going to be learning about is Microsoft Azure’s cloud computing, and we’ll be setting up an account and creating two API’s on this. We’ll first of all be creating Computer Vision API, which will allow us to send in an image and return to us the extracted text from that image. Then, we’ll create a Speech API, and this will allow us to send text up to the API and return to us a text to speech audio file.
We’ll also be using JSON files. This is the file format that we’ll get in return when we send a request to the Computer Vision API. It will return to us a JSON file, including all the text that is displayed on the screen. We’ll learn how to go through it, how to understand it, what it is, and how to extract the text that we need from it.
Unity Web Requests are something else that we’ll be using. This is Unity’s form of sending and receiving server web requests over the network. C# has their own built-in system for this already, but Unity’s is much simpler, much easier to use, and in many ways more versatile, as we have to enter in less code. It’s much more concise and good for what we need to use.
To tie this all together, and display it on the screen, we’ll be using Unity’s UI System, allowing us to project the camera view onto an image on the screen, and have text displayed at the bottom. In order to project the camera view onto the image, we’ll be using Webcam Textures. These are textures that Unity creates that allows us to render whatever our camera sees, that being a webcam or a device camera, onto a texture that we can apply to anything really. We can apply it to images on the UI, like in our example. We can even apply it as a normal texture onto cubes, 3D models, etcetera.
ZENVA is an online learning academy with over 400,000 students. We feature a wide range of courses, for people who are just starting out, or for people who are just wanting to learn something new. The courses are also very versatile, and you can learn many different ways. If you want to follow along with the tutorial videos, we have included course project files that you can use. Or you can just watch the videos along at your own pace. So that all said, let’s get started on our project.
Transcript 2
Alright, the first thing you wanna do is go to the Microsoft Azure website here. It’s just azure.microsoft.com, and it should take you to the homepage right here. Now, we then need to log in. So, we just click on the sign in button up here. And then you can choose if you want to log in with an existing account, or create a new Microsoft account. If you have a Microsoft account, just log in with that, as any sort of Microsoft account will work. So, I’ll just log in.
So, Microsoft Azure is a Cloud computing service provided to us by Microsoft. It has many different apps and functions that we can use inside of applications. For us specifically, though, we’re gonna be using the Computer Vision and the Text-to-Speech services. These are part of the Cognitive Services pack. So we can go here up to Products, and inside here we can then click on where we see AI + Machine Learning and Cognitive Services.
Now, Cognitive Services are basically machine learning sort of APIs and SDKs we can connect to. If we scroll down, we can see a bunch of the different ones here. We have Vision, which is the one we’re gonna be connecting to. We’ll send over an image to the API, and then it will analyze the text, and return that to us. We also have the Speech here. There’s also many other smaller functions inside each of these large categories.
So what we’re going to do now is actually sign up for Azure, and make it so that we can start creating some of these resources. Now, what we can do, is we can then click on the Portal button up here. This will take us to our Portal, which basically just has a list of all our different resources. All the ones we can make and allows us to manage those resources and our apps. So, we’ll click on the Portal button here.
Okay, when we’re at the Portal now, what we want to do is first of all, click on the Create a resource button here. Because what we need to do is actually set up our free account, that will allow us to use these resources. So, it doesn’t really matter which one you click on. We’ll just click on the Windows Server 2016. We’re not gonna get this, but it will require us to create a free account. This is what we’ll need to be able to actually use and create resources.
Now, with the free account you may see here that- you may see at the $200 price mark, but that just means we get $200 credit for 30 days. This is basically like a free trial. You will need to sign up with your credit card and phone number, but you won’t be charged unless you go past 30 days, or you choose one of the actual pricing tiers when we create a resource.
So, we can just click on the Start Free button here, and then it will take us to this page here. We can click on Start Free again. And then you just want to go through and fill out all of this information here. It will ask you to just enter in your name, your phone number. You don’t have to enter in your ABN. You’ll then have to verify by adding in your credit card, or bank card, or debit card. It won’t do any charges. I’m fairly certain, but it’s just there to verify you. And if you do want to then sign up further, you can then just do it much quicker then.
Alright, so when that’s complete, you should be taken back to this page now. It shouldn’t look too different, but what we can do now is start creating resources and that’s what we’re going to be doing in the next video. You might also see up here that it says, you got your free trial, and it has remaining credit. So, that you know that you are in the free trial. And yeah, then we were good to go.
So, I’ll see you next lesson where we’ll start creating an actual computer vision resource.
Transcript 3
All right, welcome back. In the last lesson, we created our Microsoft Azure account and ended up here on the portal. In this lesson, we’re gonna be creating our Computer Vision Resource, which will allow us to connect to the Computer Vision Resource API, sending an image, and then the API will extract the text from the image and then return that to us as JSON file.
Now before we continue, let’s go over what a JSON file is. Here’s an example of it. It’s basically a text file that contains objects and properties. So here we have, basically a list of users here and then we have an object for each user. You can tell an object by it having these squiggly brackets and a list or an array by having square brackets here. So each object here in this example has a name and an age. The name is a string and the age is 25.
So this is basically a way of- so this is the format that we are going to receive our text as. It will have multiple objects as well, as string containing information that just comes with the cognate service, but we’ll be looking specifically for very specific objects, lists and going down the hierarchy until we find the text that we actually want. We’ll go over more of what the actual JSON file for our computer vision API looks like once we got to scripting it, as we need to know when we are doing that.
All right, so let’s return to the portal here, and what we wanna do first of all is click on the Create Resource button at the top left. This will take us to a list where we can select something or search. What we’re gonna do is we’re gonna be searching for computer vision, select this and we want to create a new Computer Vision Resource. So we click on the create button And then this will take us to here. What we wanna do here is fill in some information.
The first thing we need to do, actually, is create a resource group. Now a resource group- it’s not that important that we do as it’s not required for when we start scripting in unity. But it is just good to pair the services that you going to be using together basically in one group. So, create a new group here, and let’s just call this ImageReaderApp- and we click okay.
And now this about the image reader app. For the name, we can call this ImageReaderComputerVision. Like so, and the subscription we wanna set to free trial. Location, you can choose whatever location you are in- whatever location here you see is close to you. I am from Eastern Australia so I’ll have it on Australia East, and for the pricing tier what we wanna do is select the F0 pricing tier. I have already created a Computer Visionary Resource before to actually test out the app, but you should have an F0 option here.
And then what we can do is click on create, and I have already created one so I’m gonna go to mine right now. But just click the create button, and it should then take you back to the actual portal home here. And in the top right if we click on the bell, you should see there’ll be a notification here. It should say something about the resource is deploying. So it will have a loading bar here showing you that it’s deployed. And once that’s complete there should be a button that says go to resource and when you click on that, it will take you to this page here.
We don’t really need to be on this page here by default, so what we what we gonna do is we gonna click on the overview button up here and this will take us to the overview page. Now there’re a few things, there are actually two things that we need in order to connect to the API once we’re in Unity.
And that is Endpoint URL here. So we need the Endpoint URL here, so just copy that and paste it to a Notepad document- just have this page opened for when we get up to scripting point. And then we need to click on short access keys, because in order to connect to your specific resource of the API, we need a specific access key. So you can click on that and it will show us we have two access keys here. Now we only need the key one, you can use the key two. It doesn’t really matter which one you use, but we’ll just use key one here. So just copy that and again keep it in a Notepad document (or just have this page opened, ready for scripting).
In the next lesson we’ll be setting up a second resource which is going to be, text to speech using the speech services and there are a few different things we need to get from that one. So, stay tuned for that.
Interested in continuing? Check out the full Applied Computer Vision with Unity and Azure course, which is part of our EdTech Mini-Degree.

