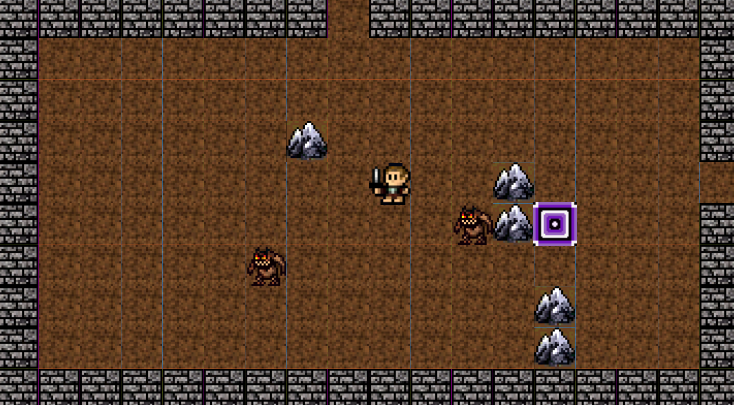
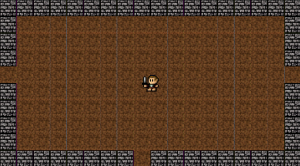
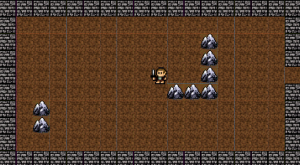
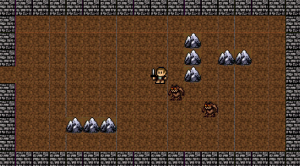
There are two ways of building dungeons in your game. The first one is to manually create the dungeon rooms and connect them through the dungeon. The advantage of doing this is that you can manually select what will be in each room of the dungeon.
The second option is to procedurally generate the dungeon rooms. In this way, you don’t have so much control of what is in each room, but you increase the unpredictability of your game, since each dungeon might be different.
In this tutorial, I’m going to show how you can use Unity to procedurally generate a dungeon. We are going to use Unity’s tilemap functionalities to generate multiple rooms and pseudo-randomly connect them. Then we are going to build a demo where you can try multiple configurations of number of rooms, enemies and obstacles inside each room.
To get the most out of this tutorial, it is important that you’re familiar with the following concepts:
- C# programming and object-oriented concepts
- Basic Unity concepts, such as Sprites, Scenes and Prefabs
Source Code files
You can download the tutorial source code files here.
Creating the tiled maps
The first thing we need to do is creating the tilemaps for the dungeon rooms. Then, we can just load those tilempas later after generating the dungeon.
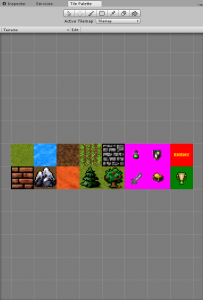
Unity provides tilemap generation features, so we are going to use them. First, download the sprites for this tutorial and we are going to configure the “terrains” sprite to be used for tilemaps. You need to do two things: (1) setting the Pixels Per Unit to 40 to make sure the tiles will appear in the right size; (2) changing the Sprite Mode to Multiple, and then slicing it to be separated into individual tiles.
Now, right click on the Object Hierarchy tab, and select 2D object -> Tilemap. You also need to open the Tile Palette window (Window -> 2D -> Tile Palette). We need to create a new tile palette with the “terrains” tileset Unity will ask where you wish to save the palette, I suggest saving it in a separate folder called Tile Palettes. After creating the tile palette, drag and drop the tileset to the Tile Palette window.
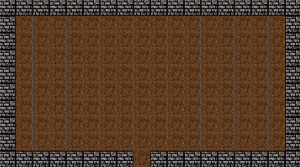
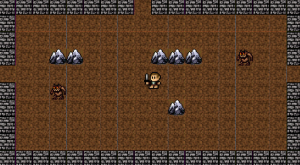
Now, we can start creating our room tilemap using this tile palette. Select the brush tool and paint the tilemap with the tiles you wish. In the end, you should have something like this:
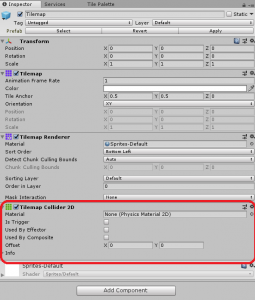
The next step is making the walls in the room collidable, while the floor tiles are not. In order to do so, select the Tilemap object and add a Tilemap Collider 2D. However, this will make all tiles collidable. To make the floor tiles not collidable, select the floor tile in the Tile Palettes folder and change the Collider Type to None.
Player and door prefabs
We created the room for our dungeon, but we still need a player to move in the dungeon, and door to navigate through rooms.
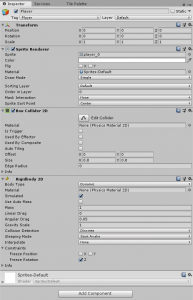
Let’s start by creating the Player. First, select the “player” sprite in the Sprites folder, change the Pixels Per Unit to 30, the Sprite Mode to multiple and slice the prefab. Then, create a new GameObject called player from this sprite, and add a Box Collider 2D and a Rigidbody 2D to this object. Notice that we need to do some changes in the components. First, we don’t want the player to rotate when colliding with things, so we check the Freeze Rotation box of Rigidbody 2D. Also, we need to reduce the size of the collider a little bit, so that the Player can walk through the doors. We do so by changing the size of the Box Collider 2D. You also need to create a Tag called “Player”, and assign it to this object.
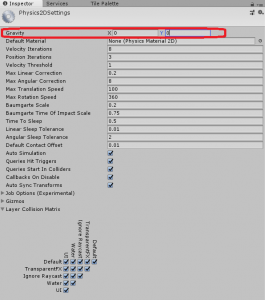
Also, since this is a top-view game, we don’t want any gravity force. We can disable gravity in Edit -> Project Settings -> Physics2D and changing the gravity in the Y axis to 0.
Now, create a new script called PlayerMovement and add it to the Player object. This script will be very simple as the only thing we need is being able to move the Player. So, it needs a speed attribute as a SerializeField and we implement the FixedUpdate method to move the player. In order to do so, it gets the values of the Horizontal and Vertical input and update the velocity accordingly.
using System.Collections;
using System.Collections.Generic;
using UnityEngine;

public class PlayerMovement : MonoBehaviour {

	[SerializeField]
	private float speed;

	// Use this for initialization
	void Start () {

	}

	// Update is called once per frame
	void FixedUpdate () {
		float horizontal = Input.GetAxis ("Horizontal");
		float vertical = Input.GetAxis ("Vertical");

		GetComponent<Rigidbody2D> ().velocity = new Vector2 (horizontal * speed, vertical * speed);
	}
}
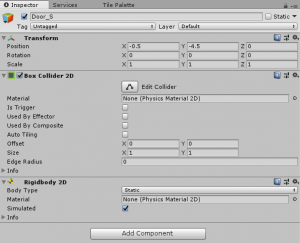
Now that we have the Player object, let’s create the Door prefab as well. So, create a new GameObject called Door. This object will not have a sprite, it will only be an invisible collidable sprite. In order to do so, you need to add a Box Collider 2D and a Rigidbody 2D to the Door. For the Rigidbody 2D, you need to set the Body Type to static. This will make sure the Door will be immovable while still colliding with the Player.
After creating the Door object, let’s create a new script called EnterDoor and add it to the Door object. For now, when the Player touches the door we are only going to restart the game. Later on, we are going to use it to navigate through the Dungeon rooms. Either way, the collision between the Door and Player will be detected by implementing the OnCollisionEnter2D method. In this method, we are going to check if the collision was with the Player. If so, we start the Demo Scene again. Notice that you need to add the SceneManagement namespace to restart the Scene.
using System.Collections;
using System.Collections.Generic;
using UnityEngine;
using UnityEngine.SceneManagement;

public class EnterDoor : MonoBehaviour {

	void OnCollisionEnter2D(Collision2D col) {
		if (col.gameObject.tag == "Player") {
			SceneManager.LoadScene ("Demo");
		}
	}
}
Now, to test it, save the Scene as Demo and you can try playing the game. By now, you should be able to move the player and restart the game when touching the Door.
The dungeon generation algorithm
Now that we have the basic objects to our game (Player and Door), let’s implement the dungeon generation algorithm. In order to do so, strat by creating an empty object called Dungeon and attach a script called DungeonGeneration to it.
The algorithm to generate the dungeon room is as follows:
- Create a empty grid where the rooms will be saved.
- Create an initial room and save it in a rooms_to_create list.
- While the number of rooms is less than a desired number “n”, repeat:
- Pick the first room in the rooms_to_create list
- Add the room to the grid in the correspondent location
- Create a random number of neighbors and add them to rooms_to_create
- Connect the neighbor rooms.
This algorithm is implemented in the GenerateDungeon method below. Notice that the first room coordinate is generated in the middle of the grid. Also, the dungeon grid is initialized with three times the number of rooms on each axis. This way, we can make sure that all rooms fit into the grid. Then, the first loop creates the rooms using the steps described above. All the created rooms are stored in a list called “createdRooms”. When all the rooms have been created, it iterates through this list connecting the neighbor rooms. This is done, by iterating through the neighbor coordinates of each room and checking if there is a room in the grid for this coordinate. If so, the algorithm connects both rooms. In the end, we guarantee the desired number of rooms in the dungeon, and we ensure that all rooms are connected, since they are always connected as neighbors of a previous room.
using System.Collections;
using System.Collections.Generic;
using UnityEngine;
using UnityEngine.Tilemaps;

public class DungeonGeneration : MonoBehaviour {

	[SerializeField]
	private int numberOfRooms;

	private Room[,] rooms;

	void Start () {
		this.currentRoom = GenerateDungeon ();
	}

	private Room GenerateDungeon() {
		int gridSize = 3 * numberOfRooms;

		rooms = new Room[gridSize, gridSize];

		Vector2Int initialRoomCoordinate = new Vector2Int ((gridSize / 2) - 1, (gridSize / 2) - 1);

		Queue<Room> roomsToCreate = new Queue<Room> ();
		roomsToCreate.Enqueue (new Room(initialRoomCoordinate.x, initialRoomCoordinate.y));
		List<Room> createdRooms = new List<Room> ();
		while (roomsToCreate.Count > 0 && createdRooms.Count < numberOfRooms) {
			Room currentRoom = roomsToCreate.Dequeue ();
			this.rooms [currentRoom.roomCoordinate.x, currentRoom.roomCoordinate.y] = currentRoom;
			createdRooms.Add (currentRoom);
			AddNeighbors (currentRoom, roomsToCreate);
		}

		foreach (Room room in createdRooms) {
			List<Vector2Int> neighborCoordinates = room.NeighborCoordinates ();
			foreach (Vector2Int coordinate in neighborCoordinates) {
				Room neighbor = this.rooms [coordinate.x, coordinate.y];
				if (neighbor != null) {
					room.Connect (neighbor);
				}
			}
		}

		return this.rooms [initialRoomCoordinate.x, initialRoomCoordinate.y];
	}

}
You may have noticed we are using a Room class to create the dungeon grid. Also, we add the neighbors of a room to the “rooms_to_create” list using a method called AddNeighbors, so we need to implement it. This method starts by checking what neighbor coordinates are actually available to be selected as having rooms. A coordinate is available only if there is not any other room occupying its place. After finding the available coordinates, a random number of them is selected to be added to “rooms_to_create”. For each room to be created, one of the neighbors is selected randomly.
private void AddNeighbors(Room currentRoom, Queue<Room> roomsToCreate) {
		List<Vector2Int> neighborCoordinates = currentRoom.NeighborCoordinates ();
		List<Vector2Int> availableNeighbors = new List<Vector2Int> ();
		foreach (Vector2Int coordinate in neighborCoordinates) {
			if (this.rooms[coordinate.x, coordinate.y] == null) {
				availableNeighbors.Add (coordinate);
			}
		}

		int numberOfNeighbors = (int)Random.Range (1, availableNeighbors.Count);

		for (int neighborIndex = 0; neighborIndex < numberOfNeighbors; neighborIndex++) {
			float randomNumber = Random.value;
			float roomFrac = 1f / (float)availableNeighbors.Count;
			Vector2Int chosenNeighbor = new Vector2Int(0, 0);
			foreach (Vector2Int coordinate in availableNeighbors) {
				if (randomNumber < roomFrac) {
					chosenNeighbor = coordinate;
					break;
				} else {
					roomFrac += 1f / (float)availableNeighbors.Count;
				}
			}
			roomsToCreate.Enqueue (new Room(chosenNeighbor));
			availableNeighbors.Remove (chosenNeighbor);
		}
	}
Now let’s create the Room class. Notice that this is not a MonoBehaviour, but simply a regular class. So, we need to create its constructor and the methods used in the DungeonGeneration script (NeighborCoordinates and Connect).
First, the constructor is simple, it only needs to initialize the room coordinate and a dictionary with neighbors information. We are going to use a dictionary instead of a list, because we want to associate each neighbor to its direction as well.
using System.Collections.Generic;
using UnityEngine;
using UnityEngine.Tilemaps;

public class Room
{
	public Vector2Int roomCoordinate;
	public Dictionary<string, Room> neighbors;

	public Room (int xCoordinate, int yCoordinate)
	{
		this.roomCoordinate = new Vector2Int (xCoordinate, yCoordinate);
		this.neighbors = new Dictionary<string, Room> ();
	}

	public Room (Vector2Int roomCoordinate)
	{
		this.roomCoordinate = roomCoordinate;
		this.neighbors = new Dictionary<string, Room> ();
	}
The NeighborCoordinates method will return the coordinates of all neighbors of the current room. Each room has a neighbor in each one of the four directions: North, East, South and West. This order is important, since it will be necessary to instantiate the Rooms in the game later.
public List<Vector2Int> NeighborCoordinates () {
		List<Vector2Int> neighborCoordinates = new List<Vector2Int> ();
		neighborCoordinates.Add (new Vector2Int(this.roomCoordinate.x, this.roomCoordinate.y - 1));
		neighborCoordinates.Add (new Vector2Int(this.roomCoordinate.x + 1, this.roomCoordinate.y));
		neighborCoordinates.Add (new Vector2Int(this.roomCoordinate.x, this.roomCoordinate.y + 1));
		neighborCoordinates.Add (new Vector2Int(this.roomCoordinate.x - 1, this.roomCoordinate.y));

		return neighborCoordinates;
	}
Finally, the Connect method will check what is the direction of the room and add it alongside its direction in the neighbors dictionary.
public void Connect (Room neighbor) {
		string direction = "";
		if (neighbor.roomCoordinate.y < this.roomCoordinate.y) {
			direction = "N";
		}
		if (neighbor.roomCoordinate.x > this.roomCoordinate.x) {
			direction = "E";
		}
		if (neighbor.roomCoordinate.y > this.roomCoordinate.y) {
			direction = "S";
		}
		if (neighbor.roomCoordinate.x < this.roomCoordinate.x) {
			direction = "W";
		}
		this.neighbors.Add (direction, neighbor);
	}
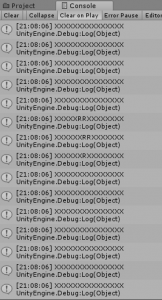
In order to test if the dungeon is being generated correctly, we are going to implement a PrintGrid method that will show the room grid as a string.
private void PrintGrid() {
		for (int rowIndex = 0; rowIndex < this.rooms.GetLength (1); rowIndex++) {
			string row = "";
			for (int columnIndex = 0; columnIndex < this.rooms.GetLength (0); columnIndex++) {
				if (this.rooms [columnIndex, rowIndex] == null) {
					row += "X";
				} else {
					row += "R";
				}
			}
			Debug.Log (row);
		}
	}
Now, back to the DungeonGeneration script, we call the GenerateDungeon method in its Start method. After creating the dungeon we print it for testing.
void Start () {
		GenerateDungeon ();
		PrintGrid ();
	}
By now, you can try running the game with a given number of parameters and checking if it is working correctly.
Navigating through rooms
Now that we are generating the dungeon grid, we need to actually instantiate the room tilemaps in the game. First, we need to create tilemaps for all the possible rooms. Let’s start by saving the room we already have in a folder called Resources. It is very important that it is in the Resources folder, since we need that to instantiate the rooms in runtime.
Now we need to do the same for all rooms. For this, I recommend you download the tutorial source code and copy the rooms from the Resources folder, because it may take some time to make all of them. You need a room for each possible neighborhood configuration, so there are a total of 15 possible rooms. The room names should follow the pattern “Room_NESW”, where “NESW” represents the neighbors of this room (North, East, South, West).
This way, we can add a method in the Room class called PrefabName which returns the name of the Room Prefab of the current room. Notice that, since the NeighborCoordinates method returns the neighbors in the correct order, the name returned by PrefabName matches the name of the prefab we want to instantiate.
public string PrefabName () {
		string name = "Room_";
		foreach (KeyValuePair<string, Room> neighborPair in neighbors) {
			name += neighborPair.Key;
		}
		return name;
	}
Finally, we update the Start method of DungeonGeneration to instantiate this room prefab. After generating the dungeon, it returns the initial room. Then, it loads the prefab from the Resources folder and instantiates the prefab.
void Start () {
		this.currentRoom = GenerateDungeon ();
		string roomPrefabName = this.currentRoom.PrefabName ();
		GameObject roomObject = (GameObject) Instantiate (Resources.Load (roomPrefabName));
	}
By now, you can try playing the game again and checking if it is instantiating the correct room. Try playing the game multiple times to see if the initial room is changing.
Now that we can instantiate a Room Prefab from its name, we can make the doors navigate through rooms. We are going to do that by restarting the Demo Scene with another room as the current one. However, we don’t want the dungeon to be generated again. So, we need to make the Dungeon object a persistent one. This way, we can make sure we have always the same dungeon.
We do that in the Awake method by calling DontDestroyOnLoad. This way, the Dungeon object will not be destroyed when we restart the scene. However, Unity will still create a new Dungeon object every time the scene is started. So, we are going to save the first DungeonGeneration instance in a static attribute. This will be set in the Awake method for the first time it is called. We are also going to generate the dungeon in this method. If the instance has already been set, we are only going to instantiate the current room prefab and we are going to delete the newly created Dungeon object.
void Awake () {
		if (instance == null) {
			DontDestroyOnLoad (this.gameObject);
			instance = this;
			this.currentRoom = GenerateDungeon ();
		} else {
			string roomPrefabName = instance.currentRoom.PrefabName ();
			GameObject roomObject = (GameObject) Instantiate (Resources.Load (roomPrefabName));
			Destroy (this.gameObject);
		}
	}

	void Start () {
		string roomPrefabName = this.currentRoom.PrefabName ();
		GameObject roomObject = (GameObject) Instantiate (Resources.Load (roomPrefabName));
	}
Now, let’s update the EnterDoor script to restart the demo scene with a new current room. For that, we need to save the direction of the door in the script. Then, in the OnCollisionEnter2D method, we get the next room from acessing the neighbors dictionary for the desired direction in the current room. After identifying the next room, we change the current room in the dungeon and restart the demo scene.
using System.Collections;
using System.Collections.Generic;
using UnityEngine;
using UnityEngine.SceneManagement;

public class EnterDoor : MonoBehaviour {

	[SerializeField]
	string direction;

	void OnCollisionEnter2D(Collision2D col) {
		if (col.gameObject.tag == "Player") {
			GameObject dungeon = GameObject.FindGameObjectWithTag ("Dungeon");
			DungeonGeneration dungeonGeneration = dungeon.GetComponent<DungeonGeneration> ();
			Room room = dungeonGeneration.CurrentRoom ();
			dungeonGeneration.MoveToRoom (room.Neighbor (this.direction));
			SceneManager.LoadScene ("Demo");
		}
	}
}
We still need to implement the CurrentRoom and MoveToRoom methods in the DungeonGeneration script, as well as the neighbor getter in the Room object.
public void MoveToRoom(Room room) {
		this.currentRoom = room;
	}

	public Room CurrentRoom() {
		return this.currentRoom;
	}
public Room Neighbor (string direction) {
return this.neighbors [direction];
}Finally, set the direction values of the doors for all rooms. Then, you can try running your game again. By now, you should be able to move between rooms.
Adding obstacles
It’s time to add other elements in our dungeon, starting with the obstacles. The obstacles will be tiles we are going to set in some specific parts of the room. For each room, the number of obstacles and their positions will be randomly chosen.
Let’s start by writing a PopulateObstacles method in the Room class. This method will receive as parameters the number of obstacles and the possible obstacle sizes. Notice that the sizes are a Vector2int, which specifies the dimensions in X and Y coordinates.
For each obstacle to be created, this method chooses a random size among the possible ones and look for a free region on the room with this size. In order to keep track of what coordinates are free in the room, we are going to use a string matrix called population. After choosing the region of the obstacle, we update the population matrix.
private string[,] population;

	public Room (int xCoordinate, int yCoordinate)
	{
		this.roomCoordinate = new Vector2Int (xCoordinate, yCoordinate);
		this.neighbors = new Dictionary<string, Room> ();
		this.population = new string[18, 10];
		for (int xIndex = 0; xIndex < 18; xIndex += 1) {
			for (int yIndex = 0; yIndex < 10; yIndex += 1) {
				this.population [xIndex, yIndex] = "";
			}
		}
		this.population [8, 5] = "Player";
	}

	public Room (Vector2Int roomCoordinate)
	{
		this.roomCoordinate = roomCoordinate;
		this.neighbors = new Dictionary<string, Room> ();
		this.population = new string[18, 10];
		for (int xIndex = 0; xIndex < 18; xIndex += 1) {
			for (int yIndex = 0; yIndex < 10; yIndex += 1) {
				this.population [xIndex, yIndex] = "";
			}
		}
		this.population [8, 5] = "Player";
	}

public void PopulateObstacles (int numberOfObstacles, Vector2Int[] possibleSizes) {
		for (int obstacleIndex = 0; obstacleIndex < numberOfObstacles; obstacleIndex += 1) {
			int sizeIndex = Random.Range (0, possibleSizes.Length);
			Vector2Int regionSize = possibleSizes [sizeIndex];
			List<Vector2Int> region = FindFreeRegion (regionSize);
			foreach (Vector2Int coordinate in region) {
				this.population [coordinate.x, coordinate.y] = "Obstacle";
			}
		}
	}
Now we need to implement the FindFreeRegion method. Basically, this method consists on a loop that looks for random regions until it finds one that is available. In each iteration of the loop, it generates a random center tile between tiles 2 and 15 in the x coordinate and between tiles 2 and 7 in the y coordinate. We are using those coordinates so that the obstacles are not above the walls of our room. After doing that, it calculates the coordinates of the rest of the obstacle, based on its size. Finally, it checks if the region is free in the while loop. If it is not, it iterates again to find another region, until finding a free one.
private List<Vector2Int> FindFreeRegion (Vector2Int sizeInTiles) {
		List<Vector2Int> region = new List<Vector2Int>();
		do {
			region.Clear();

			Vector2Int centerTile = new Vector2Int(UnityEngine.Random.Range(2, 18 - 3), UnityEngine.Random.Range(2, 10 - 3));

			region.Add(centerTile);

			int initialXCoordinate = (centerTile.x - (int)Mathf.Floor(sizeInTiles.x / 2));
			int initialYCoordinate = (centerTile.y - (int)Mathf.Floor(sizeInTiles.y / 2));
			for (int xCoordinate = initialXCoordinate; xCoordinate < initialXCoordinate + sizeInTiles.x; xCoordinate += 1) {
				for (int yCoordinate = initialYCoordinate; yCoordinate < initialYCoordinate + sizeInTiles.y; yCoordinate += 1) {
					region.Add(new Vector2Int(xCoordinate, yCoordinate));
				}
			}
		} while(!IsFree (region));
		return region;
	}
The IsFree method, by its turn, simply iterates through all coordinates of the region and checks if the population matrix is free for all of them.
private bool IsFree (List<Vector2Int> region) {
		foreach (Vector2Int tile in region) {
			if (this.population [tile.x, tile.y] != "") {
				return false;
			}
		}
		return true;
	}
Now, we need to properly call the PopulateObstacles method for each room. We are going to do that after connecting the rooms. Also, after instantiating the room prefab, we need to actually add the obstacle tiles in the tilemap. So, we update the Awake and Start methods accordingly.
[SerializeField]
	private TileBase obstacleTile;

void Awake () {
		if (instance == null) {
			DontDestroyOnLoad (this.gameObject);
			instance = this;
			this.currentRoom = GenerateDungeon ();
		} else {
			string roomPrefabName = instance.currentRoom.PrefabName ();
			GameObject roomObject = (GameObject) Instantiate (Resources.Load (roomPrefabName));
			Tilemap tilemap = roomObject.GetComponentInChildren<Tilemap> ();
			instance.currentRoom.AddPopulationToTilemap (tilemap, instance.obstacleTile);
			Destroy (this.gameObject);
		}
	}

	void Start () {
		string roomPrefabName = this.currentRoom.PrefabName ();
		GameObject roomObject = (GameObject) Instantiate (Resources.Load (roomPrefabName));
		Tilemap tilemap = roomObject.GetComponentInChildren<Tilemap> ();
		this.currentRoom.AddPopulationToTilemap (tilemap, this.obstacleTile);
	}
We still need to implement the AddPopulationToTilemap method. This method will iterate through all the coordinates in the population matrix and check if it is an obstacle. If so, we set the tile on that coordinate to be an obstacle. Notice that we need to set the tile on coordinate (xIndex – 9, yIndex – 5). That’s because in our population matrix, the (0, 0) index is the lower left corner, while in the tilemap, (0, 0) is actually the center of the map.
public void AddPopulationToTilemap (Tilemap tilemap, TileBase obstacleTile) {
		for (int xIndex = 0; xIndex < 18; xIndex += 1) {
			for (int yIndex = 0; yIndex < 10; yIndex += 1) {
				if (this.population [xIndex, yIndex] == "Obstacle") {
					tilemap.SetTile (new Vector3Int (xIndex - 9, yIndex - 5, 0), obstacleTile);
				}
			}
		}
	}
Now, update the Dungeon object to set the values for the new attributes, such as the possible obstacle sizes and the obstacle tile. Then, you can try playing the game to see if it is correctly creating the obstacles.
Adding enemies
Adding enemies will be very similar to adding obstacles, except the enemies will be prefabs instead of tiles, and their size will be always of one tile.
Let’s start by adding a PopulatePrefabs method, which will add the enemies to the game given their prefabs. This method will iterate through the number of desired prefabs and, for each one, it will pick a random prefab among the possible ones, find a free region of size one and add it to the population matrix. In the population matrix we are going to use the prefab name to identify it. Later we are going to need to instantiate the prefab from its name. So, we are going to use a dictionary (initialized in the constructor) called name2Prefab. This dictionary will be indexed by the prefab name and it will return its Prefab.
private Dictionary<string, GameObject> name2Prefab;

public Room (int xCoordinate, int yCoordinate)
	{
		this.roomCoordinate = new Vector2Int (xCoordinate, yCoordinate);
		this.neighbors = new Dictionary<string, Room> ();
		this.population = new string[18, 10];
		for (int xIndex = 0; xIndex < 18; xIndex += 1) {
			for (int yIndex = 0; yIndex < 10; yIndex += 1) {
				this.population [xIndex, yIndex] = "";
			}
		}
		this.population [8, 5] = "Player";
		this.name2Prefab = new Dictionary<string, GameObject> ();
	}

	public Room (Vector2Int roomCoordinate)
	{
		this.roomCoordinate = roomCoordinate;
		this.neighbors = new Dictionary<string, Room> ();
		this.population = new string[18, 10];
		for (int xIndex = 0; xIndex < 18; xIndex += 1) {
			for (int yIndex = 0; yIndex < 10; yIndex += 1) {
				this.population [xIndex, yIndex] = "";
			}
		}
		this.population [8, 5] = "Player";
		this.name2Prefab = new Dictionary<string, GameObject> ();
	}

public void PopulatePrefabs (int numberOfPrefabs, GameObject[] possiblePrefabs) {
		for (int prefabIndex = 0; prefabIndex < numberOfPrefabs; prefabIndex += 1) {
			int choiceIndex = Random.Range (0, possiblePrefabs.Length);
			GameObject prefab = possiblePrefabs [choiceIndex];
			List<Vector2Int> region = FindFreeRegion (new Vector2Int(1, 1));

			this.population [region[0].x, region[0].y] = prefab.name;
			this.name2Prefab [prefab.name] = prefab;
		}
	}
This way, we can update the AddPopulationToTilemap to add the prefabs in the map as well. When the coordinate is not an obstacle, but it is also not empty and it is not the player, that means we need to instantiate a prefab for it. We instantiate the prefab by acessing the name2Prefab dictionary.
public void AddPopulationToTilemap (Tilemap tilemap, TileBase obstacleTile) {
		for (int xIndex = 0; xIndex < 18; xIndex += 1) {
			for (int yIndex = 0; yIndex < 10; yIndex += 1) {
				if (this.population [xIndex, yIndex] == "Obstacle") {
					tilemap.SetTile (new Vector3Int (xIndex - 9, yIndex - 5, 0), obstacleTile);
				} else if (this.population [xIndex, yIndex] != "" && this.population [xIndex, yIndex] != "Player") {
					GameObject prefab = GameObject.Instantiate (this.name2Prefab[this.population [xIndex, yIndex]]);
					prefab.transform.position = new Vector2 (xIndex - 9 + 0.5f, yIndex - 5 + 0.5f);
				}
			}
		}
	}
Then, we can call the PopulatePrefabs method from GenerateDungeon, right after adding the obstacles.
[SerializeField]
	private int numberOfEnemies;
	[SerializeField]
	private GameObject[] possibleEnemies;

private Room GenerateDungeon() {
		int gridSize = 3 * numberOfRooms;

		rooms = new Room[gridSize, gridSize];

		Vector2Int initialRoomCoordinate = new Vector2Int ((gridSize / 2) - 1, (gridSize / 2) - 1);

		Queue<Room> roomsToCreate = new Queue<Room> ();
		roomsToCreate.Enqueue (new Room(initialRoomCoordinate.x, initialRoomCoordinate.y));
		List<Room> createdRooms = new List<Room> ();
		while (roomsToCreate.Count > 0 && createdRooms.Count < numberOfRooms) {
			Room currentRoom = roomsToCreate.Dequeue ();
			this.rooms [currentRoom.roomCoordinate.x, currentRoom.roomCoordinate.y] = currentRoom;
			createdRooms.Add (currentRoom);
			AddNeighbors (currentRoom, roomsToCreate);
		}

		foreach (Room room in createdRooms) {
			List<Vector2Int> neighborCoordinates = room.NeighborCoordinates ();
			foreach (Vector2Int coordinate in neighborCoordinates) {
				Room neighbor = this.rooms [coordinate.x, coordinate.y];
				if (neighbor != null) {
					room.Connect (neighbor);
				}
			}

			room.PopulateObstacles (this.numberOfObstacles, this.possibleObstacleSizes);
			room.PopulatePrefabs (this.numberOfEnemies, this.possibleEnemies);
		}

		return this.rooms [initialRoomCoordinate.x, initialRoomCoordinate.y];
	}
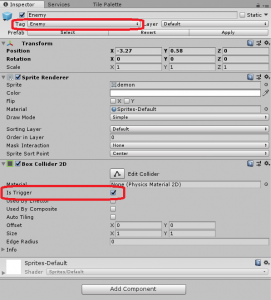
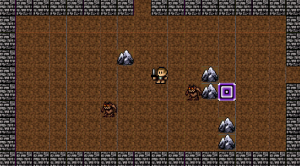
We still need to create the enemy prefab, in order to set the possible enemies in the DungeonGeneration script. First, we need to change the Enemy sprite Pixels Per Unit to 40, so that it is not too big in our map. Now, create a new GameObject from the Enemy sprite, and add a BoxCollider2D to it (you need to set the collider as a trigger). Finally, set the Enemy tag to be “Enemy” and save it as a Prefab.
Now, you can update the Dungeon object to add the number of enemies and enemy prefabs to the DungeonGeneration script. Then, you can try playing the game to check if the enemies are being created.
Adding the goal
We have enemies, but we still need a way to clear our game. What we are going to do in this demo is adding a Goal object, which will always be in the furthest room from the start, and must be found by the player. When the player touches the Goal, they should finish the game.
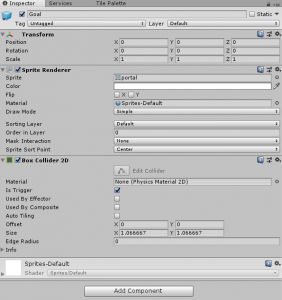
Let’s start by creating the Goal prefab. We are going to use the Portal sprite for that. So, change the Pixels Per Unit of this sprite to 30, and create a new GameObject from it. As we did with the enemies, we need to add a BoxCollider2D to this object, and set it as a trigger. Finally, save it as a Prefab.
Now, let’s change the DungeonGeneration script to create the Goal inside the furthest room. First, we need to find the furthest room. We do that when iterating through the createdRooms to populate them. For each room, we calculate its distance to the initial one, and save which is the final room. Then, outside this loop, we call PopulatePrefabs again for the final room, but now we are using the Goal prefab instead of the Enemy one, and we only need one Goal object inside the room.
[SerializeField]
	private GameObject goalPrefab;

private Room GenerateDungeon() {
		int gridSize = 3 * numberOfRooms;

		rooms = new Room[gridSize, gridSize];

		Vector2Int initialRoomCoordinate = new Vector2Int ((gridSize / 2) - 1, (gridSize / 2) - 1);

		Queue<Room> roomsToCreate = new Queue<Room> ();
		roomsToCreate.Enqueue (new Room(initialRoomCoordinate.x, initialRoomCoordinate.y));
		List<Room> createdRooms = new List<Room> ();
		while (roomsToCreate.Count > 0 && createdRooms.Count < numberOfRooms) {
			Room currentRoom = roomsToCreate.Dequeue ();
			this.rooms [currentRoom.roomCoordinate.x, currentRoom.roomCoordinate.y] = currentRoom;
			createdRooms.Add (currentRoom);
			AddNeighbors (currentRoom, roomsToCreate);
		}

		int maximumDistanceToInitialRoom = 0;
		Room finalRoom = null;
		foreach (Room room in createdRooms) {
			List<Vector2Int> neighborCoordinates = room.NeighborCoordinates ();
			foreach (Vector2Int coordinate in neighborCoordinates) {
				Room neighbor = this.rooms [coordinate.x, coordinate.y];
				if (neighbor != null) {
					room.Connect (neighbor);
				}
			}
			room.PopulateObstacles (this.numberOfObstacles, this.possibleObstacleSizes);
			room.PopulatePrefabs (this.numberOfEnemies, this.possibleEnemies);

			int distanceToInitialRoom = Mathf.Abs (room.roomCoordinate.x - initialRoomCoordinate.x) + Mathf.Abs(room.roomCoordinate.y - initialRoomCoordinate.y);
			if (distanceToInitialRoom > maximumDistanceToInitialRoom) {
				maximumDistanceToInitialRoom = distanceToInitialRoom;
				finalRoom = room;
			}
		}

		GameObject[] goalPrefabs = { this.goalPrefab };
		finalRoom.PopulatePrefabs(1, goalPrefabs);

		return this.rooms [initialRoomCoordinate.x, initialRoomCoordinate.y];
	}
Now, let’s add a new script to the Goal prefab called ReachGoal. In this script, we are only going to implement the OnTriggerEnter2D method and, when the player collides with the goal, we are going to call a method called ResetDungeon inside DungeonGeneration, besides restarting the Demo scene.
using System.Collections;
using System.Collections.Generic;
using UnityEngine;
using UnityEngine.SceneManagement;

public class ReachGoal : MonoBehaviour {

	void OnTriggerEnter2D(Collider2D col) {
		if (col.gameObject.tag == "Player") {
			GameObject dungeon = GameObject.FindGameObjectWithTag ("Dungeon");
			DungeonGeneration dungeonGeneration = dungeon.GetComponent<DungeonGeneration> ();
			dungeonGeneration.ResetDungeon ();
			SceneManager.LoadScene ("Demo");
		}
	}
}
Finally, the ResetDungeon method will simply generate the dungeon again.
public void ResetDungeon() {
		this.currentRoom = GenerateDungeon ();
	}
Now, set the Goal prefab value in the DungeonGeneration script and try playing the game again. By now, you should be able to find the Goal in the dungeon and restart the Demo.
Finishing the demo
The last thing we are going to do is allowing the player to leave a room or the dungeon only when all enemies in that room have been defeated. This is actually very simple to do, but first we need a way to defeat the enemies.
So, let’s add a new script called KillEnemy to the Enemy prefab. In this script we implement the OnTriggerEnter2D method. Since this is just a demo, the enemy will be automatically destroyed when the Player touches it.
using System.Collections;
using System.Collections.Generic;
using UnityEngine;

public class KillEnemy : MonoBehaviour {

	void OnTriggerEnter2D(Collider2D col) {
		if (col.gameObject.tag == "Player") {
			Destroy (this.gameObject);
		}
	}
}
Now, we need to update the EnterDoor and ReachGoal scripts to check the number of remaining enemies before leaving the room or the dunteon. Let’s start by the EnterDoor script. Inside the OnCollisionEnter2D method we are going to find the objects with the “Enemy” tag. This will return an array of GameObjects, and if this array length is 0, this means that all enemies have been defeated. If so, we execute the code we already had. Otherwise, we do nothing.
using System.Collections;
using System.Collections.Generic;
using UnityEngine;
using UnityEngine.SceneManagement;

public class EnterDoor : MonoBehaviour {

	[SerializeField]
	string direction;

	void OnCollisionEnter2D(Collision2D col) {
		if (col.gameObject.tag == "Player") {
			GameObject[] enemies = GameObject.FindGameObjectsWithTag ("Enemy");
			if (enemies.Length == 0) {
				GameObject dungeon = GameObject.FindGameObjectWithTag ("Dungeon");
				DungeonGeneration dungeonGeneration = dungeon.GetComponent<DungeonGeneration> ();
				Room room = dungeonGeneration.CurrentRoom ();
				dungeonGeneration.MoveToRoom (room.Neighbor (this.direction));
				SceneManager.LoadScene ("Demo");
			}
		}
	}
}
Then we do the same checking inside the ReachGoal script, which means we only restart the dungeon if there are no enemies left inside this room.
using System.Collections;
using System.Collections.Generic;
using UnityEngine;
using UnityEngine.SceneManagement;

public class ReachGoal : MonoBehaviour {

	void OnTriggerEnter2D(Collider2D col) {
		if (col.gameObject.tag == "Player") {
			GameObject[] enemies = GameObject.FindGameObjectsWithTag ("Enemy");
			if (enemies.Length == 0) {
				GameObject dungeon = GameObject.FindGameObjectWithTag ("Dungeon");
				DungeonGeneration dungeonGeneration = dungeon.GetComponent<DungeonGeneration> ();
				dungeonGeneration.ResetDungeon ();
				SceneManager.LoadScene ("Demo");
			}
		}
	}
}
Now try playing the game again, and you should only be able to leave a room or restart the dungeon once you have killed all the enemies in that room.
And that concludes this tutorial on Procedural Dungeon Generation using Unity. I hope you enjoyed it, and if you have any questions please let me know in the comments section.

