A Deeper look into the Camera in Unity3D
Project files are located here
What we will discuss today:
Today we are going to take a step back and focus on one of the most important components within Unity3D, the Camera component. Unlike the other components which aren’t needed to build a game or application, the Camera component is a pivotal component. You cannot run the application or game if a camera is not present.
The camera component is especially unique because you can use only one or many in an application or game. Before we start getting into the nitty gritty and adding a bunch of cameras to a scene, there are a few things that should be discussed. First off, we should go back over the Camera Component and the available properties for it.
become a professional vr game developer with unity
Pre-Order The Complete Virtual Reality Game Development with Unity and learn to create immersive games and experiences by building 10 VR games. The course assumes no prior Unity or VR experience – We’ll teach you C#, Unity and 3D programming from the ground-up
Check it out on Zenva Academy and get Early Access!
Tutorial screencast
For the ones with a more visual learning style, I’ve prepared a screencast showing what we do in this written article:
LET’S GET STARTED
Make sure you fully understand what you have read from the Camera Component Screenshot within the Inspector of Unity3D and what all of the properties do. This is crucial information that could lead to detrimental failures later on.
As you can see, Unity3D makes it very easy to make a split screen game, a menu, and game overlay screen using the camera component. The tutorial today will also focus more on design concepts and recreating menu’s, views, and overlays that are present in various finished video games. Each design concept will be broken into its own section and gone over with a fine tooth comb, so to speak. We will discuss the ideas behind the concept and a rudimentary implementation of the example(s).
I will also note that I am using Unity3D version 5.3.0f4 which is the latest version of Unity3D.
Section 1: Camera Properties
This is the boring section, where it is all about the theory and no practical. I find that it is fairly unavoidable in terms of explaining everything. To simplify this section, I have taken a screenshot of the Unity3D manual that has this exact information. You can view the website here.
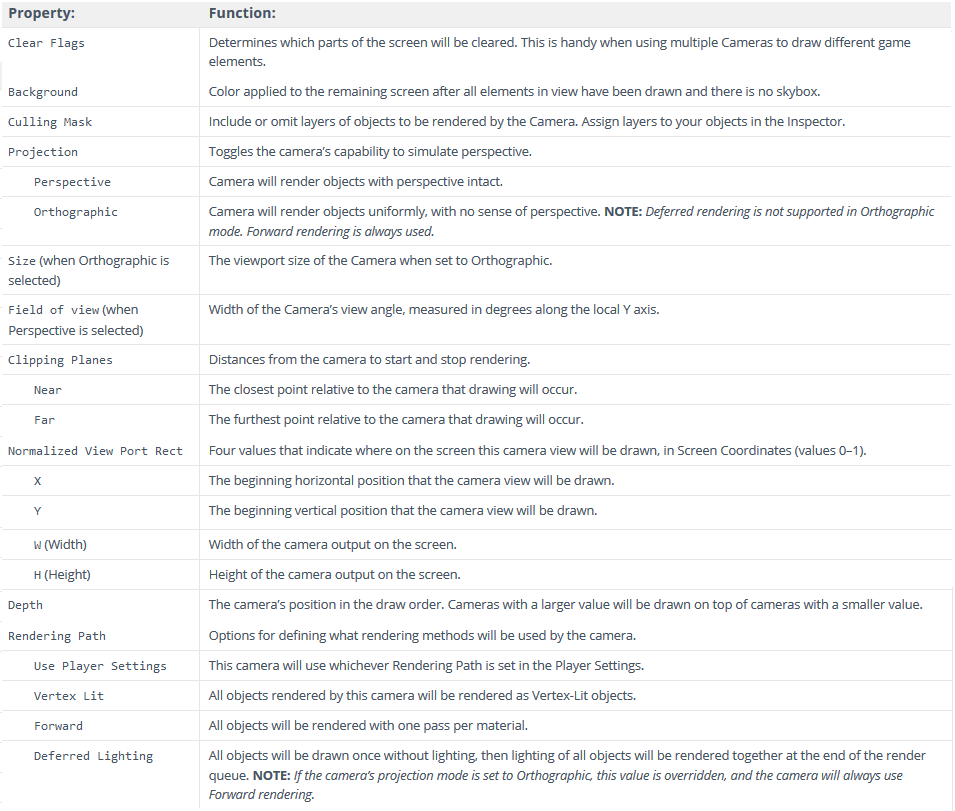
There are only a few that I want to go over in detail that coincide with this lesson, future lessons will cover more of them as needed. Just because I am not covering them in detail here does not mean that you shouldn’t read about them, in fact, I highly encourage it. I am grossly oversimplifying the definitions here, however, it will describe the basic ideas easier.
Clear Flags: Determine what is cleared on the screen by the camera.
Projection: Determines whether you are in 2D or 3D mode with the camera.
Perspective: Displays the camera in 3D mode.
Orthographic: Displays the camera in 2D mode.
Field of view: 2D mode sets the viewport (screen space size). 3D mode sets the viewing angle of the camera.
Near: closest point in the field of view that will be drawn.
Far: furthest point in the field of view that will be drawn.
View Port Rect: values that describe what will be drawn in screen space.
X: horizontal begin point (float value between 0 and 1).
Y: vertical being point (float value between 0 and 1).
W: width of the camera on screen.
H: height of the camera on screen.
Section 2: Split Screen Camera
Welcome to section 1, we will discuss the split screen camera ideals here. Chances are, you have seen the split screen camera view in one of their many incarnations. Normally, I would show screen shots of the examples being described, however, they contain images that are trademarked to each respective company. If you are curious, a quick google search will provide these images for you. This section will describe two examples of it. The first example comes from Touhou Project, a game series developed by a single person known as ZUN. Touhou Project is most typically found to be a Bullet Hell game series, and the various incarnations use the split screen archetype differently.
Zun went with a two camera setup that overlap one another. The bottom camera houses the Score, Hi-Score, Lives count, Power (damage dealing capabilities) and Graze (How long you’ve gone without being hit). The top most camera has the actual game play inside of it.
The next example is courteously given to us from the Call of Duty franchise created by Activision and Treyarch. Two cameras that make up the full screen. The top being one player and the bottom having another player. This style has started to slowly disappear from multiplayer games in favor of network only play. None the less, it is and has been a favorite style of play without network capabilities.
Building the Examples:
Now building both of these examples will utilize the same concept. It is up to you if you want to use a 2D or 3D camera component or project. Personally, I feel that doing this with a 3D camera is easier. As I stated earlier, they will be rudimentary examples. Essentially, I will use simple objects and components to convey the concept so that it is easier to digest.
Camera inside another example:
If you haven’t already created a new project in 3D, go ahead and make one now. The only components in the hierarchy pane should be your Camera and Directional Light.
If the clue left not so subtlety from the course name didn’t clue you in, go ahead and select the camera component.

Because we want to use more than one camera here, Right click on the Main Camera and select Duplicate.
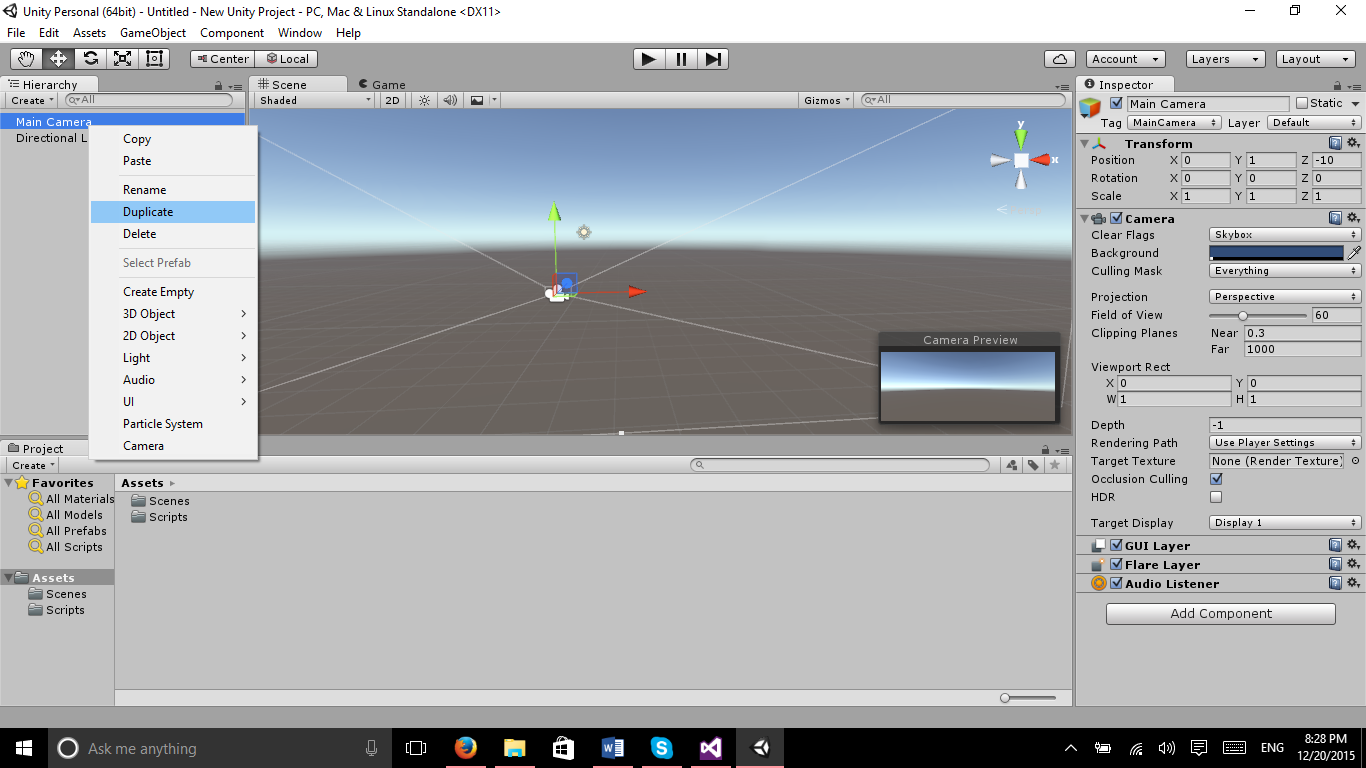
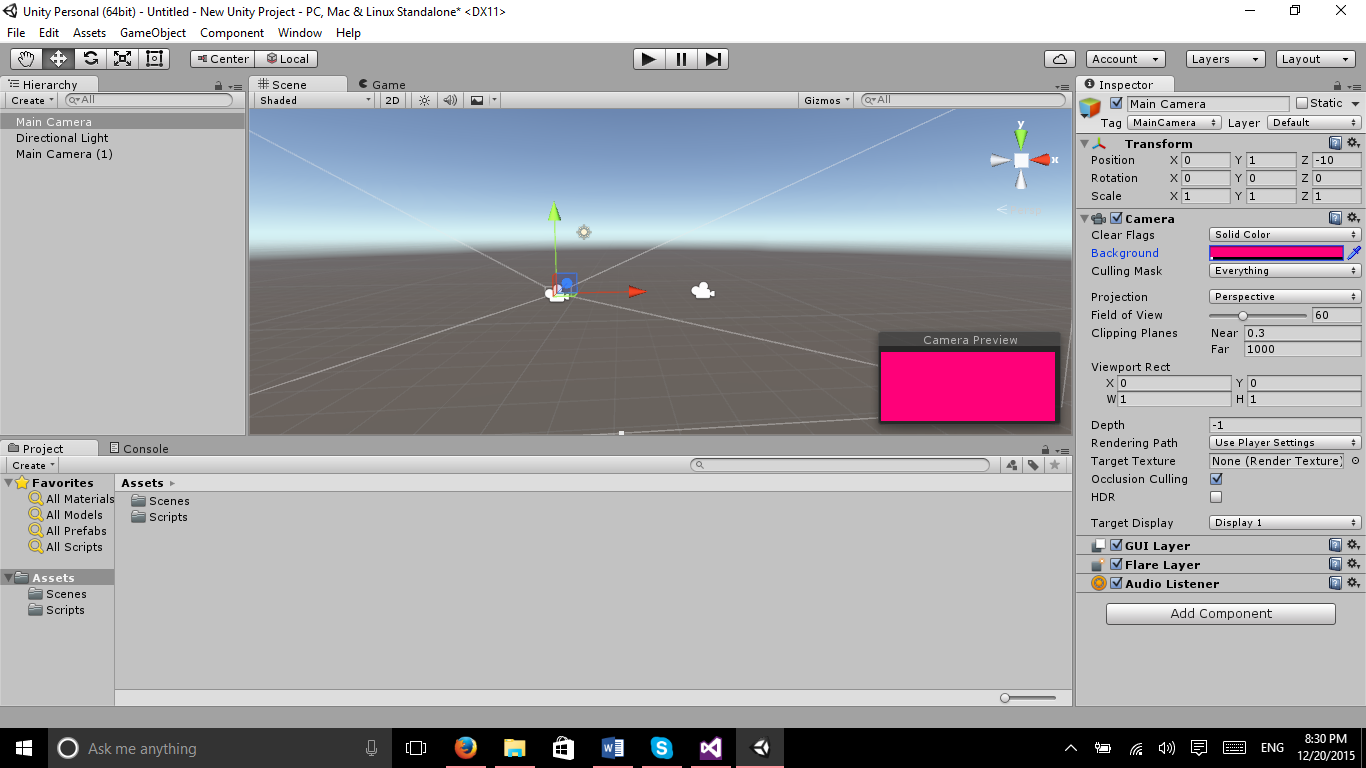
Go back to the first camera. We have a couple of changes we want to make here. We want the clear flags to be changed to Solid Color. The background property will allow you to change the colour, change it to whatever you want it to be, I went with 255,0,121,5 (a pink). Depth should be set to -1.
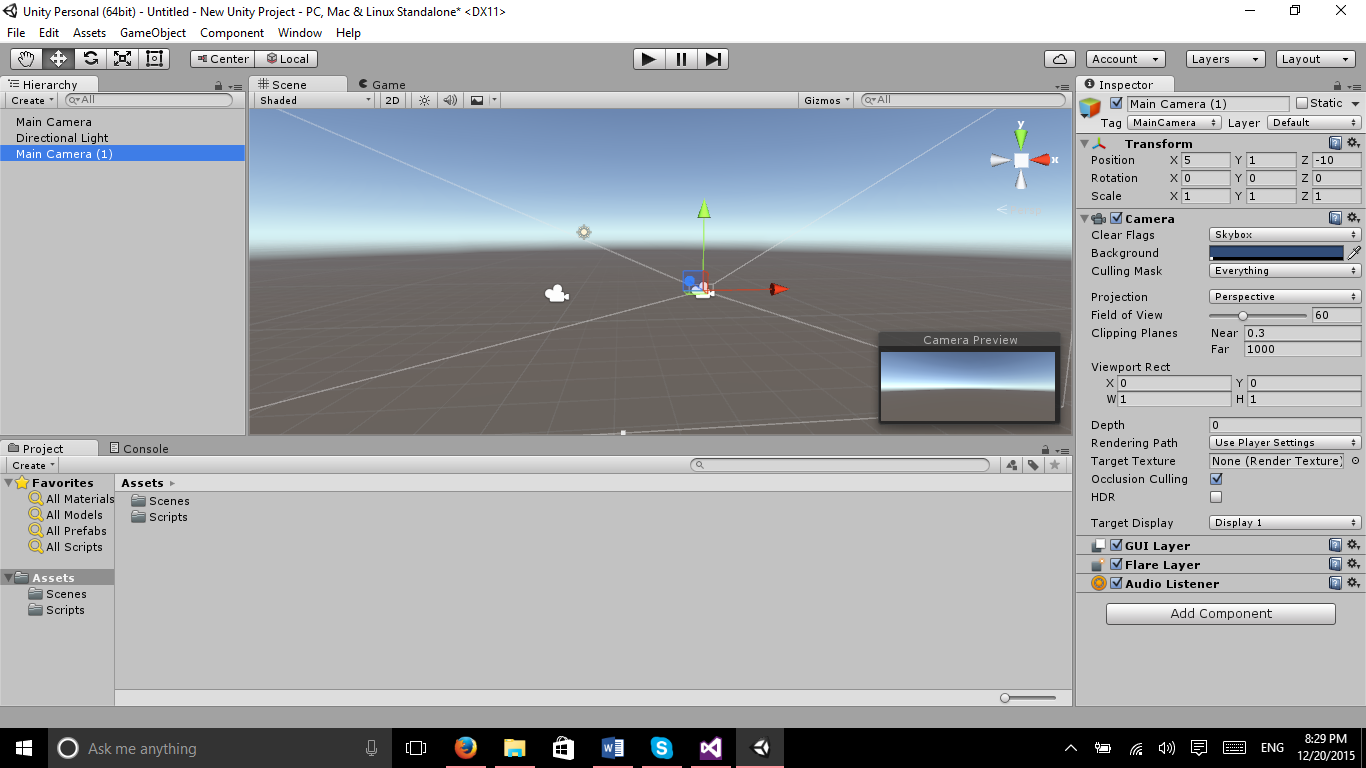
Select the Duplicated Camera, pretty much everything should be default. We need to change the depth to be 0.
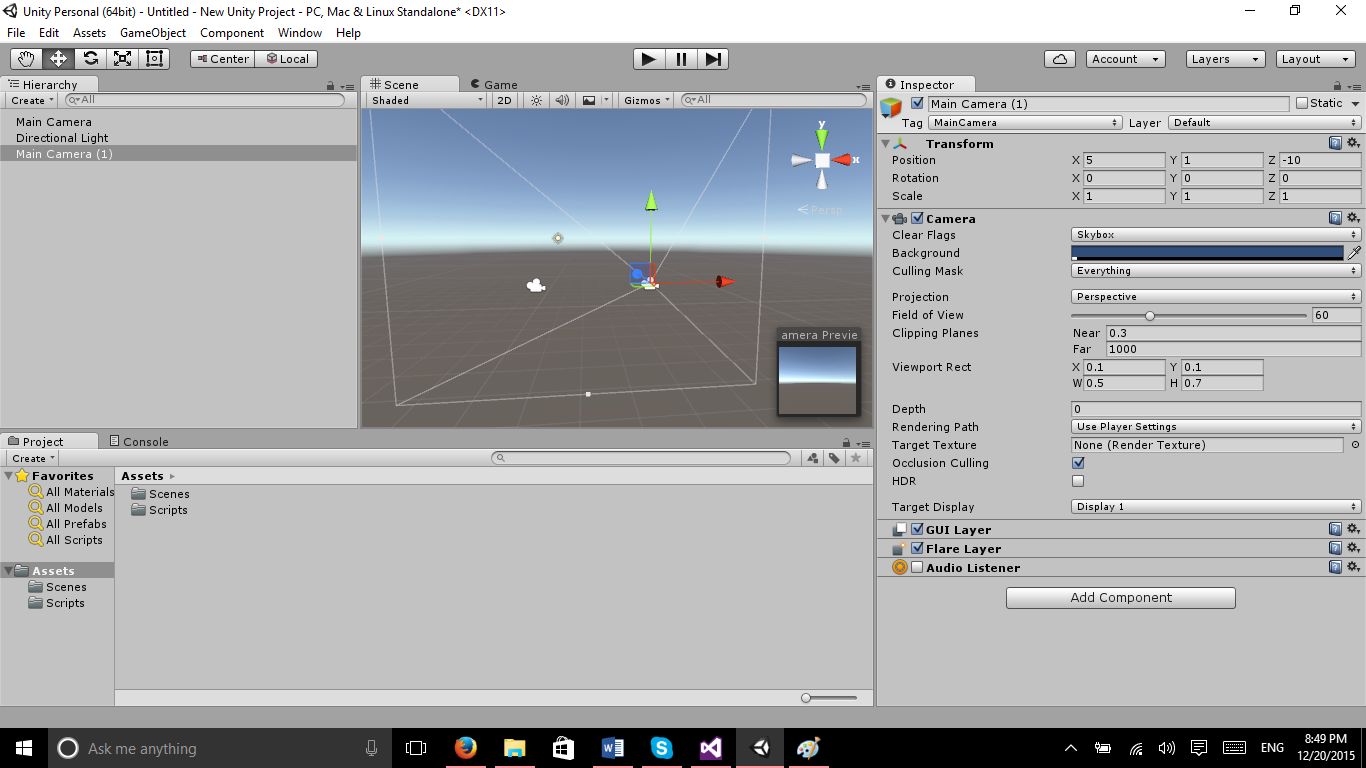
There is one last thing we need to do with the Duplicated Camera. We need to modify the viewport rect. We want the X value to be 0.1, Y value to be 0.1, W to be 0.5, and H to be 0.7. We also want to make sure the Audio Listener is Unchecked.
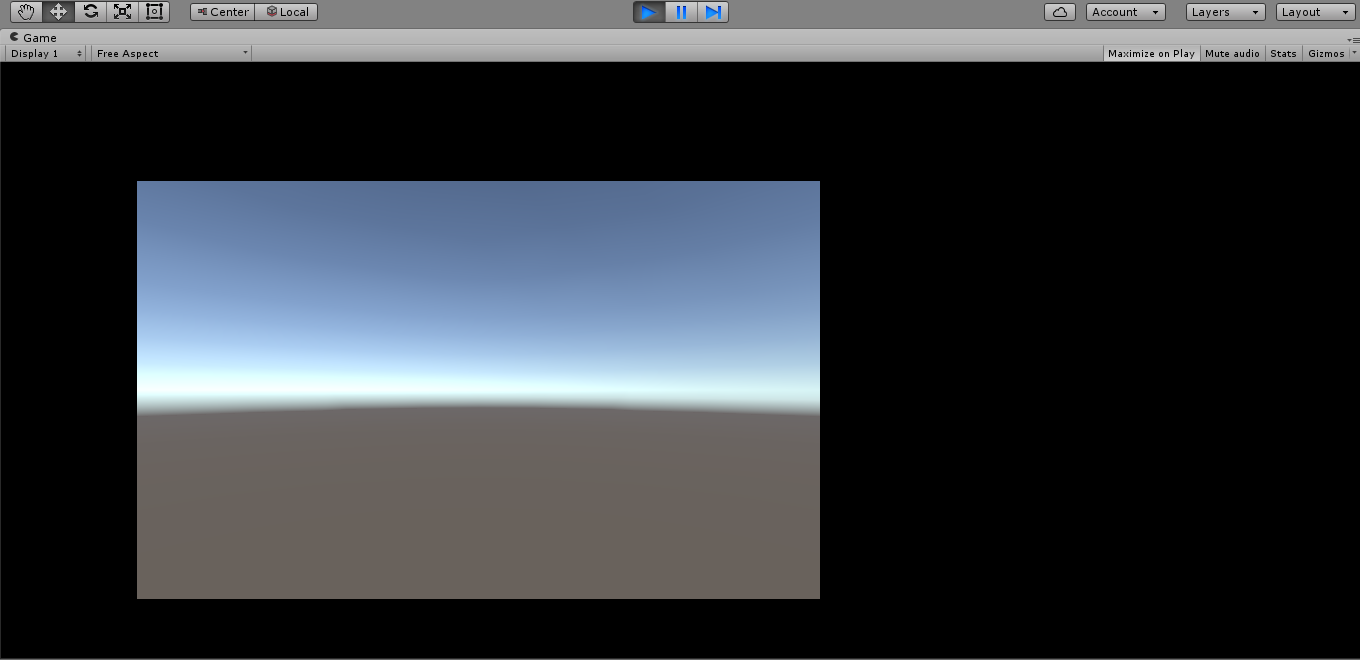
Save and run the scene and it should resemble the basic idea of what is done in the Touhou screenshot. It is really that simple, and an excellent starter point for anyone that wants to build a game with this concept in mind.
Horizontal Split Screen Example:
This example utilizes most of the same concepts as the first example, thus I will add a change at the end to show horizontal and vertical versions. If you haven’t made a new scene, go ahead and create one now. Make sure to have the x position of the Main Camera is 0, Y is 1, and z is -10.

Again, we want to make a duplicate of the Main Camera.

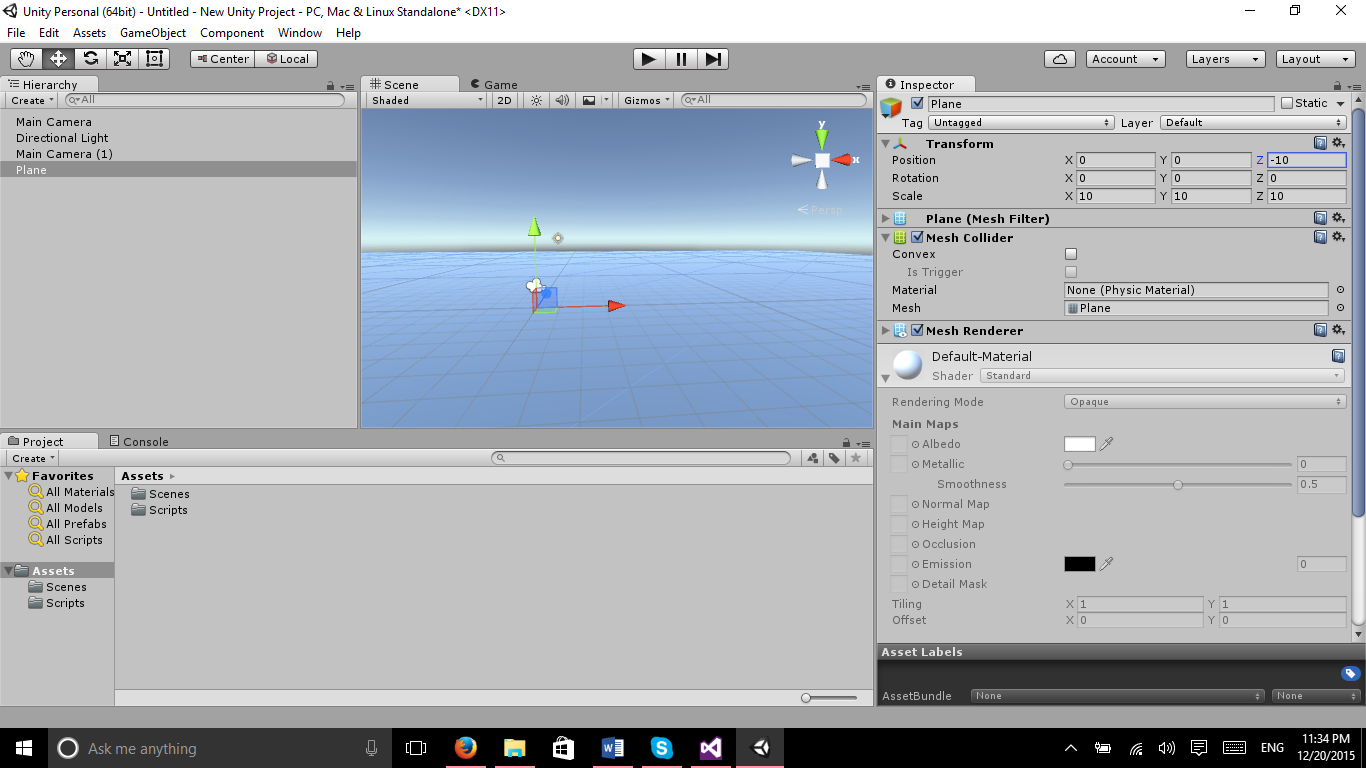
Here is where we will differentiate from the first example’s concepts. First, we will create a plane and give it a colour. First off, make a plane and give it and x, y and z scale size of 10. Also, make sure the x and y position is set to 0 and the z is set to -10.
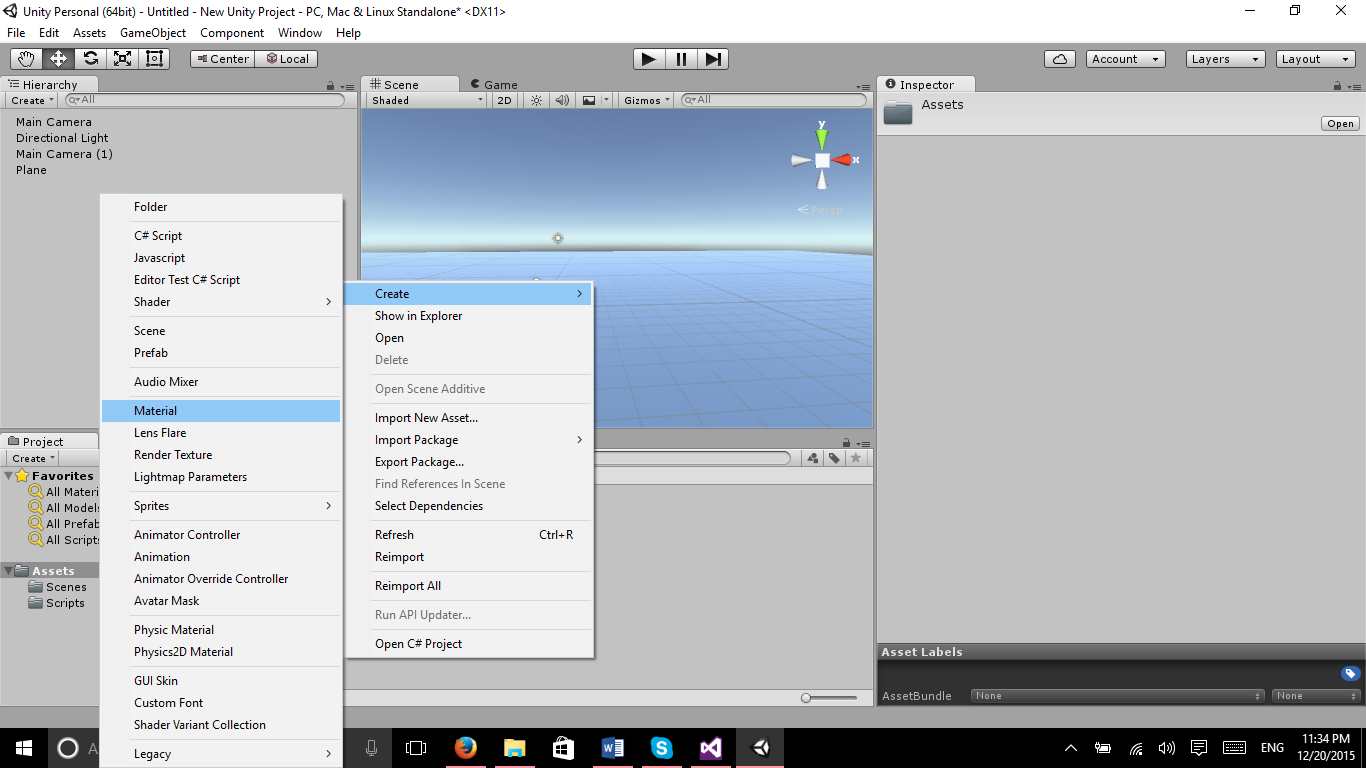
Right click on the assets folder. Highlight create, and select Material.
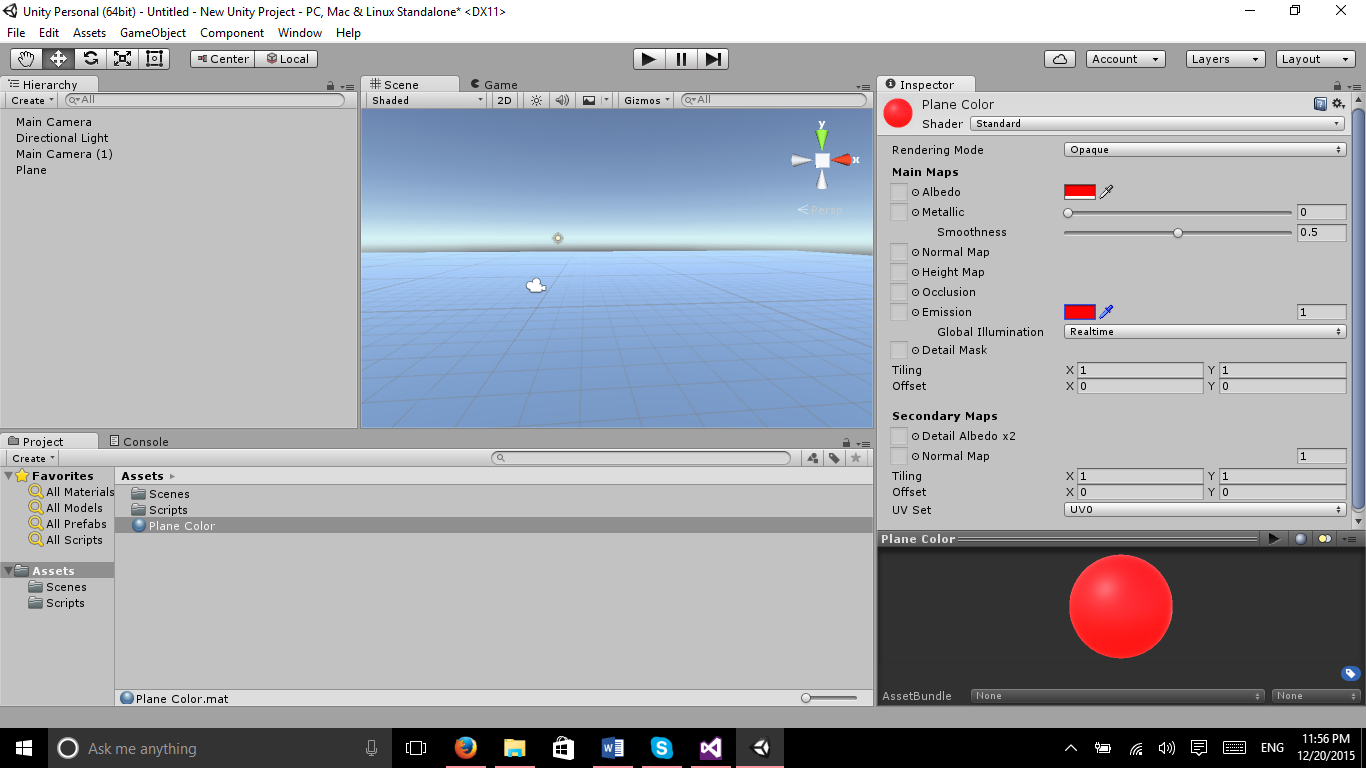
A material is a component that allows you to render a texture or shader. There are quite a few shader scripts prewritten for us to use from within Unity3D. Although you can’t see specific shaders when creating a material with this tutorial, it is a good idea to keep this in mind. If you have experience with the shaderlab language, you can create your own.
Alright, now we can apply our own colour to the material. To do this, click on the colour box to select what colour you want for both Albedo and Emission. You can leave Rendering Mode and Global Illumination as is.
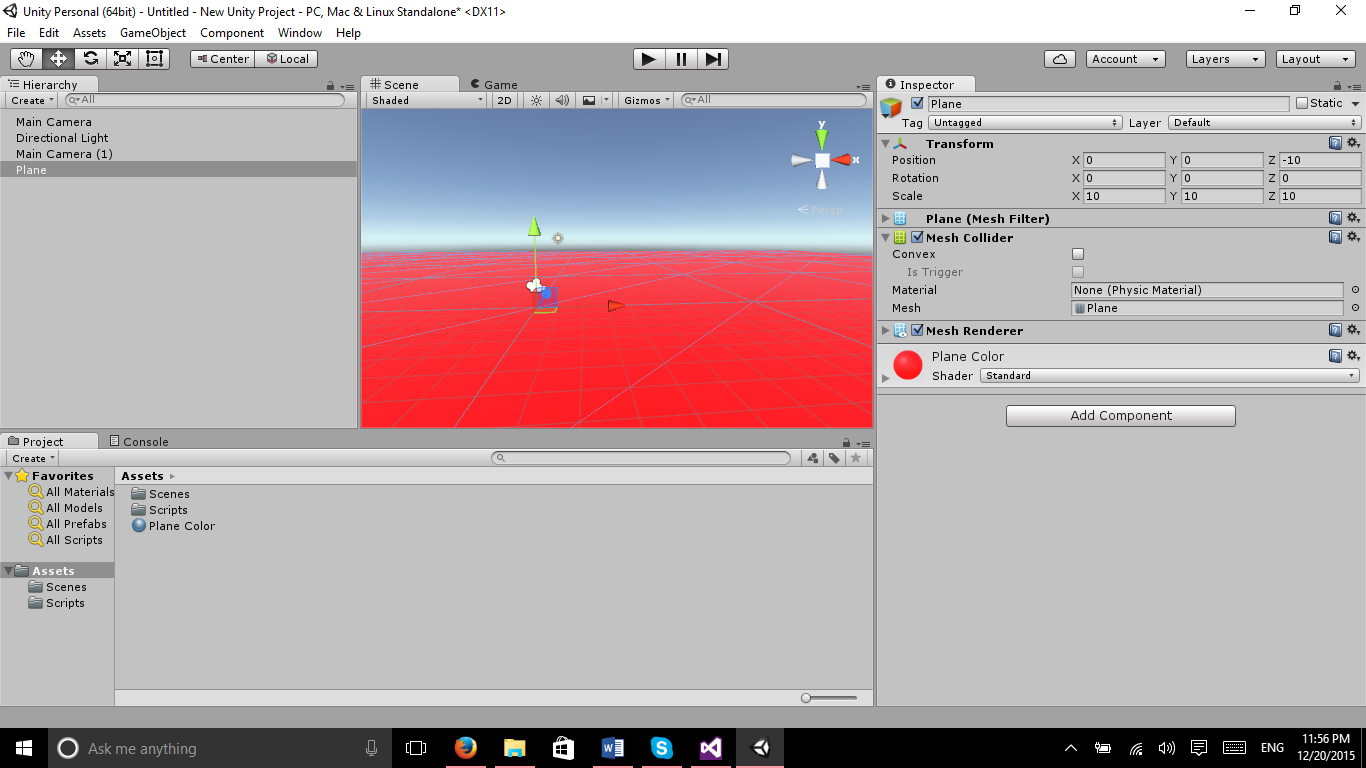
Select the plane in the hierarchy and drag the material on the add component portion of the Inspector Pane. Whatever colour you chose, the plane should now be that colour.
The scene is looking a little bland, so we should add a sphere to the scene.
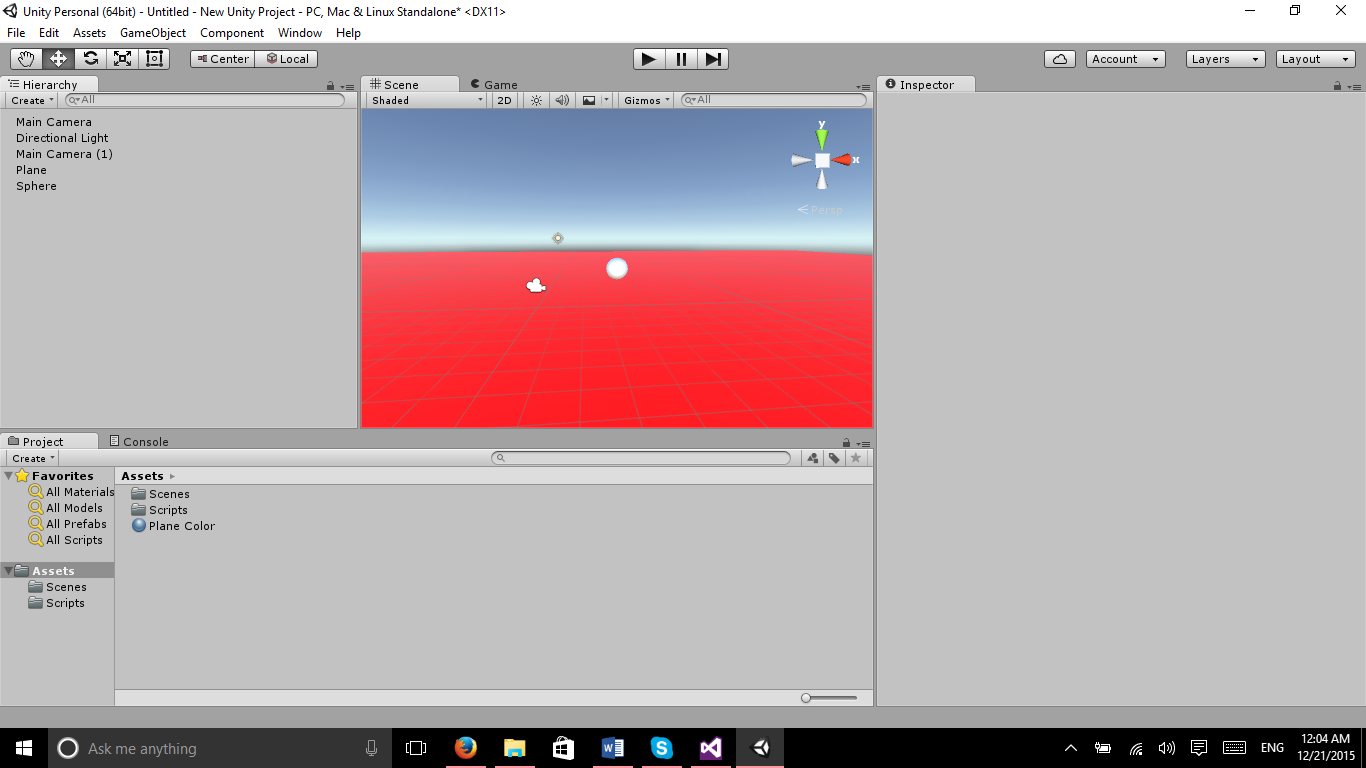
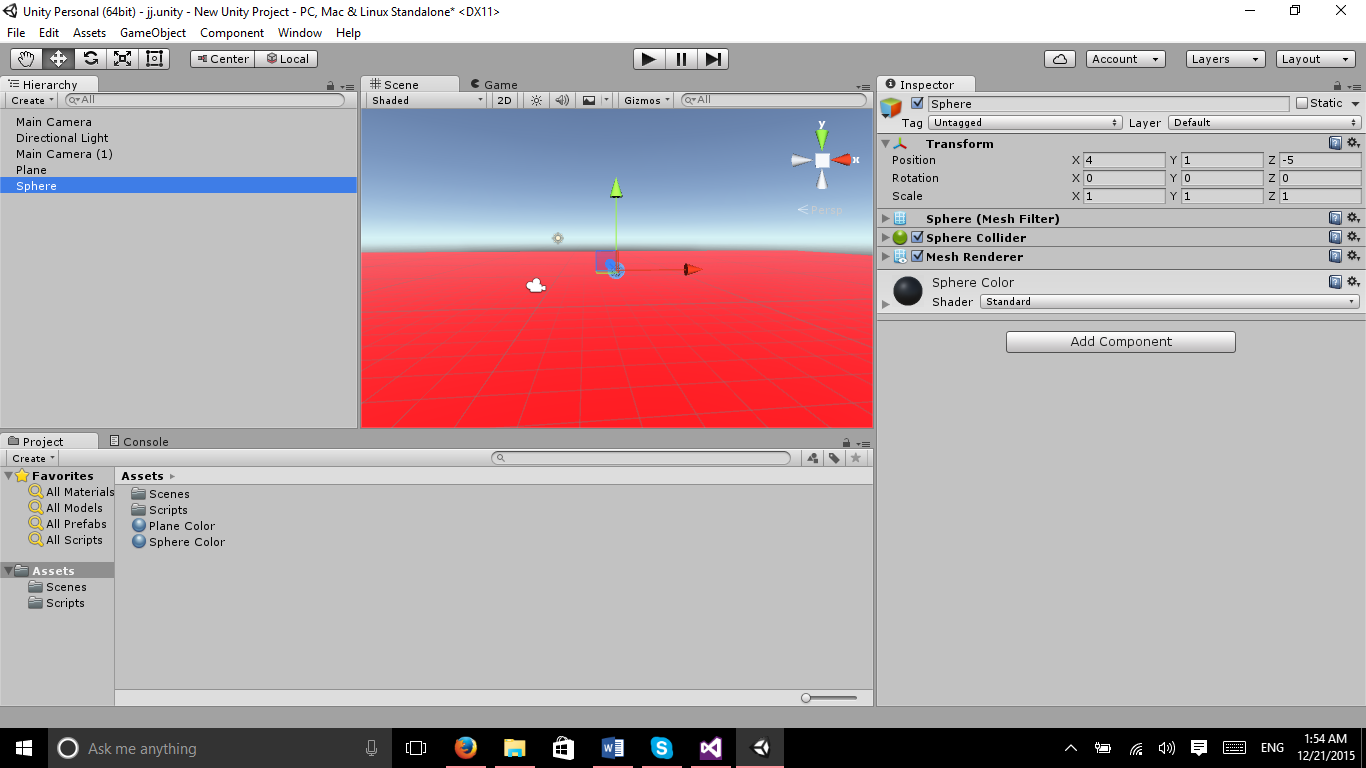
Create a material for the Sphere and attach it to the sphere just as we did for the Plane. Also make the X position of the sphere’s transform to be 4, y 1, and z to be -5.
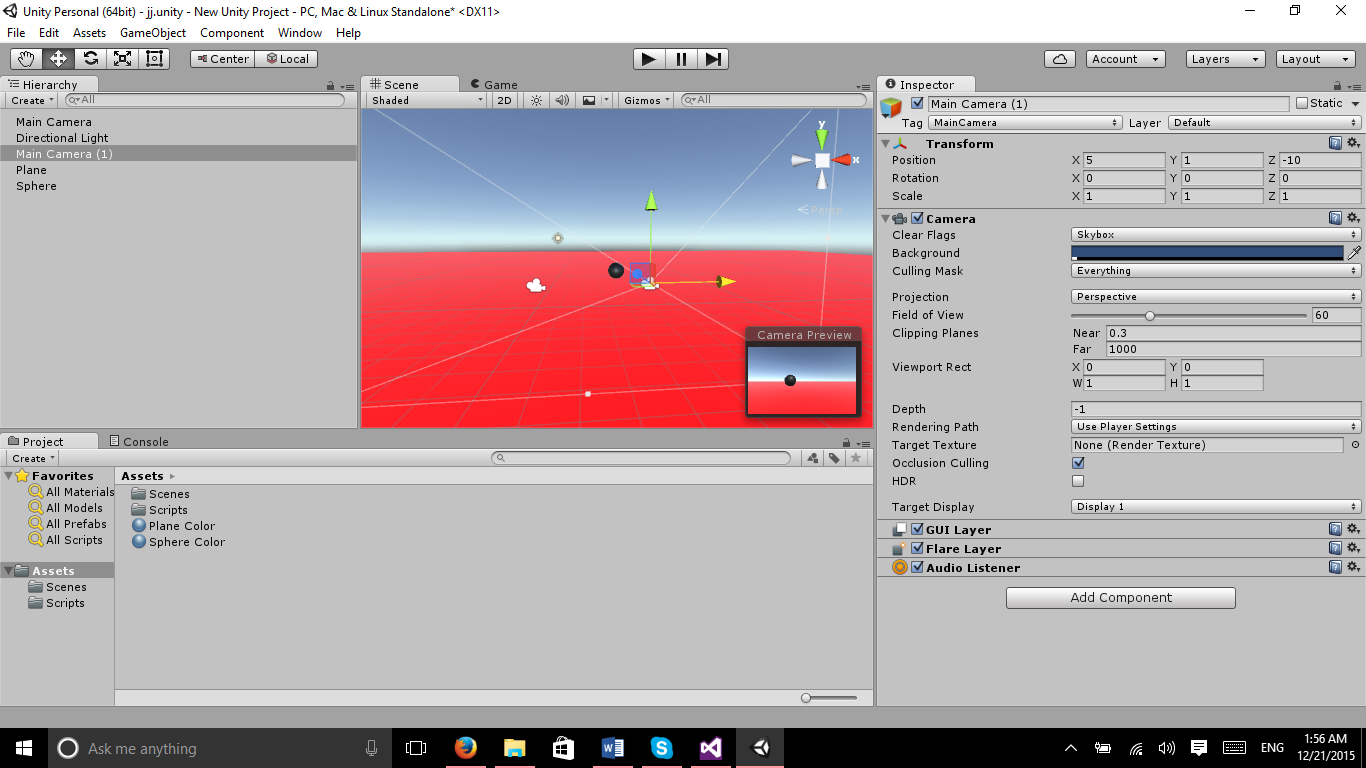
Let’s have some fun and make this look like a split screen game. Select Main Camera 2 and move the x position of its transform to 5, y should be 1, and z is -10.
On Main Camera 2, change the Viewport Rect Y to be 0.5 and H to be 0.5
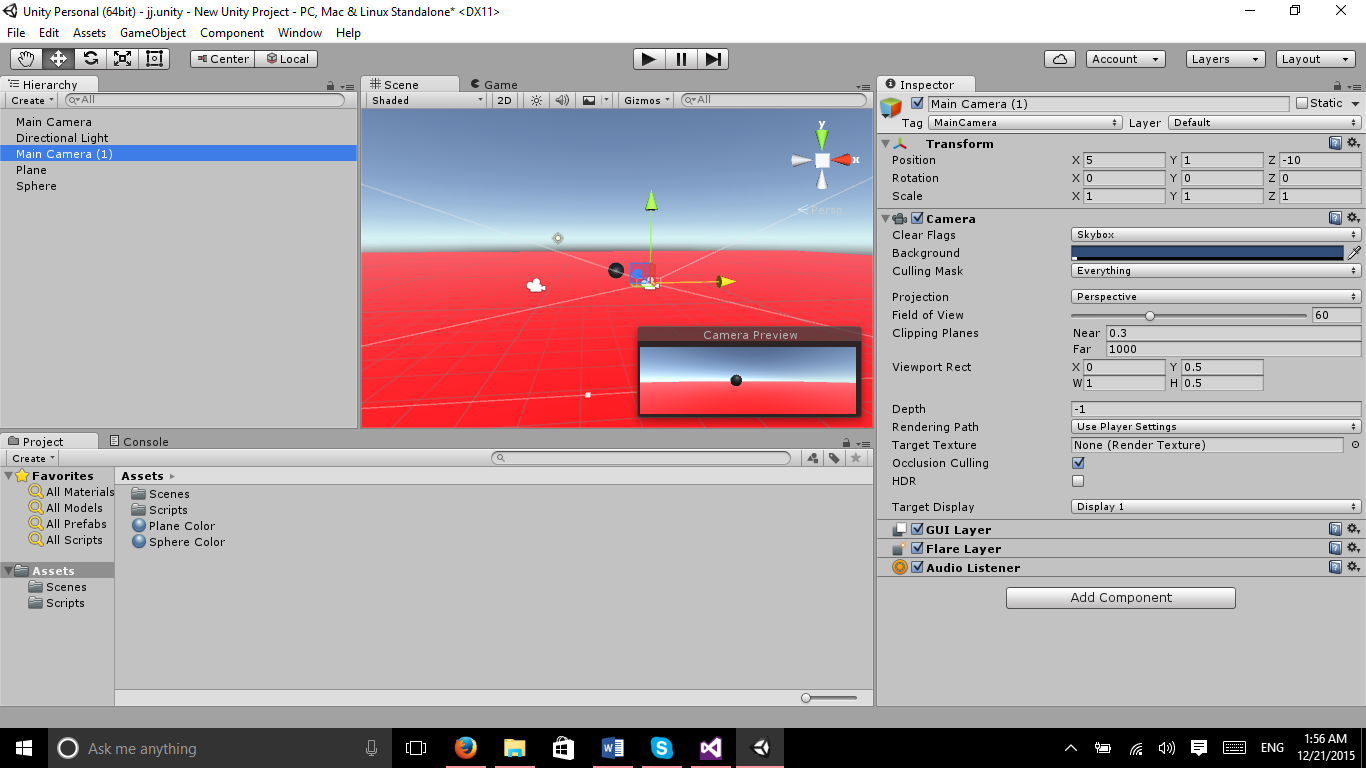
On the Main Camera, Viewport Rect Y should be 0 and the H should be changed to be 0.5.
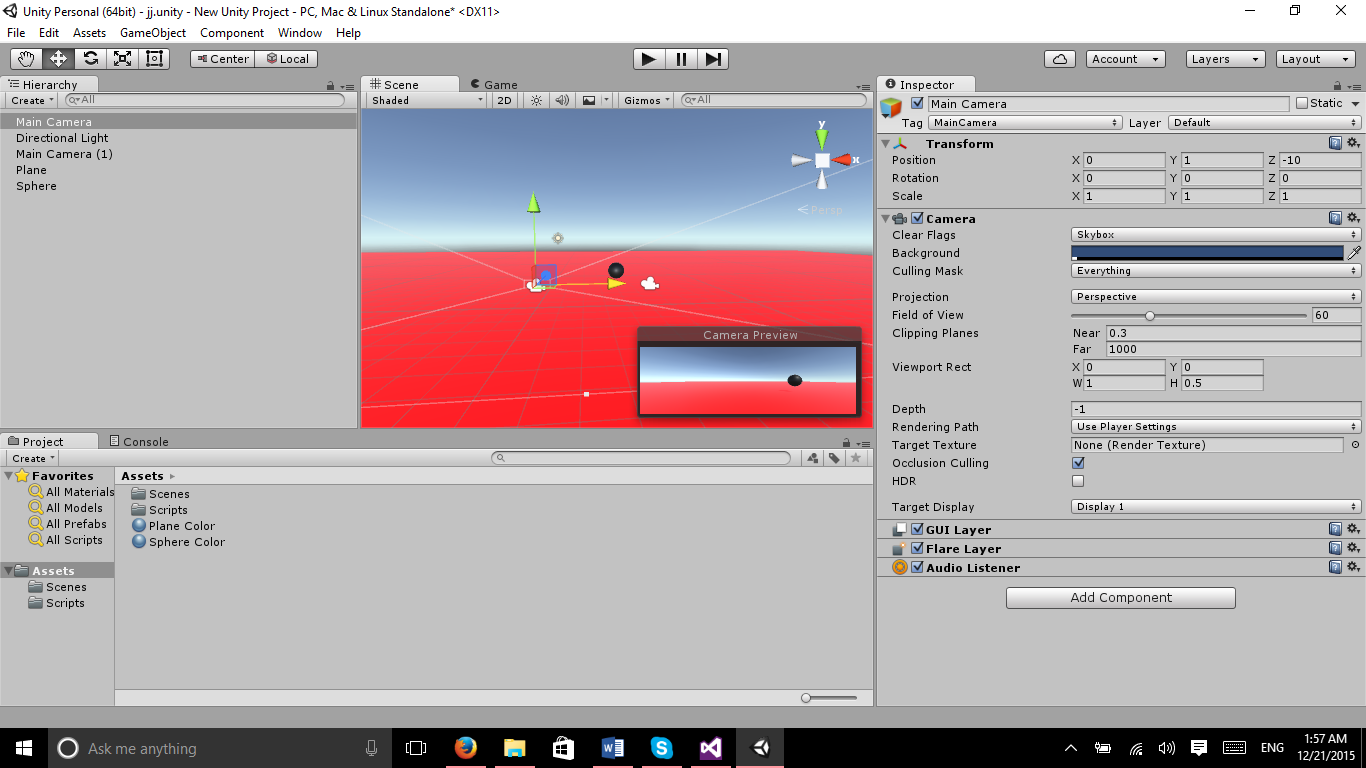
Run the game and you will see a horizontal split screen view. This is basically how you would begin the basics for a split screen view for a game. Congratulations!
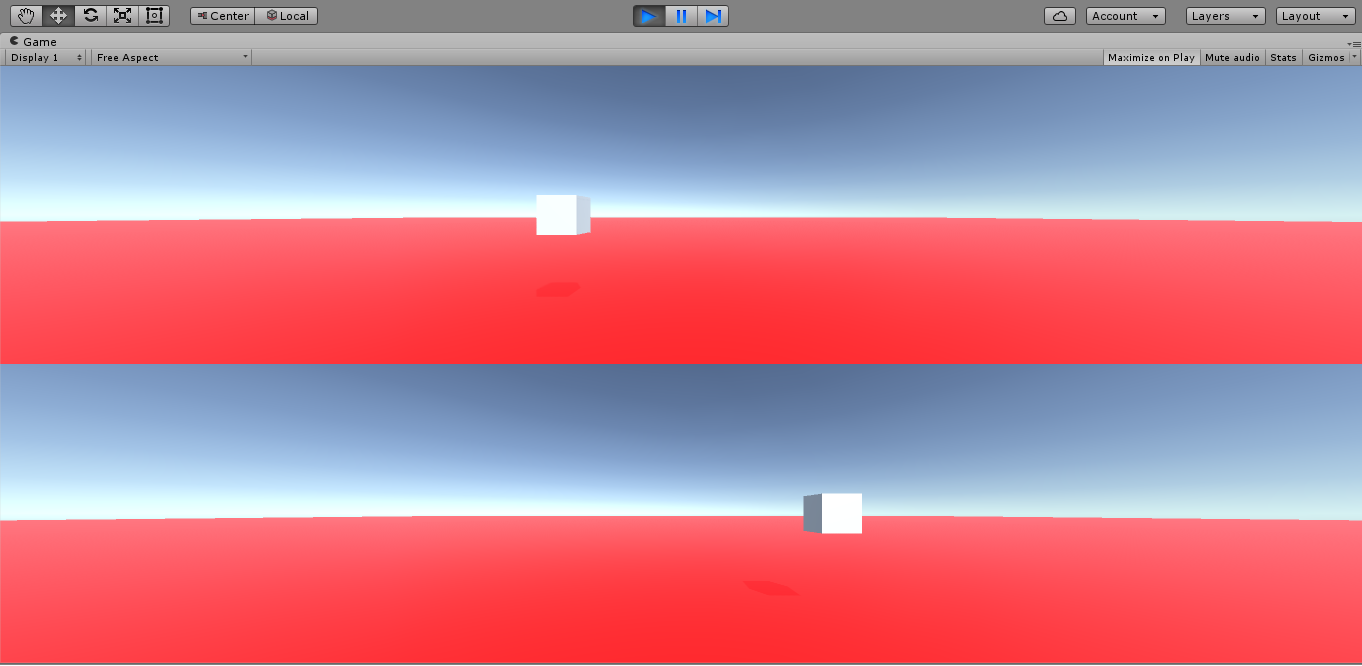
Challenge mode. Time to make it a vertical split screen view. All we need to do is change the Viewport Rect for both of the cameras to make this work appropriately.
Vertical Spit Screen:
For the Main Camera, X should be 0, Y is 0, W is 0.5, and H is 1.
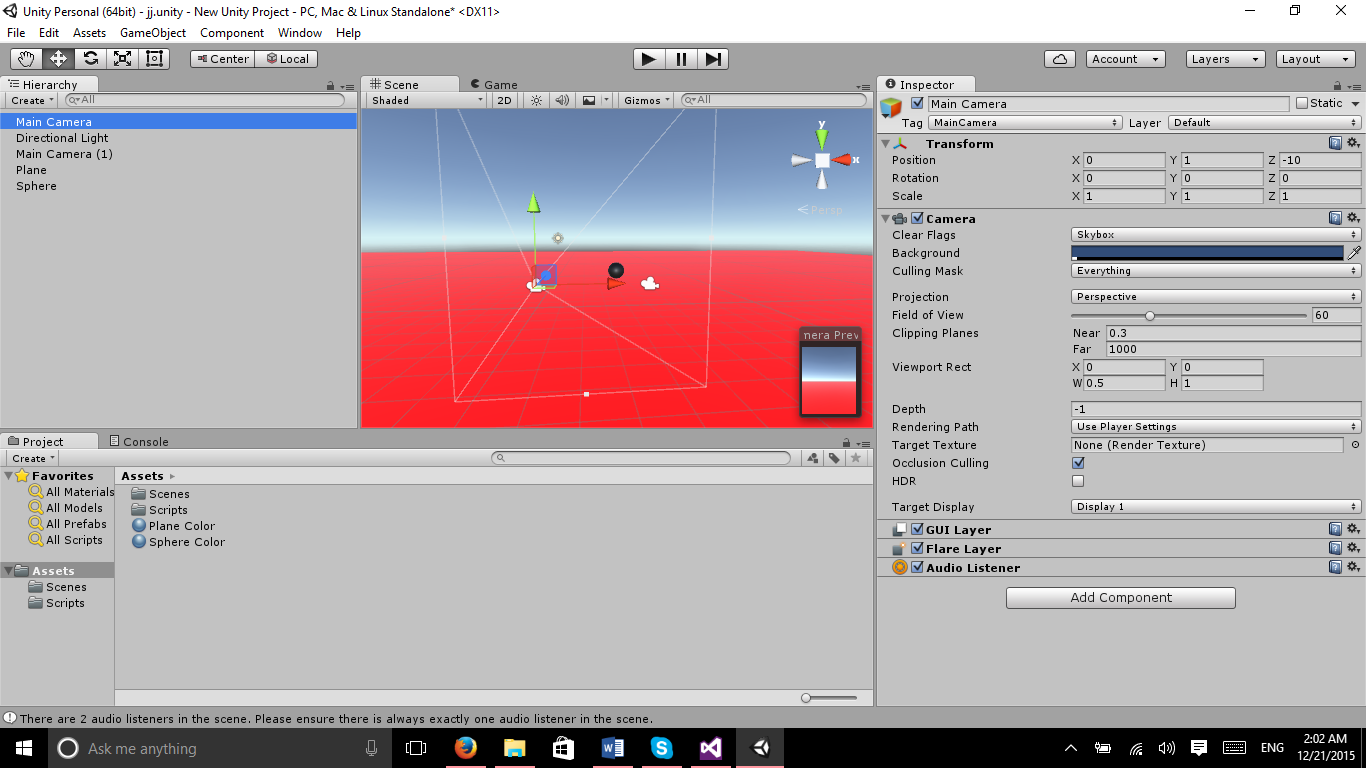
For Main Camera 2, x should be 0.5, Y is 0, W is 0.5, and H is 1.
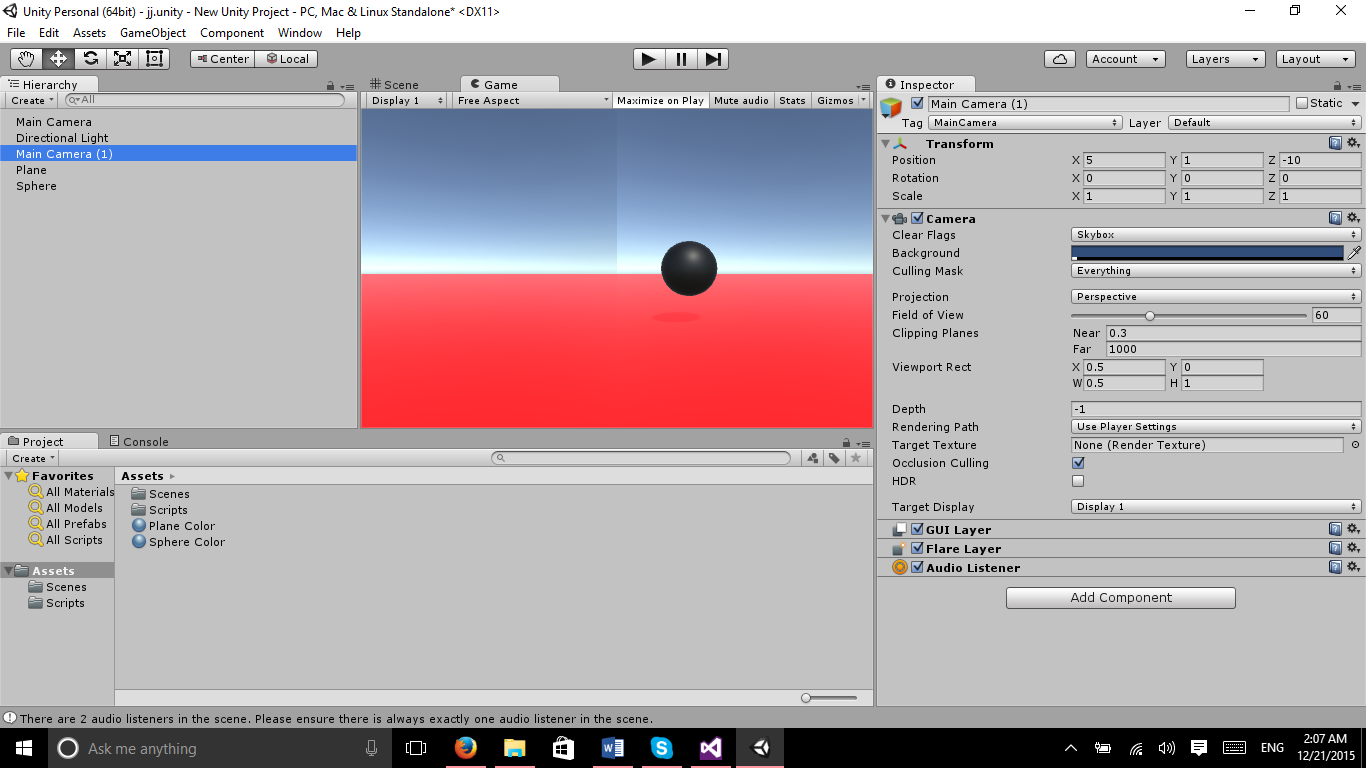
Run the game and you will see the vertical split screen view. Due to the location of the sphere, it does not show up on the left hand side of the screen.
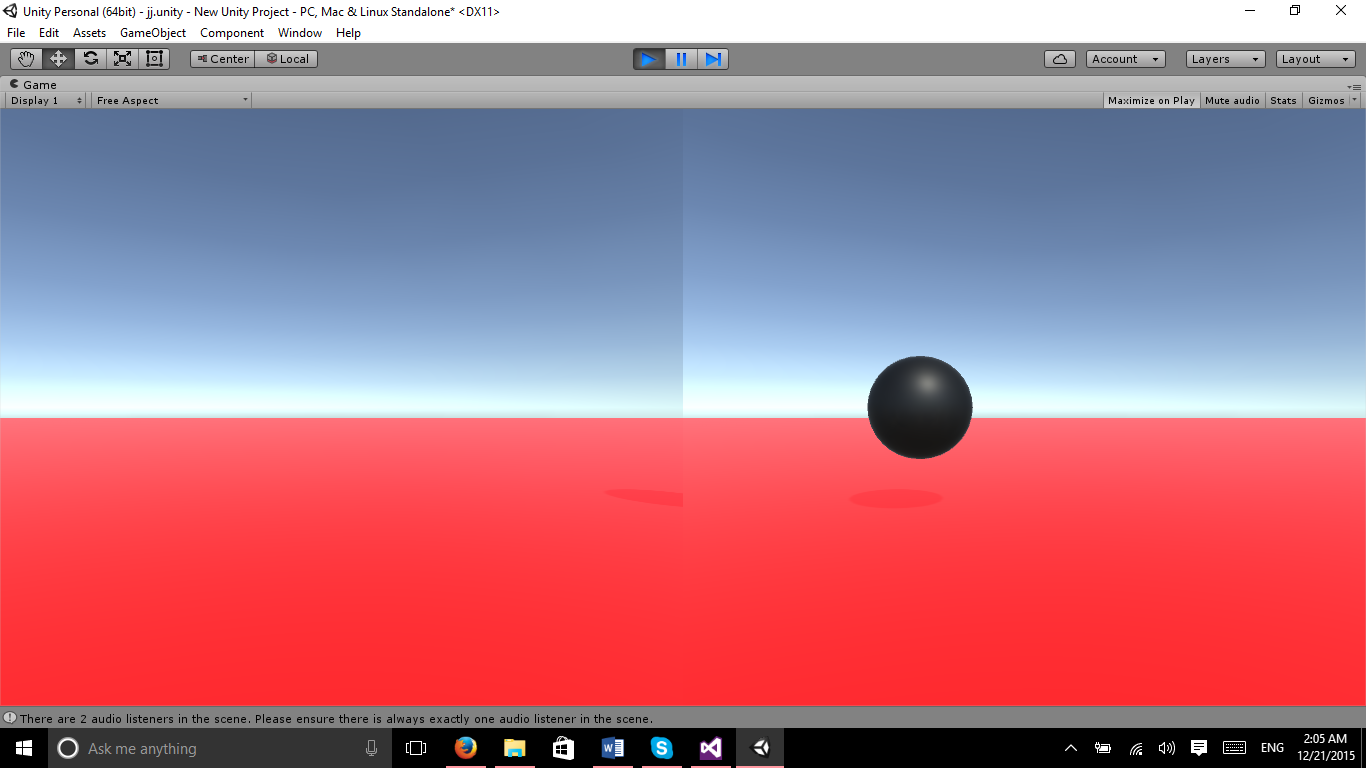
This is one of the dangers of doing horizontal and vertical split screen views. You want to be sure every asset is aligned correctly to prevent this.
Let’s go ahead and fix this by changing the position of the sphere and secondary camera some.
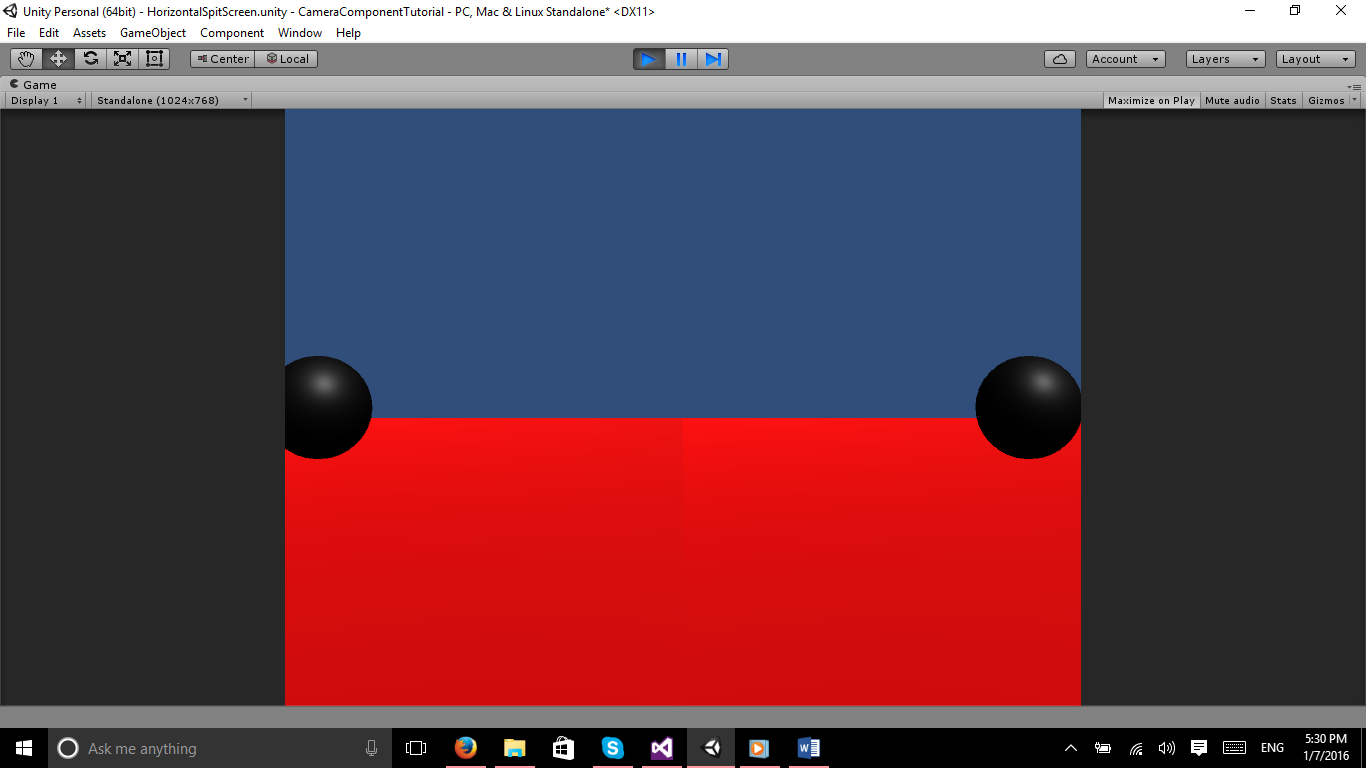
Change the X position of the secondary camera to 3 and leave everything else the way it was. Now, change the X position of the Sphere to be 1.41. This should allow you to see the sphere on both cameras on the left and right side respectively.
Section 3: Camera Overlays
Overlays are another fundamental thing that you can do with multiple cameras. You could make a mini map hud display on the screen, a pause menu, or a score display screen on separate cameras and call them on a button press. These concepts are used with single player and multiplayer games that you see today.
Pause Menu:
The pause menu has been used for quite some time and is highly doubtful to be removed anytime in the near future. Pause menus work differently depending on the game. Multiplayer games will put a mark on the player stating that they are in a menu, and display for that player a specific menu or a game paused overlay. The Hud display or Mini map is also frequently used. The design idea for it is to give the player a scale model idea of where they are in the game world. It can also be extended to have objective markers to show the player where they need to go. This is used in the FPS (First Person Shooter), RTS (Real Time Strategy), Action RPG, and MMORPG (Massively Multiplayer Online Role Playing Game) genres. I will call upon one of my favorite development studios to give an example of this, Blizzard Entertainment, with Diablo 3. The last overlay option that I want to discuss today is the Score keeping overlay. This overlay type’s design idea comes from not wanting to overload the player without much information that they don’t need. This is mostly used in the RTS and FPS genres, although, it can very easily be used with any other game type. Activision is quite known for this sort of overlay with the Call of Duty Franchise.
While we aren’t going to build examples for these, it is important to keep these sort of ideas in mind when developing games and even some types of software. These concepts are instrumental for creating immersive games and a great UX (User Experience). I hope you enjoyed this tutorial and look forward to the next one, until next time… “May your code be robust and bug free.”


