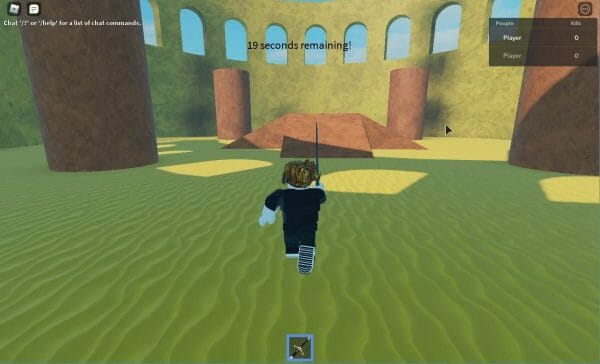
In this tutorial, we’ll be creating an arena combat game in Roblox – featuring repeating rounds of combat that allows players to increase their score.
Not only will you learn some nifty tricks to programming with Lua by a professional developer, but with Roblox game making’s soaring popularity, you can this multiplayer game available to millions of players instantly!
Let’s start learning and building our Roblox game project!
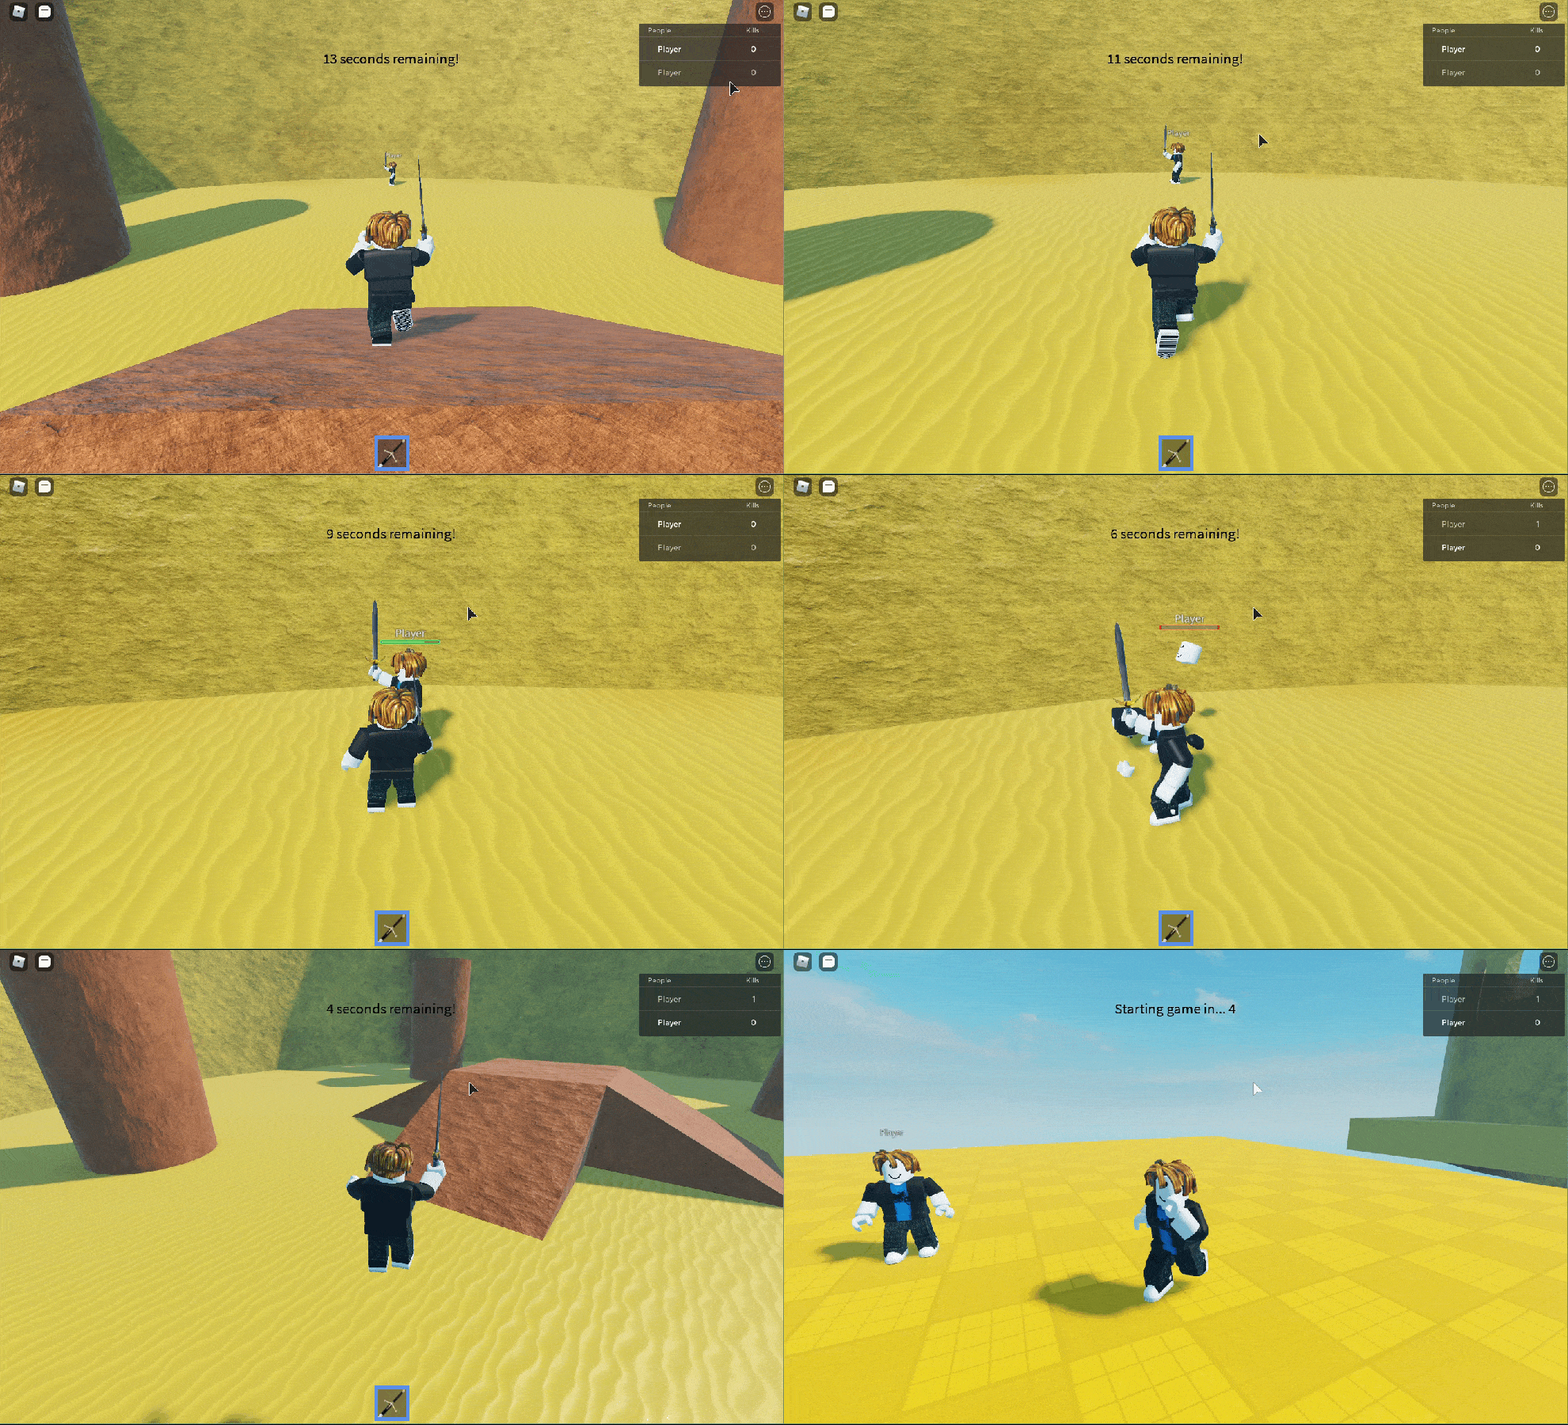
Project Files
You can download the complete .rblx project file here.
Do note that this tutorial will not go over the basics of Roblox Studio. If this is your first time developing with Roblox, you can learn the basics here.
Creating the Lobby
Let’s start by creating a brand new project – using the Baseplate template.
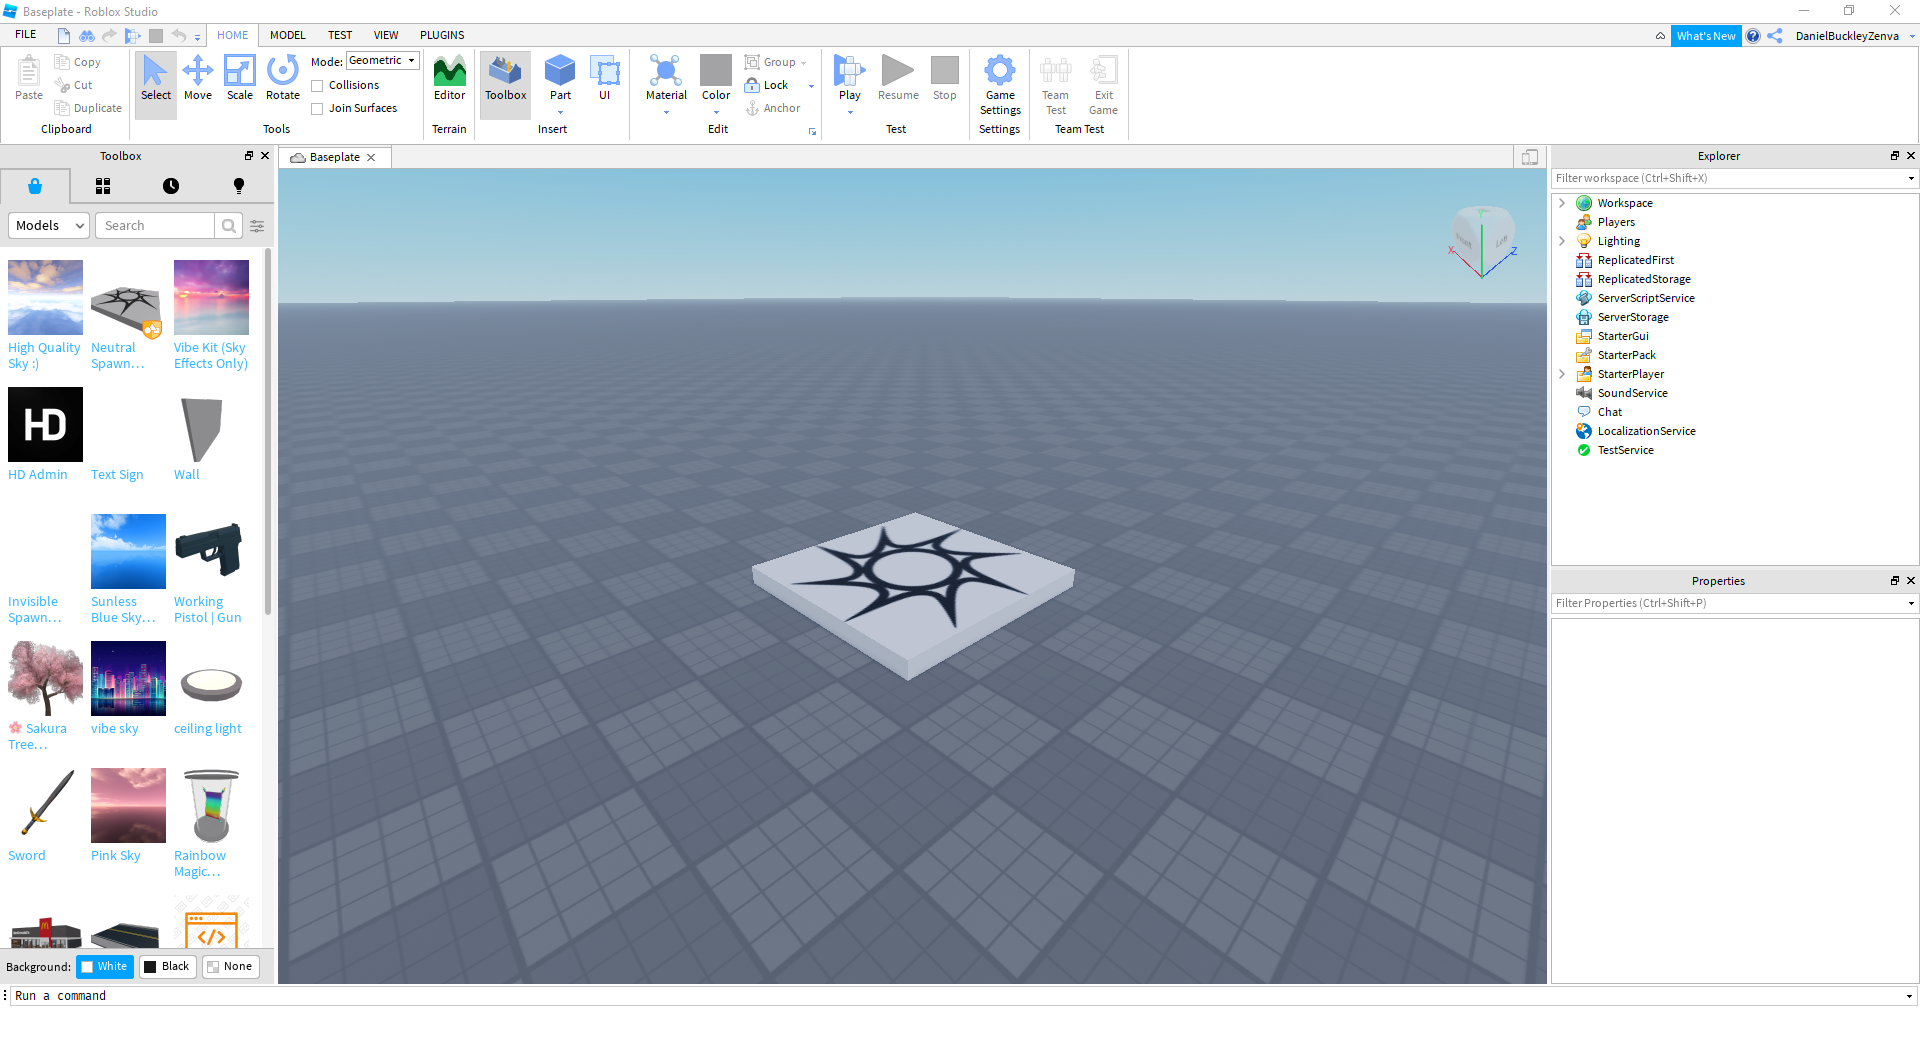
The first thing we’re going to do is set up our lobby area. This is where players will spawn and wait for the game to begin. In the Explorer, select the Baseplate part.
- Down in the Properties window, let’s change the Scale to 100, 6, 100.
- I also went ahead and changed the Color to deep orange.
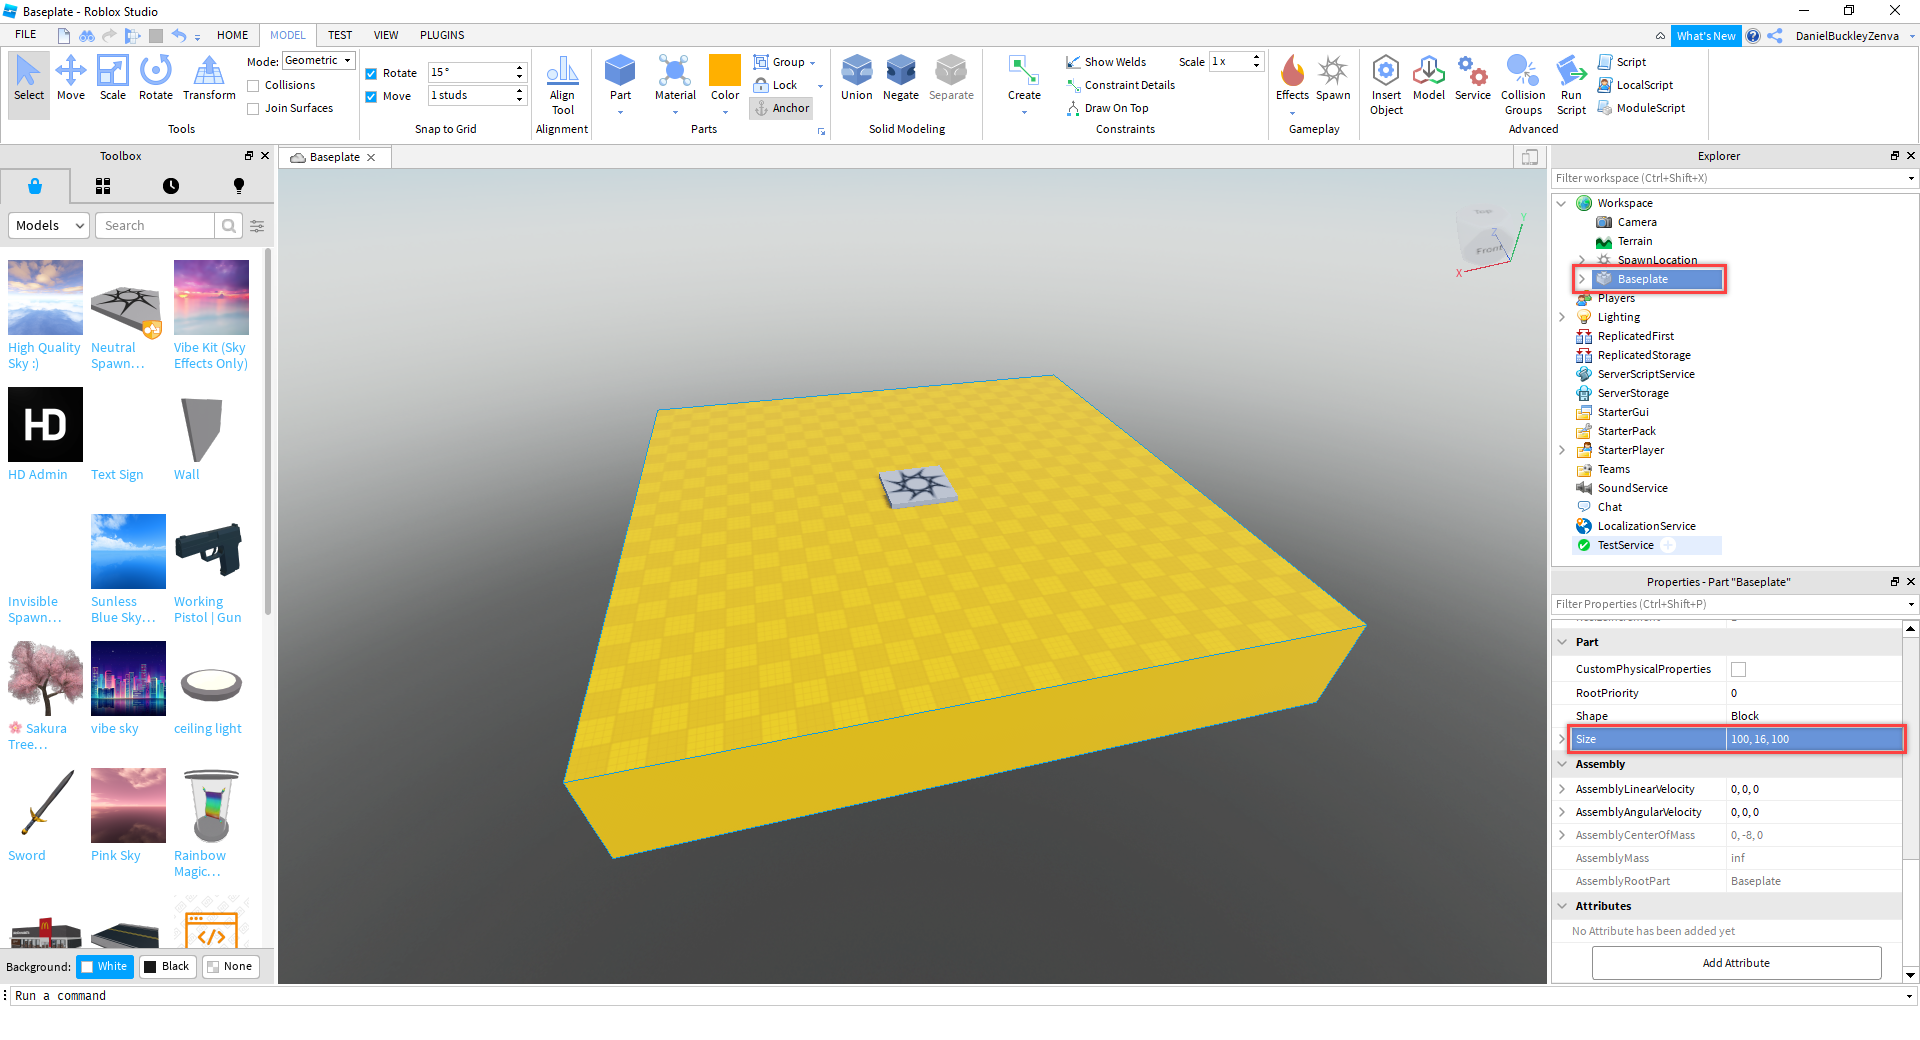
Next, we can setup the spawn location.
- Delete the Decal child part.
- Select the SpawnLocation and set the Transparency to 1.
- Disable CanCollide and CanTouch.
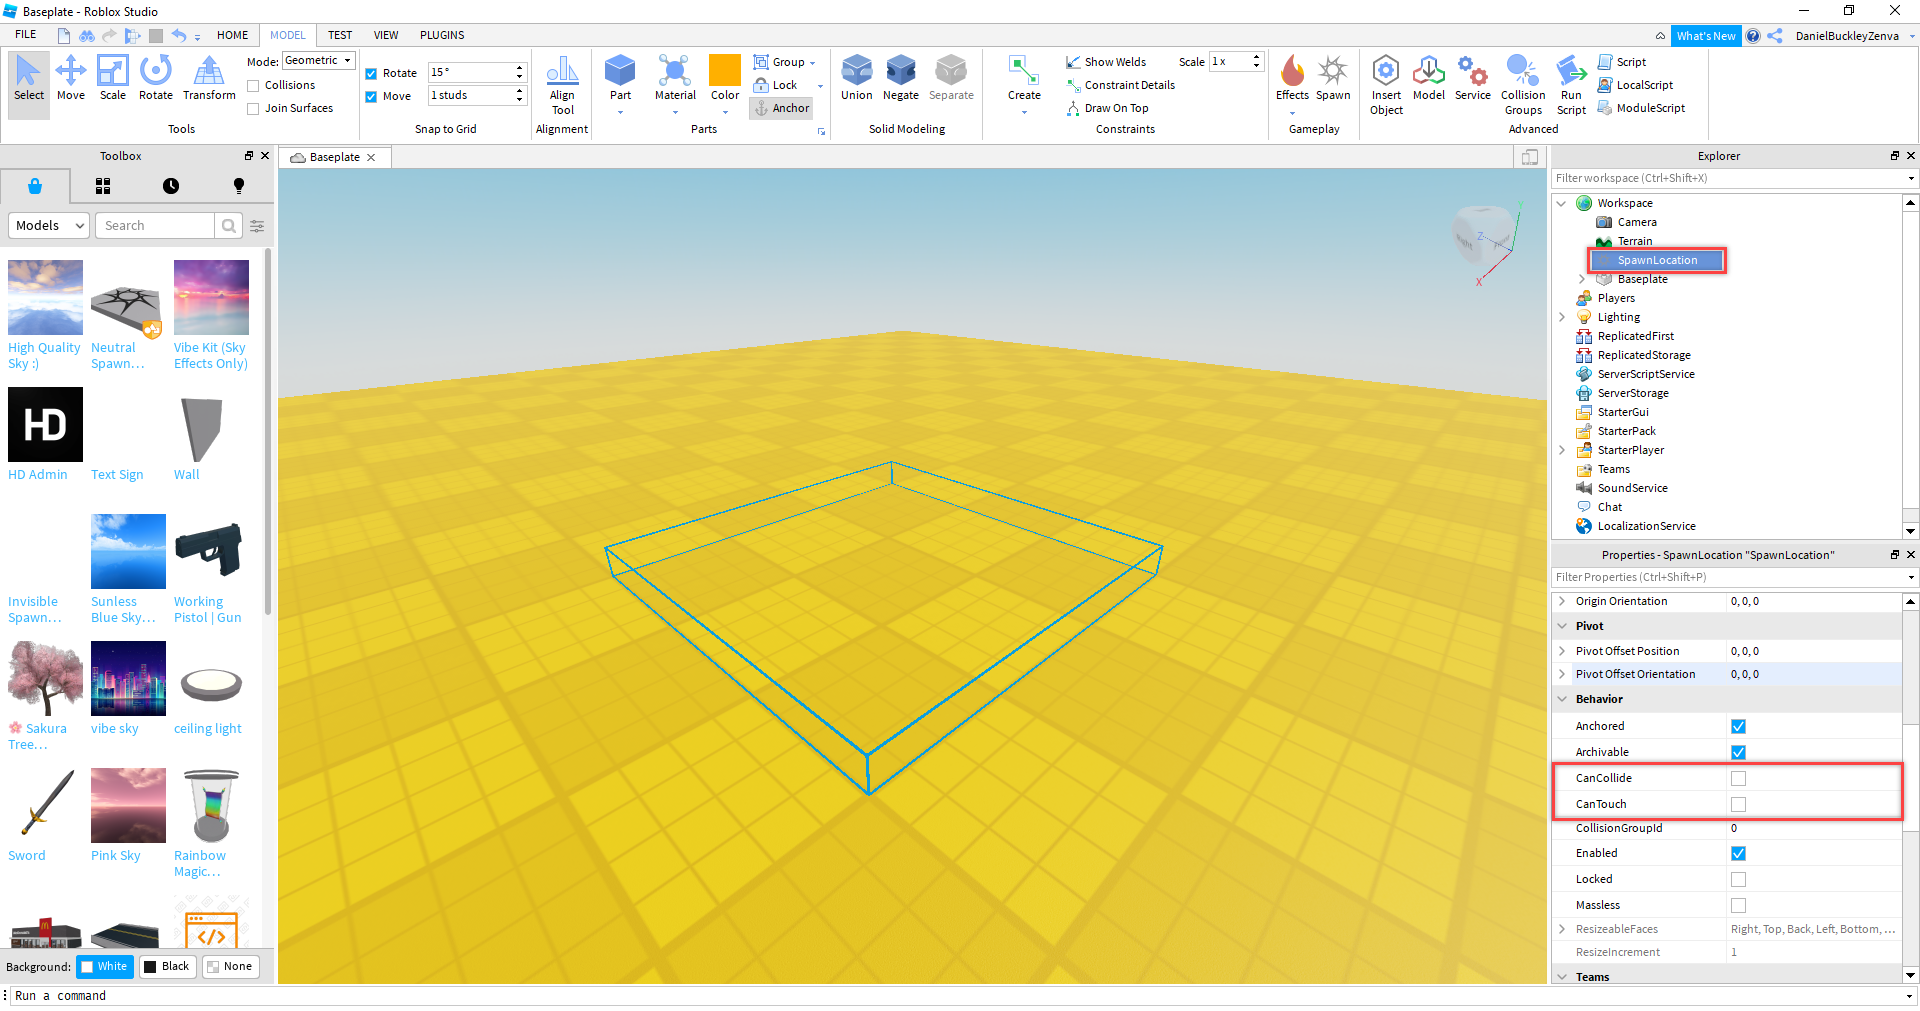
We’ve got the baseplate and spawn location setup. Now we need to make it so that players can’t jump off the platform. To do this, we’ll be adding in invisible walls around the baseplate.
- Create a new Block part.
- Scale and position it along one side of the baseplate.
- Rename it to InvisibleWall.
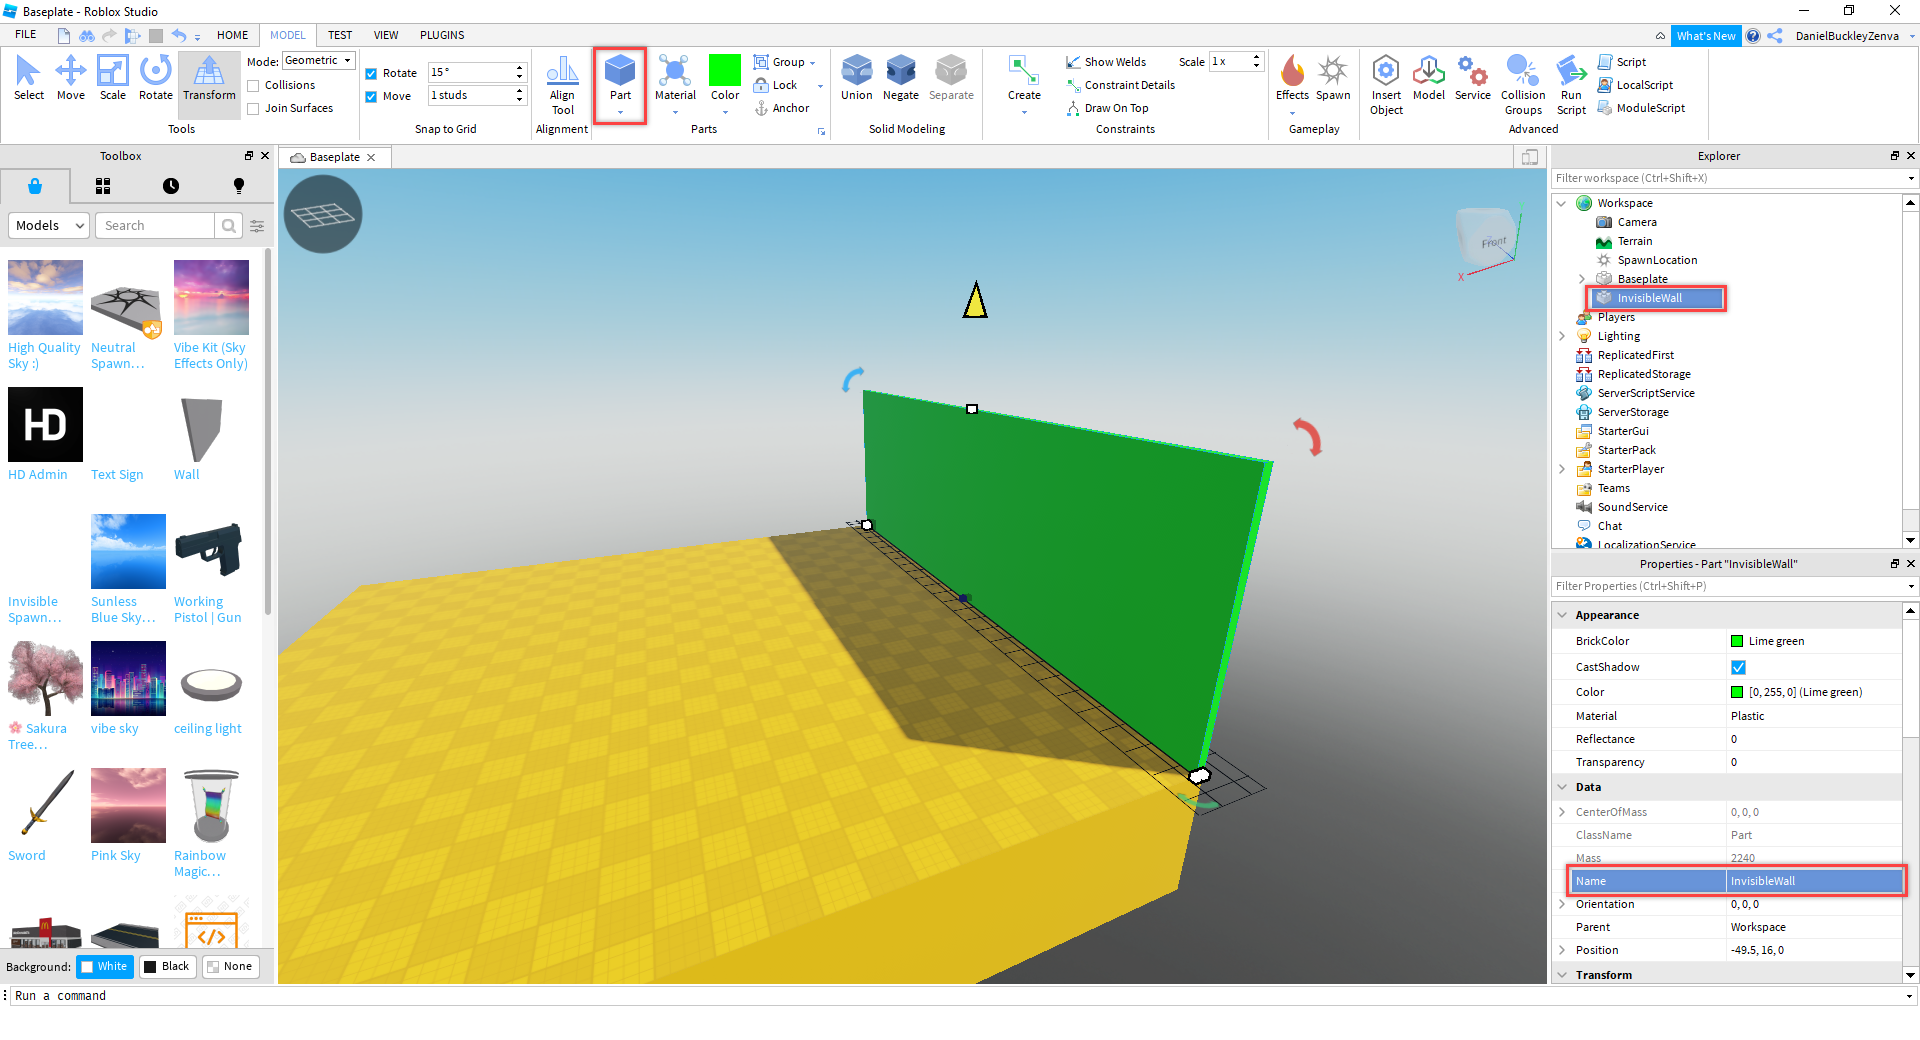
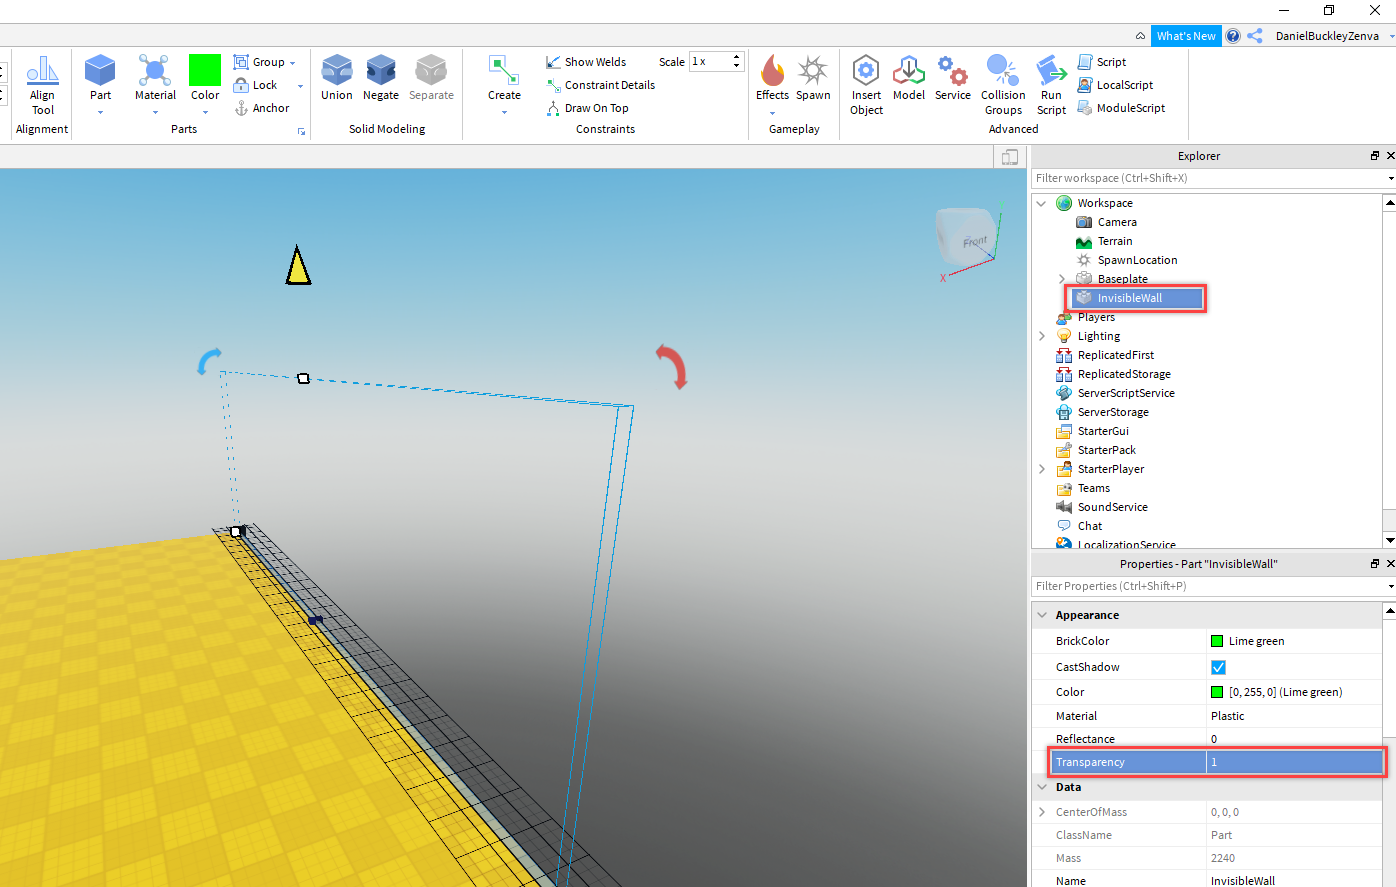
Then we can set the Transparency to 1 to make the wall invisible.
Duplicate the wall three times and move/rotate them so they surround the baseplate like so…
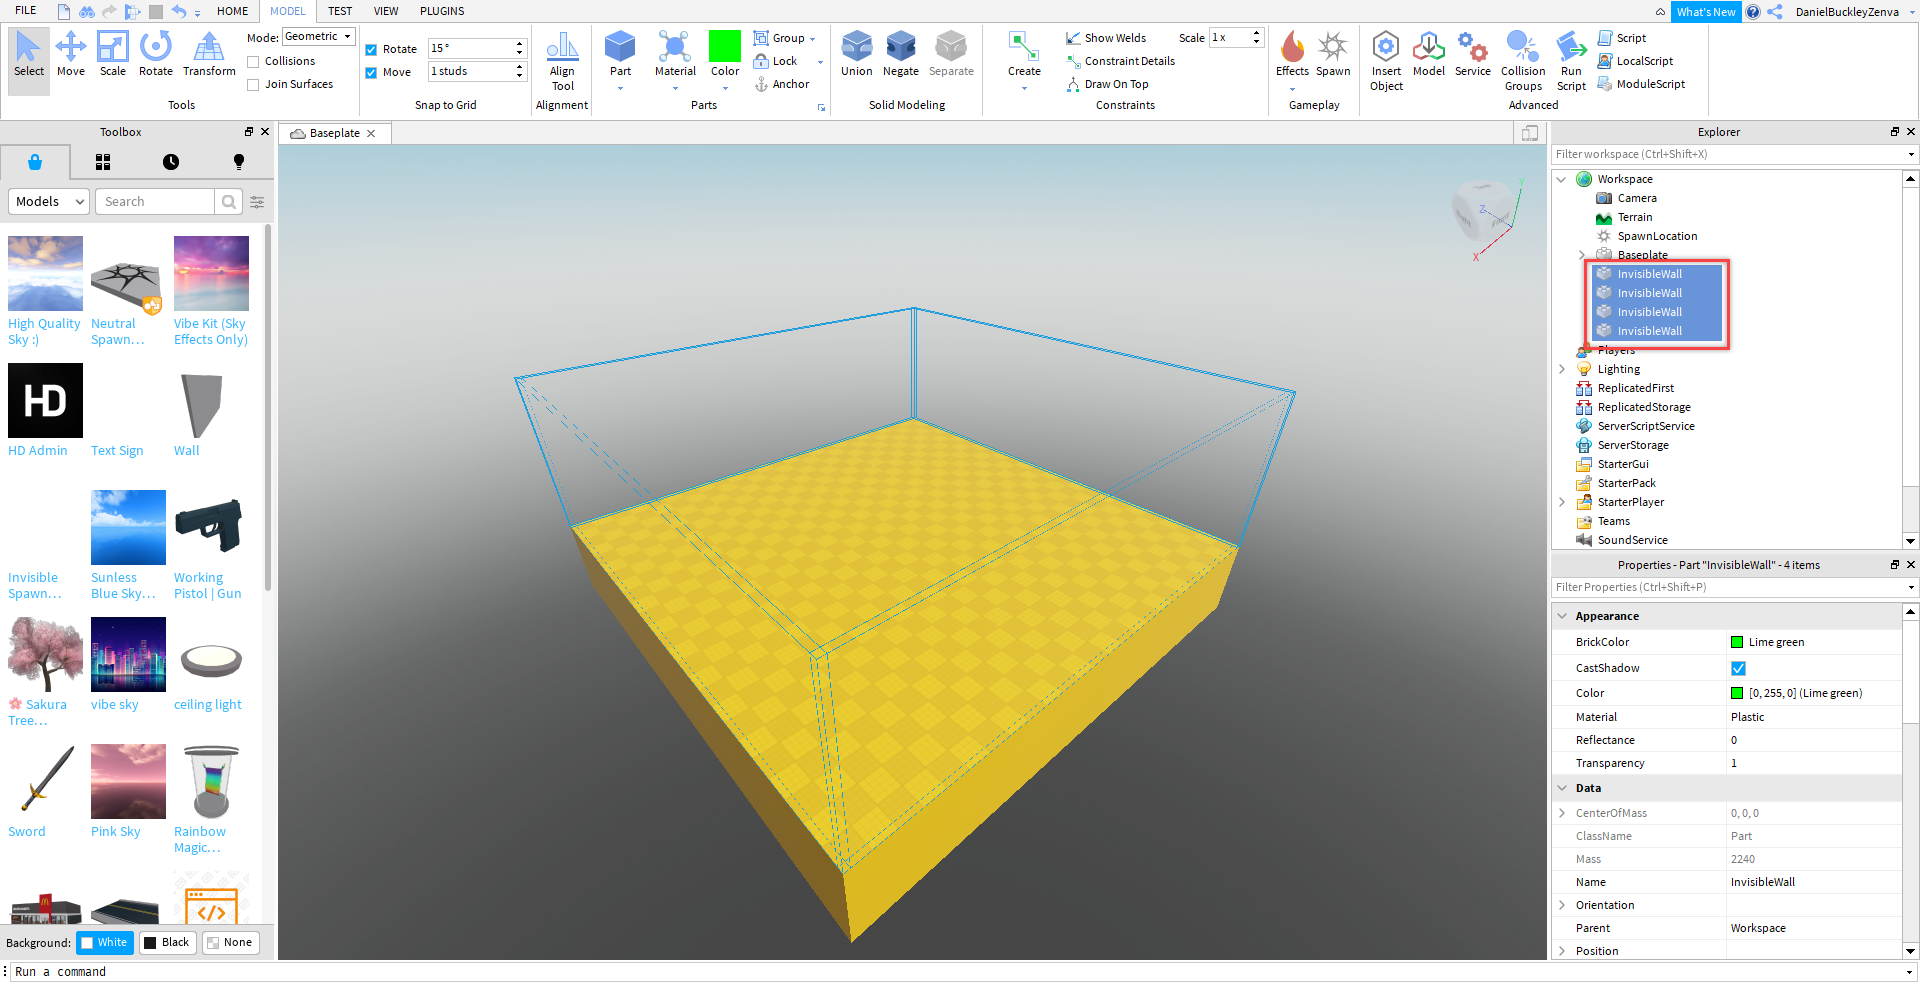
Now you can play the game (F5) and make sure that you cannot jump off the baseplate.
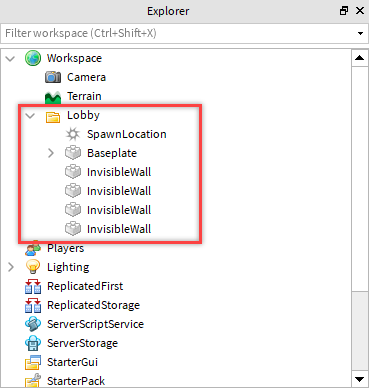
To make our workspace a bit cleaner, let’s create a folder called Lobby and store all of our lobby parts in it.
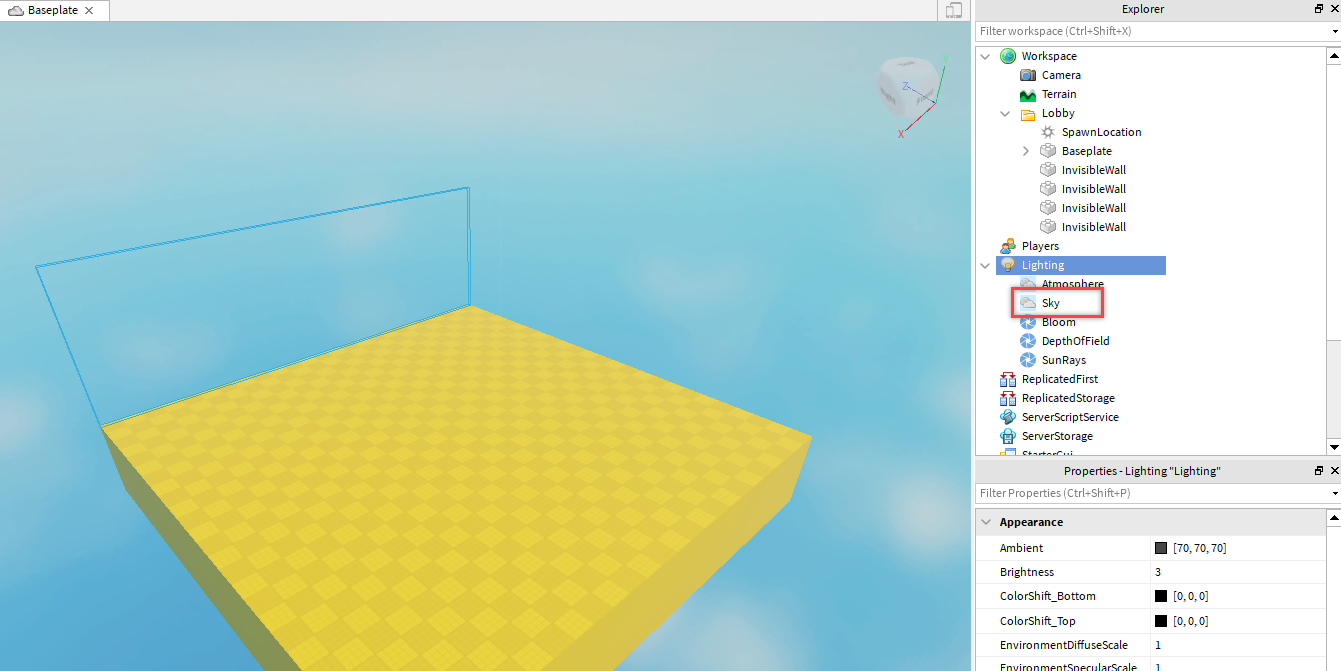
You may also notice that the sky looks a bit weird, this is due to us using the baseplate template. To fix this, open up the Lighting service and delete the Sky. Then re-add it.
Creating the Arena
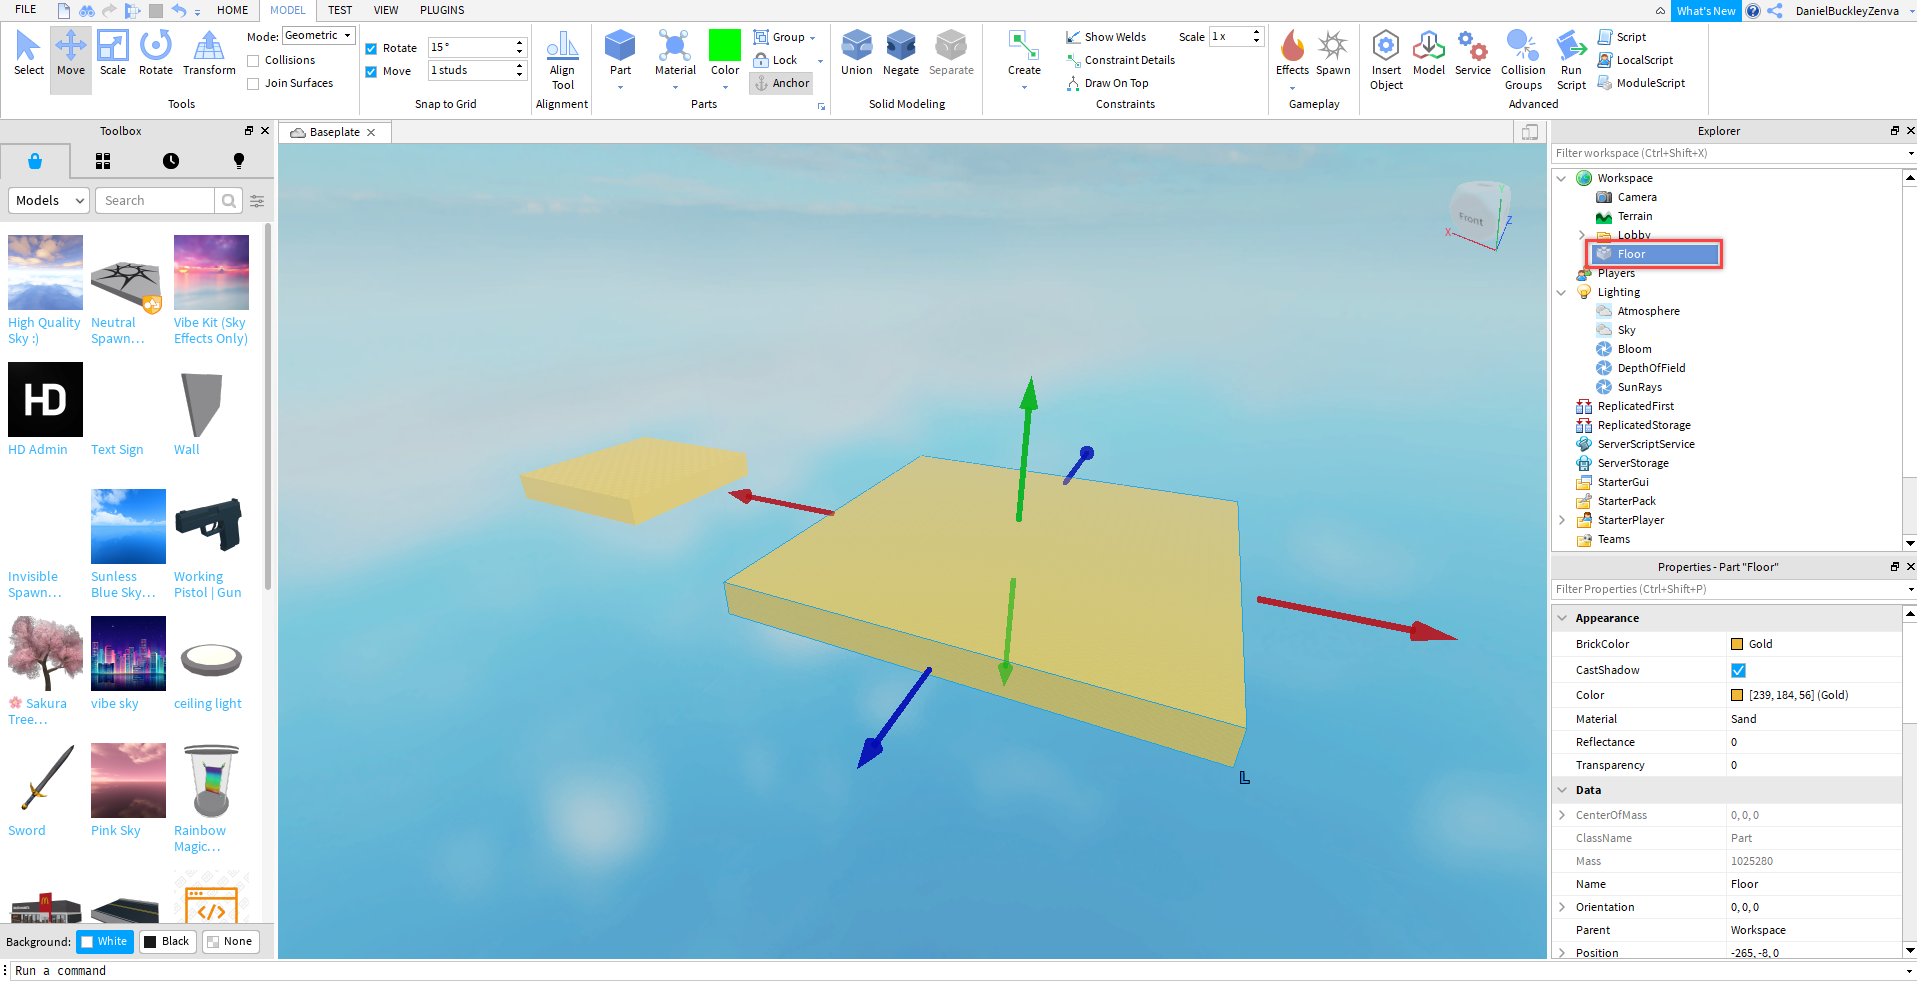
Now that we have our lobby, let’s create the arena that the players will be fighting in. This is going to be a separate area from the lobby. Let’s start by creating a new block part for our floor.
- Rename it to Floor.
- Set the Brick Color to gold.
- Set the Material to sand.
- Set the Size to 200, 16, 200.
- Make sure to also enable Anchored so that the platform doesn’t fall.
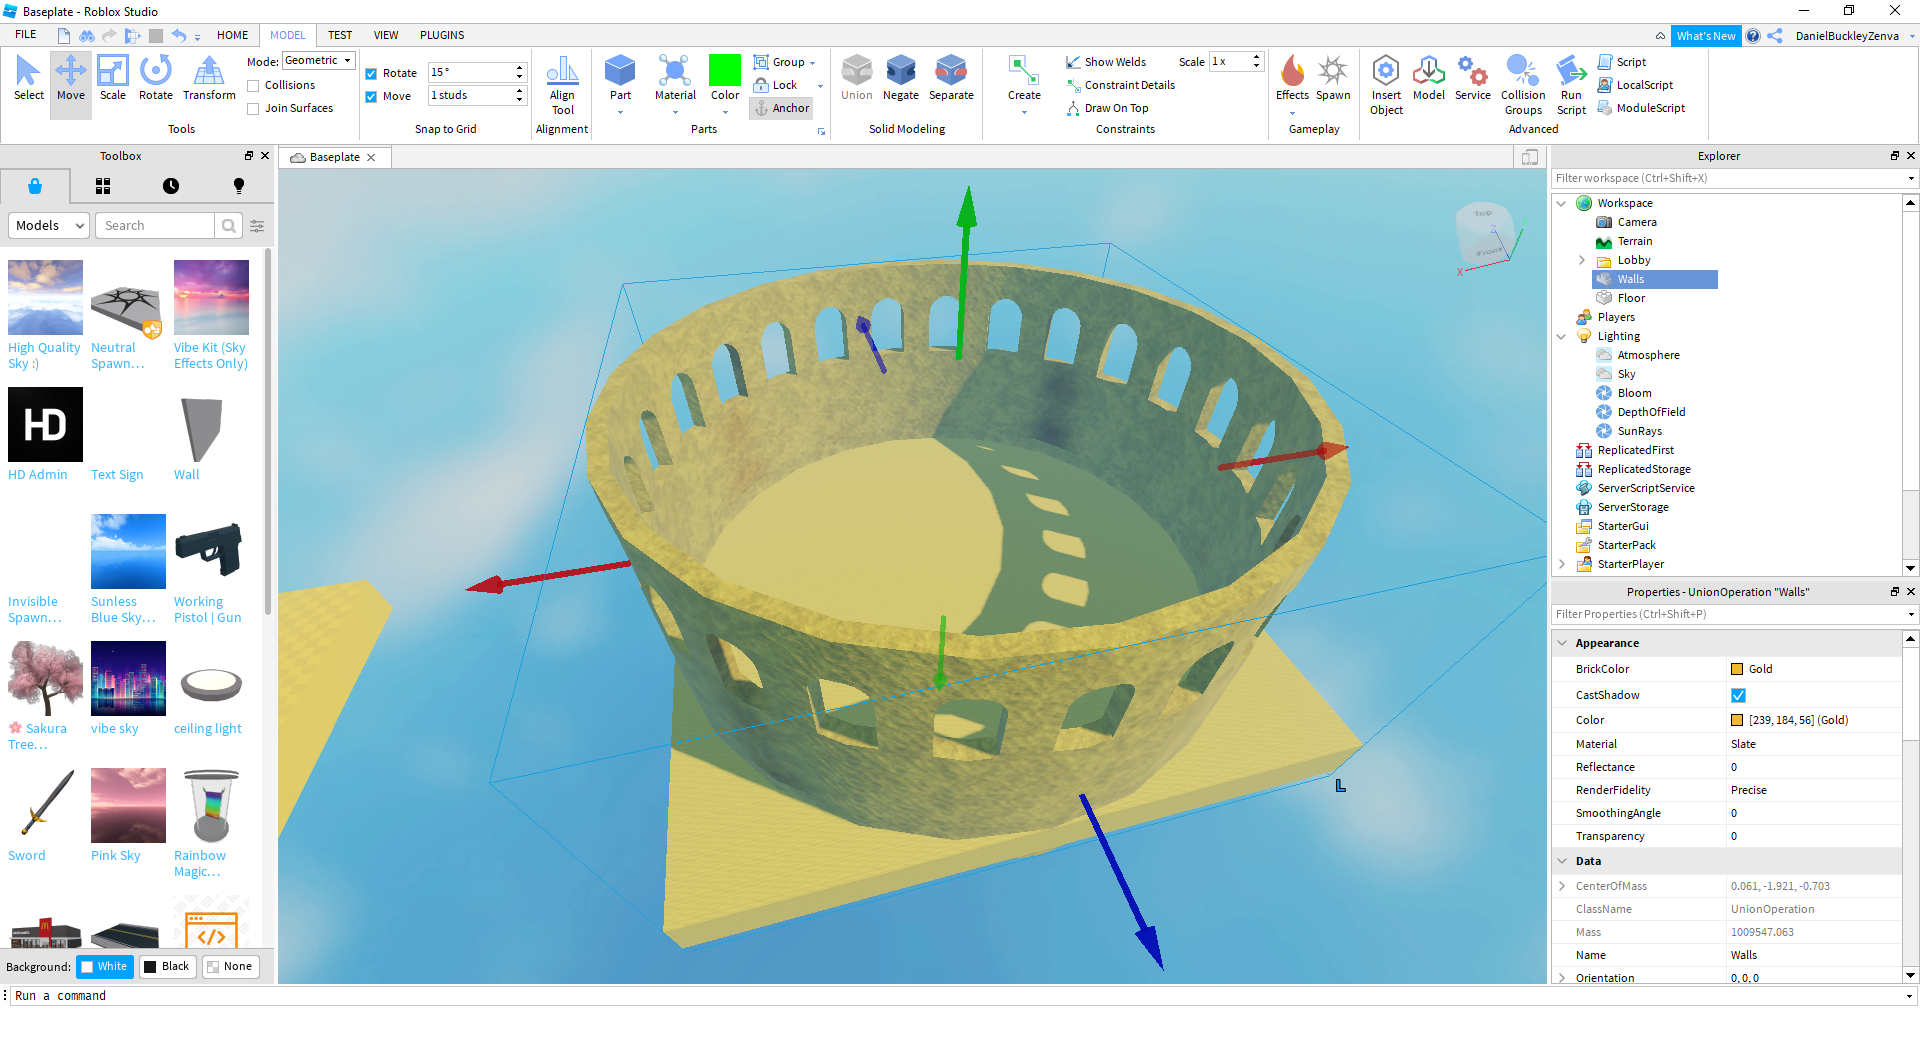
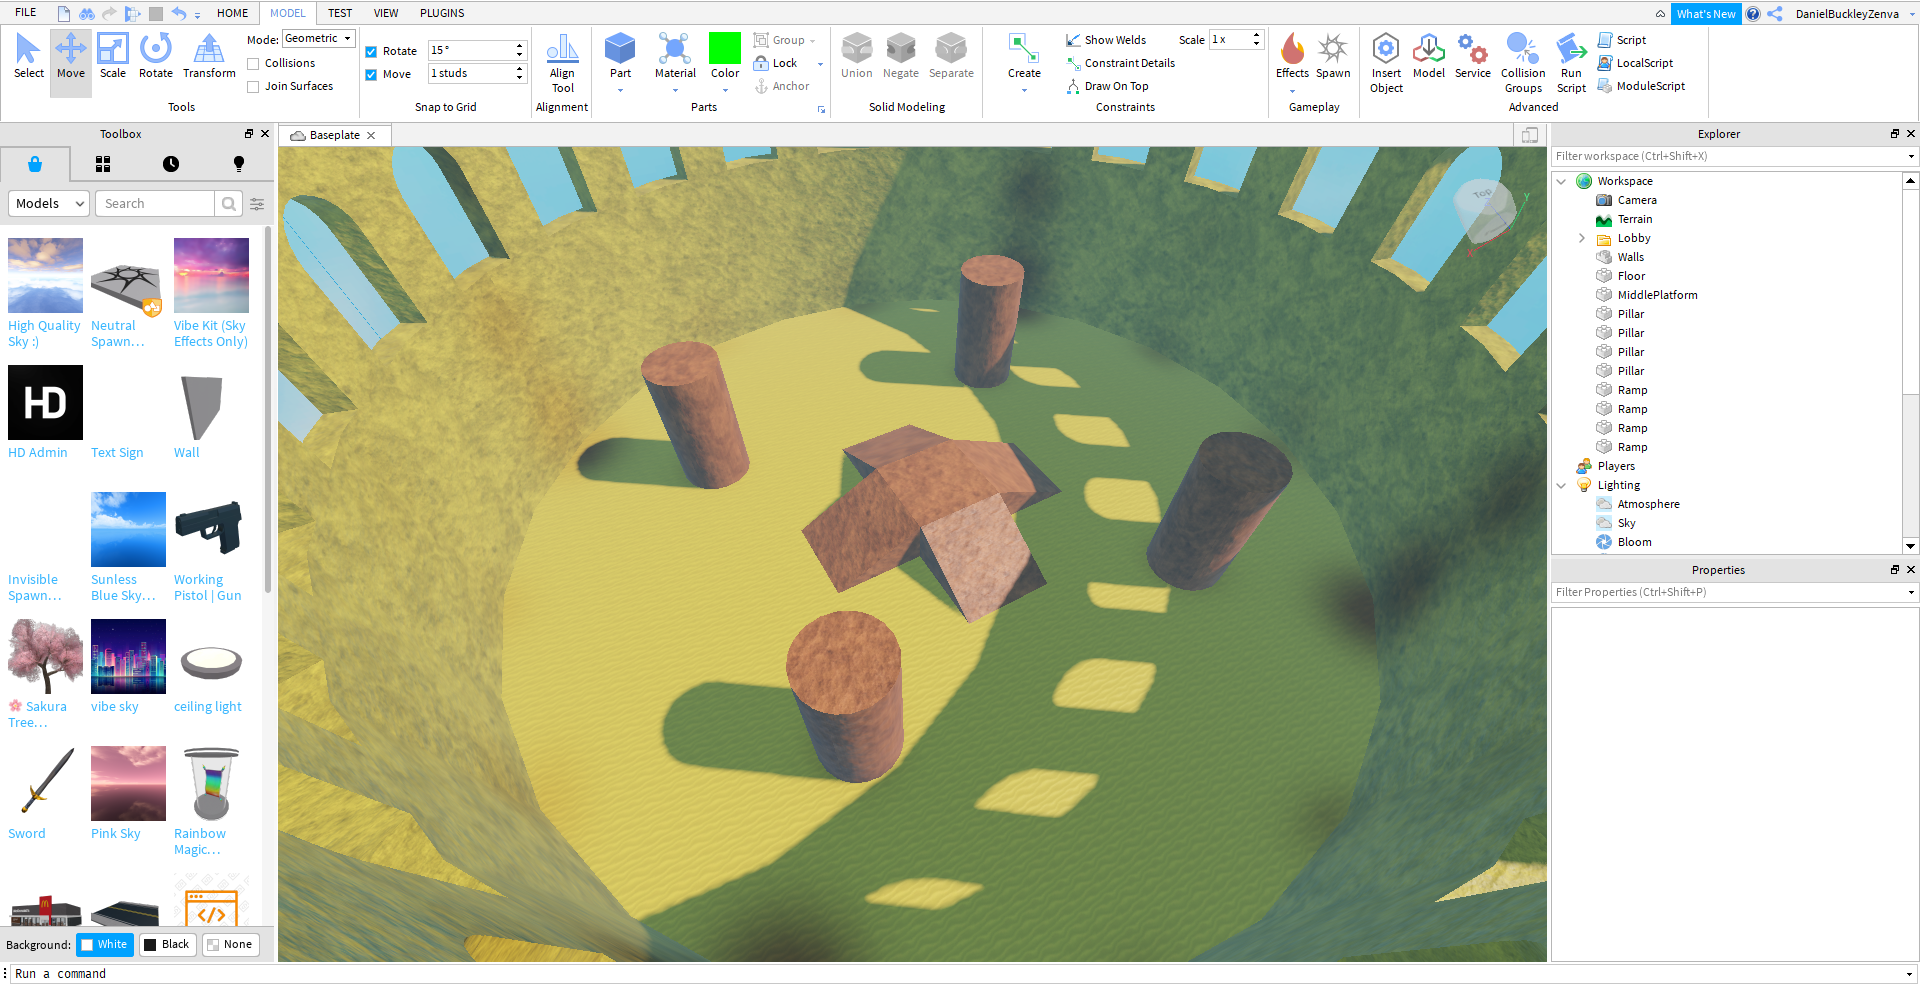
Next, we’ll need to create the walls for our arena. This can be whatever you wish. For mine, I went for a colosseum style. Using the modeling tools (union and negate).
Then finally, we can add in obstacles and platforms for the players to move around.
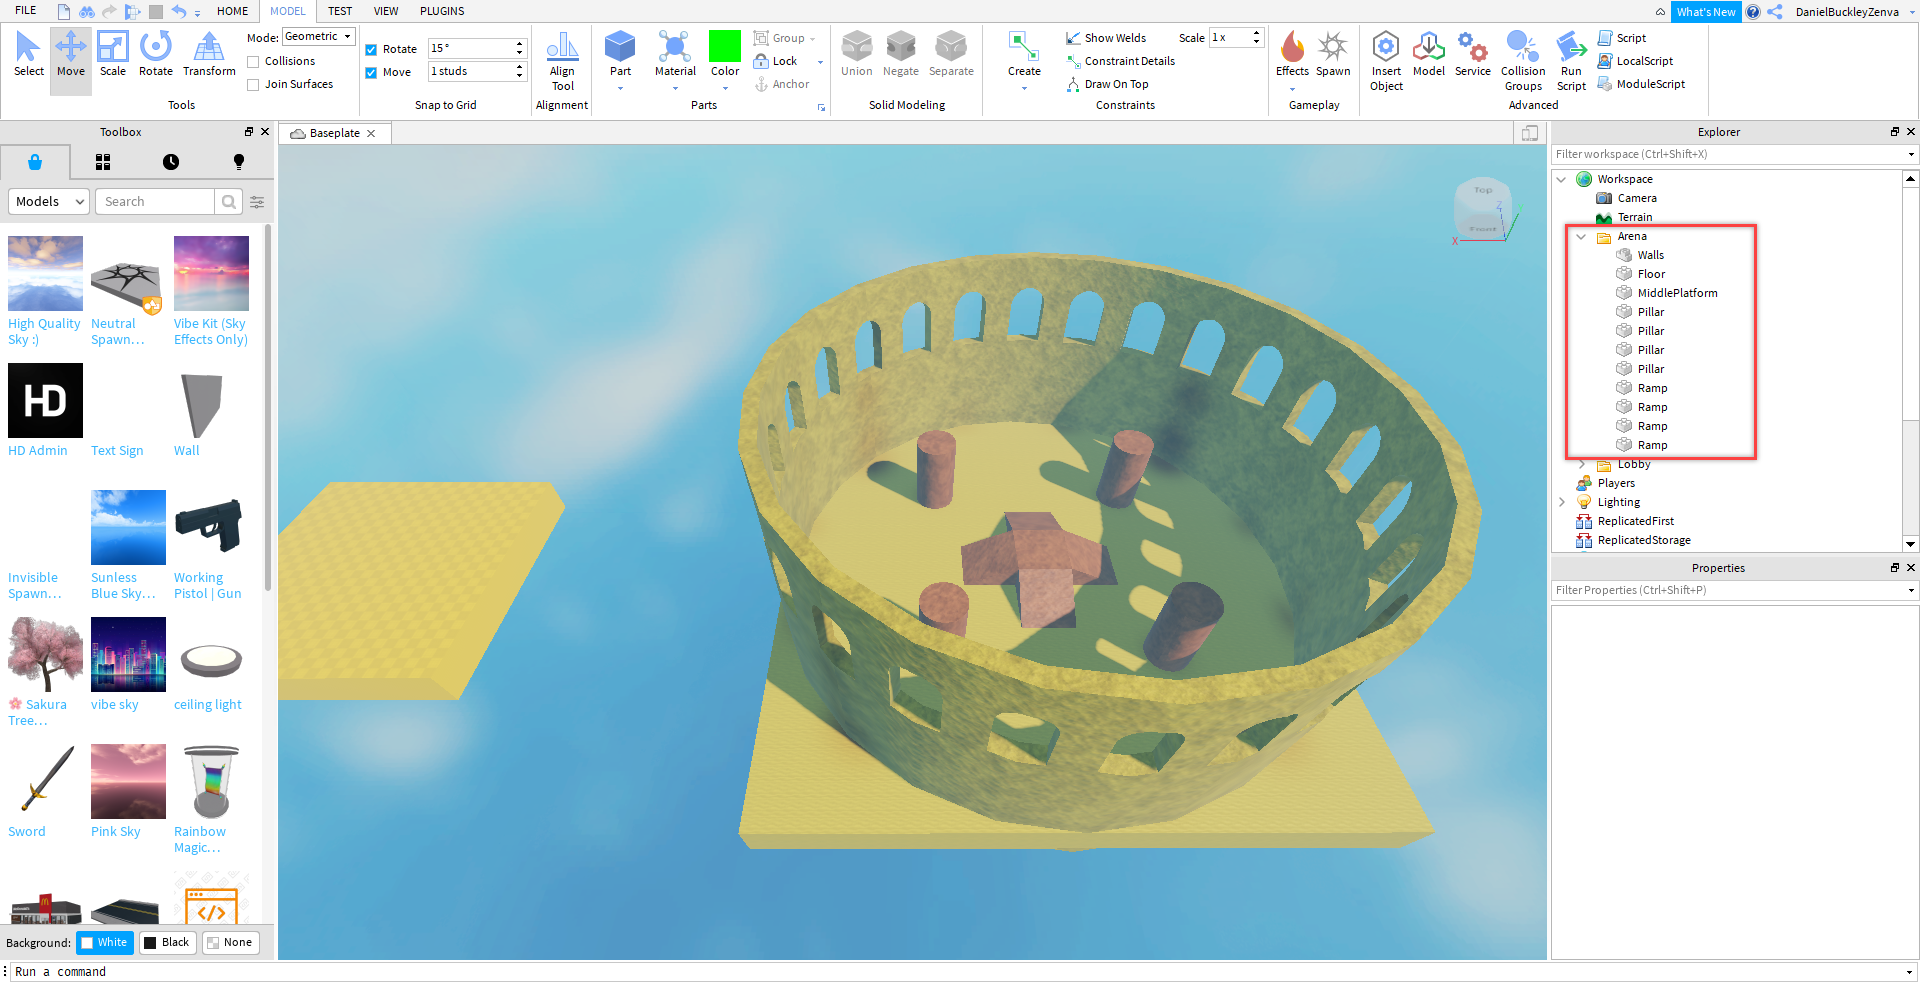
Just like with our lobby, let’s also put the arena into its own folder.
Spawn Points
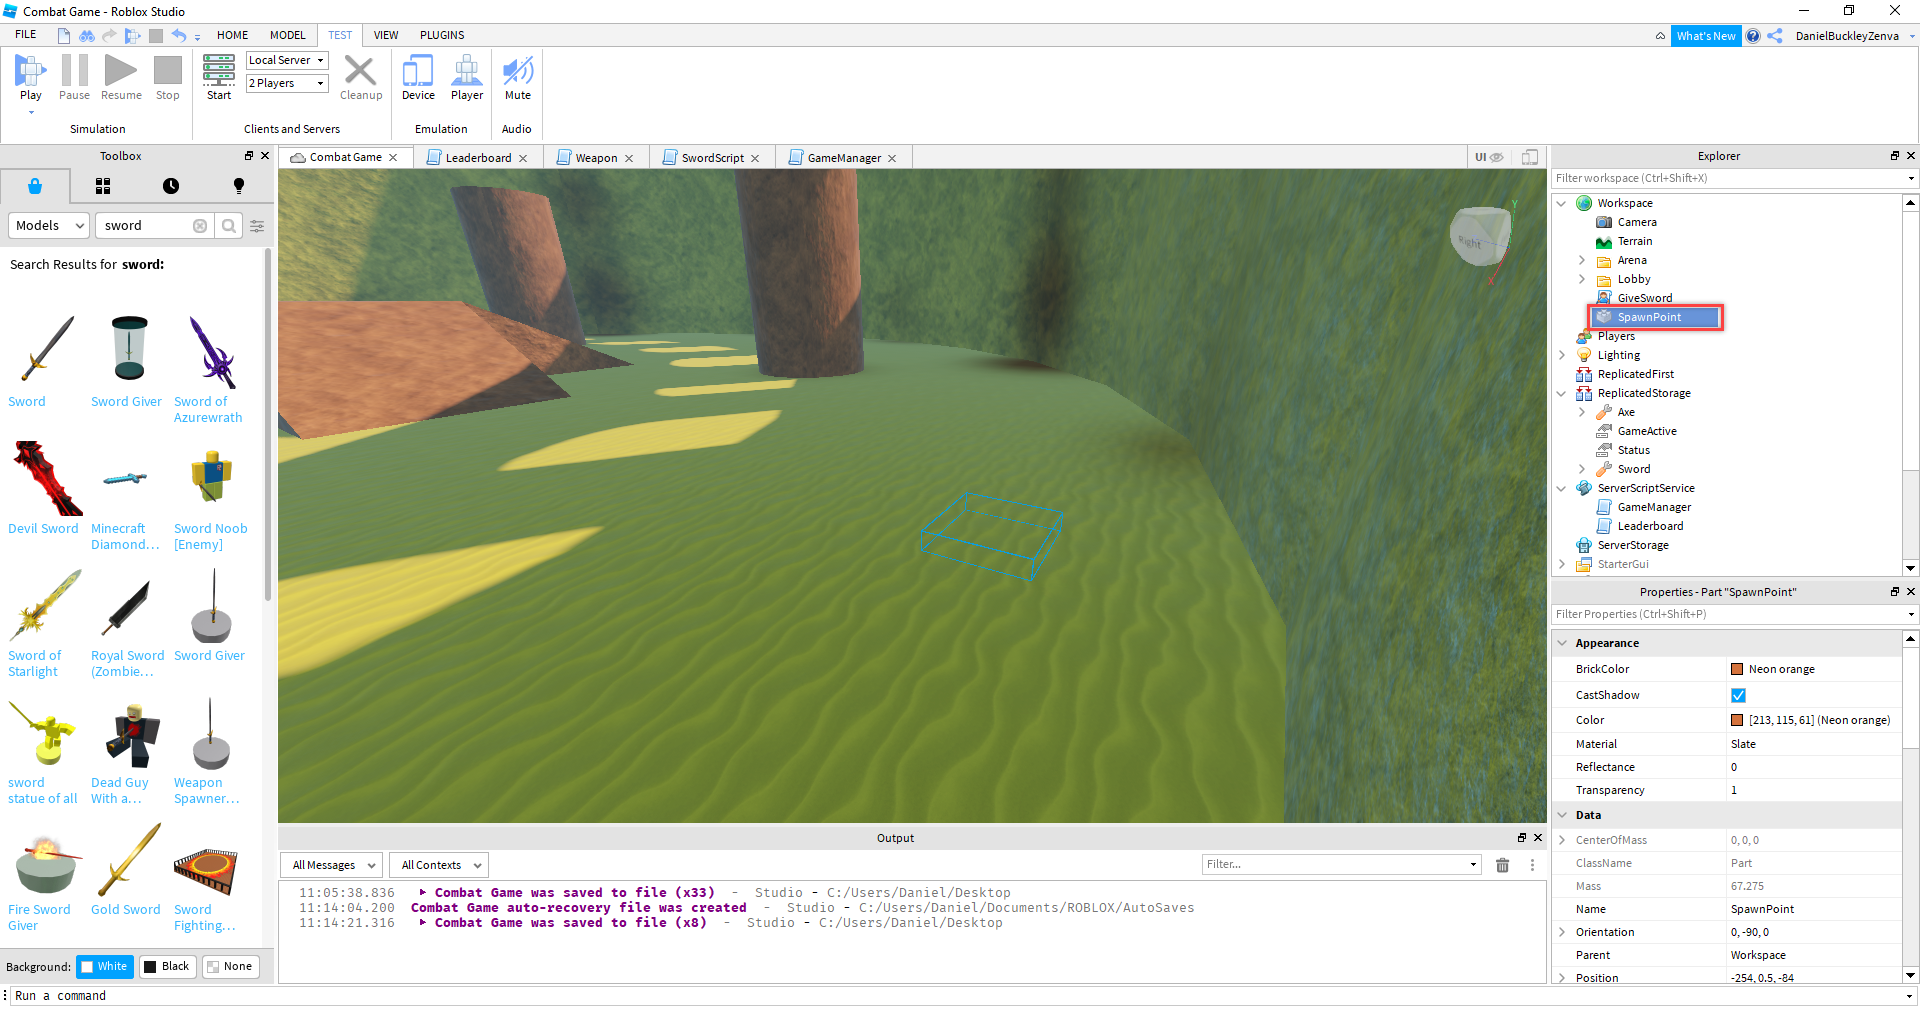
For our arena, we need to create spawn points for players to spawn at. Create a new brick part.
- Set the Transparency to 1.
- Set the Size to 5, 1, 5.
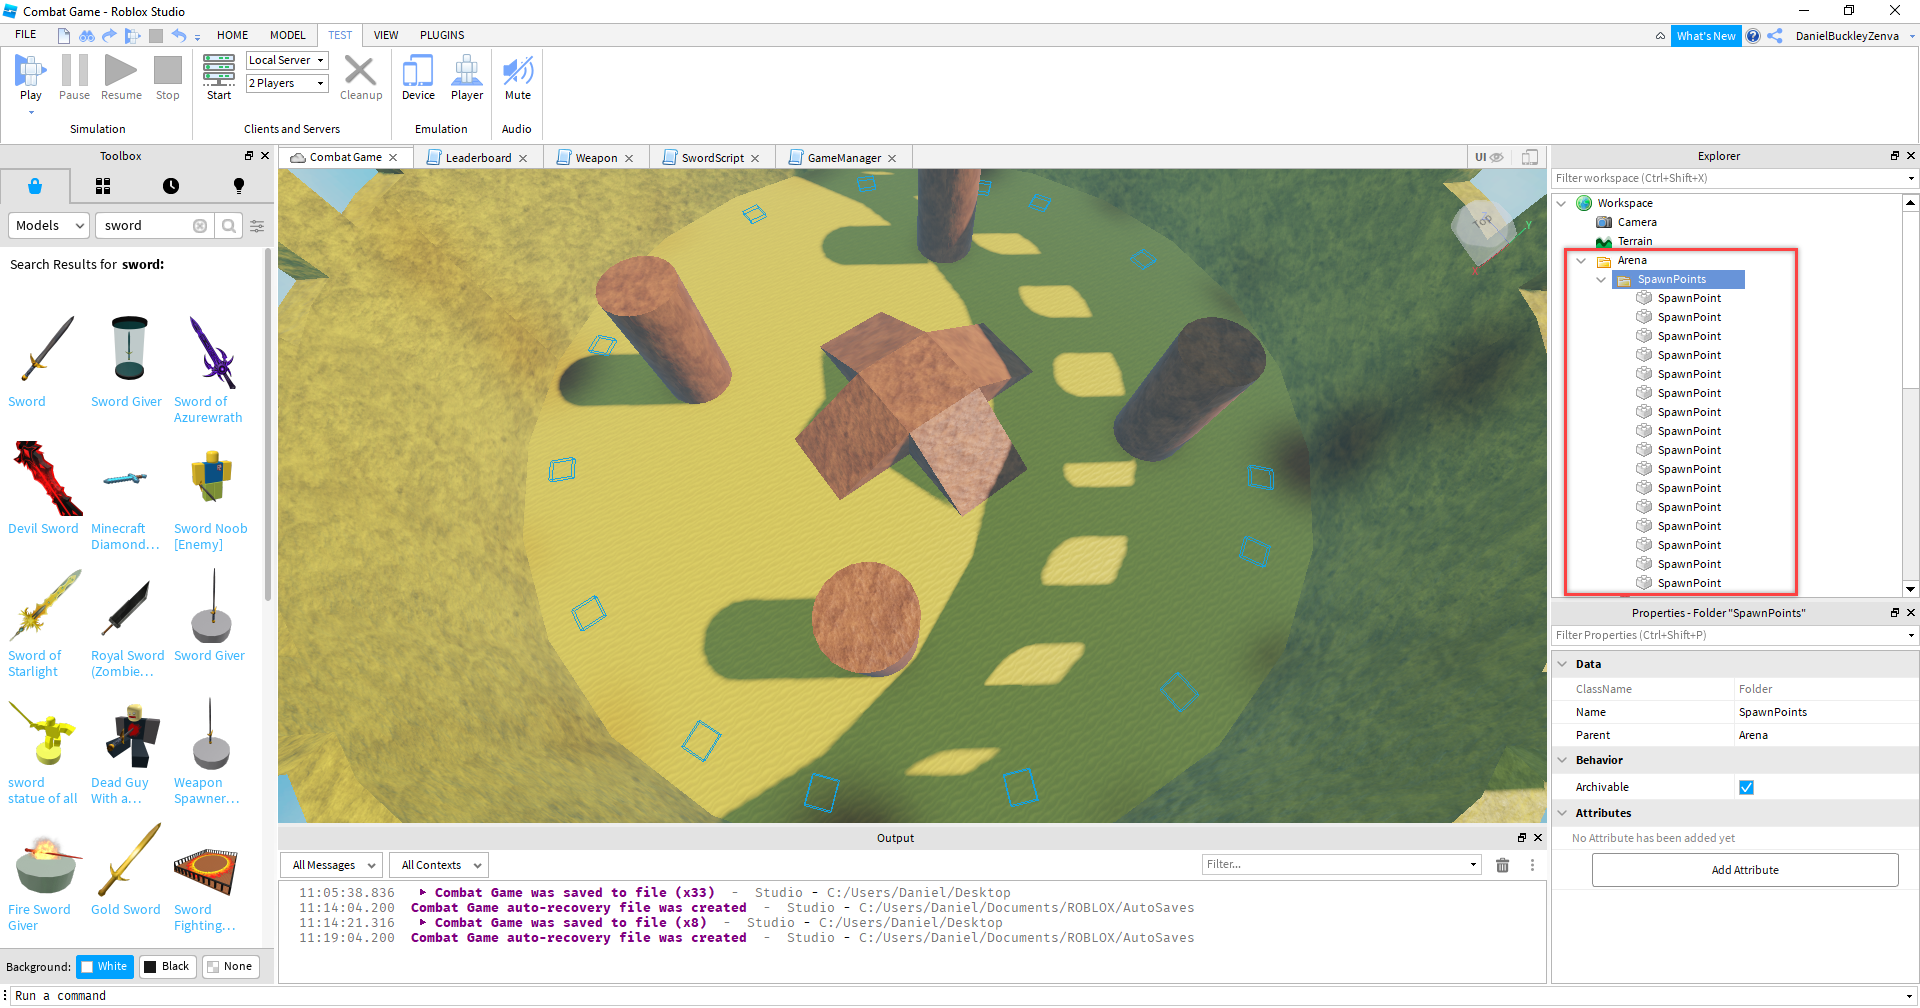
Now we can duplicate and put these spawn points all around the arena. Then create a folder called SpawnPoints in the Arena folder to store them.
Game Loop
Now that we’ve got all of the environments and spawns set up, let’s get the game loop working. It will act like this:
- Players start in the Lobby
- After 5 or so seconds, all players will be teleported to the Arena.
- After 30 seconds, all players will be teleported back to the Lobby.
- Repeat.
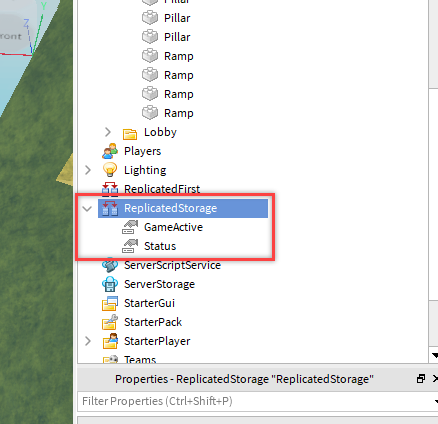
To get this working, we need to create two objects which will contain the game’s state. A BoolValue and a StringValue.
- A bool value can hold a true or false value.
- We’ll be using this to know if the game’s currently active (players are in arena).
- A string value can hold a string of text.
- We’ll be using this to update the current time remaining for all players.
In the Explorer, go over to the ReplicatedStorage service and create those two things (rename them appropriately). ReplicatedStorage is where we can put objects that are stored on the server.
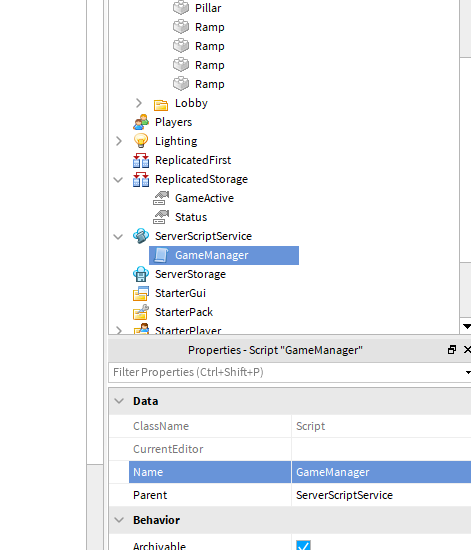
Next, in the ServerScriptService service, create a new script called GameManager.
Let’s start with our variables.
local GameLength = 20
local LobbyWaitLength = 5
local PlayersRequiredToBegin = 1

local LobbySpawn = game.Workspace.Lobby.SpawnLocation
local ArenaSpawnPoints = game.Workspace.Arena.SpawnPoints:GetChildren()

local GameActive = game.ReplicatedStorage.GameActive
local Status = game.ReplicatedStorage.Status
Then we need to create the LobbyTimer function. This runs when all the players are in the lobby, waiting for a new game to start. Here’s what it does…
- As long as the GameActive bool is false:
- Wait for the required players to join the game.
- When that number is met, countdown.
- When the countdown is complete, set the GameActive value to true.
local function LobbyTimer ()
	while GameActive.Value == false do
		local players = game.Players:GetChildren()
		local playerCount = #players


		if playerCount < PlayersRequiredToBegin then
			Status.Value = "Waiting for players"
		else
			for i = LobbyWaitLength, 1, -1 do
				Status.Value = "Starting game in... ".. i
				wait(1)
			end
			GameActive.Value = true
			return
		end

		wait(1)
	end
end
We then also have the GameTimer function. This runs when the players are in the arena, giving them a set length of time to play the game, before changing the GameActive value back to false.
local function GameTimer ()
	for i = GameLength, 1, -1 do
		Status.Value = i .." seconds remaining!"
		wait(1)
	end
	GameActive.Value = false
end
Now, this is just counting down, we’re not teleporting the player or anything yet. This is done when we change the GameActive value. We can create this event which gets triggered when GameActive changes to true or false.
GameActive.Changed:Connect(function()


end)
If the value is true, then teleport all players into the arena and give them max health.
GameActive.Changed:Connect(function()
	if GameActive.Value == true then
		for i, player in pairs(game.Players:GetChildren()) do
			local character = player.Character
			character.HumanoidRootPart.CFrame = ArenaSpawnPoints[i].CFrame
			character.Humanoid.Health = character.Humanoid.MaxHealth
		end
		GameTimer()
	else
end)
Otherwise, if it’s false, then we can teleport all players back to the lobby.
GameActive.Changed:Connect(function()
	if GameActive.Value == true then
		for i, player in pairs(game.Players:GetChildren()) do
			local character = player.Character
			character.HumanoidRootPart.CFrame = ArenaSpawnPoints[i].CFrame
			character.Humanoid.Health = character.Humanoid.MaxHealth
		end
		GameTimer()
	else
		for i, player in pairs(game.Players:GetChildren()) do
			local character = player.Character
			character.HumanoidRootPart.CFrame = LobbySpawn.CFrame
		end
		LobbyTimer()
	end
end)
Finally, at the bottom of the script – we can call the initial LobbyTimer function.
LobbyTimer()
Now you can test it out!
UI
In order to see how much time we have left, let’s create some text on-screen.
In the StarterGui service, create a new ScreenGui object and as a child of that, create a TextLabel.

In our game view, drag the text label to the top-center of the screen.
- Rename it to StatusText
- Set the Text to Starting game in… 5
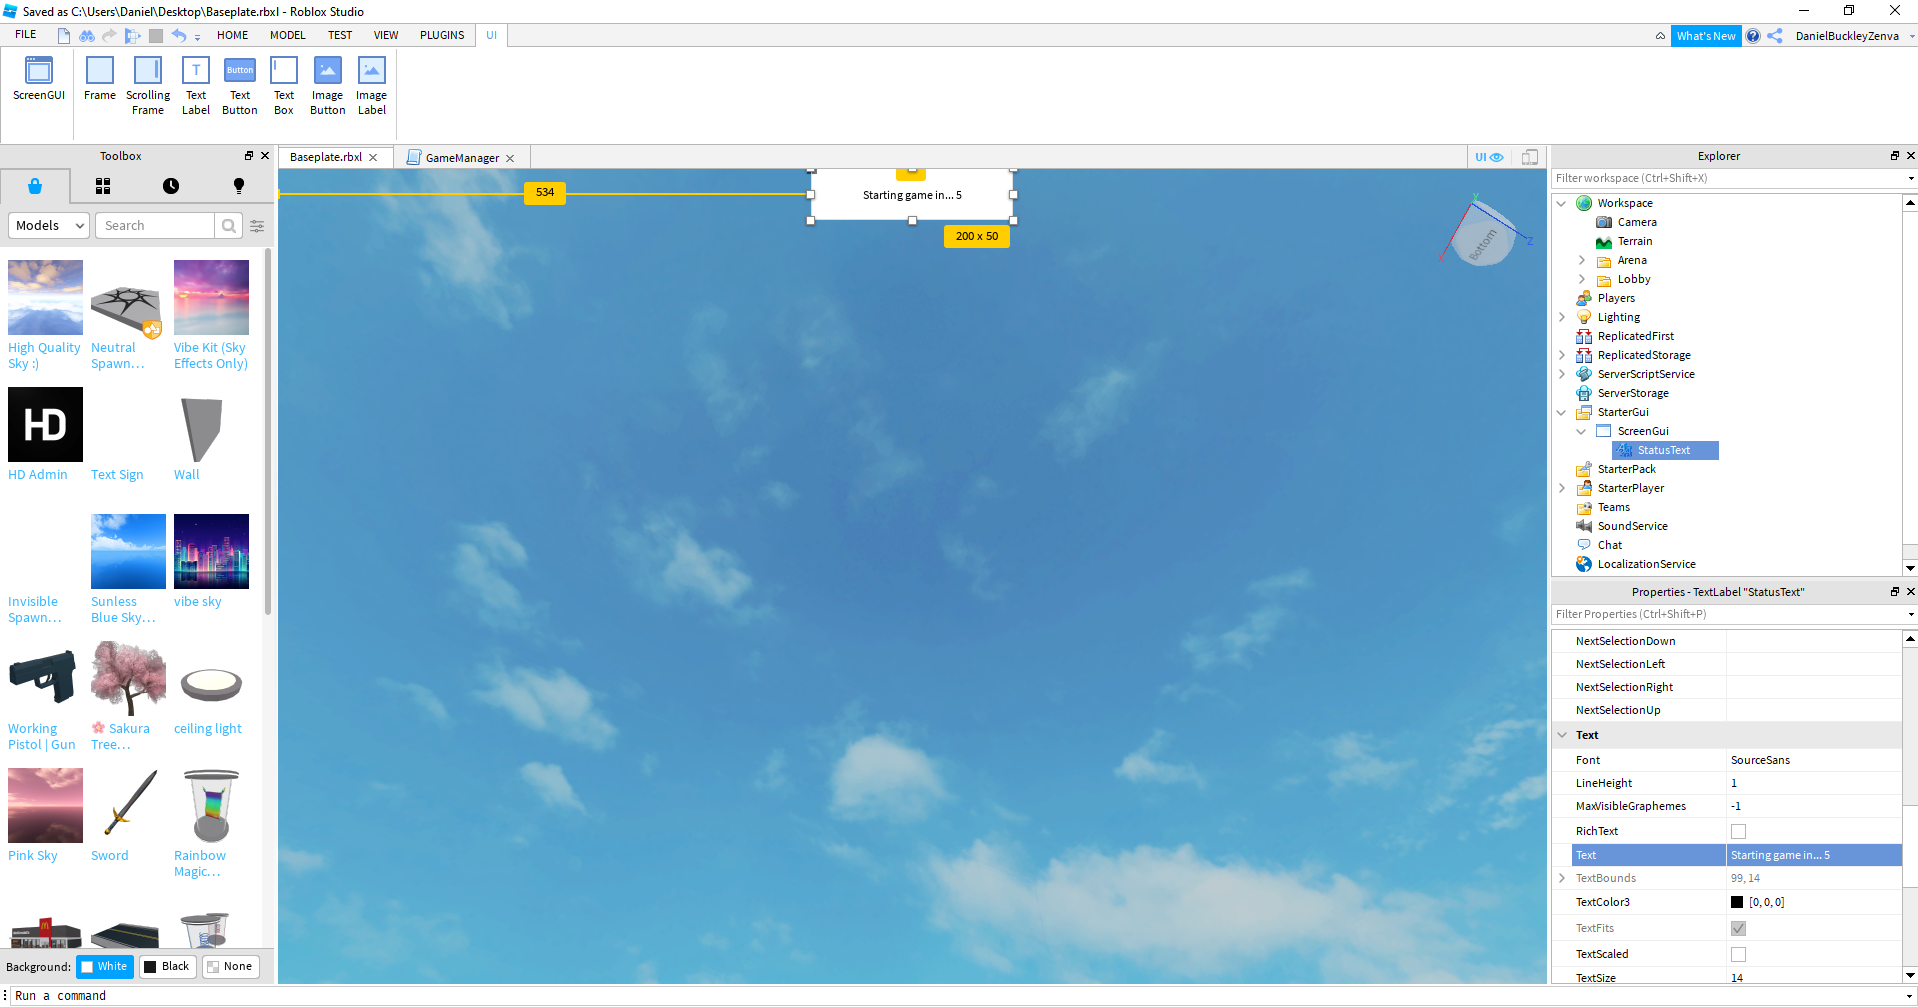
- Set the BackgroundTransparency to 1.
- Set the AnchorPoint to 0.5, 1.
- Set the TextSize to 30.

As a child of ScreenGui, create a new LocalScript. A local script is the same as a script but it only runs on the client – not the server.
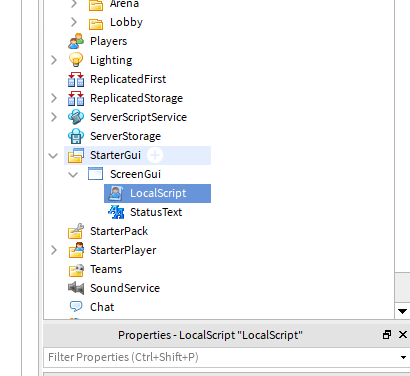
All this code will do, is update the text to display the status when the text changes.
local Status = game.ReplicatedStorage.Status
local TimerText = script.Parent.StatusText

Status.Changed:Connect(function()
	TimerText.Text = Status.Value
end)
Creating the Weapon
Now let’s create the weapon which our players will be using. For the model, we can use the Toolbox window to find one which looks good.
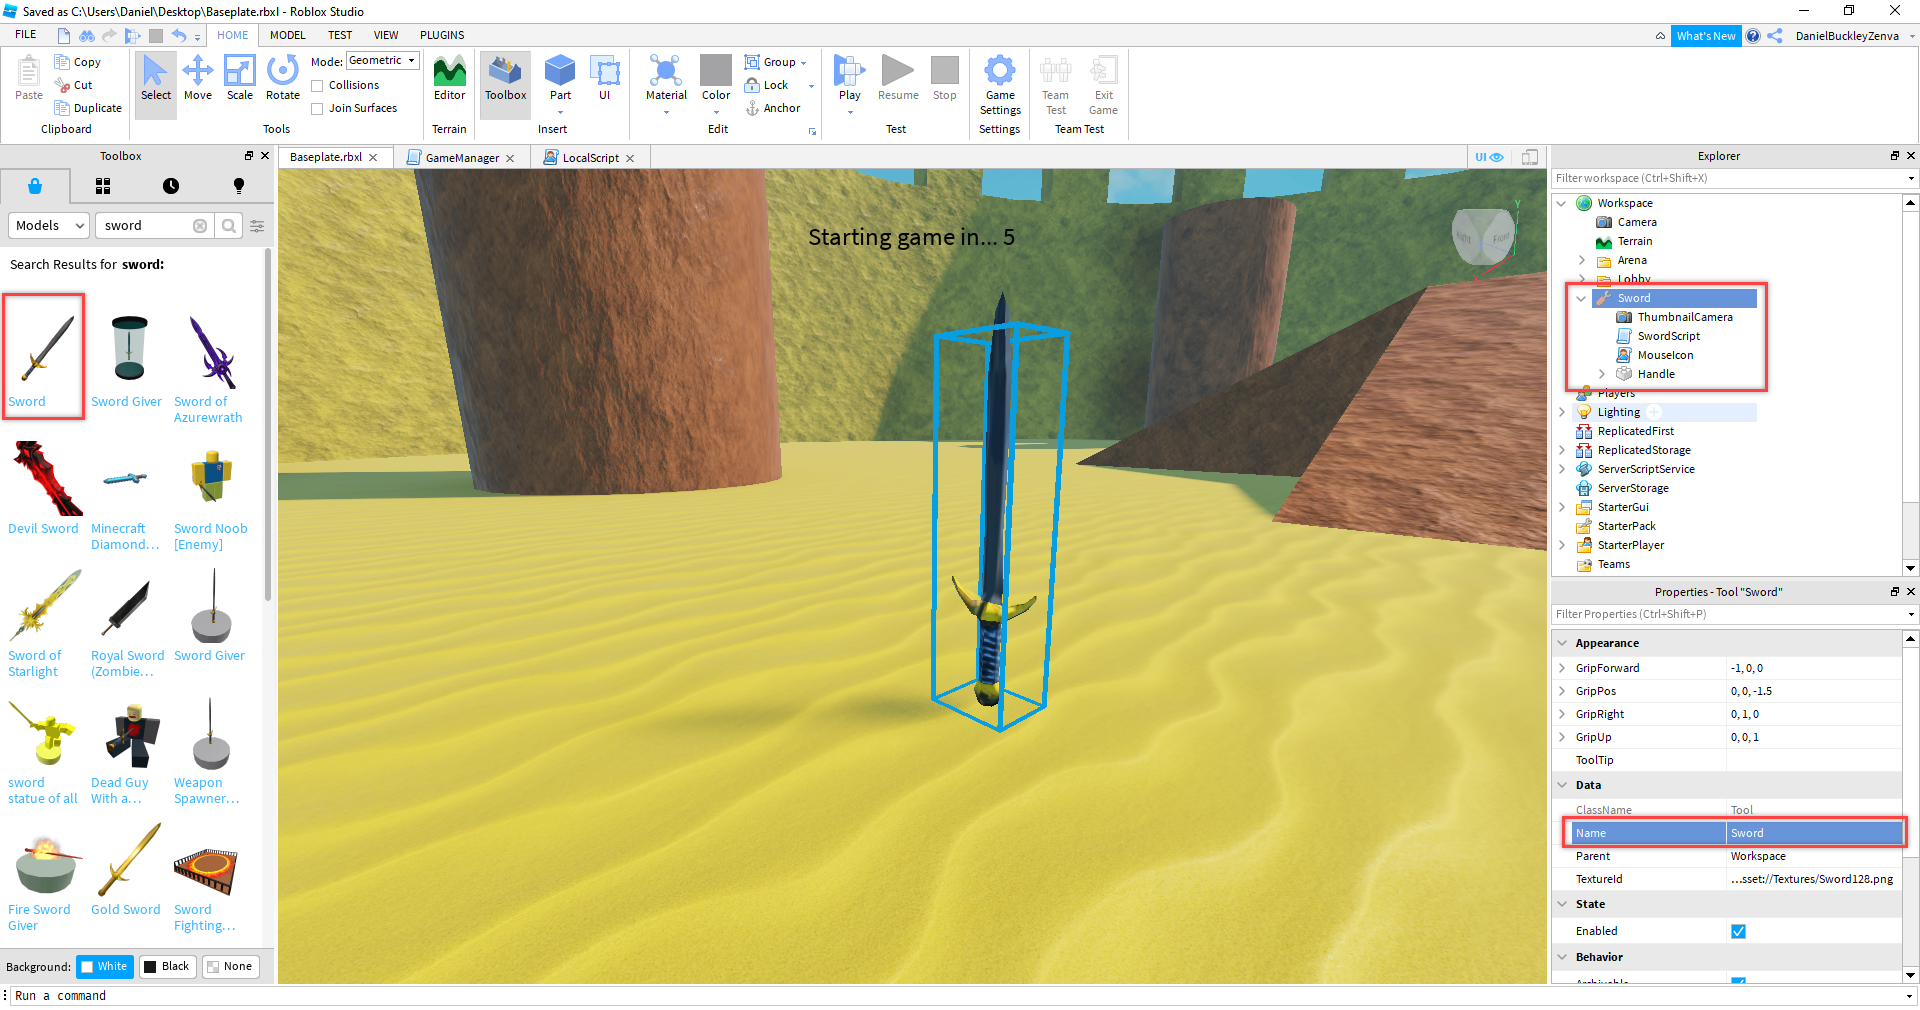
First, open up the sword’s children object and DELETE:
- ThumbnailCamera
- MouseIcon
We won’t be needing those. You can then rename the sword to Sword.
Next, drag the sword into ReplicatedStorage as it will be held on the server and given to players when needed by the GameManager script.
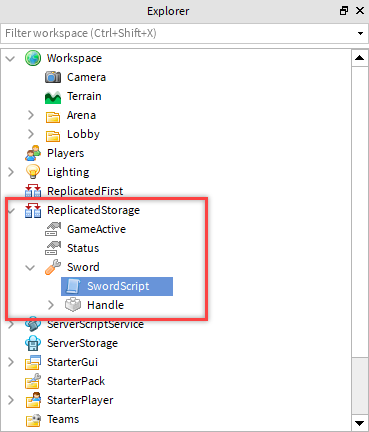
After this, open up the SwordScript and delete all the code there – we’ll be creating our own from scratch. First, the variables.
local Tool = script.Parent
local CanDamage = false
local Damage = 25
local Target
Then we can create the OnTouched function. This gets called when the sword hits another part. We need to first make sure that it’s a player and if so, damage them.
local function OnTouched (otherPart)
	local humanoid = otherPart.Parent:FindFirstChild("Humanoid")

	if not humanoid then
		return
	end

	if humanoid.Parent ~= Tool.Parent and CanDamage and Target ~= humanoid then
		Target = humanoid

		humanoid:TakeDamage(25)
	else
		return
	end

	CanDamage = false
end
The Attack function gets called when we click our mouse button. This will play a swing animation.
local function Attack ()
	Target = nil

	local anim = Instance.new("StringValue")
	anim.Name = "toolanim"
	anim.Value = "Slash"
	anim.Parent = Tool
	CanDamage = true
	wait(0.5)
	CanDamage = false
end
Then finally, we need to hook these functions up to their respective events.
Tool.Activated:Connect(Attack)
Tool.Handle.Touched:Connect(OnTouched)
Here’s the final script.
local Tool = script.Parent
local CanDamage = false
local Damage = 25
local Target

local function OnTouched (otherPart)
	local humanoid = otherPart.Parent:FindFirstChild("Humanoid")

	if not humanoid then
		return
	end

	if humanoid.Parent ~= Tool.Parent and CanDamage and Target ~= humanoid then
		Target = humanoid

		humanoid:TakeDamage(25)
	else
		return
	end

	CanDamage = false
end

local function Attack ()
	Target = nil

	local anim = Instance.new("StringValue")
	anim.Name = "toolanim"
	anim.Value = "Slash"
	anim.Parent = Tool
	CanDamage = true
	wait(0.5)
	CanDamage = false
end

Tool.Activated:Connect(Attack)
Tool.Handle.Touched:Connect(OnTouched)
Equipping the Weapon
We’ve got our weapon, now we need to give it to the players when they spawn in the arena and remove it when back in the lobby.
Let’s go over to the GameManager script and create a variable referencing the weapon.
local Weapon = game.ReplicatedStorage.Sword
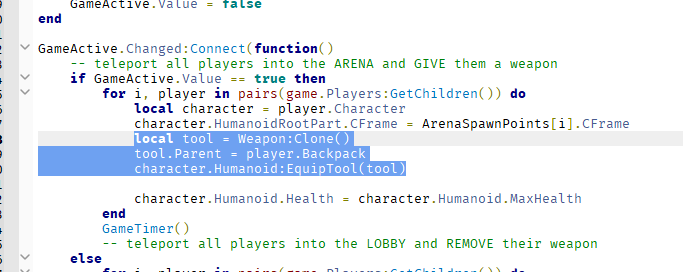
Then when the game active value is true, we want to add the weapon to each player’s backpack and equip it.
local tool = Weapon:Clone()
tool.Parent = player.Backpack
character.Humanoid:EquipTool(tool)
Then when game active is false, remove the weapon.
for _, obj in pairs(character:GetChildren()) do
    if obj:IsA("Tool") then
        obj:Destroy()
    end
end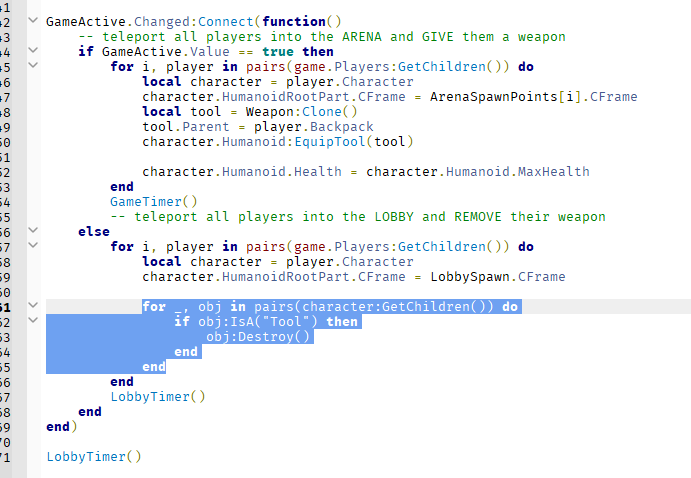
Here’s the GameActive.Changed event with the final code:
GameActive.Changed:Connect(function()
	-- teleport all players into the ARENA and GIVE them a weapon
	if GameActive.Value == true then
		for i, player in pairs(game.Players:GetChildren()) do
			local character = player.Character
			character.HumanoidRootPart.CFrame = ArenaSpawnPoints[i].CFrame
			local tool = Weapon:Clone()
			tool.Parent = player.Backpack
			character.Humanoid:EquipTool(tool)

			character.Humanoid.Health = character.Humanoid.MaxHealth
		end
		GameTimer()
		-- teleport all players into the LOBBY and REMOVE their weapon
	else
		for i, player in pairs(game.Players:GetChildren()) do
			local character = player.Character
			character.HumanoidRootPart.CFrame = LobbySpawn.CFrame

			for _, obj in pairs(character:GetChildren()) do
				if obj:IsA("Tool") then
					obj:Destroy()
				end
			end
		end
		LobbyTimer()
	end
end)
Leaderstats
We’ve got most of the game setup and working. But there’s no score right now. So how do we do that?
In the ServerScriptService, create a new script called Leaderboard. This is where we’re going to create and manage player kills.
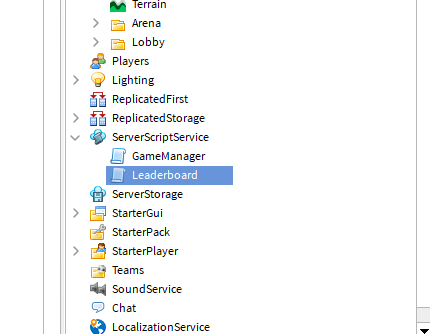
First, let’s get a list of all the players.
local Players = game.Players
Then we can create the SetupLeaderboard function. This will be called when a new player joins the game.
local function SetupLeaderboard (player)

end)
Inside of this function, let’s create our leaderstats folder. It’s important that the names are the exact same as the code below, as the game requires specific naming.
local leaderstats = Instance.new("Folder")
leaderstats.Name = "leaderstats"
leaderstats.Parent = player
Now with our leaderstats, let’s create a new int value to store our kills.
local kills = Instance.new("IntValue")
kills.Name = "Kills"
kills.Parent = leaderstats
Then (still inside of the function), let’s run some code when the player’s character has been added.
player.CharacterAdded:Connect(function(character)
	local humanoid = character:WaitForChild("Humanoid")
	local objectValue = Instance.new("ObjectValue")
	objectValue.Name = "Killer"
	objectValue.Parent = humanoid

	humanoid.Died:Connect(function()
		local killer = humanoid:WaitForChild("Killer")

		if killer then
			game.Players:GetPlayerFromCharacter(character).leaderstats.Kills.Value += 1
			killer = nil
		end
	end)
end)
Finally, at the bottom of the script, let’s call the SetupLeaderboard function every time a new player joins the game.
Players.PlayerAdded:Connect(SetupLeaderboard)
Here’s the final script.
local Players = game.Players

local function SetupLeaderboard (player)
	local leaderstats = Instance.new("Folder")
	leaderstats.Name = "leaderstats"
	leaderstats.Parent = player

	local kills = Instance.new("IntValue")
	kills.Name = "Kills"
	kills.Parent = leaderstats

	player.CharacterAdded:Connect(function(character)
		local humanoid = character:WaitForChild("Humanoid")
		local objectValue = Instance.new("ObjectValue")
		objectValue.Name = "Killer"
		objectValue.Parent = humanoid

		humanoid.Died:Connect(function()
			local killer = humanoid:WaitForChild("Killer")

			if killer then
				game.Players:GetPlayerFromCharacter(character).leaderstats.Kills.Value += 1
				killer = nil
			end
		end)
	end)
end

Players.PlayerAdded:Connect(SetupLeaderboard)
Connecting the Weapon to the Leaderboard
Now that we have our leaderboard, let’s go back to our weapon script and navigate over to the onTouched function. Just before we take damage (the line above humanoid:TakeDamage(25)), we want to set that player’s Killer value to be us – the attacker.
humanoid:FindFirstChild("Killer").Value = Tool.ParentHere’s what the full function looks like:
local function OnTouched (otherPart)
	local humanoid = otherPart.Parent:FindFirstChild("Humanoid")

	if not humanoid then
		return
	end

	if humanoid.Parent ~= Tool.Parent and CanDamage and Target ~= humanoid then
		Target = humanoid

		humanoid:FindFirstChild("Killer").Value = Tool.Parent
		humanoid:TakeDamage(25)
	else
		return
	end

	CanDamage = false
end
Testing on Multiple Clients
Now we can test our game! To test a multiplayer game, you need multiple clients. Roblox Studio has that feature build in. Over in the Test tab, you can select the number of clients, then click Start.

Once done, just click on the Cleanup button to close the clients and server.
Conclusion
There we go! We now have a fully functional multiplayer arena combat game in Roblox. Over the course of this tutorial, we’ve learned a lot! We set up a level, learned how to manage our spawn points, created a UI, added weapon combat, and more! We even learned how Roblox game making makes it super easy to make our games multiplayer without a lot of complicated coding.
From here, you can expand in a number of ways. If you enjoyed this project, you can try adding in new features such as different weapons, powerups, etc – all common features for battle royale types of games. Or, since we’ve learned a lot about Roblox Studio’s features and Lua, you can use your new knowledge to create a different game all together – whether that be some sort of race car game, pet game, or something else entirely.
Thank you very much for following along, and I wish you the best of luck with your future Roblox games.
