You can access the full course here: Godot Game Development for Beginners
Godot Editor
In this lesson, we are going to be creating our first Godot project.
Creating a new project
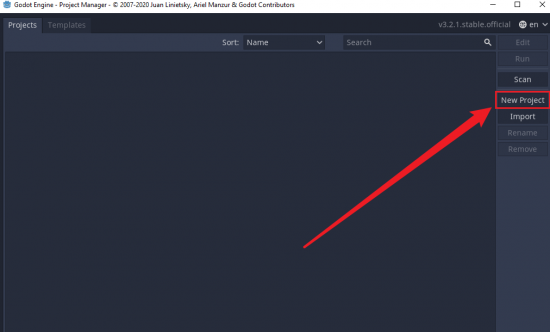
1. Open up the Godot Editor, and click on the New Project button.
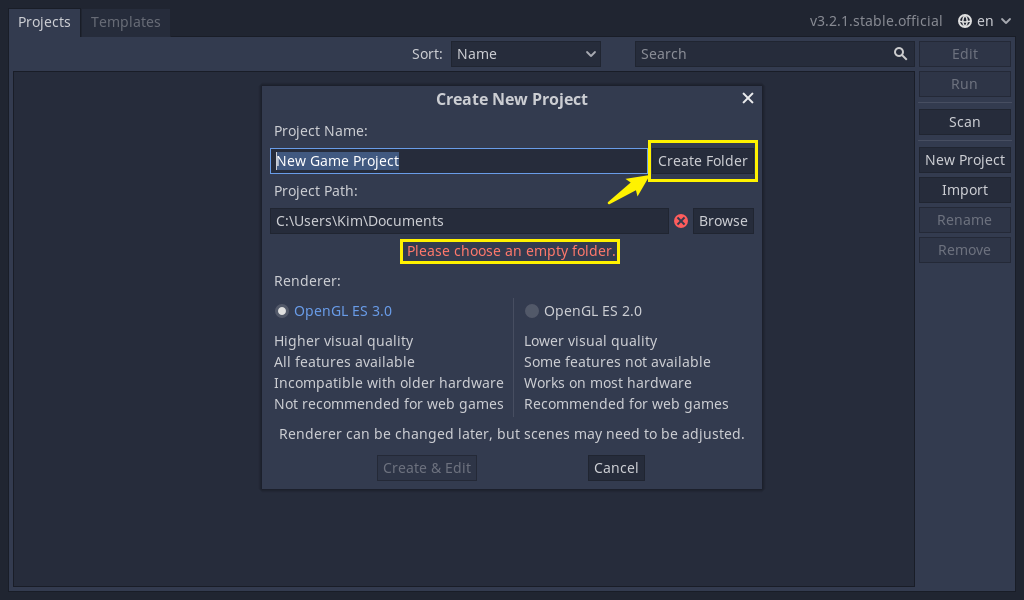
2. You need to either browse an empty folder or click on Create Folder.
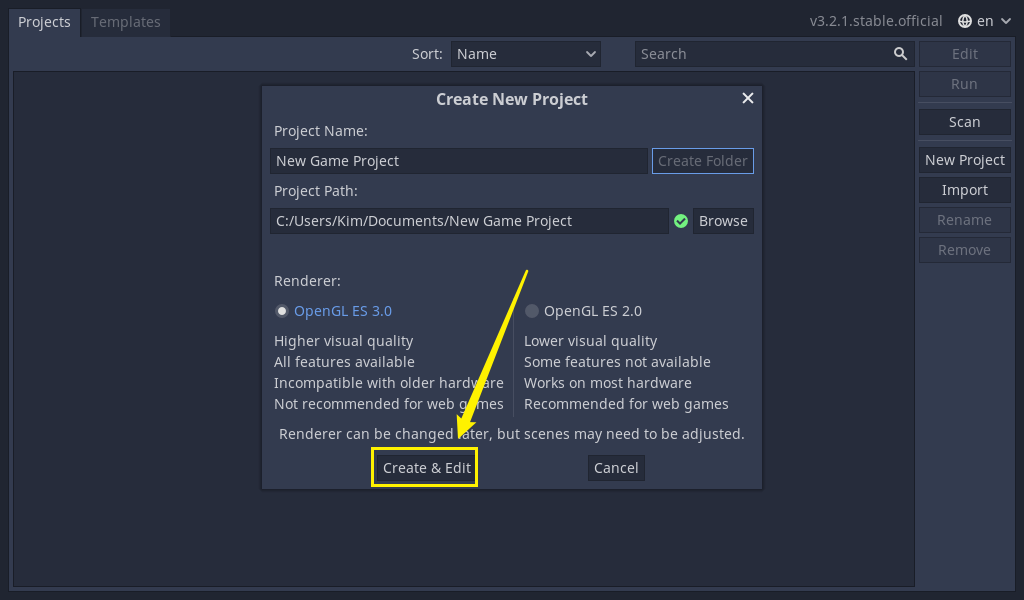
3. Click on Create & Edit.
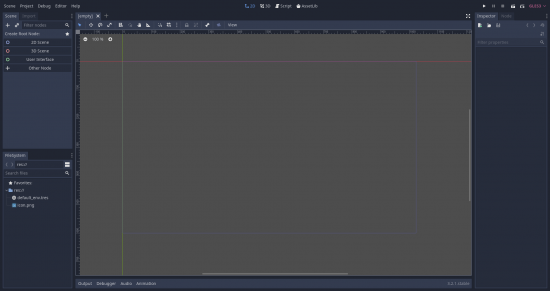
With your project open, you should see the editor’s interface with the 3D viewport active. You can change the current workspace at the top of the interface.
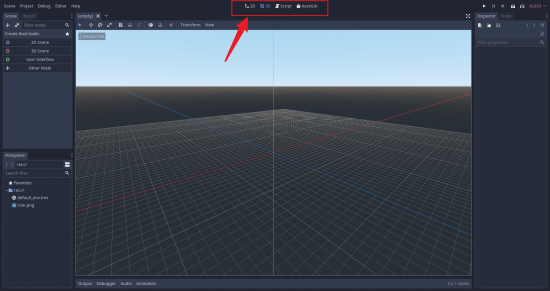
Click on 2D to switch to the 2D workspace.
Scene Panel
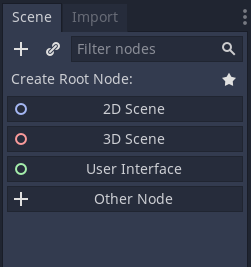
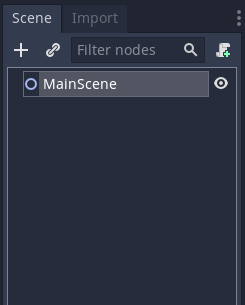
On the top right corner of the interface is the Scene Panel. You can see the list of all the nodes in our current scene.
Nodes
Nodes are the basic building blocks for creating games in Godot. They encapsulate data and behaviour, and they can inherit properties from other nodes.
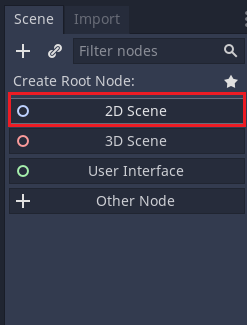
To create a Root Node in the scene, you can simply click on 2D Scene.
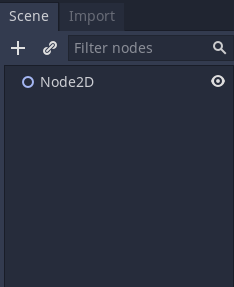
A new root node is created.
We can rename this node to ‘MainScene’.
Inspector
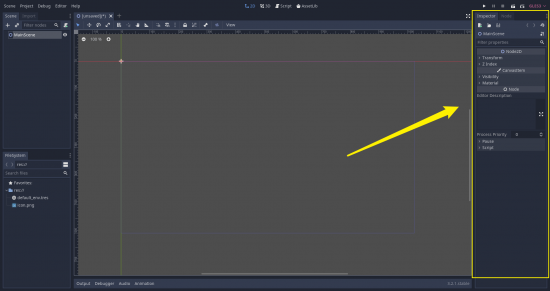
On the right-hand side, in the Inspector panel, a list of all the properties of the node is shown.
File System
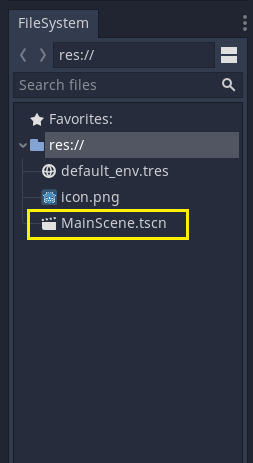
On the bottom left-hand side is the FileSystem panel, where we can view our file structure.
Let’s save this scene by pressing Ctrl+S. You will now see that the new MainScene object is added to FileSystem.
Scene Viewport
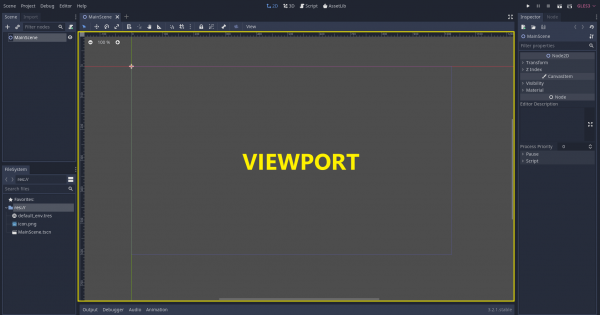
The center of the screen is the scene viewport. This is where we can see and interact with the rendered objects.
Transcript
Welcome back, everyone. In this lesson, we are gonna be creating our first Godot project and just having an overview of the editor looking at all the different things and just getting an understanding of how this engine works.
So first of all, we are here in our Godot project manager. This can be launched by double-clicking on the EXE application which we downloaded in the previous lesson. And here in the project manager we have a list of all of our existing projects. I already have some here because I’ve created some projects in the past but if this is your first time launching Godot this will most likely be empty. There’s also this Templates tab, which allows us to download some existing templates of the Godot website, which could be interesting if you wanna learn how to do a certain thing in the engine.
But for us right now, we’re gonna go back to the Projects tab and we want to click on the New Project button right here. This will launch up this little window right here and what we want to do is first of all, give our project a name. So, I’m just gonna give this one, let’s just say, this FirstGodotProject. And as you can see here, it also says, please choose an empty folder. By default, this will set the project path to be the folder where you have the EXE installed. So what we can do is just click on Create Folder. It will create a new folder here in My Documents for example because that is where this application is and we can then click Create and Edit.
And here we are inside of the Godot engine. It may be a bit confusing because there’s lots of buttons, lots of options, lots of different windows, but we’ll get an understanding of how they all work very shortly.
So first of all, you can see in the middle here, we have this 3D view of our world. And what we need to do is switch it back over to 2D since that is what we’re gonna be working with. So up here, at the top, you’ll see 2D, 3D, Script, and Asset Library. Let’s just click on 2D and it will switch us over to a 2D mode where we can see it on a flat plane.
So let’s begin with the concept of scenes and nodes in Godot. Godot is a game engine that is built upon using nodes, a node-based system. And what a node is, is pretty much anything that has any sort of function in your game is a node. For example the player, the enemies, the coins, the tiles, it could even be a light, a interactable object anything that you can see, you can interact with or anything that you want to have a function, such as holding a script which can then execute a piece of code. That is a node and Godot uses these nodes to structure a scene.
And a scene is basically a collection of nodes and each node can also have children nodes. So if we have a player for example, we’re gonna have a main player node, that player is going to have multiple children nodes, one of them would be a sprite, so it can have some sort of visual image, it is also going to have a collider node, so it has the ability to collide with other objects.
Now, when we have these player nodes, these enemy nodes, these are all going to be added into a final main scene, which is going to be what gets launched when we play the game. And in a main scene, everything is going to be a child of the main scene nodes, so let’s actually go ahead and create that now.
Over here in the scene panel right here, this is going to be the list of all the nodes in our current scene, so it says, Create Root Node, I’m just gonna click on the 2D Scene button right here. And as you can see, it has created a new node. Right now it’s called Node2D. This doesn’t really explain what it is so let’s just double-click on it. And I’m gonna rename this here to our MainScene, because this is gonna be our main scene right here.
Straight away in the middle panel here, nothing really happened, but over on the right-hand side, in the Inspector panel, you can see that there’s all of a sudden some sort of information. And what the Inspector is, is basically a list of all the properties of the selected node.
So here we have the Transform, if we click on that, we can change and view the position, the rotation, and the scale of the node. On CanvasItem we have visibility, so we can toggle if it’s visible or not and some various other options as well. If this is a light node, then we can change the intensity, the color of the light and various different things depending on the node. If it’s a UI node, we can change the text that UI is gonna display, what image it’s displaying. We could take a collider node, we can change the type of collider, the size of it, et cetera.
So we have our main scene right here, now, what we need to do first of all, is save this main scene, because right now, you can see here, it is unsaved. So I’m just gonna go Control + S. And it is going to ask us to save this scene as. We’re gonna save it as MainScene.tscn so we can just hit Enter. And down here in the FileSystem panel, you can see that we have this new main scene object added. And the FileSystem here is just going to be a view of our file structure. A folder structure where our project is stored, so we can see stuff such as our assets, these includes our scenes, our sprites, our textures, our scripts, audio clips, pretty much anything that is an asset for the game is going to be stored here in the FileSystem.
Okay, we’ll be going over this a bit more once we start importing some assets.
In the center here we have our main scene window. And this where we can pretty much interact with the game, where we can select stuff, where we can view what the game is gonna look like. We can also switch between 2D mode and 3D mode up here, which, since we are just working on a 2D game, we’re just gonna stay on the 2D mode right here.
We also have a Script button, which switches us over to the scripting side of Godot, and in here, is where we are going to be modifying our scripts. We’re going to be creating our scripts for the player, for the enemy, for the coins and this is where we’re gonna be programming that individual functionality for each of those things.
So back in 2D mode here, we can move around by holding down the middle mouse or right mouse, but yeah, this is basically the screen size where we’re gonna be adding elements in. So we can have the rough approximation of how large those things will look on our screen.
So we have a main scene here added and saved as an asset here in the FileSystem. Now, since this is an asset in the FileSystem, what we can do is create a new instance of the scene if we wish, but we’re not gonna be doing that for our main scene. For our player though, we’re gonna have a separate scene for our player, a separate scene for our enemy and a separate scene for our coins. And this is gonna allow us to individually modify the aspects of each of those and then create an instance of that inside of that main scene.
Because since we’re gonna have multiple enemies for example, you might in your project, you don’t wanna have to go over every single enemy node, every single time you wanna make a change. Instead, we can just make one change to the main enemy scene and that change will apply to all instances of that enemy across the main scene. If you have ever used the Unity engine, think of that as prefabs.
Okay, so we got a basic understanding of how scenes and nodes work. We’ll of course get a much deeper understanding as we continue with this project and actually get into creating those. But for now, let’s go over some of the other aspects of the engine here.
Over here on the top left, top right I mean. It is all the different buttons to actually play your game, to test it out. So right here we have the play button and this will launch the game and allow us to play it. We have the pause button so we can pause the game and the stop button so we can stop playing the game. Over here we have the play scene, so this will just launch the game into the scene we’re currently on. And this right here allows us to play a custom scene so we can select the scene to launch.
And that’s about it for going over the basic overview of the editor. In the next lesson, we’re gonna begin setting up our project. We’ll be learning more about nodes, about scenes and we’ll be importing some assets to use for this project. So I’ll see you then, in the next lesson.
Interested in continuing? Check out the full Godot Game Development for Beginners course, which is part of our Godot Game Development Mini-Degree.

