With this step-by-step tutorial, you’re going to learn how to create an exciting and action-packed Roblox FPS game complete with lobby, arena, scoreboard, and goal of getting 10 kills per round.
In addition, thanks to Roblox’s built-in multiplayer features, your game will be ready to be enjoyed by the millions of Roblox players in an instant – something becoming a necessity into today’s game industry!
If you’re ready to master building FPS games right in Roblox, let’s get started!
Project Files
You can download the complete project here. Unzip the file and double-click RobloxFPS to open it up in Roblox Studio.
Note that this tutorial won’t be going over the basics, so if this is your first time developing in Roblox, I recommend you follow this tutorial first to learn Roblox game making fundamentals.
BUILD GAMES

FINAL DAYS: Unlock 250+ coding courses, guided learning paths, help from expert mentors, and more.
Creating the Lobby
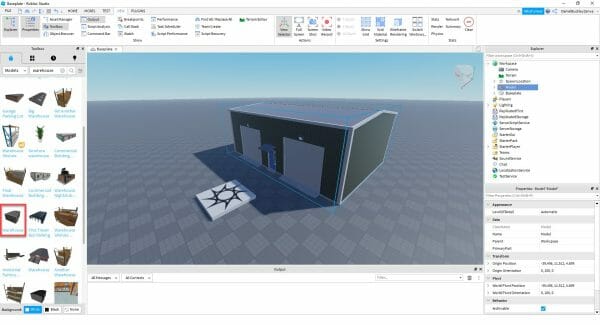
Let’s start by creating a new Roblox game, using the Baseplate template.
Then in the Toolbox window, let’s look for a warehouse model to act as our lobby. This is the one I’m using.
By default this warehouse doesn’t have collisions, so let’s go inside and add some parts to act as collider walls.
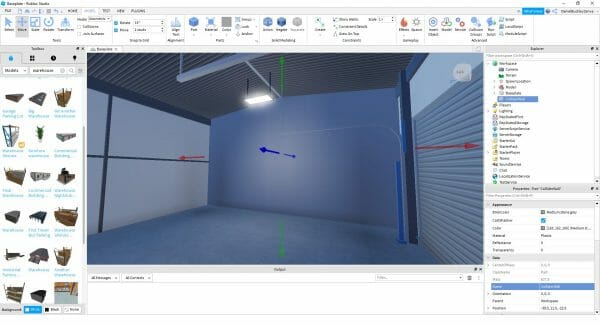
Cover all 4 sides of the inside.
We can then select all of them and…
- Set the Transparency to 1
- Enable Anchored
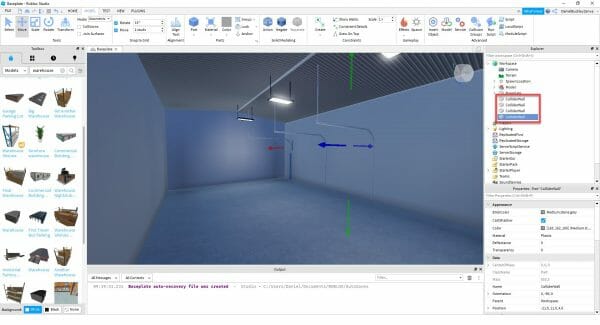
Let’s also drag in the SpawnLocation object as we want our players spawning inside of the lobby room.
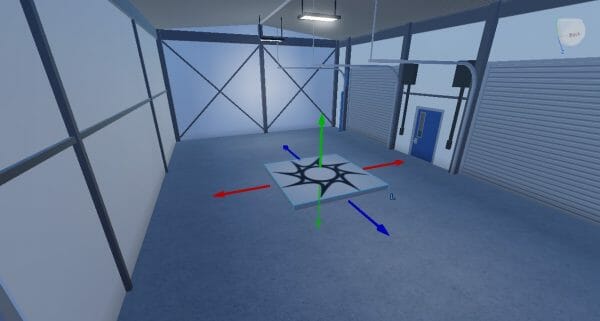
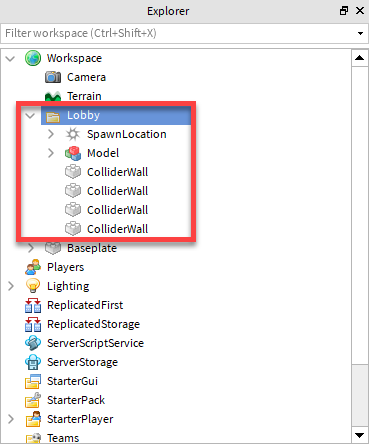
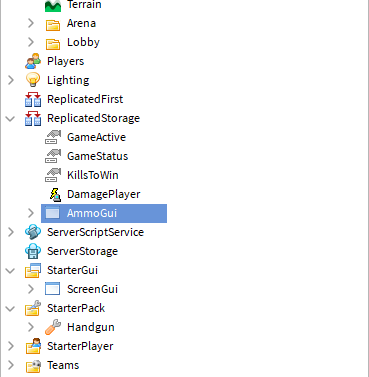
Finally, we can create a folder in the workspace called Lobby, and put all of our lobby related objects in it.
Creating the Arena
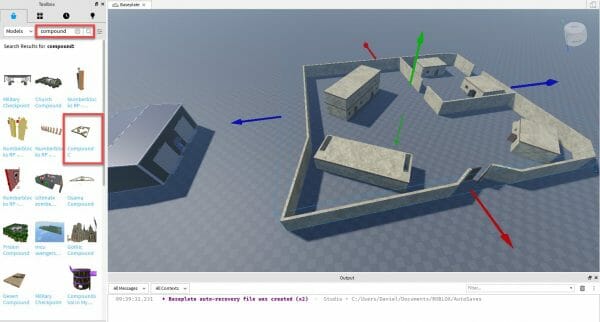
Now let’s create our arena. For this, let’s go over to the Toolbox and look for a “compound”. These normally have walls surrounding it with buildings inside – perfect for an FPS arena. This is the one I’m using.
We can also change the Baseplate to match the compound.
- Set the Material to Sand
- Set the Color to Bright orange
- Delete the child Texture object

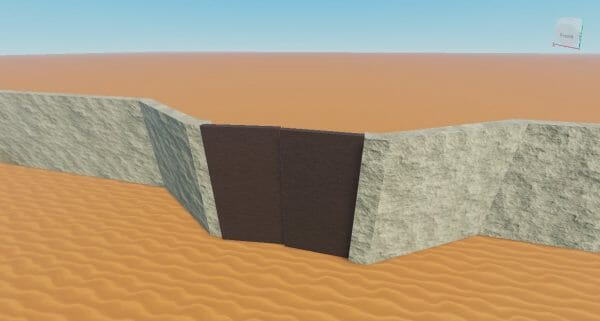
Next, let’s border up all the gaps so players can’t escape. Starting with the door, we can just rotate to close it.
We can do the same thing for the back entrance. Just copy and paste the doors there.
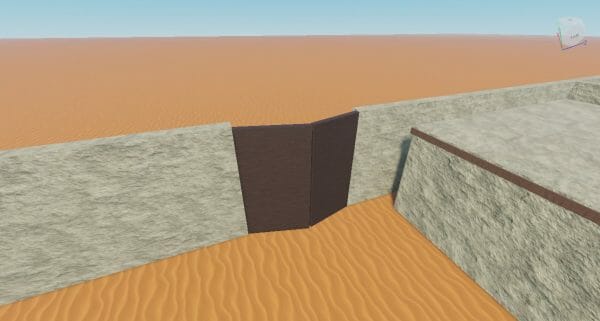
Now players should be blocked in and not able to get out.
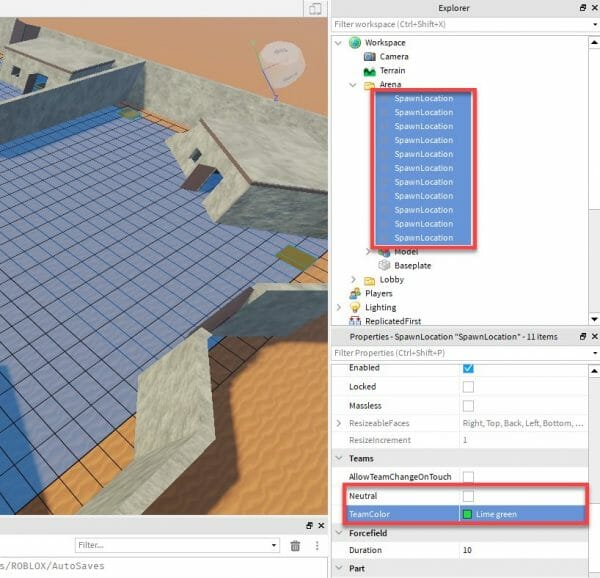
Next up, are the spawn points. Go ahead and create a new SpawnLocation object inside of the Workspace and set it up how you like.
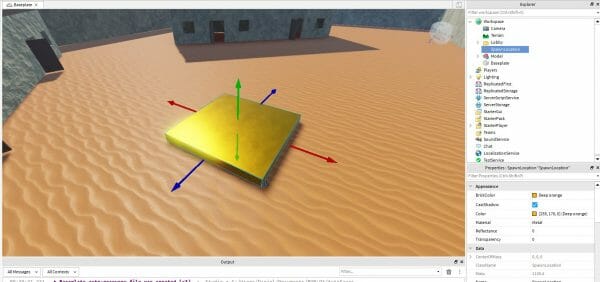
Go ahead and copy/paste a lot of them around the arena.
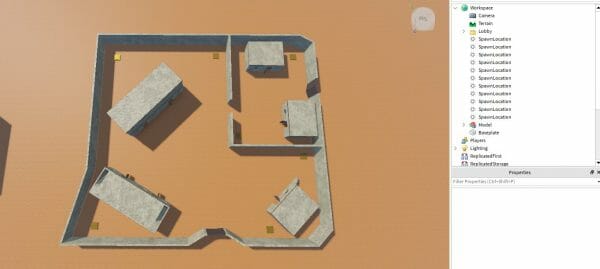
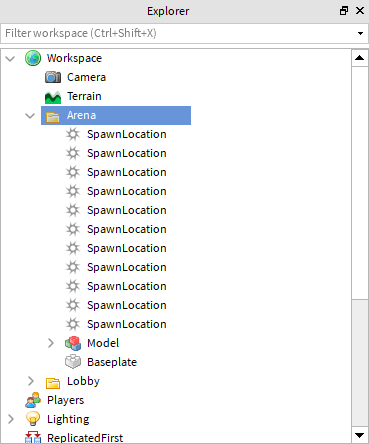
That’s our arena done! Let’s finish it off by creating a new folder called Arena and put all of the objects that relate to it, inside.
Teams
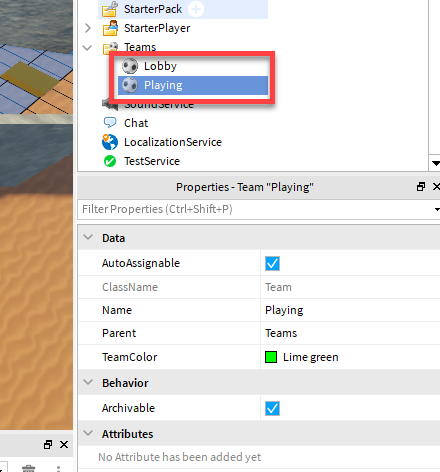
The way we’re going to have players spawn in the lobby at the start of the game and in the arena afterwards is going to be done through teams. Players can be assigned a team and spawn locations too. So when a player respawns, they will spawn at their team’s designated ones. Down in the Teams service, create 2 new Teams.
- Lobby, with a TeamColor of White.
- Playing, with a TeamColor of Lime green.
The team color is what will differentiate the 2 teams.
Now let’s select all of our arena spawn locations and…
- Disable Neutral
- Set the TeamColor to Lime green
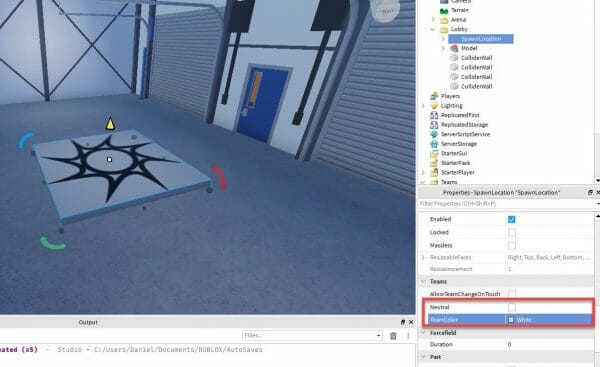
Then for the single lobby spawn location…
- Disable Neutral
- Set the TeamColor to White
Game Loop
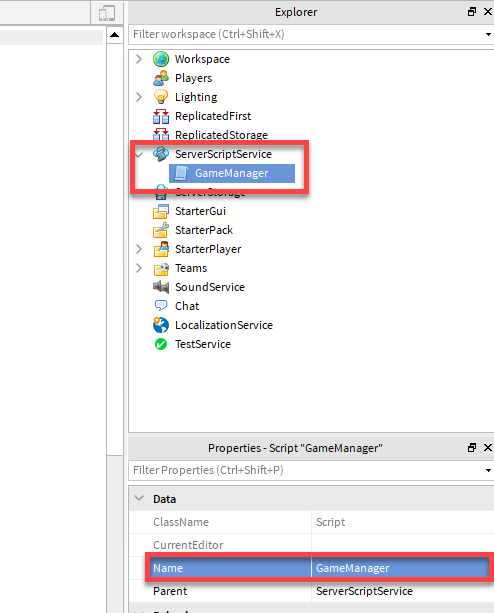
Now that we’ve got the lobby, arena and spawn locations setup, let’s create the game loop. Let’s start by creating a new script inside of the ServerScriptService service and rename it to GameManager.
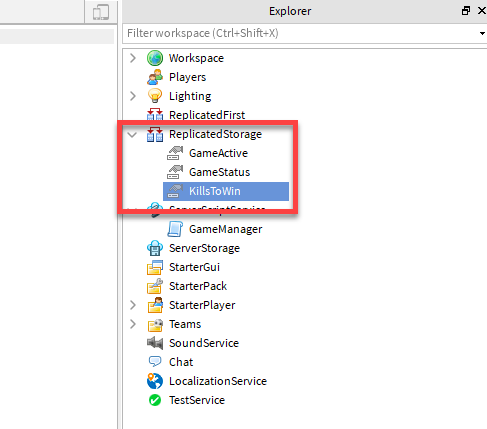
Then, inside of the ReplicatedStorage service, we’re going to create a few value objects to hold data.
- Create a BoolValue and call it GameActive
- Create a StringValue and call it GameStatus
- Create an IntValue and call it KillsToWin
- Set the value to 10.
These are going to be used to hold data that we can change and refer to. Now let’s go over to the GameManager script and start with creating some variables.
local LobbyWaitTime = 5
local KillsToWin = game.ReplicatedStorage.KillsToWin
local GameActive = game.ReplicatedStorage.GameActive

local CurrentTime
local GameStatus = game.ReplicatedStorage.GameStatus

local LobbySpawn = workspace.Lobby.SpawnLocation

local Players = game.Players

local LobbyTeam = game.Teams.Lobby
local PlayingTeam = game.Teams.Playing
The LobbyTimer function will be called when players return to the lobby to await the next game. It will countdown from LobbyWaitTime, change the GameStatus string value to display the countdown. Then when the countdown is complete, it will set GameActive to true.
local function LobbyTimer ()
    CurrentTime = LobbyWaitTime

    while GameActive.Value == false do

        CurrentTime -= 1
        GameStatus.Value = "Game starting in... " .. CurrentTime

        if CurrentTime <= 0 then
            GameActive.Value = true
        end

        wait(1)
    end
end
After this, we want to listen to when our GameActive BoolValue changes. When it does, we will either teleport players to the lobby or arena depending on if it’s true or false.
GameActive.Changed:Connect(function(value)

    if value == true then
        -- change all players team and respawn them
        for i, player in pairs(Players:GetChildren()) do
            player.Team = PlayingTeam
            player:LoadCharacter()
        end

        GameStatus.Value = "First to ".. KillsToWin.Value .. " kills wins!"

    elseif value == false then
        -- change all players team and respawn them
        for i, player in pairs(Players:GetChildren()) do
            player.Team = LobbyTeam
            player:LoadCharacter()
        end

    end
end)
Now to get things started, let’s call the LobbyTimer function at the end of the script.
LobbyTimer()
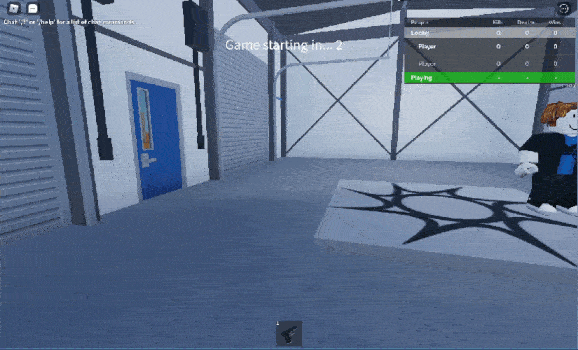
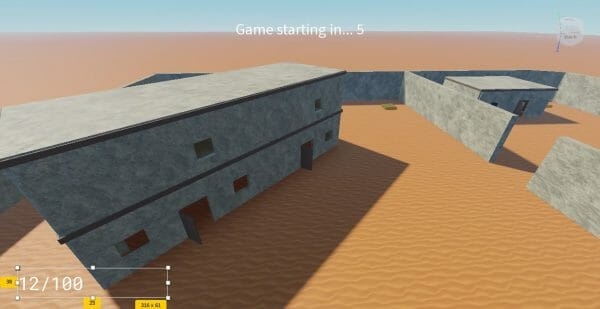
If you press play, you should spawn in the lobby and after 5 seconds spawn in the arena.
Game Status GUI
We’ve got the GameStatus string value setup and changing, but we can’t see what it’s saying in-game. So let’s create some GUI text.
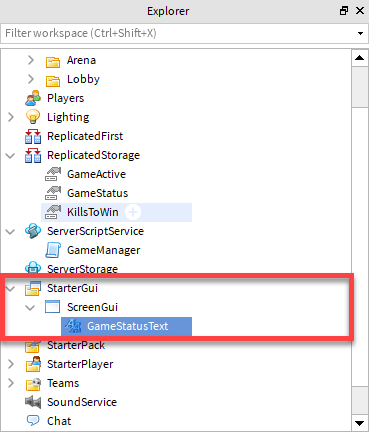
In the StarterGUI service, create a new ScreenGui and inside of that, create a TextLabel. Rename it to GameStatusText.
Let’s now move the text over to the top-center of the screen.
- Set the BackgroundTransparency to 1
- Set the TextColor3 to white
- Set the TextSize to 40

Then under the ScreenGui object, we need to create a new LocalScript. This is a script that runs only on the local player’s computer.
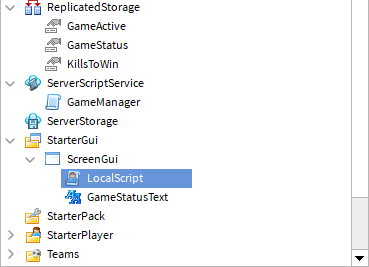
This script is just going to have two variables. One for the text object and the other for the GameActive value. Then we’ll change the text whenever the value of GameStatus has been changed.
local Text = script.Parent.GameStatusText
local GameStatus = game.ReplicatedStorage.GameStatus

GameStatus.Changed:Connect(function(value)
    Text.Text = GameStatus.Value
end)
Now if you press play, you should see the text counting down and when in the arena, displaying the kills to get.
First-Person Mode
Right now, you’ll notice that the player is still third-person. To fix this, select the StarterPlayer.
- Set the CameraMode to LockFirstPerson
- Set the CameraMaxZoomDistance to 0.5
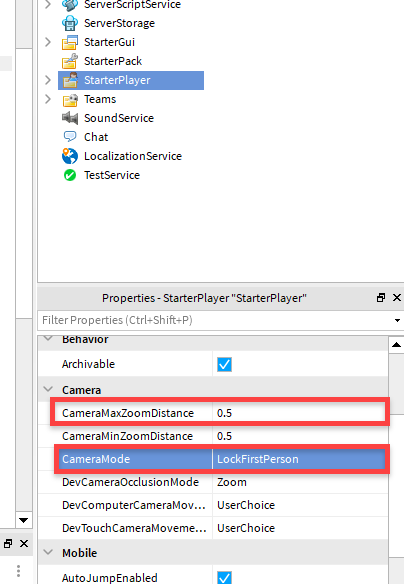
Pressing play, the camera should now be locked in first-person mode.
Creating the Gun
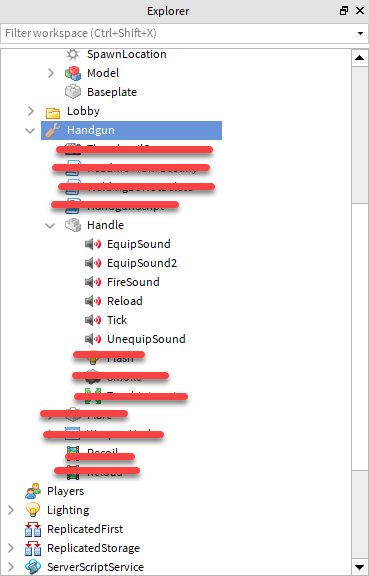
With our player setup, let’s create our gun. Over in the Toolbox, search for Handgun and we want to find the Working Handgun model. Here’s a link to the asset. Drag that into the game and open it up, we’re going to modify it a bit.
Delete all parts except for…
- The base Handgun tool.
- The Handle and its sounds.
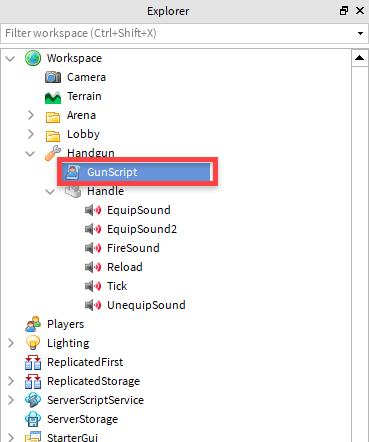
Now we can create a local script for the gun called GunScript.
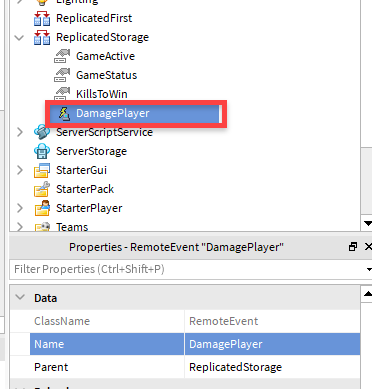
Before we write code, let’s go over to the ReplicatedStorage service and create a new RemoteEvent. A remote event can be used to communicate between the client and server. In our case, when the player shoots another player, we’ll be telling that to the server so they can damage them.
Now back to our gun script. Let’s start with some variables.
-- Parts
local weapon = script.Parent
local camera = workspace.CurrentCamera

-- Sound Effects
local shootSFX = weapon.Handle["FireSound"]
local reloadSFX = weapon.Handle["Reload"]

-- Replicated Storage
local replicatedStorage = game:GetService("ReplicatedStorage")
local damagePlayerEvent = replicatedStorage:WaitForChild("DamagePlayer")

-- Damage
local Damage = 25

-- Ammo
local CurMagAmmo = 12
local MagSize = 12
local ReserveAmmo = 48

local CanShoot = true
Next, we can create the Shoot function which gets called when we press the left mouse button.
function Shoot (mouse)

    -- play shoot sfx
    shootSFX:Play()

    local target = mouse.Target
    local humanoid = nil

    CurMagAmmo -= 1

    -- get the target HUMANOID
    if target.Parent:FindFirstChild("Humanoid") then
        humanoid = target.Parent:FindFirstChild("Humanoid")
    elseif target.Parent.Parent:FindFirstChild("Humanoid") then
        humanoid = target.Parent.Parent:FindFirstChild("Humanoid")
    end

    -- if we hit a player, damage them
    if humanoid then
        local hitPlayer = game.Players:GetPlayerFromCharacter(humanoid.Parent)
        damagePlayerEvent:FireServer(hitPlayer, Damage)
    end

end
The Reload function gets called when we need to reload our gun. Here’s what it does:
- Disable the ability to shoot.
- Play the reload sound and wait for it to finish.
- Enable the ability to shoot.
- Subtract from the reserve ammo.
- Set the current mag ammo.
function Reload ()

    CanShoot = false

    reloadSFX:Play()
    wait(reloadSFX.TimeLength)

    CanShoot = true

    local leftOverAmmo = CurMagAmmo

    if ReserveAmmo < MagSize then
        CurMagAmmo = ReserveAmmo
    else
        CurMagAmmo = MagSize
    end

    ReserveAmmo -= MagSize - leftOverAmmo

    if ReserveAmmo < 0 then
        ReserveAmmo = 0
    end

end
Alright, now how do we connect these functions to actual interactions? When we equip the gun, we’ll attach a new event that gets called when we press the left mouse button. When that happens, we’ll either shoot, reload or do nothing.
weapon.Equipped:Connect(function (mouse)
mouse.Button1Down:Connect(function()
if CanShoot == true then
if CurMagAmmo > 0 then
Shoot(mouse)
elseif ReserveAmmo > 0 then
Reload()
end
end
end)
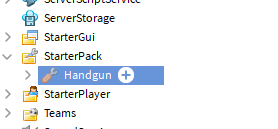
end)Now let’s test it out. But how do we give the player their gun? Well let’s drag it out of the Workspace and into the StarterPack. This is where we can give the players things when they join the game.
If you press play, you can test it out. After shooting 12 times, you should hear the reload sound.
Weapon Gui
In order to see our current ammo, we’ll need to create a gui. In the StarterGui, create a new ScreenGui object called AmmoGui and inside of that create a new TextLabel called AmmoText.
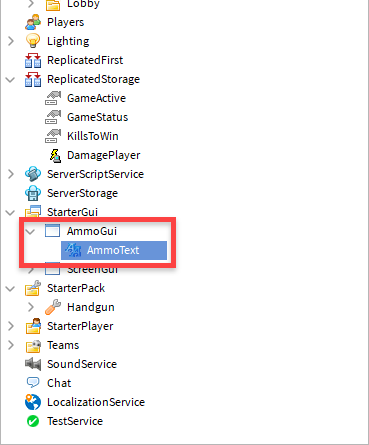
Position and setup the ammo text to look like this:
Now we’re not going to keep the gui inside of StarterGui. So let’s drag it over to ReplicatedStorage. This is because we need to clone and destroy it.
Back in the GunScript, let’s create two new variables.
local PlayerGui = game.Players.LocalPlayer:WaitForChild("PlayerGui")
local AmmoText = nil
PlayerGui is the container which holds all player gui at runtime. AmmoText is what we’ll assign when we create the gui.
Just below the variables, let’s create the UpdateAmmoText function. This will simply update the text to display the current ammo.
function UpdateAmmoText ()

    if AmmoText ~= nil then
        AmmoText.Text = CurMagAmmo .. "/" .. ReserveAmmo
    end

end
Down where we listen to the Equipped event, let’s add in code to create, assign and update the ammo text.
weapon.Equipped:Connect(function (mouse)

    -- NEW CODE STARTS HERE

    local guiClone = game.ReplicatedStorage.AmmoGui:Clone()
    guiClone.Parent = PlayerGui
    AmmoText = guiClone.AmmoText

    UpdateAmmoText()

    -- NEW CODE ENDS HERE

    mouse.Button1Down:Connect(function()

        if CanShoot == true then
            if CurMagAmmo > 0 then
                Shoot(mouse)
            elseif ReserveAmmo > 0 then
                Reload()
            end
        end
    end)
end)
Then we need to listen to when the weapon is unequipped and destroy the gui.
weapon.Unequipped:Connect(function()

    PlayerGui.AmmoGUI:Destroy()

end)
Finally, at the end of both the Shoot and Reload functions, we need to call the UpdateAmmoText function to update the text.
UpdateAmmoText()
Now you can press play and test it out!
Here’s the gun script as of this point in the tutorial:
-- Parts
local weapon = script.Parent
local camera = workspace.CurrentCamera

-- Sound Effects
local shootSFX = weapon.Handle["FireSound"]
local reloadSFX = weapon.Handle["Reload"]

-- Replicated Storage
local replicatedStorage = game:GetService("ReplicatedStorage")
local damagePlayerEvent = replicatedStorage:WaitForChild("DamagePlayer")

-- Damage
local Damage = 25

-- Ammo
local CurMagAmmo = 12
local MagSize = 12
local ReserveAmmo = 48

local CanShoot = true

local PlayerGui = game.Players.LocalPlayer:WaitForChild("PlayerGui")
local AmmoText = nil

function UpdateAmmoText ()

	if AmmoText ~= nil then
		AmmoText.Text = CurMagAmmo .. "/" .. ReserveAmmo
	end

end

function Shoot (mouse)

	-- play shoot sfx
	shootSFX:Play()

	local target = mouse.Target
	local humanoid = nil

	CurMagAmmo -= 1

	-- get the target HUMANOID
	if target.Parent:FindFirstChild("Humanoid") then
		humanoid = target.Parent:FindFirstChild("Humanoid")
	elseif target.Parent.Parent:FindFirstChild("Humanoid") then
		humanoid = target.Parent.Parent:FindFirstChild("Humanoid")
	end

	-- if we hit a player, damage them
	if humanoid then
		local hitPlayer = game.Players:GetPlayerFromCharacter(humanoid.Parent)
		damagePlayerEvent:FireServer(hitPlayer, Damage)
	end

	UpdateAmmoText()

end

function Reload ()

	CanShoot = false

	reloadSFX:Play()
	wait(reloadSFX.TimeLength)

	CanShoot = true

	local leftOverAmmo = CurMagAmmo

	if ReserveAmmo < MagSize then
		CurMagAmmo = ReserveAmmo
	else
		CurMagAmmo = MagSize
	end

	ReserveAmmo -= MagSize - leftOverAmmo

	if ReserveAmmo < 0 then
		ReserveAmmo = 0
	end

	UpdateAmmoText()

end

weapon.Equipped:Connect(function (mouse)

	local guiClone = game.ReplicatedStorage.AmmoGui:Clone()
	guiClone.Parent = PlayerGui
	AmmoText = guiClone.AmmoText

	UpdateAmmoText()

	mouse.Button1Down:Connect(function()

		if CanShoot == true then
			if CurMagAmmo > 0 then
				Shoot(mouse)
			elseif ReserveAmmo > 0 then
				Reload()
			end
		end
	end)
end)

weapon.Unequipped:Connect(function()

	PlayerGui.AmmoGUI:Destroy()

end)
Leaderstats
Let’s now create the leaderboard to display kills, deaths, and wins.
In the ServerScriptService, create a new script called Leaderboard.
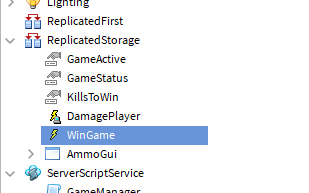
We also need to create what’s known as a BindableEvent inside of ReplicatedStorage. Call it WinGame.
A bindable event is like a remote event, but instead of being client-server or server-client, a bindable event is just server-server.
Now in our Leaderboard script, let’s begin with some variables.
local GameManager = game.ServerScriptService.GameManager
local KillsToWin = game.ReplicatedStorage.KillsToWin
local WinGameEvent = game.ReplicatedStorage.WinGame
Then when a new player is added to the game, we can listen for that.
-- create leaderstats when a new player is added
game.Players.PlayerAdded:Connect(function(player)

end)
Inside of this event, let’s create our leaderstats folder and make it a child of our new player.
local leaderstats = Instance.new("Folder")
leaderstats.Name = "leaderstats"
leaderstats.Parent = player
Then as a child of this leaderstats folder, we need to create values for the kills, deaths, wins and attacker (the player who is currently attacking us).
local kills = Instance.new("IntValue")
kills.Name = "Kills"
kills.Value = 0
kills.Parent = leaderstats

local deaths = Instance.new("IntValue")
deaths.Name = "Deaths"
deaths.Value = 0
deaths.Parent = leaderstats

local wins = Instance.new("IntValue")
wins.Name = "Wins"
wins.Value = 0
wins.Parent = leaderstats

local attacker = Instance.new("ObjectValue")
attacker.Name = "Attacker"
attacker.Value = nil
attacker.Parent = player
Next, we need a way of changing these values when a player is killed. Add this code just under where we created our values but still inside of the player added event.
-- change leaderstats when a player dies
player.CharacterAdded:Connect(function(character)
    character:WaitForChild("Humanoid").Died:Connect(function()
        player.leaderstats.Deaths.Value += 1

        -- increase the killer's kills
        if player.Attacker.Value then
            local killer = player.Attacker.Value
            killer.leaderstats.Kills.Value += 1

            -- if the killer has enough kills, they win!
            if killer.leaderstats.Kills.Value == KillsToWin.Value then
                WinGameEvent:Fire(player.Attacker.Value)
            end
        end
    end)
end)
What are we doing here?
- When a player dies, increase their Deaths value by 1.
- Increase their Attacker kills by 1.
- If the Attacker has the KillsToWin call the win game event with the attacker as the parameter value.
Now if we press play, you should see the leaderboard at the top-right.
Damaging Players
We’ve already got the DamagePlayer remote event setup and calling in the gun script. Now we need to create a new script inside of ServerScriptService called PlayerDamageManager.
First, let’s get our variables. The replicated storage and damage event.
local replicatedStorage = game:GetService("ReplicatedStorage")
local damagePlayerEvent = replicatedStorage:WaitForChild("DamagePlayer")
Then we can listen to when the event has been called on the server. It will send over three values. The attacker, hit player and damage.
damagePlayerEvent.OnServerEvent:Connect(function(attacker, hitPlayer, damage)
    hitPlayer.Attacker.Value = attacker
    hitPlayer.Character.Humanoid:TakeDamage(damage)
end)
We can test this out with multiple players by going to the Test tab, setting the player number and clicking Start.

You should be able to shoot and kill other players. You can always increase the lobby wait time in the GameManager if the clients aren’t all in the arena.
Winning the Game
Let’s go over to the GameManager script. Here, let’s first set the player’s initial team to Lobby once they join the game.
-- called when a player joins the game
Players.PlayerAdded:Connect(function(player)
    player.Team = LobbyTeam
end)
Next, we need to create a variable to reference the win game remote event.
local WinGameEvent = game.ReplicatedStorage.WinGame
Now let’s also listen to the WinGame remote event. This gets called once a player reaches a certain amount of kills.
WinGameEvent.Event:Connect(function(winner)
    -- increase the winner's wins stat
    winner.leaderstats.Wins.Value += 1

    GameActive.Value = false
end)
This will increase the winner’s Wins and set GameActive to false. This will teleport players back to the lobby.
Conclusion
Congratulations on completing the tutorial! We just finished creating a Roblox FPS game from scratch – and learned quite a lot while doing so. We covered setting up a lobby and arena, how to make an FPS camera in Roblox, and even made a multiplayer-friendly leaderboard so every player can see where they stand.
From here, though, you can expand upon this game and skills in a lot of ways. For this project, you could strive to add new mechanics such as health packs, ammo packs, different weapons, etc. Or, if you want to try your hand at something, you can try making a first-person survival game. The sky is the limit with the systems set up here and they can easily be used for other games and genres!
Thank you very much for following along, and I wish you the best of luck with your future Roblox games.