In Part 3 of this tutorial series, we continued working on our Express server. We did the following:
- Updated our endpoints to store, retrieve, and update data in MongoDB.
- Used passportjs to add authentication to our endpoints.
In Part 4 of this tutorial series, we will start working on our client side code by adding a login page along with the code for our Phaser game.
If you didn’t complete Part 3 and would like to continue from here, you can find the code for it here.
You can download all of the files associated with the source code for Part 4 here.
Let’s get started!
Login Page
With most of our API logic in place, we will now focus on adding the client side code to our game. For all of our client side code, we will have our current express server serve the static files. To do this, open app.js and add the following code below the `require(‘./auth/auth’);` line:
app.use(express.static(__dirname + '/public'));

app.get('/', function (req, res) {
  res.sendFile(__dirname + '/index.html');
});
In the code above, we told express to use the express.static middleware to serve static files from the public folder. Then, we setup a new route for the root path, and for this route, we return an HTML page.
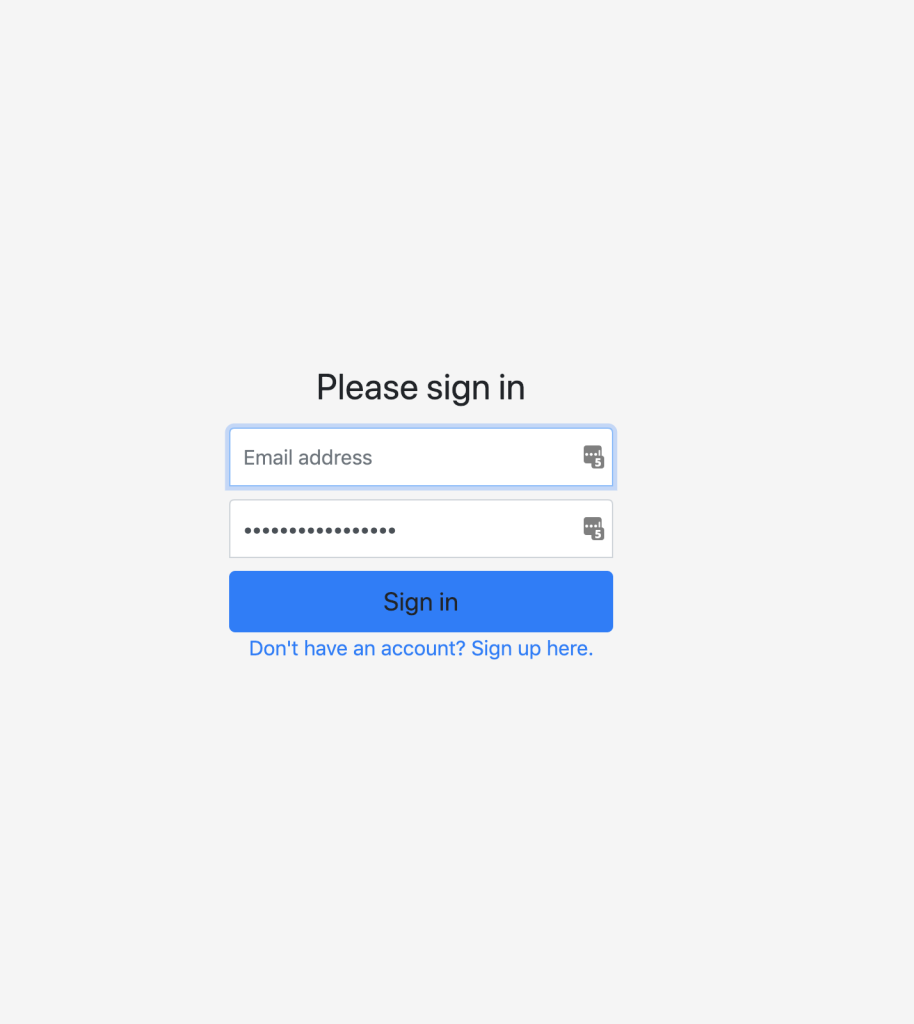
Next, we will create the login page. For our login page, we will create a simple form for logging in and we will use bootstrap to quickly style our page. To do this, create a new folder at the root of our project called public. Then, in the public folder create a new file called index.html and add the following code to the file:
<!doctype html>
<html lang="en">

<head>
  <meta charset="utf-8">
  <meta name="viewport" content="width=device-width, initial-scale=1, shrink-to-fit=no">
  <title>Login Page</title>
  <link rel="stylesheet" href="https://stackpath.bootstrapcdn.com/bootstrap/4.3.1/css/bootstrap.min.css" integrity="sha384-ggOyR0iXCbMQv3Xipma34MD+dH/1fQ784/j6cY/iJTQUOhcWr7x9JvoRxT2MZw1T" crossorigin="anonymous">
  <link href="assets/css/main.css" rel="stylesheet">
  <script src="https://ajax.googleapis.com/ajax/libs/jquery/3.3.1/jquery.min.js"></script>
</head>

<body class="text-center">
  <form class="form-signin">
    <h1 class="h3 mb-3 font-weight-normal">Please sign in</h1>
    <label for="email" class="sr-only">Email address</label>
    <input type="email" id="email" class="form-control" placeholder="Email address" required autofocus>
    <label for="password" class="sr-only">Password</label>
    <input type="password" id="password" class="form-control" placeholder="Password" required>
    <a class="btn btn-lg btn-primary btn-block" onClick="signIn()">Sign in</a>
    <a href="/signup.html">Don't have an account? Sign up here.</a>
  </form>
  <script>
    function signIn() {
      var data = {
        email: document.forms[0].elements[0].value,
        password: document.forms[0].elements[1].value
      };
      $.ajax({
        type: 'POST',
        url: '/login',
        data,
        success: function (data) {
          window.location.replace('/game.html');
        },
        error: function (xhr) {
          window.alert(JSON.stringify(xhr));
          window.location.replace('/index.html');
        }
      });
    }
  </script>
</body>

</html>
Let’s review the code we just added:
- We created a new HTML page and we loaded in some additional libraries that will be used. These libraries include bootstrap and jquery.
- In the body section, we created a new form with a
usernameandpasswordfield. Also, in the form, we added a sign-in link that looks like a button. When that button is clicked, it will trigger a new function calledsignIn. - At the bottom of the form, we include a link to a signup page that we will create next.
- Finally, we created the
signInfunction that will pull the username and password values from the form, and then send those values in a POST request to theloginendpoint we created in the previous tutorials. If the request is successful, we redirect the user to the game page, and if the request was not successful we alert the user and reload the page.
Next, in the public folder create a new folder called assets. In the new assets folder, create two new folders: js and css. Then, in the new css folder create a new file called main.css, and in this file add the following code:
html,
body {
  height: 100%;
}

body {
  display: -ms-flexbox;
  display: -webkit-box;
  display: flex;
  -ms-flex-align: center;
  -ms-flex-pack: center;
  -webkit-box-align: center;
  align-items: center;
  -webkit-box-pack: center;
  justify-content: center;
  padding-top: 40px;
  padding-bottom: 40px;
  background-color: #f5f5f5;
}

.form-signin {
  width: 100%;
  max-width: 330px;
  padding: 15px;
  margin: 0 auto;
}
.form-signin .checkbox {
  font-weight: 400;
}
.form-signin .form-control {
  position: relative;
  box-sizing: border-box;
  height: auto;
  padding: 10px;
  font-size: 16px;
}
.form-signin .form-control:focus {
  z-index: 2;
}
.form-signin input {
  margin-bottom: 10px;
  border-bottom-right-radius: 0;
  border-bottom-left-radius: 0;
}
With the CSS file created, you can now test the new login page. To do this, save your code changes and then start your server. Once the server is running, navigate to the following URL in your browser: http://localhost:3000/. You should see the login form, and if you log in with the user credentials you created earlier you should get redirected to the game.html page.
Sign Up Page
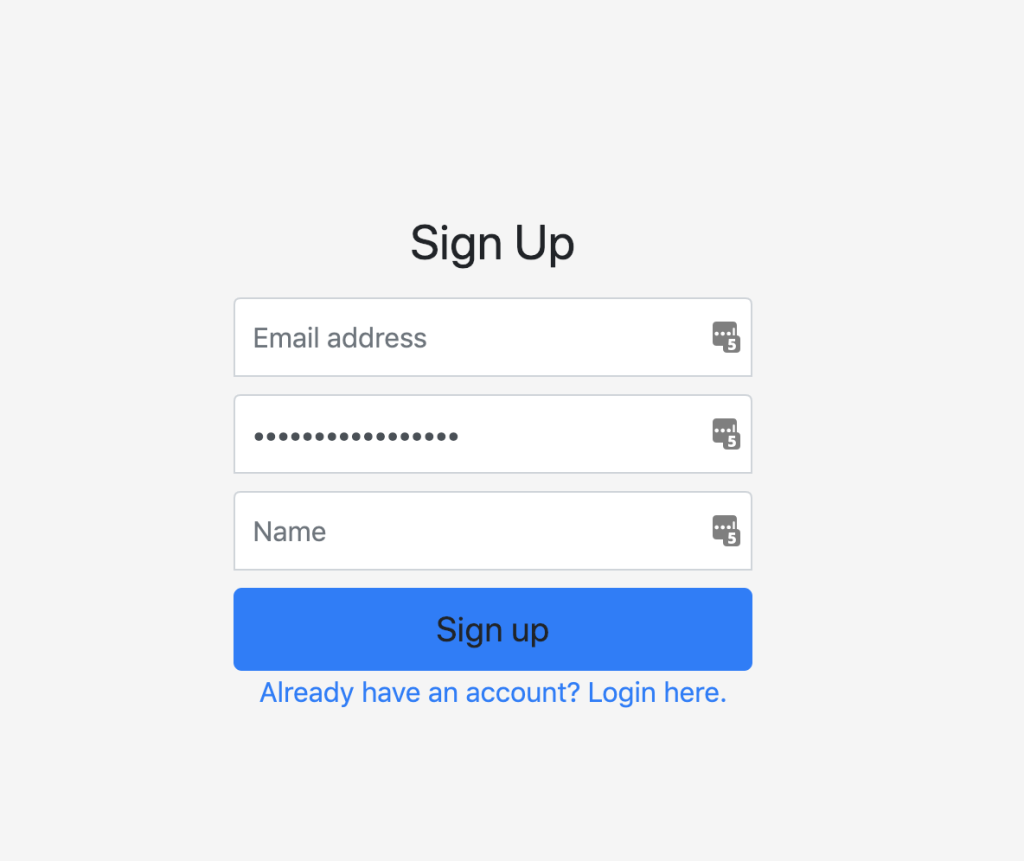
With the login page working, we will now start working on the sign-up page. For the sign-up page, we will re-use the code from the login page and add in a new field for the user’s name. To do this, in the public folder create a new file called signup.html and in this file add the following code:
<!doctype html>
<html lang="en">

<head>
  <meta charset="utf-8">
  <meta name="viewport" content="width=device-width, initial-scale=1, shrink-to-fit=no">
  <title>Sign Up Page</title>
  <link rel="stylesheet" href="https://stackpath.bootstrapcdn.com/bootstrap/4.3.1/css/bootstrap.min.css" integrity="sha384-ggOyR0iXCbMQv3Xipma34MD+dH/1fQ784/j6cY/iJTQUOhcWr7x9JvoRxT2MZw1T"
    crossorigin="anonymous">
  <link href="assets/css/main.css" rel="stylesheet">
  <script src="https://ajax.googleapis.com/ajax/libs/jquery/3.3.1/jquery.min.js"></script>
</head>

<body class="text-center">
  <form class="form-signin">
    <h1 class="h3 mb-3 font-weight-normal">Sign Up</h1>
    <label for="email" class="sr-only">Email address</label>
    <input type="email" id="email" class="form-control" placeholder="Email address" required autofocus>
    <label for="password" class="sr-only">Password</label>
    <input type="password" id="password" class="form-control" placeholder="Password" required>
    <label for="name" class="sr-only">Name</label>
    <input type="text" id="name" class="form-control" placeholder="Name" required>
    <a class="btn btn-lg btn-primary btn-block" onClick="signUp()">Sign up</a>
    <a href="/index.html">Already have an account? Login here.</a>
  </form>
  <script>
    function signUp() {
      var data = {
        email: document.forms[0].elements[0].value,
        password: document.forms[0].elements[1].value,
        name: document.forms[0].elements[2].value
      };
      $.ajax({
        type: 'POST',
        url: '/signup',
        data,
        success: function (data) {
          window.alert('user created successfully');
          window.location.replace('/index.html');
        },
        error: function (xhr) {
          window.alert(JSON.stringify(xhr));
          window.location.replace('/signup.html');
        }
      });
    }
  </script>
</body>

</html>
This code should look familiar to the code we added in the login page. A few things to note are:
- We added a new field for the user’s name, and when the user clicks on the sign-up link the
signUpfunction will be called. - In the
signUpfunction, we pull the forms values and send them as a POST request to thesignupendpoint we created in a previous tutorial. - If the request is successful, we let the user know and redirect them to the login page.
- If the request is not successful, we let the user know and reload the sign-up page.
If you save your code changes and visit the following URL: http://localhost:3000/signup.html, you should see the new sign up page. If you fill out the form and submit it, you should get the success message and you should be able to log in as that user.
Game Page
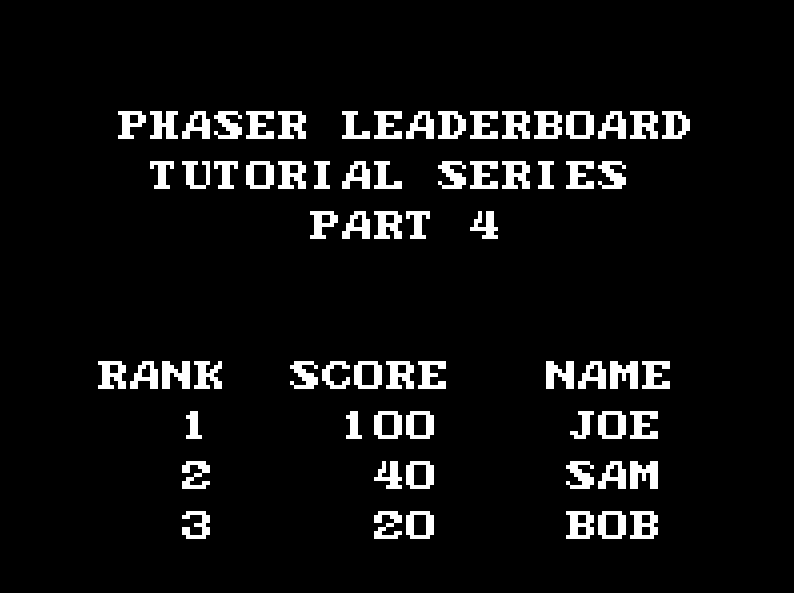
With the sign-up page working, the last page we need to work on is the game page. The game page will contain all of the logic for our Phaser game, and it will also contain the logic for refreshing the jwt token. The Phaser game instance will be a simple game that displays a leaderboard, and this leaderboard will display the names and scores that are pulled from our database.
To do this, create a file in the public folder called game.html. In game.html, add the following code:
<!doctype html>
<html lang="en">

<head>
  <meta charset="utf-8">
  <title>Leaderboard</title>
  <script src="https://ajax.googleapis.com/ajax/libs/jquery/3.3.1/jquery.min.js"></script>
  <script src="//cdn.jsdelivr.net/npm/[email protected]/dist/phaser.min.js"></script>
</head>

<body>
  <script src="assets/js/refreshToken.js"></script>
  <script src="assets/js/game.js"></script>
</body>

</html>
In the code above, we created a simple HTML page and we include the phaser.min.js file from the cdn. We then included two js files which will be created next: refreshToken.js and game.js. refreshToken.js will include all of the logic for getting the refresh token from the cookie and sending the POST request to get the new token. game.js will include all of the logic for our Phaser game instance.
Next, we will add the logic for refreshing the JWT. To do this, create a new file in the public/assets/js folder called refreshToken.js. In refreshToken.js, add the following code:
function getCookie(cname) {
  var name = cname + "=";
  var decodedCookie = decodeURIComponent(document.cookie);
  var ca = decodedCookie.split(';');
  for(var i = 0; i <ca.length; i++) {
    var c = ca[i];
    while (c.charAt(0) == ' ') {
      c = c.substring(1);
    }
    if (c.indexOf(name) == 0) {
      return c.substring(name.length, c.length);
    }
  }
  return "";
}

setInterval(function() {
  $.ajax({
    type: 'POST',
    url: '/token',
    data: {
      refreshToken: getCookie('refreshJwt')
    },
    success: function(data) {},
    error: function(xhr) {
      window.alert(JSON.stringify(xhr));
      window.location.replace('/index.html');
    }
  });
}, 10000);
In the code above, we created a new function called getCookie that accepts the name of a cookie as a parameter, and it will return the value of that cookie if it is found. We then created a new interval for calling the token endpoint we created every ten seconds.
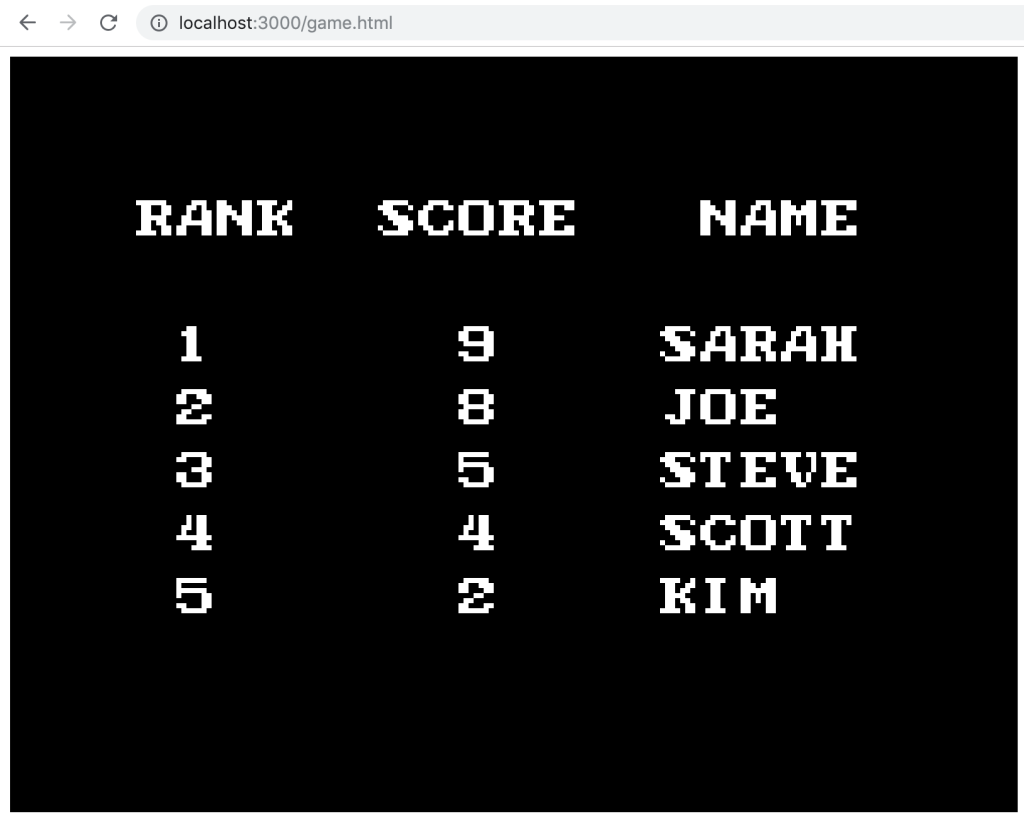
Now, we just need to add the logic for our Phaser game instance. For the purpose of this tutorial, we will just show a simple leaderboard in our Phaser game instance and there will be no actual gameplay. For the leaderboard, we will be modifying the example code that is provided in the Phaser Labs here: Retro Leaderboard Example. If you are not familiar with Phaser Labs, it is a fantastic site that contains a large number of Phaser 3 examples.
To create the Phaser game instance, create a new file in the public/assets/js folder called game.js. Then, in game.js add the following code:
let game, scores;

class Highscore extends Phaser.Scene {

  constructor() {
    super({
      key: 'Highscore',
      active: true
    });

    this.scores = [];
  }

  preload() {
    this.load.bitmapFont('arcade', 'assets/arcade.png', 'assets/arcade.xml');
  }

  create() {
    this.add.bitmapText(100, 110, 'arcade', 'RANK  SCORE   NAME').setTint(0xffffff);

    for (let i = 1; i < 6; i++) {
      if (scores[i-1]) {
        this.add.bitmapText(100, 160 + 50 * i, 'arcade', ` ${i}      ${scores[i-1].highScore}    ${scores[i-1].name}`).setTint(0xffffff);
      } else {
        this.add.bitmapText(100, 160 + 50 * i, 'arcade', ` ${i}      0    ---`).setTint(0xffffff);
      }
    }
  }
}

let config = {
  type: Phaser.AUTO,
  parent: 'phaser-example',
  width: 800,
  height: 600,
  pixelArt: true,
  scene: [Highscore]
};

$.ajax({
  type: 'GET',
  url: '/scores',
  success: function(data) {
    game = new Phaser.Game(config);
    scores = data;
  },
  error: function(xhr) {
    console.log(xhr);
  }
});
Let’s review the code we just added:
- First, we created two new variables:
gameandscores.gamewill be set to the Phase Game instance that will be created.scoreswill be the array of score values that is returned from the/scoresendpoint. - We then created a new class called `Highscore` that extends the `Phaser.Scene` class.
- Next, in the
preloadmethod, we loaded in a new bitmap font, and then in thecreatemethod, we added new bitmap text to the scene. This bitmap text will serve has the header row of the leaderboard. - Then, we loop through the
scoresarray and add a new bitmap text row to the leaderboard. This row includes the user’s name and high score. If there are less than five scores in the database, then we add a placeholder row to the leaderboard. - Finally, we created the Phaser config object and then used
ajaxto send aGETrequest to the/scoresendpoint. Once we get a success response from the endpoint, we then store the results into thescorevariable and create the Phaser Game instance.
Now, we just need to add in the assets for the bitmap font, and then we can test the new game page. You can find the assets for the bitmap font here. Once you have downloaded the zip folder, unzip the folder and place the two files in the public/assets folder.
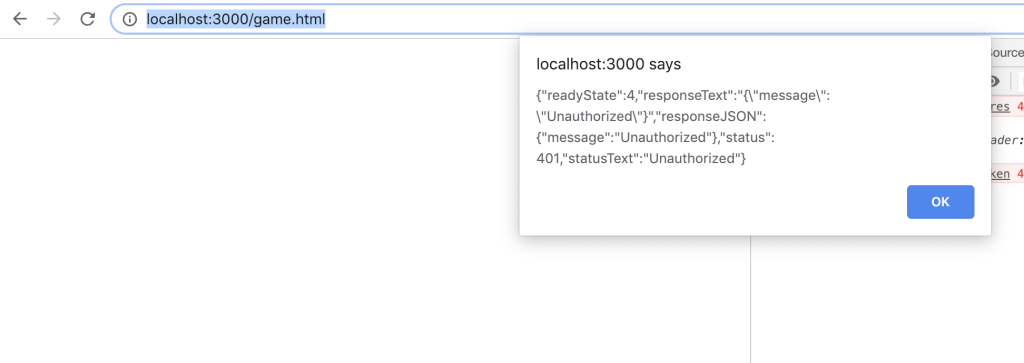
If you save your code changes and visit the following URL in your browser: http://localhost:3000/game.html, you should see an empty page and after a few seconds, you should get a message about you not being authorized.
If you click the ok button, you will be taken back to the login page. If you enter your credentials and click the sign in button, you should be taken to the game page and you should see the new leaderboard.
Now, if you create a few more users, use the /submit-score endpoint to update the score of a user, or use the MongoDB Atlas UI to modify the user data, you can refresh the game page and you should see those changes reflected in the leaderboard.
The last thing we need to do with the game page is we need to add the authentication middleware to this route on our server. Even though when the user is not authenticated, and they visit the game page they are being redirected, we should also add protection to this route on our server.
To do this, open app.js and add the following code above the `app.use(express.static(__dirname + ‘/public’));` line:
app.get('/game.html', passport.authenticate('jwt', { session : false }), function (req, res) {
  res.sendFile(__dirname + '/public/game.html');
});
Now, if you save your code changes, restart your server, and visit the game page you should get an `Unauthorized` message and the client side HTML page is never rendered.
Conclusion
With the leaderboard now functional, that brings Part 4 of this tutorial series to an end. In the fifth and final part, we will wrap things up by adding in the logic for allowing a user to reset their password.
I hope you enjoyed this tutorial and found it helpful. If you have any questions, or suggestions on what we should cover next, please let us know in the comments below.
