In this post we’re going to learn how to use the Android notification system. Android notifications have evolved from the standard one-liner with an app icon to having actions, showing images, and expanding to show more information. Notifications are a critical part of the user experience. Instead of the user having to check your app for updates, your app will save the user the time and effort by notifying the user about important things. We’re going to learn how to use the notification system as well as the variety of styles that notifications come in.
You can download the source code for this post here.
Let’s get started! Create a new Android Studio project called NotificationDemo with Android 6.0. We just need an empty Activity with the default naming conventions. In addition to this primary Activity, we also need to create a second Activity so that the user will be directed to that when they tap on the notification. Android Studio has a shortcut that will allow us to create an Activity and corresponding XML layout file. Right-click on the primary package and select New->Android Activity-> Empty Activity. Then enter ResultActivity for the name of our new Activity. Android Studio will now create the corresponding Java and XML file.
Regarding the view of this Activity, we want to keep this simple by just having a large TextView centered on the screen so that we know our notification directed us to the appropriate Activity. Change the XML of ResultActivity to be the following:
<?xml version="1.0" encoding="utf-8"?>
<RelativeLayout xmlns:android="http://schemas.android.com/apk/res/android"
    xmlns:tools="http://schemas.android.com/tools"
    android:layout_width="match_parent"
    android:layout_height="match_parent"
    android:paddingBottom="@dimen/activity_vertical_margin"
    android:paddingLeft="@dimen/activity_horizontal_margin"
    android:paddingRight="@dimen/activity_horizontal_margin"
    android:paddingTop="@dimen/activity_vertical_margin"
    tools:context="com.deshpande.notificationdemo.ResultActivity">

    <TextView
        android:layout_width="wrap_content"
        android:layout_height="wrap_content"
        android:textAppearance="?android:attr/textAppearanceLarge"
        android:text="Notification Worked"
        android:id="@+id/textView"
        android:layout_centerVertical="true"
        android:layout_centerHorizontal="true" />
</RelativeLayout>
Now that we’ve done that, we need to consider the view that will actually launch the notification that will get us to this Activity. In our case, since we just need to generate a notification, let’s have a simple button that will launch a notification when it is clicked. The XML layout file of MainActivity should now look like the following:
<?xml version="1.0" encoding="utf-8"?>
<RelativeLayout xmlns:android="http://schemas.android.com/apk/res/android"
    xmlns:tools="http://schemas.android.com/tools"
    android:layout_width="match_parent"
    android:layout_height="match_parent"
    android:paddingBottom="@dimen/activity_vertical_margin"
    android:paddingLeft="@dimen/activity_horizontal_margin"
    android:paddingRight="@dimen/activity_horizontal_margin"
    android:paddingTop="@dimen/activity_vertical_margin"
    tools:context="com.deshpande.notificationdemo.MainActivity">

    <Button
        android:layout_width="wrap_content"
        android:layout_height="wrap_content"
        android:text="Click Me!"
        android:id="@+id/button"
        android:layout_centerVertical="true"
        android:layout_centerHorizontal="true"
        android:onClick="createNotification" />
</RelativeLayout>
We’ve centered the Button on the screen and already assigned it a method to be called when the button is clicked. All of our notification content is going to go into that single method. Let’s open up MainActivity and add the method below onCreate(…) as public void createNotification(View view). The reason we need that one View parameter is because that’s a part of the method signature required for our Button’s onClick attribute.
Now we can get started building the notification. First of all, the process of creating a notification follows the Builder design pattern. With this pattern, the only way to create a Notification object is to use the public inner class Notification.Builder. Then we can customize our notification, call build(), and our Notification object is created and ready to hand off to the system to post. Each setter method of the Builder also returns a Builder with that property set. This means that we can chain together the setters like the following:
        NotificationCompat.Builder builder = new NotificationCompat.Builder(this)
                .setSmallIcon(android.R.drawable.ic_dialog_alert)
                .setContentTitle("Notification!")
                .setContentText("This is my first notification!");
Make sure to import the v4 NotificationCompat class, not the v7! The only argument the Builder requires is the Context. Note that on the left gutter of Android Studio’s main text pane, we can see a tiny thumbnail of the drawable icon. This gives us an idea of what the icon is going to look like.
After we’ve created this preliminary Builder object, we can then consider changing the style. You might have noticed that when you have multiple unread emails, the notification looks like a miniature ListView. This is the NotificationCompat.InboxStyle. If you get a notification with a single email, the notification becomes expandable and we can actually read the first few lines of the email. This is the NotificationCompat.BigTextStyle. Finally, when you take a screenshot, there’s always a follow-up notification that can be expanded into a picture of the screenshot. This is the NotificationCompat.BigPictureStyle. In fact, we can create our own custom styles by extending the NotificationCompat.Style abstract class.
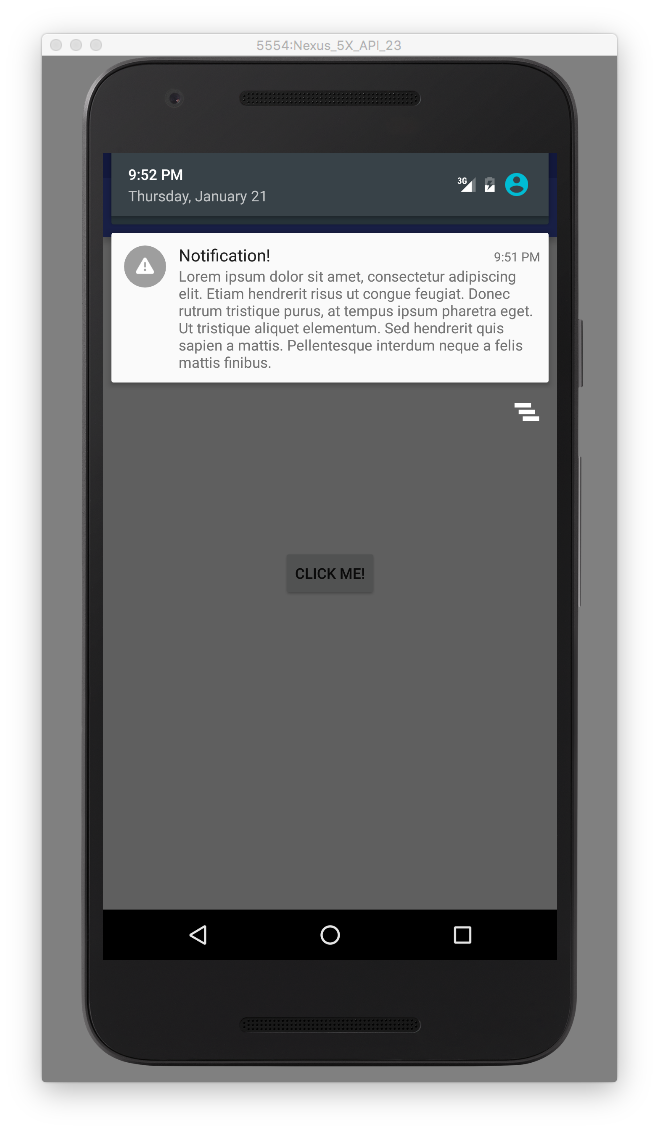
For our purposes, we’re going to look at the BigTextStyle. Using styles is very straightforward. We just create a BigTextStyle object and call bigText(…) on it to set the expanded content of the notification. In our case, we’re going to use a Lorem Ipsum generator so that we can generate some phony text to see how the notification is going to work. Finally, we need to set our builder object’s style to be the one we just created. All of this looks like the following in code:
NotificationCompat.BigTextStyle bigText = new NotificationCompat.BigTextStyle();
bigText.bigText("Lorem ipsum dolor sit amet, consectetur adipiscing elit. " +
        "Etiam hendrerit risus ut congue feugiat. Donec rutrum tristique purus, at tempus ipsum pharetra eget. " +
        "Ut tristique aliquet elementum. Sed hendrerit quis sapien a mattis. " +
        "Pellentesque interdum neque a felis mattis finibus. ");

builder.setStyle(bigText);
Now that we’ve done this, we need to handle what happens when the user clicks on the notification. We can use the Intent system to launch an Activity. However, we need to wrap that Intent inside another kind of special Intent called a PendingIntent. By wrapping our Intent around a PendingIntent and passing that to the system, it becomes the systems responsibility to call the Intent when the notification is called. A PendingIntent is just what the name implies: it’s an Intent that has yet to be used. After we create this PendingIntent, we then tell our builder to use it. This is represented in code by the following:
Intent resultIntent = new Intent(this, ResultActivity.class);
PendingIntent pendingIntent = PendingIntent.getActivity(this, 0, resultIntent, PendingIntent.FLAG_UPDATE_CURRENT);
builder.setContentIntent(pendingIntent);
Notice that we don’t really care about the request code since this is the only PendingIntent our app launches. In addition, the last parameter of the getActivity(…) method is any flags we want to give to this PendingIntent. In our case, we’re telling the system not to push out a new notification if any information changes, but to update this current one. This prevents the user from receiving a hundred notifications from our app!
Finally, we can build this Notification. We also want to set an additional flag so that the notification is dismissed when the user taps on it. We can do this by building our notification and setting the flags on the built notification as follows:
Notification notification = builder.build();
notification.flags = Notification.FLAG_AUTO_CANCEL;
Now that we’ve finally built our notification, we can send it off to the system! We need to get a backwards-compatible reference to the system’s notification manager and simply call notify(…) with our notification object.
NotificationManagerCompat notificationManager = NotificationManagerCompat.from(this);
notificationManager.notify(0, notification);
Notice how we simply set the ID of the notification to be some arbitrary integer. However, if we wanted to cancel our notification programmatically for some reason, then we would need to keep track of the ID.
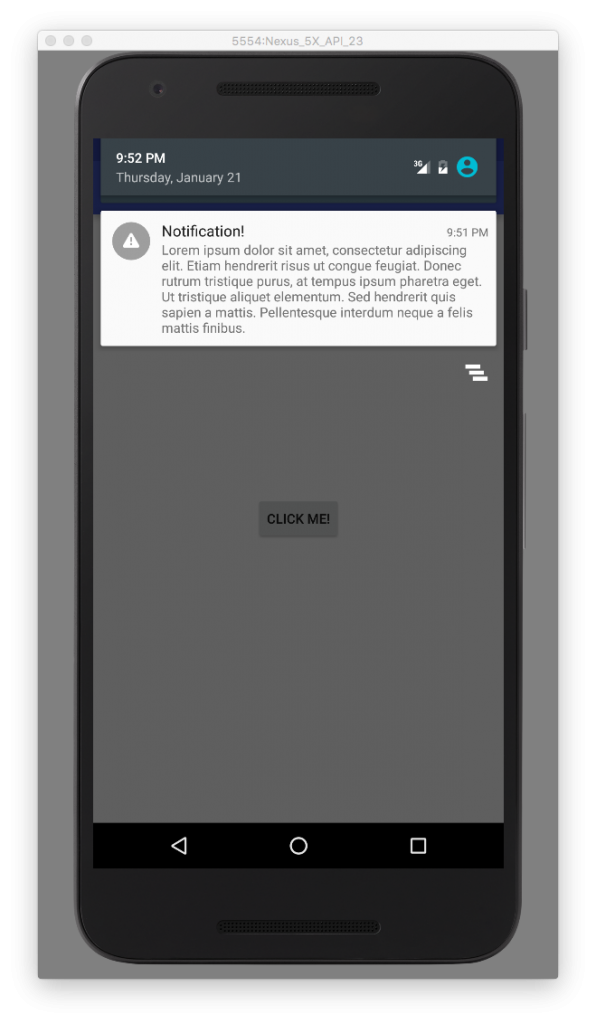
And that’s all it takes to create a highly-customizable notification! We can see the various stages of the notification in the screenshots below!
In this post, we learned how to create and customize a notification that can be sent programmatically. We learned about how the notification system uses the Builder pattern to create Notification objects. We also covered the three styles of notifications: InboxStyle, BigTextStyle, and BigPictureStyle. In addition to that, we learned what PendingIntents are and their uses. Finally, we saw how to formally post the notification to the Android systems. Notifications are a key part of an app’s interact with the user. A word of warning: only make notifications if it makes sense for your app to do so. Nothing is more annoying than receiving random notifications from a calculator app! Be smart about your notifications!


