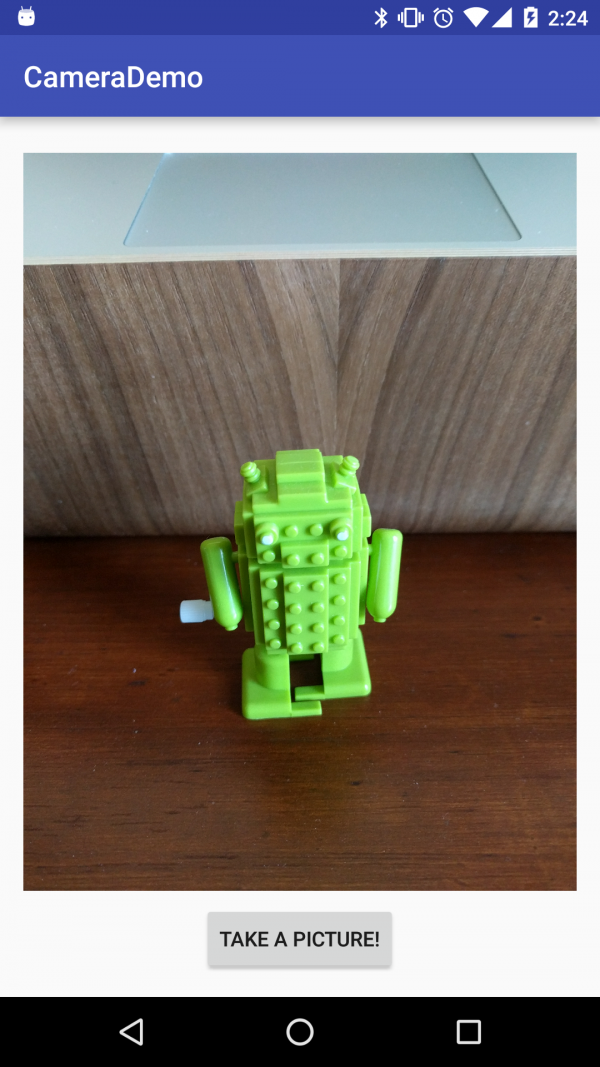
In this post, we’re going to learn how we can access the camera and use it to take a picture. Grabbing data from the camera can be a bit tricky, especially when dealing with the Android filesystem so we’ll be covering how to create an image file for the photo and extracting that image back into the ImageView. In this post, we’re going to create an app that will take a photo and display that photo in an ImageView.
Download the full source code here.
Let’s get started right away and create a new Android project called CameraDemo with Android 6.0. We’ll just need to create a blank activity and leave the defaults as is. The first thing we’ll need to do is to define the appropriate permissions in our AndroidManifest.xml. So open that up and add the following lines before the application tag.
<uses-permission-sdk-23 android:name="android.permission.CAMERA" />
<uses-permission-sdk-23 android:name="android.permission.WRITE_EXTERNAL_STORAGE" />
We’ll obviously need the camera permission, but we’ll also need the permission to write this image to the device’s public storage, so even if our application is uninstalled, the photos that users took with it will still remain on the device. Next we’ll need to define our layout so open activity_main.xml and substitute the following text (replacing tools:context with your respective MainActivity).
<?xml version="1.0" encoding="utf-8"?>
<RelativeLayout xmlns:android="http://schemas.android.com/apk/res/android"
    xmlns:tools="http://schemas.android.com/tools"
    android:layout_width="match_parent"
    android:layout_height="match_parent"
    android:paddingBottom="@dimen/activity_vertical_margin"
    android:paddingLeft="@dimen/activity_horizontal_margin"
    android:paddingRight="@dimen/activity_horizontal_margin"
    android:paddingTop="@dimen/activity_vertical_margin"
    tools:context="com.deshpande.camerademo.MainActivity">


    <ImageView
        android:id="@+id/imageview"
        android:layout_width="wrap_content"
        android:layout_height="wrap_content"
        android:layout_centerHorizontal="true"
        android:layout_above="@+id/button_image"/>

        <Button
            android:id="@+id/button_image"
            android:layout_width="wrap_content"
            android:layout_height="48dp"
            android:layout_alignParentBottom="true"
            android:layout_centerHorizontal="true"
            android:onClick="takePicture"
            android:text="Take a picture!"/>

</RelativeLayout>
We’re defining the ImageView that will store our resulting image. We also want to center that and make sure it’s above the Button. Speaking of the Button, we’re giving it a height of 48dp so that it conforms with Material Design (for more information on Material Design, read this post). We want to anchor this view to the bottom of the screen and center it as well. Notice that we give it a method name for the onClick event that we’ll later define. Finally, we give it some text.
Now that we’ve completed our view, we’ll need to handle the permissions. But what if the user doesn’t want to give us permission to access the camera or external storage? Instead of closing the app, we can actually disable the Button that allows the user to take a picture. Then after the user has given us permission to access those systems, we can re-enable the Button. In order to do this however, we need to declare the Button as a field and set it in onCreate(…) before we check out permissions. If we don’t have the appropriate permissions, we disable the button until we do. We also need the ImageView to populate so we can do that as well in a similar fashion to the following.
private Button takePictureButton;
private ImageView imageView;

@Override
protected void onCreate(Bundle savedInstanceState) {
    super.onCreate(savedInstanceState);
    setContentView(R.layout.activity_main);

    takePictureButton = (Button) findViewById(R.id.button_image);
    imageView = (ImageView) findViewById(R.id.imageview);

    if (ContextCompat.checkSelfPermission(this, Manifest.permission.CAMERA) != PackageManager.PERMISSION_GRANTED) {
        takePictureButton.setEnabled(false);
        ActivityCompat.requestPermissions(this, new String[] { Manifest.permission.CAMERA, Manifest.permission.WRITE_EXTERNAL_STORAGE }, 0);
    }
}
We can save some checking by only determining whether or not we have the camera permission since the only reason we need the external storage permission is to save images from the camera. So we can add both permissions to the String array. To save some space, we’re also simply using 0 as the request code since we’re only calling requestPermissions(…) once in our app. If the user accepts our terms, then we simply re-enable the button like the following.
@Override
public void onRequestPermissionsResult(int requestCode, String[] permissions, int[] grantResults) {
    if (requestCode == 0) {
        if (grantResults.length > 0 && grantResults[0] == PackageManager.PERMISSION_GRANTED
                && grantResults[1] == PackageManager.PERMISSION_GRANTED) {
            takePictureButton.setEnabled(true);
        }
    }
}
Next, we’re going to implement the onClick attribute of the button. We’ll be using the system’s Intent for taking pictures so we don’t have to implement our own functionality of taking pictures. Since we also need a result, we call startActivityForResult(…) and not just startActivity(…) . We also need a file that we’re saving the image to. This will have to be defined as a member variable at the top of our class for reasons we’ll see in just a second. For now, we’re assuming that there’s a method called getOutputMediaFile() that does this for us. We’ll implement it later in this post. We also need to make this file Uri a field in our class instead of a local variable in the method since Intents fully support having Uris as extras and for another reason we’ll see in the implementation of that method. Now we can just call startActivityForResult(…) . As with requesting permissions, we’re just going to use some integer constant like 100.
public void takePicture(View view) {
    Intent intent = new Intent(MediaStore.ACTION_IMAGE_CAPTURE);
    file = Uri.fromFile(getOutputMediaFile());
    intent.putExtra(MediaStore.EXTRA_OUTPUT, file);

    startActivityForResult(intent, 100);
}
Now that we’ve sent this Intent to the system, we have to handle the result in onActivityResult(…) like the following.
@Override
protected void onActivityResult(int requestCode, int resultCode, Intent data) {
    if (requestCode == 100) {
        if (resultCode == RESULT_OK) {
            imageView.setImageURI(file);
        }
    }
}
But wait, there’s no result? This is why we needed to declare that file Uri to be a member. For camera events, data is written to the file and not returned in the data Intent. So the workflow here is to pass in a reference to a file that the camera will populate with image data. In onActivityResult(…) , we’re really just setting the ImageView’s image data to be that URI since it’s been set by the system’s camera activity if the result code was RESULT_OK.
The only thing left to do is to implement the getOutputMediaFile() method to create a file reference that the image data will be saved to. We first need to get access to the public directory where images may be saved on the device. As mentioned before we don’t want to use just our application’s inner directory because our user will loose all of the photos that were taken with our app when it is uninstalled. To do this, we need to get a file path to that external pictures directory and then add a subdirectory to the path for our app’s pictures! Now we need to create that subdirectory. So we first check if the path exists, and, if it doesn’t, then we call mkdirs() to create the file path. If that failed, we simply return null since we weren’t able to create a path for the file.
private static File getOutputMediaFile(){
    File mediaStorageDir = new File(Environment.getExternalStoragePublicDirectory(
            Environment.DIRECTORY_PICTURES), "CameraDemo");

    if (!mediaStorageDir.exists()){
        if (!mediaStorageDir.mkdirs()){
            return null;
        }
    }

    String timeStamp = new SimpleDateFormat("yyyyMMdd_HHmmss").format(new Date());
    return new File(mediaStorageDir.getPath() + File.separator +
                "IMG_"+ timeStamp + ".jpg");
}
Now that we have the directory, we need to create the file. We’re going to have the file names contain timestamps so that each is unique and no two files would have a chance at being overwritten. Calling new Date() will return the timestamp exactly when that call is executed. Then we create the filepath to be the subdirectory in the public pictures directory, plus a file separator, and plus an IMG_ prefix, then the name of the file and the file extension. (Please note that this code is adapted from Android’s API. Original source here) Now we’re done!
Before we can run our app, we need to make sure we have a camera-enabled emulator by opening up our AVD manager and clicking the pencil icon next to our emulator to manage it. In the dialog that comes up, click on the button that says “Show Advanced Settings” and find the Camera section. In here, we have the option to emulate the camera or actually use our computer’s webcam. Currently, the default is that our device won’t have a camera, but we need it for our app. Click the dropdown for both Front and Back cameras and change them to webcam if you have one. If not, change them to emulated. We need them to be not “None” since our app requires a camera and the system will tell us that a camera doesn’t exist.
Now that we’re finished with our app, we can run it! Our app will have a mostly-blank screen with a button (initially disabled) at the bottom. After we accept all of the permissions, the button will be enabled and we can click on it. This will bring us to the system’s Activity for handling image capture and we can take a picture now. After we do that and accept the photo, Android will bring us back to the Activity that called the system’s camera Activity and we will be able to see the image in the main view of our app!
Conclusion
In this post, we learned how we can access the Camera using Intents so we don’t have to create our own Activity to take pictures. We learned how we can get a result back from that camera Activity and how we can use the Android filesystem’s public directories to save data. We learned how to create an image file that the system will save the data to before control jumps back to our app. Ultimately, we created an app that can take a picture using the system’s Activity for picture-taking and read the result back.


