Hello World! In this post, we’re going to look at how we can retrieve the user’s location as pure data and as a position on a map. We’ll look into the CoreLocation and MapKit modules and build an app that will display some diagnostic information like latitude, longitude, altitude, and accuracy. Right underneath those fields, we’ll have a map view that will animate to the user’s location automatically. We’ll also learn how to simulate location using the iOS simulator.
Download the source code for this project here.
Learn iOS by building real apps
Check out The Complete iOS Development Course – Build 14 Apps with Swift 2 on Zenva Academy to learn Swift 2 and iOS development from the ground-up with an expert trainer.
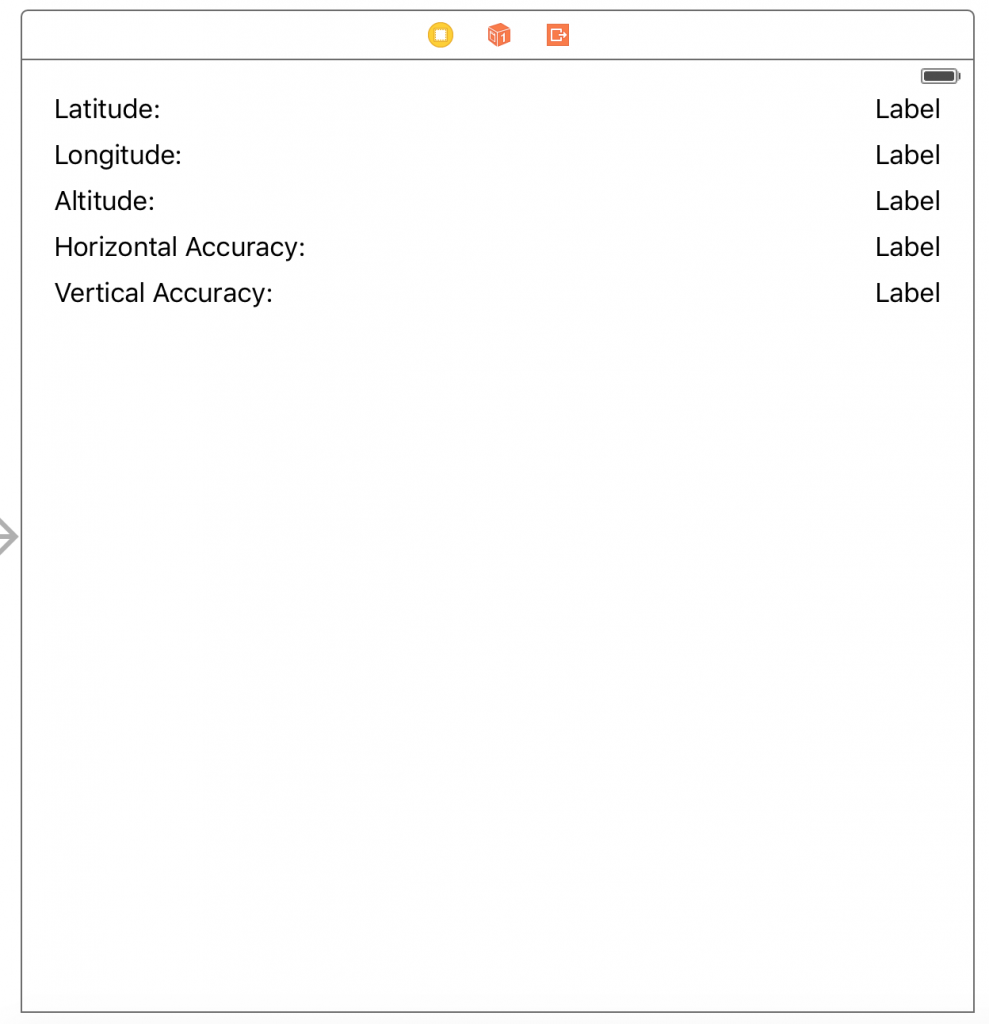
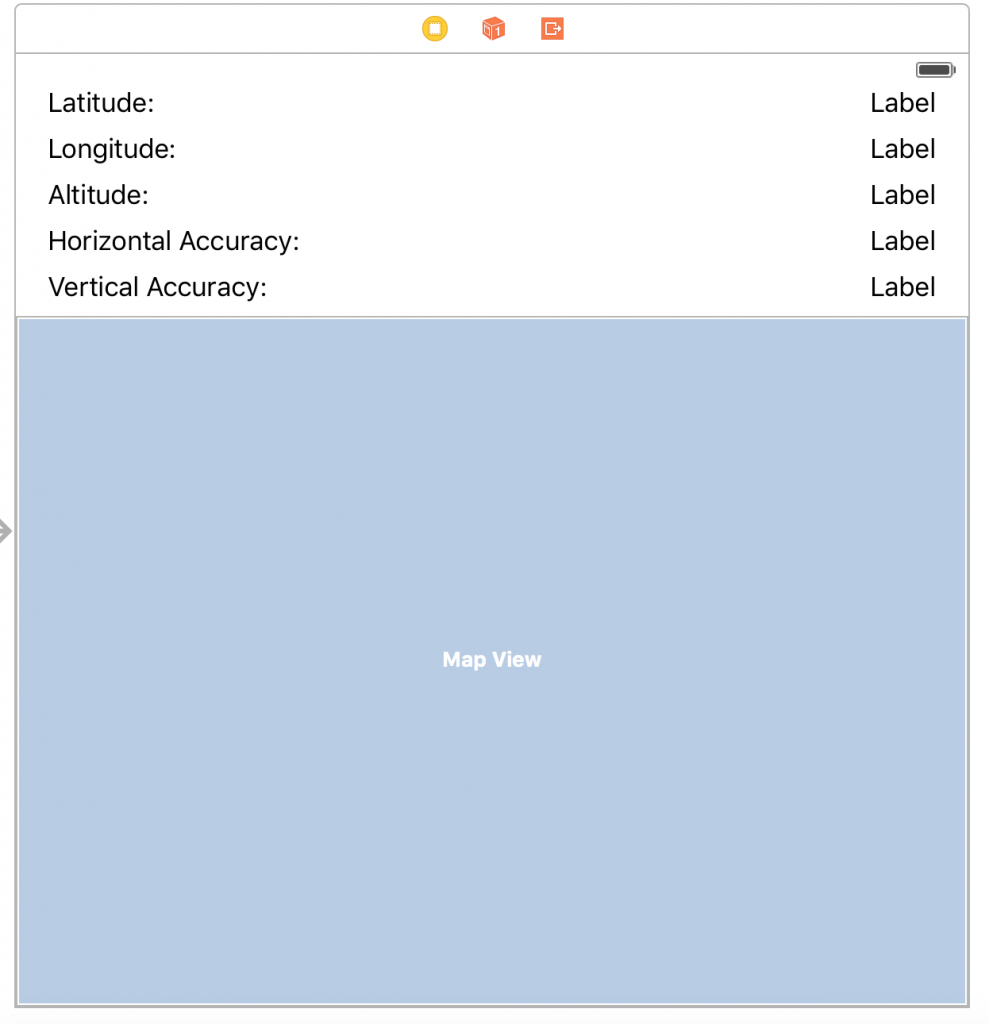
Let’s create a new Single-View iOS app in Xcode called FindMe. We’re going to build our UI first. We’ll need several static UILabels and equally as many dynamic ones to display various diagnostic information like latitude, longitude, altitude, and accuracy. Refer to the screenshot below on how to position these views.
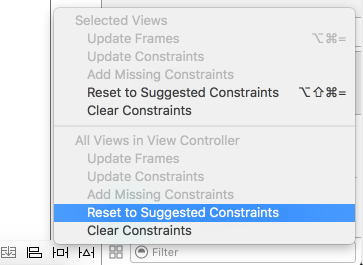
Regarding autolayout, we can use a shortcut to automatically remove any ambiguity in our view. Select the view controller and open up the Resolve Conflicts menu on the bottom right (to the right of the pin menu). Select Reset to Suggested Constraints.
This will automatically add autolayout constraints based on how we positioned the views in the view controller. Even though this is automatic, we should still check the results to make sure there isn’t a constraint that we don’t want applied. In our case, there doesn’t seem to be any so let’s move on to some source code.
Let’s create outlets to all of the labels on the right side. Control-drag and name them latitudeLabel, longitudeLabel, altitudeLabel, hAccuracyLabel, and vAccuracyLabel, respectively. We don’t need to create outlets for the UILabels on the left side since those labels have static text so we don’t have to reference them for anything.
In addition, we’ll need to import CoreLocation right under the import to UIKit. In addition to the labels, let’s create another variable called locationManager of type CLLocationManager and initialize it. This class is what we’ll use to request the user’s location. Our entire Swift file should look like the following.
import UIKit
import CoreLocation

class ViewController: UIViewController {

    @IBOutlet weak var latitudeLabel: UILabel!
    @IBOutlet weak var longitudeLabel: UILabel!
    @IBOutlet weak var altitudeLabel: UILabel!
    @IBOutlet weak var hAccuracyLabel: UILabel!
    @IBOutlet weak var vAccuracyLabel: UILabel!

    var locationManager: CLLocationManager = CLLocationManager()

    override func viewDidLoad() {
        super.viewDidLoad()
        // Do any additional setup after loading the view, typically from a nib.
    }

    override func didReceiveMemoryWarning() {
        super.didReceiveMemoryWarning()
        // Dispose of any resources that can be recreated.
    }


}
Now we have to configure the location manager and request the user for permission to retrieve location. We can do this in the viewDidLoad method. First, we need to set the level of accuracy we want. There are many different levels of accuracy we can request. Keep in mind that the higher level of accuracy we request, the more battery life we’re going to consume. We should set the desiredAccuracy to be the least accurate that will still allow our app to function smoothly.
For example, if we were building a navigation app, we want high accuracy since the user is probably driving. However, if we were building a weather app, we don’t need very accurate location on the user; perhaps a general vicinity will work fine. Since we’re running our app on the simulator and simulation a location, we can simply select the best accuracy available.
We need to set the delegate to be self. When we do this, we also need to conform to the CLLocationManagerDelegate in our class declaration. Next, we need to either request authorization to retrieve location only when the app is in use or always. For privacy reasons, we should only request authorization when our app is in use. Finally, we can call startUpdatingLocation to receive location updates.
Our entire viewDidLoad method should look like the code snippet below.
override func viewDidLoad() {
    super.viewDidLoad()

    locationManager.desiredAccuracy = kCLLocationAccuracyBest
    locationManager.delegate = self
    locationManager.requestWhenInUseAuthorization()
    locationManager.startUpdatingLocation()
}
When we request permission for the user’s location, we can give them a custom message to explain why we want to access their location. We should always do this! But we don’t set this string in the source code; we set this constant in the Info.plist file in the project.
On the left pane, find the Info.plist file and open it up. This is a Property List file that contains configuration information essential to the app. In our case, we need to right-click on the top level entry and select Add Row. In the new row, set its key to be NSLocationWhenInUseUsageDescription. For the value, set it to be something descriptive. This description needs to provide a reason to the user. If your app needs the user’s location for a valid purpose, explain that purpose. We don’t want our location permission to be rejected on the grounds that the user thought our description wasn’t descriptive!
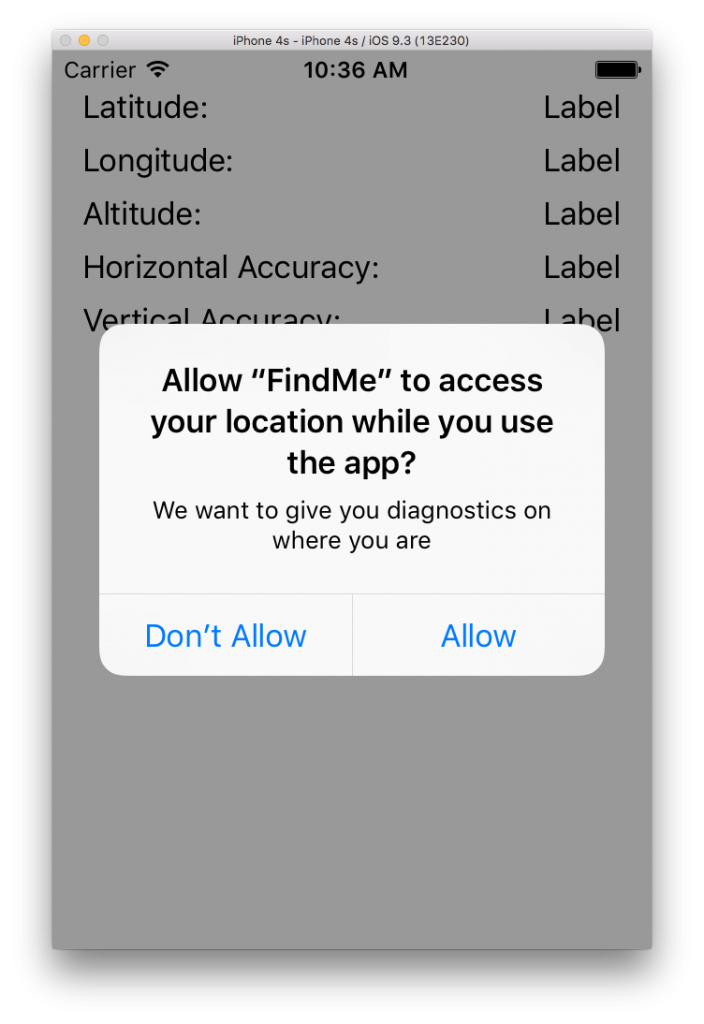
Furthermore, this key in the Info.plist file is required to get authorization for our app. If we didn’t have this in the Info.plist file, then the user would never receive that authorization dialog, and location permissions would be rejected by default. Take a look at the screenshot for reference.
Now that we’re finished with this configuration, let’s get back to the Swift file and implement the delegate methods of the CLLocationManagerDelegate. The one we’re particularly interested in is the locationManager:didUpdateLocations method.
func locationManager(_ manager: CLLocationManager, didUpdateLocations locations: [CLLocation]) {

}
We can retrieve the last location of the user and set those diagnostics in this method. We first need to grab the most recent location of the user by retrieving the last element in the array. Then we can use the properties on that CLLocation object to set the diagnostic labels. We’re using a String format to convert the properties to a human-readable format.
func locationManager(_ manager: CLLocationManager, didUpdateLocations locations: [CLLocation]) {
    let lastLocation: CLLocation = locations[locations.count - 1]

    latitudeLabel.text = String(format: "%.6f", lastLocation.coordinate.latitude)
    longitudeLabel.text = String(format: "%.6f", lastLocation.coordinate.longitude)
    altitudeLabel.text = String(format: "%.6f", lastLocation.altitude)
    hAccuracyLabel.text = String(format: "%.6f", lastLocation.horizontalAccuracy)
    vAccuracyLabel.text = String(format: "%.6f", lastLocation.verticalAccuracy)
}
Now let’s try running our app!
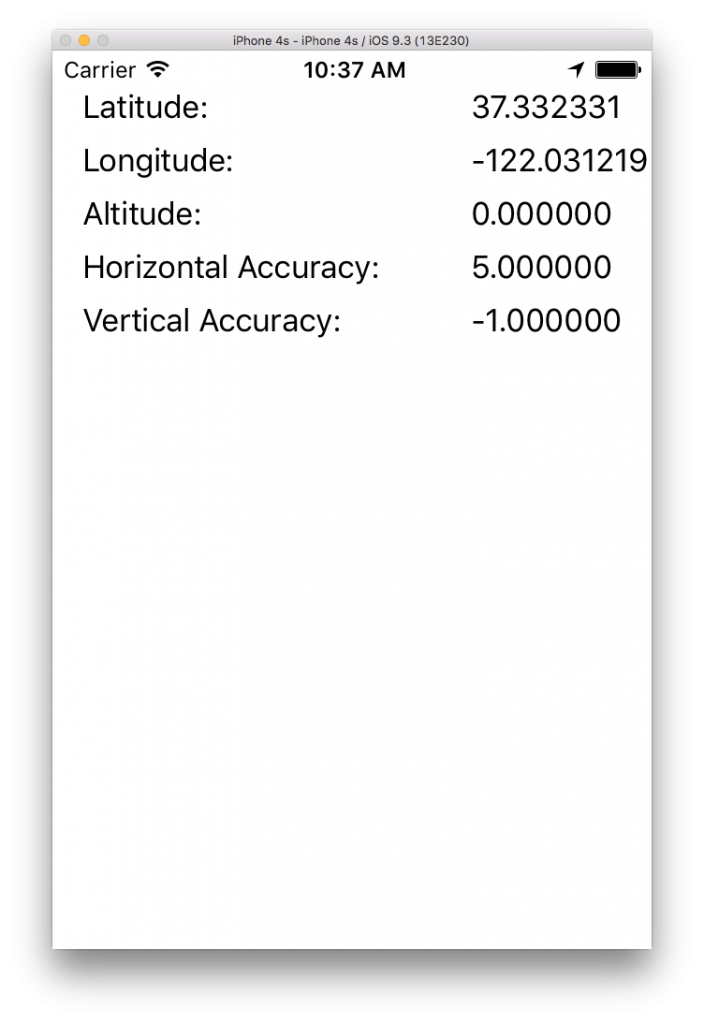
The first thing we see is the authorization dialog! Then we see the location appear! Success! This particular location is Apple’s headquarters in the U.S. We can change the simulated location on the simulator by going to Debug->Location in the menu bar.
For this next part of the post, we’re going to see how to use a MapKit MapView in conjunction with our CoreLocation configuration we already set up in the previous part of the post. Let’s go back to our storyboard and add the MapKit MapView to fill the bottom of the view controller.
For autolayout, select it and go to the Resolve Conflicts menu. Select Reset to Suggested Constraints in the Selected View subsection. That should automatically add autolayout constraints. Next, we need to create an outlet to it in our Swift class called mapView. We’ll get an error about not being able to find MKMapView. We need to import the MapKit module right under the import statement for CoreLocation.
We want to center and animate the map to the user’s current location. However, the latitude and longitude are not enough to accomplish this task. We also need to specify a region to animate to. For convenience, let’s create a function to do this called animateMap. In this method, we’ll create a region and animate the mapView to that region.
func animateMap(_ location: CLLocation) {
    let region = MKCoordinateRegionMakeWithDistance(location.coordinate, 1000, 1000)
    mapView.setRegion(region, animated: true)
}
In the above code snippet, we’re creating a region whose center is the coordinate of the CLLocation object passed in. The region is a rectangular region with a width and heigh of 1000 meters. Finally, we set the mapView’s region and tell it to animate itself to that region.
We also want that blue dot to show the user’s current location. To do this, we have to configure a property on the mapView object. Set it’s showsUserLocation property to be true in the viewDidLoad method.
override func viewDidLoad() {
    super.viewDidLoad()

    locationManager.desiredAccuracy = kCLLocationAccuracyBest
    locationManager.delegate = self
    locationManager.requestWhenInUseAuthorization()
    locationManager.startUpdatingLocation()

    mapView.showsUserLocation = true
}
Now when we get the last location of the user, we can also animate the map to that location using the animateMap function.
func locationManager(_ manager: CLLocationManager, didUpdateLocations locations: [CLLocation]) {
    let lastLocation: CLLocation = locations[locations.count - 1]

    latitudeLabel.text = String(format: "%.6f", lastLocation.coordinate.latitude)
    longitudeLabel.text = String(format: "%.6f", lastLocation.coordinate.longitude)
    altitudeLabel.text = String(format: "%.6f", lastLocation.altitude)
    hAccuracyLabel.text = String(format: "%.6f", lastLocation.horizontalAccuracy)
    vAccuracyLabel.text = String(format: "%.6f", lastLocation.verticalAccuracy)

    animateMap(lastLocation)
}
To recap, below is the full source code for the entire class.
import UIKit
import CoreLocation
import MapKit

class ViewController: UIViewController, CLLocationManagerDelegate {

    @IBOutlet weak var latitudeLabel: UILabel!
    @IBOutlet weak var longitudeLabel: UILabel!
    @IBOutlet weak var altitudeLabel: UILabel!
    @IBOutlet weak var hAccuracyLabel: UILabel!
    @IBOutlet weak var vAccuracyLabel: UILabel!
    @IBOutlet weak var mapView: MKMapView!

    var locationManager: CLLocationManager = CLLocationManager()

    override func viewDidLoad() {
        super.viewDidLoad()

        locationManager.desiredAccuracy = kCLLocationAccuracyBest
        locationManager.delegate = self
        locationManager.requestWhenInUseAuthorization()
        locationManager.startUpdatingLocation()

        mapView.showsUserLocation = true
    }

    override func didReceiveMemoryWarning() {
        super.didReceiveMemoryWarning()
        // Dispose of any resources that can be recreated.
    }

    func locationManager(_ manager: CLLocationManager, didUpdateLocations locations: [CLLocation]) {
        let lastLocation: CLLocation = locations[locations.count - 1]

        latitudeLabel.text = String(format: "%.6f", lastLocation.coordinate.latitude)
        longitudeLabel.text = String(format: "%.6f", lastLocation.coordinate.longitude)
        altitudeLabel.text = String(format: "%.6f", lastLocation.altitude)
        hAccuracyLabel.text = String(format: "%.6f", lastLocation.horizontalAccuracy)
        vAccuracyLabel.text = String(format: "%.6f", lastLocation.verticalAccuracy)

        animateMap(lastLocation)
    }

    func animateMap(_ location: CLLocation) {
        let region = MKCoordinateRegionMakeWithDistance(location.coordinate, 1000, 1000)
        mapView.setRegion(region, animated: true)
    }

}
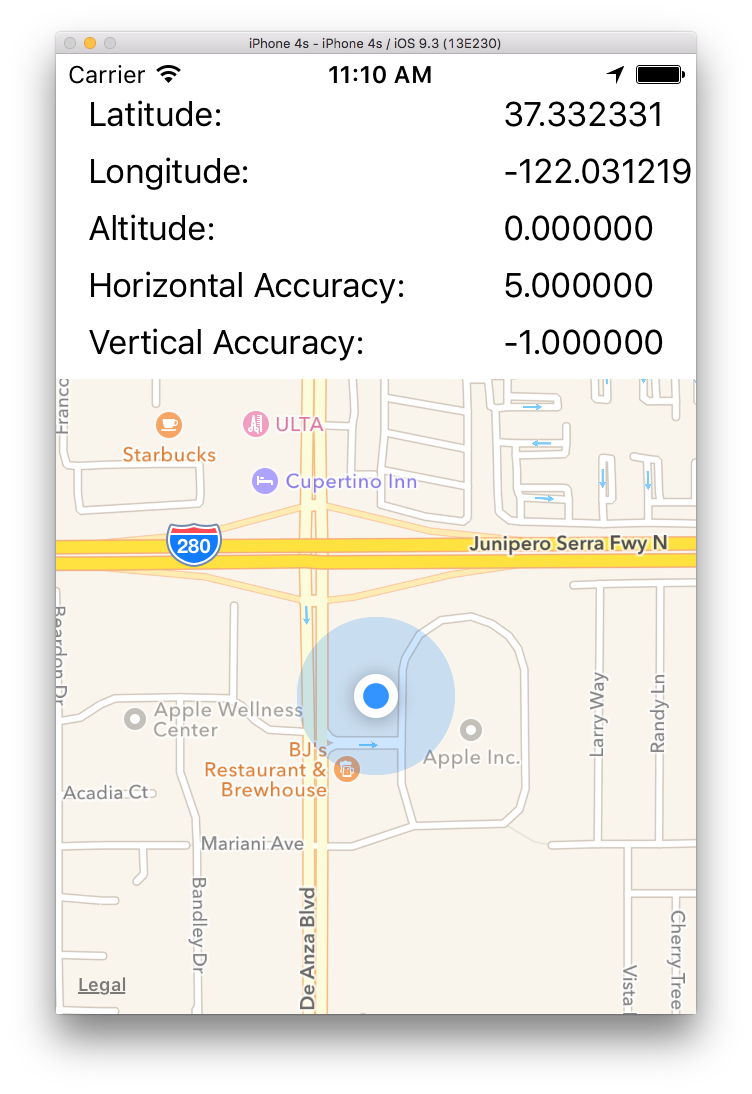
Now let’s run our app and see our map!
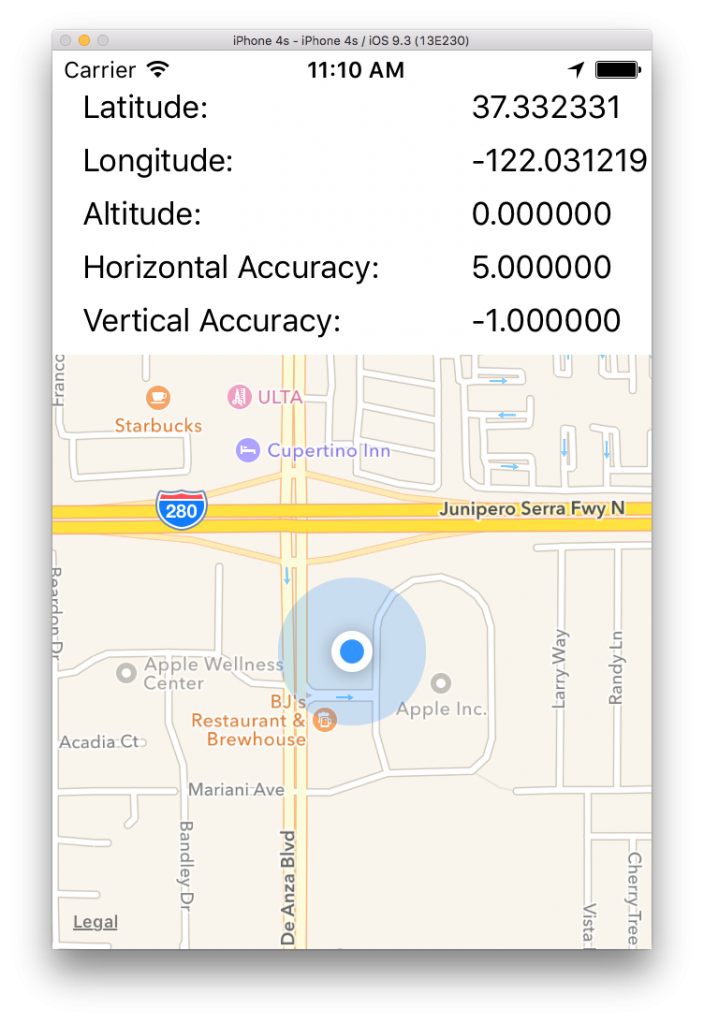
It works! We can see the diagnostic UILabels show data, and the MKMapView shows the location and the blue dot for the user’s current location.
In this post, we saw how to use the CoreLocation module to request the user’s current location. We learned the different levels of accuracy and the different types of authorization. We then looked at the MapKit module and saw how to use the MKMapView to display the user’s location and animate to the region of the user automatically.
