BabylonJS Series by David Catuhe (@DeltaKosh):
- Part 1 – Build a 3D Sphere with WebGL
- Part 2 – 3D Elements with HTML5 and WebGL
- Part 3 – Rotating and Scaling 3D Objects in HTML5
- Part 4 – 3D Objects with Textures using HTML5
- Part 5 – Using a Camera in a 3D WebGL World
- Part 6 – Light in a 3D WebGL World
- Part 7 – How to Animate 3D Object with WebGL
Learn WebGL and Babylon.js at your own pace
Feel free to check out our online course 3D Programming with WebGL and Babylon.js for Beginners on Zenva Academy. The course covers the Babylon.js framework and explains all you need to get started with using this fantastic library in new or existing projects.
What you could expect
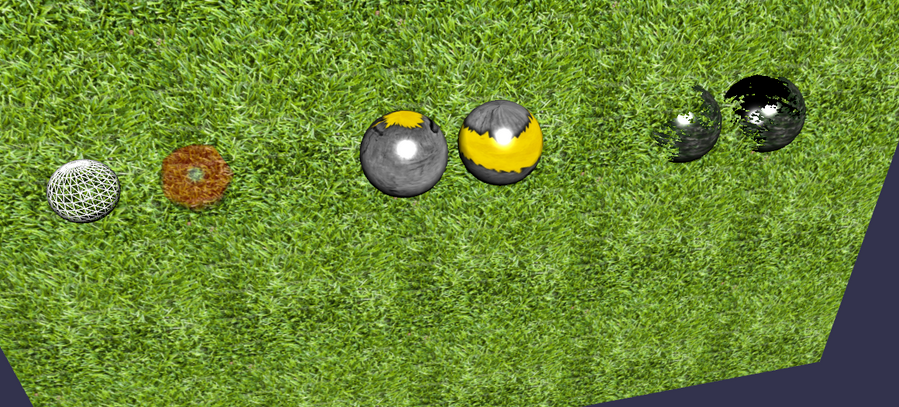
Now that you can create different meshes everywhere in the scene, we are going to give those meshes some materials, to define how a mesh looks like.
Final result
How can I do this ?
First, as you are now used to from our previous three tutorials, we create a new basic scene in the “scene_tuto.js” file:
function createSceneTuto(engine) {
    var scene = new BABYLON.Scene(engine);
    var light = new BABYLON.PointLight("Omni", new BABYLON.Vector3(0, 100, 100), scene);
    var camera = new BABYLON.ArcRotateCamera("Camera", 0, 0.8, 100, new BABYLON.Vector3.Zero(), scene);

    //Creation of spheres
    var sphere1 = BABYLON.Mesh.CreateSphere("Sphere1", 10.0, 6.0, scene);
    var sphere2 = BABYLON.Mesh.CreateSphere("Sphere2", 2.0, 7.0, scene);
    var sphere3 = BABYLON.Mesh.CreateSphere("Sphere3", 10.0, 8.0, scene);
[…]
    //Positioning the meshes
    sphere1.position.x = -40;
    sphere2.position.x = -30;
For now, you only have some grey-lighted meshes. To apply a material on it, you have to create a new material object like this:
var materialSphere1 = new BABYLON.StandardMaterial("texture1", scene);And apply this material to the object of your choice, e.g.:
sphere1.material = materialSphere1;
Or, shortly:
sphere1.material = new BABYLON.StandardMaterial("texture1", scene);“I tested my scene, and …nothing changed…”? Exact, because this material is the default one, you have to customize it as you want. You won’t change the mesh itself, but the material. So how can I shape my material to give the perfect look to my object?
- Transparency (alpha channel)
To apply some alpha to a material, written in percent (%):
materialSphere1.alpha = 0.5;
- Texture
One of the most important feature on materials is texturing. You can apply a texture on every material, by giving an image path.
materialSphere1.diffuseTexture = new BABYLON.Texture("grass.png", scene);Don’t forgot to check the right path of your image (relative or absolute path). About image format support, it can be JPG, PNG, JPEG, BMP,…(every image format available on your browser). If you want to translate your texture on your mesh, you can use “uOffset” and “vOffset”. And if you want to repeat an image pattern (e.g. grass texture), you can use “uScale” and “vScale”:
materialSphere1.diffuseTexture.uScale = 5.0;
materialSphere1.diffuseTexture.vScale = 5.0;
And if your texture have some alpha, simply specify it:
materialSphere1.diffuseTexture.hasAlpha = true;
- Back-Face Culling
“Back-face culling” determines whether a polygon of a graphical object is visible or not. In short, if active, Babylon engine won’t render hidden face of this material. It’s true by default, but can be swapped to false if you need to.
In this example, a texture have some alpha, and back-face culling need to be turned to false to see the inside face:
- WireFrame
You can see your object in Wireframe by writing:
materialSphere1.wireframe = true;


