You can access the full course here: Intro to 3D Modeling with Blender
Proportional Editing
In this lesson, we’ll learn about proportional editing inside Blender.
Let’s first create a flat surface by going to Add -> Mesh -> Grid.
Set its size to 10 to make it a bit bigger in the popup window at the bottom:

Switch to edit mode:

If you want to keep it flat like this, you actually don’t need this many faces as it would slow performance down. However, we can modify the individual vertices.

In this context, we’re going to use proportional editing to smooth these transitions out.
The icon for the proportional editing is a dot at the top of the scene window (you can also use the shortcut O):

Next to it, there’s its falloff type which is set by default to smooth.
When moving your selected vertex up, use the scroll wheel to set the area that’ll have the proportional editing applied to:

The bigger the circle more vertices will be moved up as well, while the vertices further out will be less affected.
Note that it produces a shape very similar to the one indicated on the icon at the top menu:

Feel free to explore the other several falloff options, such as ‘Random‘:

You can apply the proportional editing to several vertices at once too, just as edges or multiple faces:

Creating a Terrain
As a challenge, try coming up with a basic terrain in a new grid that is 100×100 in dimension, with mountains and peaks surrounding the borders.
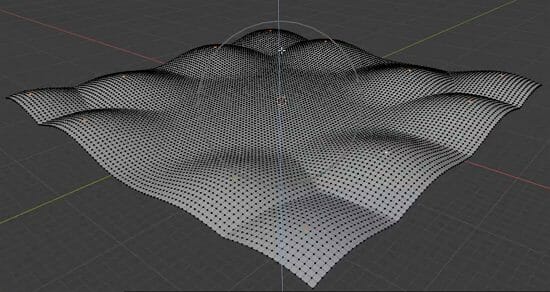
Let’s make it have a size of 50. Then, select a few vertices to have smooth falloffs like so:

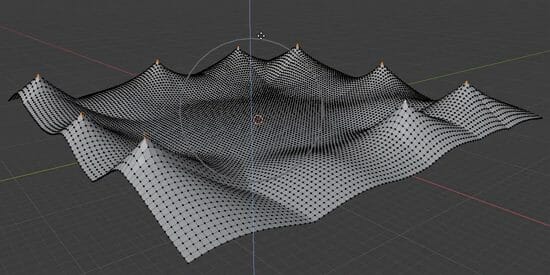
Select other points now to make some sharp mountains:

Lastly, for a final touch, we can add some more points of random falloffs as follows:

And here we have a nice terrain that you can use in your game as a background.
Transcript
Hey everyone, in this lesson, we are going to be going over proportional editing inside of Blender. So, first of all, let’s just go ahead and create ourselves a flat surface.
So for example, if you’re creating a game and you want to make some terrain, or if you want to sort of add a bit of blending between the vertices, so for example, we can go up to add mesh and then we’ll go down to grid.
And what grid does is if we open up this little dropdown, we can specify how many X and Y subdivisions there are. So right now it’s on 10 and we can keep it like that. Let’s just make the size a bit bigger. So we’ll make it a size 10. So it’s a bit of a bigger grid here.
Now, if I go into edit mode with tab, you’ll see that we have a lot of basically slices, okay? So this is a square that has been sliced up a bunch of times.
Now, if you’re just keeping it flat like this, then you probably wouldn’t wanna have this many faces as that would be quite performance-heavy, but what we can do then is modify the individual vertices.
So for example, I can modify these vertices here and you’ll see that it moves it up. I can move it around, I can scale it. The scaling doesn’t really work on one vertex but yeah, you can see then I can basically modify these vertices but it doesn’t really smooth out to the others, okay.
So I can, of course, go ahead, select multiple here. And yeah, as you can see, I can modify them, but you know, it doesn’t really, you know, smooth it off. So how can we, for example, move these vertices up and have a smooth transition around it with all the others?
Well, that’s where proportional editing can come in handy. So at the top of your screen, you’ll see there is a little dot icon right here, which is proportional editing with the shortcut O.
So we can click on that and to the right of it, you’ll see basically the fall-off and this is basically the fall of curve. So by default, it’s smooth, there’s sphere route, inverse sphere, et cetera. So, let’s have a look first of all at what it does. So I can select a vertex, move it up.
And you’ll see that nothing really happens. But if I hold down left mouse and use my scroll wheel, you’ll see this circle increases in size. And this basically shows us which vertices are going to be affected when we move this one.
So if I make the circle about half the size of the grid and move it up, as you can see, the vertices surrounding this one are being moved as well. And you can see the further out, the less they have been affected, okay.
So the vertices closer to the one we have selected are been moved up more and the ones further out are being moved less. And you can see the shape it makes is very similar to this smooth fall-off curve here.
And so, for example, if you want is to be more of a, sort of a stretch up, we can undo this here, change this here to sharp, move it up and you’ll see it is more sort of pointy like a mountain.
We can also go ahead, change that over to linear, if you just want to straight, constant increase and decrease like so, and there are many others. Okay, there’s constant, which basically moves them all up in the same rate.
And if you’re working on terrain or you want a bit of randomness, you can click on the random button right here, and this will sort of give a random fall-off curve to each of these, okay? So it can add a bit of randomness and noise to your mesh.
So, when doing this, you can of course increase and decrease the size by using a scroll wheel at pretty much any time. Now, this also works. If you want to select multiple vertices, so for example, say we want to select a bunch of different vertices right here, and we increase those up, you’ll say, yep.
The exact same thing happens. We can also do the same for edges so we can select just a bunch of random edges here, bring them up. There you go. We’ve got a couple of different hills and of course faces too. So yeah, proportional editing is really good if you want to basically modify a group of vertices and have them sort of smooth out.
So this is especially good when creating a terrain, for example, mountains, if you want to create sort of rocks and have, you know, the sort of randomness even here, or if you wanna add in some sharp inclines to things.
Yeah, proportional editing is a great tool and something handy to always have in the back of your mind when working on game assets. All right, so, as a bit of a challenge, I want you to go ahead and create some basic terrain, okay.
What we’re going to be doing here is I want you to go ahead and create a new grid, but this time, instead of having 10 divisions on each side, I want you to have 100 divisions okay. So along the X and the Y axes, I want there to be 100 rows and 100 columns.
So you can do that by creating a new grid, and then surrounding the square here, I want there to be mountains, you can add a bit of randomness.
You can add some toll peaks, some short peaks, but just make it a train where in the middle we could place down objects for the player to walk around in and see mountains in the background, okay. So, I’ll be right back to see how you done.
All right, so I hope you had a go at that challenge. Pretty much, we just wanna go add mesh, go down to grid. You can set the X subdivisions to 100, same thing for the Y. We probably might wanna also increase the size of tiny bit so let’s bring this up to 50.
There we go, if we go to edit mode now, you’ll see there is a lot of different faces right here. So, we can go ahead. Get our vertex selection right here and just start selecting some vertices.
So select one there, one there, one there, one there, we’ll even select some just add a bit of randomness as well here with vertices we’re selecting. And if we move it up, you’ll see that’s what we get there, but let’s change it to be sort of a smooth increase.
We can scroll your mouse wheel a bit until we get what we want, something like that. Then we can go ahead, select a few more vertices here, and then we might wanna change it over to sharp, bring this up and there you go, we’ve got a bit of a mountains here.
And then finally, we might wanna add some randomness to this. So, we can go ahead, select a bit more like here. And then what we can do is we can change the fall-off curve to be random here.
And we can then increase this a tiny bit, probably bring it’s down a bit more as quite a bit of randomness, something like that, there we go, and as you can see here, we’ve just quickly chucked together a quick little piece of terrain that you can chuck into your game as a backdrop.
So you don’t just have the standard skybox and flat ground that you sometimes see in games instead you can have a nice mountain range in the background. And then of course, later on, you can go ahead and texture and give it some color. So yeah, that is a look at the proportional editing tool inside of Blender, thank you for watching.
Interested in continuing? Check out our all-access plan which includes 250+ courses, guided curriculums, new courses monthly, access to expert course mentors, and more!


