Find the source code for this example here.
Photon Storm’s Phaser is one of the most trusted frameworks for developing professional-quality 2D games in JavaScript. With Phaser, it’s feasible to make performant games that run smoothly in all major browsers, across all major systems, while only having to maintain one codebase. And now, the latest installment of Phaser has made its debut: Phaser 3.
But did you know that the same code that runs in your browser can be wrapped into a “native” mobile application? By combining Phaser 3 with Apache Cordova, we can produce games that not only run in the browser, but can also be published to the App Store and Google Play Store.
In this article, we’ll use Phaser to make a simple “game” that can be built for iOS, Android, and the Web. Though the result won’t truly be a “game” in the playable sense, the concepts it introduces will be referenced again in future tutorials where we will, indeed, create playable games.
Pre-requisites (things to install!)
We’ll be dealing with purely JavaScript (and tiny bit of HTML) through this tutorial, so all you need to install manually is Node.js. This will give you the node and npm executables on your system.
Once Node.js is installed, download the Apache Cordova command line by running this command in your terminal/command prompt:
npm i -g cordova
Learn Phaser 3 with our newest Mini-Degree
The HTML5 Game Development Mini-Degree is now available for Pre-Order on Zenva Academy. Learn to code and make impressive games with JavaScript and Phaser 3!
Project Setup
Cordova includes boilerplate projects that make it much simpler to start off with a mobile-enabled project, so let’s take advantage of that, by running:
cordova create hello
This will create a directory named hello, and copy multiple files into the project.
Next, let’s install Phaser into our project. In our project directory, run the following:
cd www
npm init
npm i --save phaser
For those unfamiliar with npm, the above command downloads the source code of the Phaser framework and saves a local copy in the www/node_modules folder. This way, we have a copy of the code without having to download it from a CDN on every run. The reason we have to have a separate package.json file in the www directory is that static files are served from the www directory, and not from our project root. If Phaser were installed in the project root, we would never be able to access it in the browser.
Next, let’s add support for running our app in a browser. We’ll add support for running on iOS and Android later. Run this:
cordova platform add browser
Next, we’ll want to add support for live-reloading our changes when we edit our file. Otherwise, Cordova will only ever serve one version of our files, which will lead to a lot of head scratching and wondering why errors seemingly don’t vanish, even after changing your code! Run this command:
cordova plugin add cordova-plugin-browsersync
Now that we’ve set our project for development, let’s run the HTTP server:
cordova run browser --live-reload
Now, you should be able to visit http://localhost:8000/index.html to view your game in action.
Basic Game Code
First, let’s remove the starter code that Cordova gives us; we won’t be needing it anymore. Remove the <div id="app">...</div> code in index.html, and add a reference to our downloaded Phaser source, so that the file looks like the following, ignoring comments:
<html>
    <head>
        <meta http-equiv="Content-Security-Policy" content="default-src 'self' data: gap: https://ssl.gstatic.com 'unsafe-eval'; style-src 'self' 'unsafe-inline'; media-src *; img-src 'self' data: content:;">
        <meta name="format-detection" content="telephone=no">
        <meta name="msapplication-tap-highlight" content="no">
        <meta name="viewport" content="user-scalable=no, initial-scale=1, maximum-scale=1, minimum-scale=1, width=device-width">
        <link rel="stylesheet" type="text/css" href="css/index.css">
        <title>Hello World</title>
    </head>
    <body>
        <script type="text/javascript" src="cordova.js"></script>
        <script type="text/javascript" src="js/index.js"></script>
    </body>
</html>
Feel free to remove the Content-Security-Policy tag in the head. Though it’s a smart choice for security, if you are unfamiliar with CSP, it can be a rather confusing roadblock for such a simple tutorial.
Next, let’s add some code in js/index.js to start up a Phaser instance:
document.addEventListener('deviceready', function() {
    var config = {
        type: Phaser.WEBGL,
        parent: 'game',
        scene: {
            preload: preload,
            create: create
        }
    };

    var game = new Phaser.Game(config);

    function preload() {
    }

    function create() {
    }
});
Even in this relatively small code snippet, there’s quite a bit going on:
- We create a configuration object, which we pass to the
Phaser.Gameconstructor to specify where the framework should call our code. - We indicate to Phaser, via,
type: Phaser.WEBGL, that we want to use the WebGL-based renderer, which is faster than plain Canvas 2D-based rendering. - We tell Phaser to render into an existing
<canvas>whereid="game", or to create such a<canvas>element if one does not exist. - We embed a
sceneobject, which points to two functions Phaser will call at different points in the game lifecycle.
Now, let’s run our game! Type the following in your terminal:
cordova run browser -- --livereload
Next, to actually see the game in your browser, visit http://localhost:8000 in your browser. Check out the output!
Beautiful! It’s an empty black screen!
Adding Game Objects
As you can probably imagine, nobody wants to just sit there and stare at an infinitely-blank screen. So let’s spruce it up and add something that moves!
Phaser has long been based on object-oriented programming, but Phaser 3 introduces the categorization of certain objects as game objects, which share common functionality while achieving different goals. The kind of game object we’ll be adding now is called a sprite, which in the 2D world means “image that represents an object.” Common examples of sprites include animated sprites, which are often used to represent characters in games.
Even though a sprite by itself is just an image, in the context of a game engine like Phaser, it is frequently associated with physics computations, and provides an abstraction through which a game can programmatically change what’s visible on screen in a logical way.
Using an asset from Kenney, let’s load an image and draw it to the screen.
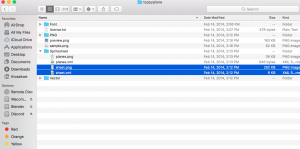
First, let’s download the Tappy Plane Asset Pack. Copy SpriteSheet/sheet.png and SpriteSheet/sheet.xml into the local www/img directory. We’ll load these into our game by modifying our preload and create functions as follows:
function preload() {
   this.load.atlas('sheet', 'img/sheet.png', 'img/sheet.json');
}

function create() {
    this.add.sprite(400, 300, 'sheet', 'planeBlue1.png');
}
Note that img/sheet.json is included in the project assets, and is based on the contents of img/sheet.xml.
Quite a bit happened in the lines above. First, we told Phaser that we have a texture file, img/sheet.png, and that the framework should use the contents of img/sheet.json to find the location of frames within the image. img/sheet.json contains a map of frames that map names (i.e. planeBlue1.png) to distinct locations and sizes within the texture file, which contains the entire Tappy Plane pack compressed into a single image.
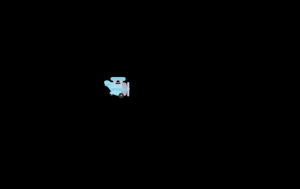
Next, we created a sprite that references planeBlue1.png within our sheet asset. As mentioned earlier, though a Sprite is just an image, in Phaser, we can use it to perform physics computations and another complex transformations.
Refresh the page to see the current game:
Animating the Sprite
The blue plane sprite included in Kenney’s Tappy Plane pack includes three frames, which can be combined to create an animation. Change the create function as follows:
function create() {
    this.anims.create({
        key: 'plane',
        repeat: -1,
        frameRate: 10,
        frames: this.anims.generateFrameNames('sheet', { start: 1,  end: 3, prefix: 'planeBlue', suffix: '.png' })
    });

    var plane = this.add.sprite(400, 300, 'sheet').play('plane');
}
Firstly, we register an animation configuration in Phaser’s AnimationManager. Using the generateFrameNames helper, we specify that the animation contains the frames planeBlue1.png, planeBlue2.png, and planeBlue3.png. The animation we create, named plane, can be applied to any sprite; however, for this example, we will only apply it to our plane sprite.
Next, we add .play('plane') to our instantiation of the plane sprite. Reload the page, and you’ll see the plane’s turbine spinning infinitely!
Note that the plane key corresponds to the key of the animation object we created.
Adding a Background
Of course, a game with a boring, empty background is (usually) a boring, empty game. Let’s add a background sprite, right before creating our plane. create should look like this:
function create() {
    this.anims.create({ ... });
    this.add.image(0, 0, 'sheet', 'background.png').setOrigin(0);
    var plane = this.add.sprite(400, 300, 'sheet').play('plane');
}
Note the setOrigin(0), which tells the image to position itself according to its top-left corner, rather than the middle (the default origin is 0.5).
Let’s take a look at the game now:
Scaling the Game
As you’ve likely noticed, there’s still a lot of dead space. We can eliminate this by explicitly sizing the game canvas to the size of our background image, 800x480.
Modify the game configuration like so:
var config = {
    type: Phaser.WEBGL,
    parent: 'game',
    width: 800,
    height: 480,
    scene: {
        preload: preload,
        create: create
    }
};
And voila, empty space gone!
One caveat to mobile development is that there is no guarantee of the size of a screen. Even within the context of one device, a resize of the window or orientation switch can throw the scaling of your game completely off-balance. However, with some simple math, we can responsively resize our game. Change your create function as follows (source):
function create() {
    window.addEventListener('resize', resize);
    resize();

    // Earlier code omitted
}
Next, implement the resize function that auto-resize our game canvas:
function resize() {
    var canvas = game.canvas, width = window.innerWidth, height = window.innerHeight;
    var wratio = width / height, ratio = canvas.width / canvas.height;

    if (wratio < ratio) {
        canvas.style.width = width + "px";
        canvas.style.height = (width / ratio) + "px";
    } else {
        canvas.style.width = (height * ratio) + "px";
        canvas.style.height = height + "px";
    }
}
Now, the game will resize automatically when the window does!
Infinite Scrolling
As is the nature of Tappy Plane and Flappy Bird, our background should scroll infinitely. Fortunately, it’s simple to implement this in Phaser. First, let’s update our game configuration to point to an update function we will create. This function will be called once per frame.
var config = {
    type: Phaser.WEBGL,
    parent: 'game',
    width: 800,
    height: 480,
    scene: {
        preload: preload,
        create: create,
        update: update
    }
};
Next, let’s change our create function to declare the background image as a tile sprite instead. A tile sprite is a special sprite that can update its position relative to the camera, to create parallax/infinite scrolling phenomena.
this.bg = this.add.tileSprite(0, 0, 800, 480, 'sheet', 'background.png').setOrigin(0);
Lastly, let’s actually implement that update function:
function update() {
    this.bg.tilePositionX += 5;
}
Refresh the game, and you’ll see the background continuously scrolling, repeating itself once it reaches the end of the screen.
Note that though we are adding to tilePositionX, it looks as though the background is moving to the left. It helps to think of tile sprites as an endless wallpaper, that we are only viewing a certain piece of at a time. When tilePositionX increases, this is analogous to the viewer’s eyes moving to the right, which creates a parallax effect moving to the left.
Building the Game for iOS and Android
Now for the fun part: Running our game on mobile! First off, add the ios and android platforms to the codebase:
cordova platform add ios android
If this errors, you may need to delete package-lock.json.
Next, we can use cordova to run our app in an emulator:
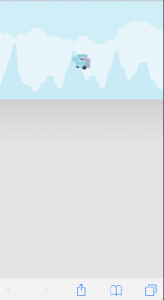
cordova emulate ios
This will bring our app up in the iOS Simulator (granted, you’ll need to install that, which comes bundled with XCode, first):
Distributing the Game
Lastly, we eventually will want to publish and distribute our game. Whether through the App Store, the Google Play Store, or another app distribution platform, our game needs to be downloadable and easily accessible in order for our users to get their hands on it.
Firstly, you’ll need to build your app in release mode. Try the following for iOS:
cordova build --release ios
The steps to build a properly signed application for iOS are quite intensive, and include the following steps:
- Sign the application
- Register an app ID
- Make a provisioning profile
- Modify app configuration
- Submit to the App Store
This process is well summarized in this article; for the sake of not reinventing the wheel, I’ve linked to it, rather than rewriting content.
After that, you’re done! Good work.
Conclusion
Apache Cordova is a great solution for running applications originally aimed at web browsers on mobile devices. By wrapping such applications in webview wrappers, Cordova lets us produce a “native” (notice the quotes) experience across multiple platforms. This is great when writing games, because it eliminates the need for rewriting code to target different platforms.
With Phaser, we can create games with Cordova that run in the browser, iOS, and Android.
Stick around for the next tutorial, where we continue with the Tappy Plane Pack and turn this into a real game!
