
In the beginning of this tutorial series, we started building our Node.js + Express server that will be used for user authentication and for serving our client-side Phaser game. In Part 1 we:
- Setup a new MongoDB cluster using MongoDB Atlas cloud service
- Created a basic Node.js + Express server
- Created a new Express Router
In Part 2 of this tutorial series, we will continue working on our server by adding user authentication, setting up the logic for connecting to MongoDB, and adding the logic for securing our API endpoints.
You can download all of the files associated with the source code for Part 2 here.
If you didn’t complete Part 1 and would like to start from there, you can find the code for it here.
Let’s get started!
BUILD GAMES

FINAL DAYS: Unlock 250+ coding courses, guided learning paths, help from expert mentors, and more.
Adding New Routes
Now that we have the express server up and running, we will start adding the other endpoints that will be needed on our server. Since we will be requiring users to log in before they can access our game, we will need to create routes for the following flows:
- sign up
- login
- logout
- forgot password
Also, since we plan to display a leaderboard in our game, we will need endpoints for getting the high scores and for submitting a score. Lastly, with the type of authentication we will be using, we will need an additional endpoint for that.
For our new routes, we are going to add this logic to the router we created in part one of this tutorial series. In routes/main.js, add the following code below the /status endpoint logic:
router.post('/signup', (req, res, next) => {
  res.status(200);
  res.json({ 'status': 'ok' });
});

router.post('/login', (req, res, next) => {
  res.status(200);
  res.json({ 'status': 'ok' });
});

router.post('/logout', (req, res, next) => {
  res.status(200);
  res.json({ 'status': 'ok' });
});

router.post('/token', (req, res, next) => {
  res.status(200);
  res.json({ 'status': 'ok' });
});
In the code above, we created the four new endpoints that use the POST method and had each one return a 200 response as a placeholder.
Next, we are going to create a new file for the rest of the API routes that we want to be secure. By separating out these routes into a separate file, it makes it really easy to add a new middleware to those routes later. To do this, create a new file in the routes folder called secure.js and add the following code to that file:
const express = require('express');

const router = express.Router();

router.post('/submit-score', (req, res, next) => {
  res.status(200);
  res.json({ 'status': 'ok' });
});

router.get('/scores', (req, res, next) => {
  res.status(200);
  res.json({ 'status': 'ok' });
});

module.exports = router;
Lastly, we need to add these new routes to the app.js file. First, we need to require the file by adding the following line at the top of the file with the other require statements:
const secureRoutes = require('./routes/secure');Then, we need to tell the app to use these new routes and we can do that by adding this line with the other route code:
app.use('/', secureRoutes);Now, if you save your code changes and restart the server, you should be able to hit the new endpoints and get the 200 response.
Mongoose and Connecting to MongoDB
With our new routes in place, we are going to add the logic for having our server connect to our MongoDB Atlas cluster, and to do this we will use Mongoose. Mongoose is a MongoDB object modeling tool that makes it easy to work with MongoDB by providing a schema-based solution to our data model and it includes some nice features like validation, query building, and much more out of the box.
Before we can start using Mongoose, we will need to install that node package and we can do that by running the following code in the terminal:
npm install --save mongoose
Once the package is installed, we can add the Mongo connection in app.js. To do this, we need to include mongoose by adding the following line at the top of the file with the other require statements:
const mongoose = require('mongoose');Then, add the following code below the require statements:
// setup mongo connection
const uri = process.env.MONGO_CONNECTION_URL;
mongoose.connect(uri, { useNewUrlParser : true, useCreateIndex: true });
mongoose.connection.on('error', (error) => {
  console.log(error);
  process.exit(1);
});
mongoose.connection.on('connected', function () {
  console.log('connected to mongo');
});
In the code above, we did the following:
- First, we imported the
mongoosepackage. - Next, we pulled the
MONGO_CONNECTION_URLenvironment variable and set it to a new variable calleduri. - We then created a new mongoose connection by calling the
connectmethod and we passed two arguments to the method.- The first was the mongo connection string.
- The second is an object with the
useNewUrlParseranduseCreateIndexproperties. - The
useNewUrlParserproperty tells mongoose to use the new URL parser for each connection. By default, this is set tofalse. - The
useCreateIndexproperty to make mongoose’s default index build usingcreateIndex()instead ofensureIndex(), which is deprecated by the MongoDB Driver. By default, this is set tofalse.
- Next, we added a function that will be called if mongoose throws an error, and if there is an error we log it and exit our application.
- Lastly, we added a function that will be called when mongoose successfully connects to our MongoDB database.
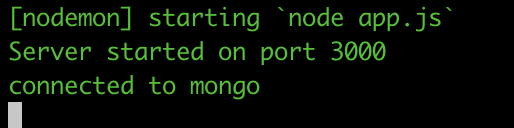
If you save your code changes and restart your server, you should see a message about being connected to mongo.
User Model
With our server now connecting to MongoDB, we can start working on the logic for storing and retrieving data from the database. To do this, we need to define the schema and model for the data we will store in MongoDB, and one of the benefits of using Mongoose is that it provides a straight forward solution for this. For each user, we will need to store the following fields:
- email – the user’s email address they provide when they sign up
- password – the hashed password the user provides when they sign up
- name – the name the user provides when they sign up
- highScore – the highest score the user has ever achieved, this value will be 0 by default.
To create the schema and model, create a new folder at the root of your project called models and in this folder create a new file called userModel.js. Then, open userModel.js and add the following code to it:
const mongoose = require('mongoose')
const bcrypt = require('bcrypt');

const Schema = mongoose.Schema;

const UserSchema = new Schema({
  email : {
    type : String,
    required : true,
    unique : true
  },
  password : {
    type : String,
    required : true
  },
  name : {
    type: String,
    required: true
  },
  highScore : {
    type: Number,
    default: 0
  }
});

UserSchema.pre('save', async function (next) {
  const user = this;
  const hash = await bcrypt.hash(this.password, 10);
  this.password = hash;
  next();
});

UserSchema.methods.isValidPassword = async function (password) {
  const user = this;
  const compare = await bcrypt.compare(password, user.password);
  return compare;
}

const UserModel = mongoose.model('user', UserSchema);

module.exports = UserModel;
Let’s review the code we just added:
- First, we imported the
mongooseandbcryptpackages.bcryptis a helper library for hashing passwords. - Next, we created a new mongoose Schema object which allows us to define the fields we want our model to have and in each of these fields we can specify their type, if they are required, and provide default values. By creating and using a Schema object, it will provide us built-in typecasting and validation. For example, if we’re to pass
"12"instead of12for the high score, mongoose will automatically cast that string into a number. - Then, we created a pre-save hook that will be called before a document is saved in MongoDB. When this hook is triggered, we get a reference to the current document that is about to be saved, and then we used
bcryptto hash that users password. Finally, we call the callback function that passed as an argument to our hook. - Next, we created a new method called
isValidPasswordthat will be used for validating that the user’s password is correct when they try to log in. - Lastly, we created our model by calling
mongoose.modeland we passed this method two arguments: the name of our model and the schema that will be used for the model. Then, we exported theUserModel.
Before we can start using our new model, we need to install the bcrypt package, and this can be done by running the following line in the terminal:
npm install bcrypt
To start using our new model, we are going to update some of the routes we created earlier to create, update, and read data from our database. The first route we are going to update is the /signup route. In routes/main.js, replace the signup route code with the following:
router.post('/signup', asyncMiddleware( async (req, res, next) => {
  const { name, email, password } = req.body;
  await UserModel.create({ email, password, name });
  res.status(200).json({ 'status': 'ok' });
}));
Then, at the top of the file add the following lines below the require express line:
const asyncMiddleware = require('../middleware/asyncMiddleware');
const UserModel = require('../models/userModel');
In the code above, we did the following:
- First, we imported the
UserModelthat we just created, and then we imported a new middleware calledasyncMiddleware. We will create this middleware next. - Then, in the
signuproute we wrapped our function in the newasyncMiddlewarewe just imported. The reason we did this is that we are going to useasync/awaitin our function, however, to ensure we catch any uncaught errors in our function we would normally wrap our logic in a try/catch statement. However, by using theasyncMiddlewarewe can write our logic without the try/catch and let the middleware catch any uncaught errors. - In the function that is called when the
signuproute is visited, we pull thename,email, andpasswordfields from the request body and then we pass these arguments to thecreatemethod of ourUserModel. By calling thecreatemethod on our model, mongoose will trigger the save pre-hook we set up, and once that is complete mongoose will attempt to add the new document to the database. - Lastly, we respond with the 200 status code.
Before we can test our changes, we need to create the new asyncMiddleware middleware. To do this, create a new folder at the root of your project called middleware and in this folder create a new file called asyncMiddleware.js. In this file, add the following code:
const asyncMiddleware = fn =>
  (req, res, next) => {
    Promise.resolve(fn(req, res, next))
      .catch(next);
  };

module.exports = asyncMiddleware;
In the code above, we created a new function called asyncMiddleware that will take another function as an argument and it wraps it in a promise. When our route handlers resolve, this new promise will resolve with that value, however, if there is an error it will be caught here and it will be passed onto the next middleware.
Now, if you save your code changes and restart your server, you can test the updated signup route. To do this, you will need to use curl, Postman, or some other method for sending a POST request. For the rest of this tutorial, we will be using curl.
First, we will test the validity of our mongoose model. In the terminal, open a new tab or window and enter the following code:
curl -X POST \
  http://localhost:3000/signup \
  -H 'Content-Type: application/json' \
  -d '{
	"email": "[email protected]",
	"password": "1234",
	"name2": "test4"
}'
Once you submit the request, you should get an error message about name being required.

Next, we will test if the endpoint creates the data in mongo when the appropriate body is sent. In the terminal, run the following code:
curl -X POST \
http://localhost:3000/signup \
-H 'Content-Type: application/json' \
-d '{
"email": "[email protected]",
"password": "1234",
"name": "test5"
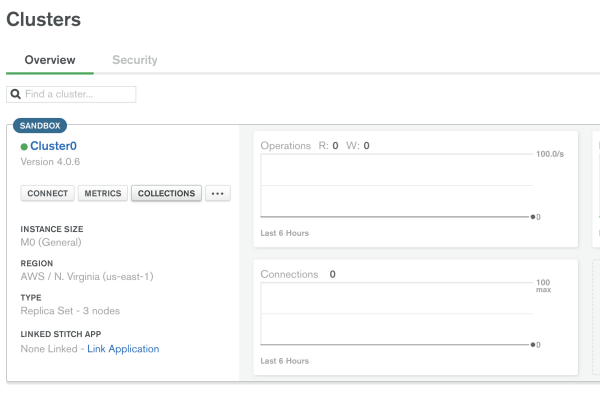
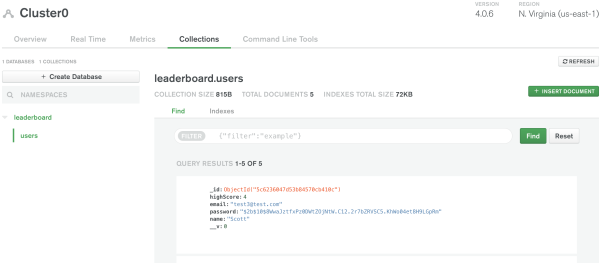
}'Once you submit the request, you should get the status ok message. To validate that our endpoint is actually storing the data in our database, we can use the MongoDB Atlas UI. To do this, log in to MongoDB Atlas here: https://cloud.mongodb.com/user#/atlas/login, and then click on the Collections button.
You should see the users collection with the new user you just created added to your database.
Updating Login Route
With our sign up route writing data to the database, we can start working on updating some of our other routes. The first route we will focus on will be the login route. In routes/main.js, replace all of the logic for the login route with the following code:
router.post('/login', asyncMiddleware(async (req, res, next) => {
  const { email, password } = req.body;
  const user = await UserModel.findOne({ email });
  if (!user) {
    res.status(401).json({ 'message': 'unauthenticated' });
    return;
  }
  const validate = await user.isValidPassword(password);
  if (!validate) {
    res.status(401).json({ 'message': 'unauthenticated' });
    return;
  }
  res.status(200).json({ 'status': 'ok' });
}));
Let’s review the code we just added:
- First, we wrapped the function in our
asyncMiddlewaremiddleware. - Then, we got the
emailandpasswordfrom the request body. - We then used the
findOnemethod on theUserModelto query the database for a user that has the email address that was passed into the request body. - If the query to the database does not return any matches, then we return a 401 response. If there is a match, we then call the
isValidPasswordmethod on the returneduserobject to see if thepasswordprovided in the request body matches the one stored in the database. - If the password does not match, then we return a 401 response. If the passwords do match, then we return a 200 response.
If you save your code changes and restart your server, you can test the updated login endpoint. To do this, run the following code in your terminal:
curl -X POST \
  http://localhost:3000/login \
  -H 'Content-Type: application/json' \
  -d '{
	"email": "[email protected]",
	"password": "1234"
}'
You should get a 200 response. If you change the password or email fields in the body and resend the request, then you should get the 401 response.
Conclusion
With the new login logic in place, that brings Part 2 of this tutorial series to an end. In Part 3, we will continue updating our existing routes, and we will do the following while creating a Phaser game:
- Add passport and JWT authentication to our server to protect our API endpoints.
- Display the leaderboard using the data from our database.
I hope you enjoyed this tutorial and found it helpful. If you have any questions or suggestions on what we should cover next, please let us know in the comments below.