NOTE: This tutorial is not updated to the latest Quintus version and doesn’t run with it.
HTML5 Mario-Style Platformer Series with Quintus:
- Part 1 – Create a HTML5 Mario-Style Platformer Game
- Part 2 – Adding Enemies to a HTML5 Mario-Style Platformer
- Part 3 – Adding Coins and Lives to the Mario-Style HTML5 Platformer
Are you a French speaker? If so, thanks to Alexandre Bianchi you can enjoy an adapted French version of this tutorial.
This tutorial is the second part of the Quintus Platformer Series. In the first tutorial we learned some framework basics, build a basic level using the Tiled map editor, loaded the level in our game and implemented a Player class which we can control using the keyboard and move around the level.
In this second tutorial we’ll add enemies to the level. We’ll implement two types of enemies: “ground enemies” and “vertical enemies”. We’ll also cover how we can have our enemies scan the environment around them and act accordingly.
Tutorial goals
- Creating creatures that follow simple movement and behavior rules
- Using collision detection to kill the player or the enemies
- Understanding the game loop step() method
- Learn how to create reusable components
- Having enemies “observe” around them and act accordingly
- Loading level elements from a JSON object
HTML5 game dev, I like that!
If you are enjoying this tutorial and want a lot more of this stuff feel free to check out our HTML5 game development online courses that cover all the basics to get started:
- HTML5 Game Development for Beginners (Discounted price for a limited time)
- Create a HTML5 Game from Scratch (Discounted for a limited price)
Requirements
As I mentioned in the introduction, you should have completed the previous Quintus tutorial. The requirements for these tutorial series are:
- Familiarity with HTML, CSS, JavaScript and basic object oriented concepts.
- Clone or download Quintus from it’s Github page.
- Setup a local webserver. We need to run the code in this tutorial in a web server and not by just double clicking on the files. WAMP for Windows, MAMP for Mac. On linux just type sudo apt-get install apache2.
- Download and install the Tiled game editor, available for Linux, Mac and Windows
- Have your favorite IDE ready (Netbeans, Eclipse, Sublime2, Notepad++, VIM, or any tool you use for coding).
- Have your knuckles cracked and ready for coding.
Tutorial Assets
Get the full tutorial source code and images here. All images used in this tutorial have a Public Domain license.
I’ve provided the Quintus files among the tutorial source code but keep in mind that the framework is under heavy development. It’s be best if you just grab them straight from the Github page. Also, keep an eye on the repository as you work on your games since new features are being added.
Killer Flies
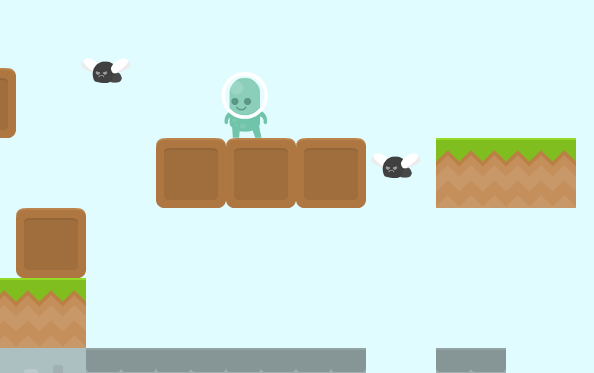
We’ll begin by creating a new class which inherits from Q.Sprite. VerticalEnemies as I’ve called them will be alien flies that only move up and down. You can step on them to kill them and if you touch them in any other manner they’ll kill you.
The vertical movement will be within a range. We’ll call the distance they’ll move from their initial location “rangeY”. So if I define rangeY = 100 it means they will move 100 pixels up from the start, then down until they go 100 pixels from the initial location.
//enemy that goes up and down
Q.Sprite.extend("VerticalEnemy", {
    init: function(p) {
        this._super(p, {vy: -100, rangeY: 200, gravity: 0 });
        this.add("2d");

        this.p.initialY = this.p.y;

        //TODO: check for player collisions, die or kill accordingly
    },
    step: function(dt) {
        //TODO: update range movement within the game loop
    }
});
Let’s analise this step by step. We define our class and give it a default rangeY of 200 pixels. We’ve also set gravity to 0 which means they won’t fall to the ground but will float instead (the gravity is given by the 2d component, which we still need for easier collision detection). The parameter initialY will store the initial location in the Y axis, which we’ll use in our calculations.
The step() will be executed multiple times per second and will be used to check things that “should be being checked all the time”. This is what we call the Game Loop, an important concept in game development. The parameter dt represents the amount of time in seconds that has passed since the step() method was last called.
Let’s add the code inside step() to check that we are moving within our range, and to switch directions once we reach the borders of this range:
step: function(dt) {
    if(this.p.y - this.p.initialY >= this.p.rangeY && this.p.vy > 0) {
        this.p.vy = -this.p.vy;
    }
    else if(-this.p.y + this.p.initialY >= this.p.rangeY && this.p.vy < 0) {
        this.p.vy = -this.p.vy;
    }
}
In Quintus and when using the CANVAS tag (and in all other game frameworks that I’m familiar with for the matter) the Y axis starts in zero at the top and is positive when going down. The X axis is zero on the left as usual.
If we reached the bottom of the range while moving up (vy is our speed in Y, which is positive when going down) then we should change direction (setting vy to -vy). Same applies for when going up.
So that’s how we can use step() to check for things on every game iteration. Start thinking of all the possibilities this opens and how powerful it is. In the game loop you can check and update pretty much everything. Actually that is how the framework works behind the scenes! if you open up quintus_2d.js you’ll find step() being used for collision detection, movement, etc.
Spend at least half an hour looking at the code of the Quintus library. Don’t just grab stuff from the examples you find on the web. You need to spend time looking at how the inners of the framework work. You’ll be surprised on how intuitive and simple it is.
So what if you touch the flies? we’ll, it depends on WHERE you touch them (and yes, we are still talking about game development here). If you step on them, you kill them (pure Mario style). If you hit them on either side or on the bottom then you die. Let’s add the remaining code:
init: function(p) {
    this._super(p, {vy: -100, rangeY: 200, gravity: 0 });
    this.add("2d");

    this.p.initialY = this.p.y;

    this.on("bump.left,bump.right,bump.bottom",function(collision) {
        if(collision.obj.isA("Player")) {
          Q.stageScene("endGame",1, { label: "Game Over" });
          collision.obj.destroy();
        }
    });
    this.on("bump.top",function(collision) {
        if(collision.obj.isA("Player")) {
          collision.obj.p.vy = -100;
          this.destroy();
        }
    });
},
With this.on we are listening for events. Events are a core elements in the Quintus framework and this is how you can listen for them. You’ll find the definition of the bump.* events inside quintus_2d.js.
When the collision is triggered, we can check the class of element we have collided with using collision.obj.isA(…).
If the player hits the enemy in all sides except top a “game over” scene will be staged (we still need to create it) and the player object destroyed.
If we step on the enemies, the player gets a little bounce back and the enemy is destroyed.
Game Over Scene
In the next tutorial we’ll implement player lives. For now the game will be tough, if you die once the game is over. And for simplicity we are just gonna reload the page on game over. Add the following scene staging code:
Q.scene("endGame",function(stage) {
    alert("game over");
    window.location = "";
});
Showing the Enemies
Inside the level1 initialisation you can create enemies in the same way we’ve created the player:
stage.insert(new Q.VerticalEnemy({x: 800, y: 120, rangeY: 70, asset: "fly.png" }));
You should be able to create, kill and be killed by flies now.

Juicy slimes
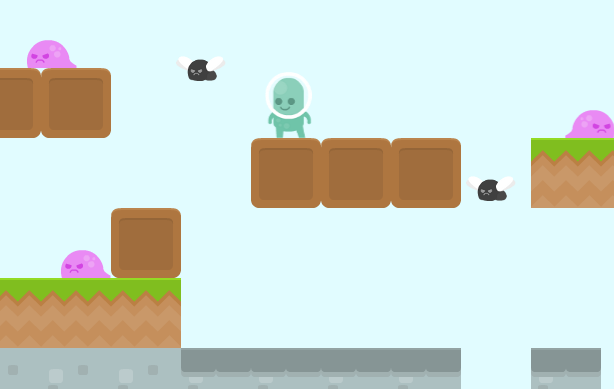
The second type of enemy we’ll be adding here are creatures that move on the ground level (I called them GroundEnemies). If they hit a hall or the edge of a cliff they turn on their back and move on the other direction (flipping the sprite as well to face likewise).
//enemy that walks around
 Q.Sprite.extend("GroundEnemy", {
    init: function(p) {
        this._super(p, {vx: -100, defaultDirection: "left"});
        this.add("2d, aiBounce");

        this.on("bump.left,bump.right,bump.bottom",function(collision) {
            if(collision.obj.isA("Player")) {
              Q.stageScene("endGame",1, { label: "Game Over" });
              collision.obj.destroy();
            }
        });
        this.on("bump.top",function(collision) {
            if(collision.obj.isA("Player")) {
                //make the player jump
                collision.obj.p.vy = -300;

                //kill enemy
                this.destroy();
            }
        });
    },
    step: function(dt) {
        //TODO for edges and turn back when finding them
    }
});
What we added above is pretty much the same we added for the VerticalEnemy, with the sole difference that we included the component “aiBounce” which gives the enemies some basic behaviour: walking and turning around when hitting walls. I strongly recommend you take a look at this component in quintus_2d.js as it’ll give you more hints on how to create your own.
Since we are duplicating code it’s best to create a reusable component called “commonEnemy” and update the code a bit:
//component for common enemy behaviors
Q.component("commonEnemy", {
    added: function() {
        var entity = this.entity;
        entity.on("bump.left,bump.right,bump.bottom",function(collision) {
            if(collision.obj.isA("Player")) {
              Q.stageScene("endGame",1, { label: "Game Over" });
              collision.obj.destroy();
            }
        });
        entity.on("bump.top",function(collision) {
            if(collision.obj.isA("Player")) {
                //make the player jump
                collision.obj.p.vy = -100;

                //kill enemy
                this.destroy();
            }
        });
    },

});

//enemy that walks around
Q.Sprite.extend("GroundEnemy", {
    init: function(p) {
        this._super(p, {vx: -100, defaultDirection: "left"});
        this.add("2d, aiBounce, commonEnemy");
    },
    step: function(dt) {
        //TODO
    }
});

//enemy that goes up and down
Q.Sprite.extend("VerticalEnemy", {
    init: function(p) {
        this._super(p, {vy: -100, rangeY: 200, gravity: 0 });
        this.add("2d, commonEnemy");
        this.p.initialY = this.p.y;
    },
    step: function(dt) {
        if(this.p.y - this.p.initialY >= this.p.rangeY && this.p.vy > 0) {
            this.p.vy = -this.p.vy;
        }
        else if(-this.p.y + this.p.initialY >= this.p.rangeY && this.p.vy < 0) {
            this.p.vy = -this.p.vy;
        }
    }
});
The “added()” method inside the component creation is executed once the component is loaded to the object. See how inside this method we obtain the enemy by getting this.entity, after which you can pretty much refer to the enemy as if you were in it’s own init() method.
Scanning the Environment
If you noticed in the previous code I’ve left the step() method of the GroundEnemy. We’ll use the game loop to check for edges, otherwise our enemies will fall down the cliff.
Before giving up the code I want to explain what we are trying to do:
- We want, in every step, to check the tiles beneath and in front of our monster, and read whatever we find there.
- If there is just another tile, keep walking.
- If there are no tiles it means we are reaching the edge. In this case turn back and walk to the opposite direction
- This is a very rudimentary AI feature, we are giving our slime some basic perception of the world around it
- Quintus makes this easy by using the locate() method. We specify the current stage, the coordinates and the collision type and it gives us whatever is found there
step: function(dt) {
    var dirX = this.p.vx/Math.abs(this.p.vx);
    var ground = Q.stage().locate(this.p.x, this.p.y + this.p.h/2 + 1, Q.SPRITE_DEFAULT);
    var nextTile = Q.stage().locate(this.p.x + dirX * this.p.w/2 + dirX, this.p.y + this.p.h/2 + 1, Q.SPRITE_DEFAULT);

    //if we are on ground and there is a cliff
    if(!nextTile && ground) {
        if(this.p.vx > 0) {
            if(this.p.defaultDirection == "right") {
                this.p.flip = "x";
            }
            else {
                this.p.flip = false;
            }
        }
        else {
            if(this.p.defaultDirection == "left") {
                this.p.flip = "x";
            }
            else {
                this.p.flip = false;
            }
        }
        this.p.vx = -this.p.vx;
    }
}
Enemies in JSON
Scalability (the ability to grow without going crazy) is an aspect to keep in mind. We wanna be able to quickly create multiple enemies and not having to create the individual instances one by one.
Also, there is the chance that we may want to load the level parameters from the Internet, in which case we need to be able to load stuff from a JSON object.
I’m just gonna show a quick way to load the level enemies using JSON. You could load a lot of other parameters in this manner, and this JSON object could come from the Internet, the local storage, etc. The following code goes inside our level1 initialisation, and uses a Quintus method that stages have called “loadAssets”:
//level assets. format must be as shown: [[ClassName, params], .. ]
            var levelAssets = [
                ["GroundEnemy", {x: 18*70, y: 6*70, asset: "slime.png"}],
                ["VerticalEnemy", {x: 800, y: 120, rangeY: 70, asset: "fly.png"}],
                ["VerticalEnemy", {x: 1080, y: 120, rangeY: 80, asset: "fly.png"}],
                ["GroundEnemy", {x: 6*70, y: 3*70, asset: "slime.png"}],
                ["GroundEnemy", {x: 8*70, y: 70, asset: "slime.png"}],
                ["GroundEnemy", {x: 18*70, y: 120, asset: "slime.png"}],
                ["GroundEnemy", {x: 12*70, y: 120, asset: "slime.png"}]
            ];

            //load level assets
            stage.loadAssets(levelAssets);
Suggested Activities
We’ve reached the end of this tutorial and before closing this up I’d like to suggest a few activities you can try on your own:
- Join and participate of the vibrant Quintus Google Plus community
- Add more kinds of enemies
- Load the enemies JSON and level TMX files from a remote location.
- Share back to the community the reusable components you’ve created.
What Else to Check Out
If you like my teaching style, at Zenva we have two high quality video courses on HTML5 game development where we build several examples of different types of games, such as a top-view shooting bad guys Zelda-style game, spaceship games, farming games, virtual pet games and many other examples!


