You can access the full course here: Craft Web Forms with React
React Project Setup
In this lesson, we’ll be learning how to set up our environment for building our application.
Summary
We’re going to be using a tool made by Facebook called React, that provides a starter project and built-in build tools so we can skip to the fun part– creating our app.
The tools we’ll need are:
- Node.js – https://nodejs.org/en/download/
- NPM – https://www.npmjs.com/
- Google Chrome – https://www.google.com/intl/en/chrome/
- React Developer Tools – https://chrome.google.com/webstore/
- Visual Studio Code – http://code.visualstudio.com/
- Create React App
Installing Node.Js
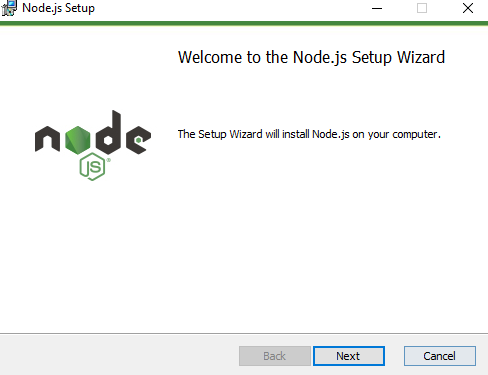
First, we’re going to install Node.js. This is an open-source server environment that allows you to run JavaScript on the server.
You can download it from here: https://nodejs.org/en/download/
(At the creation of this video, the latest is 14.3.0.)
Once the download is complete, unzip node package and run the install.
Installing NPM
NPM is a package manager for Node.js packages. The NPM website https://www.npmjs.com/ hosts thousands of free packages to download and use.
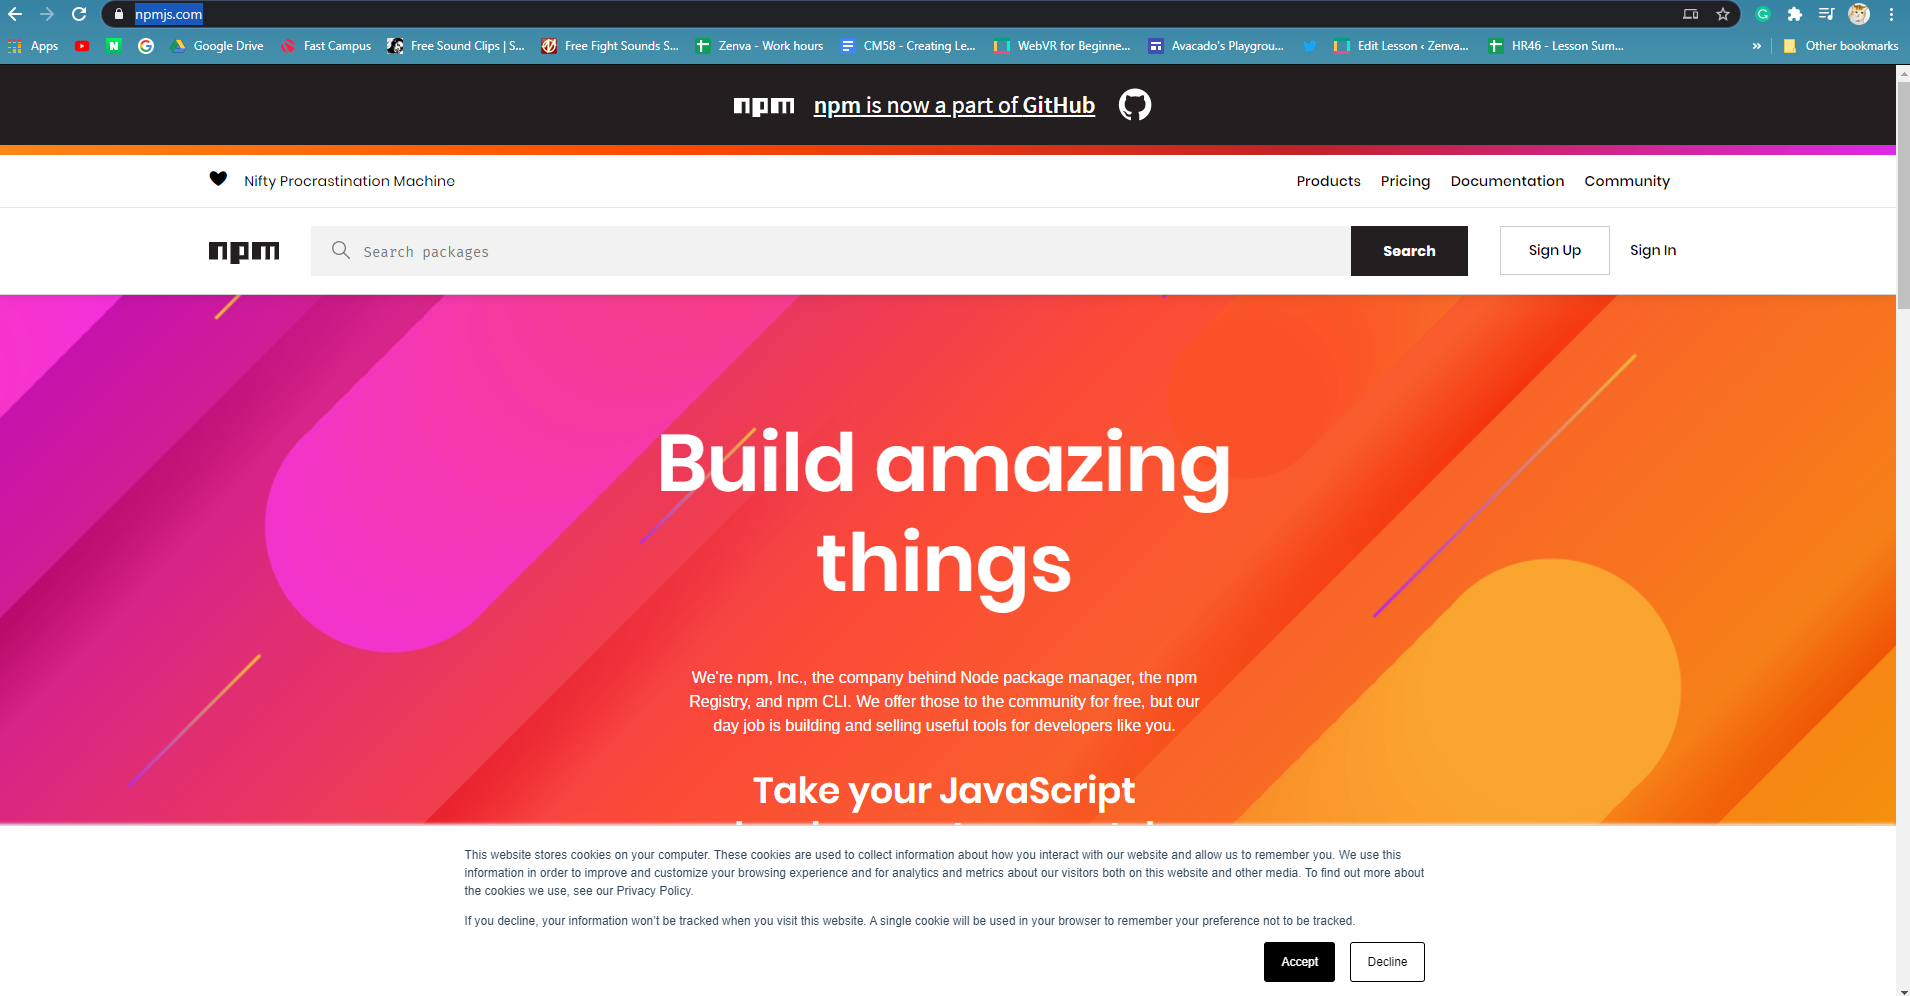
The NPM program is installed on your computer when you install node.js.
Installing Google Chrome
If you don’t have Chrome already installed on your system, you can download it from here: https://www.google.com/intl/en/chrome/
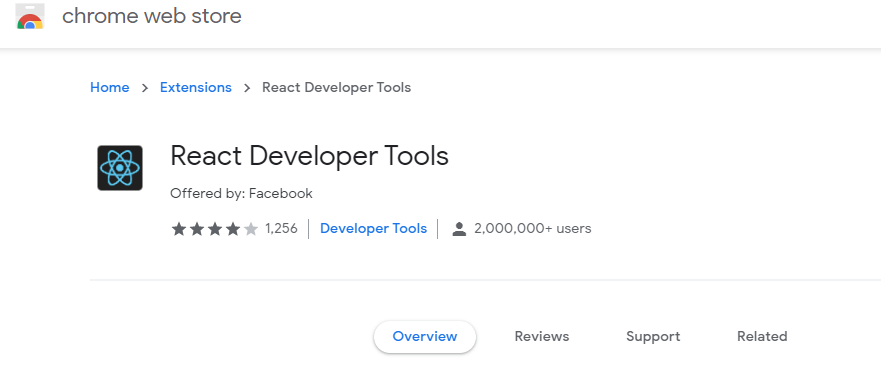
We recommend using Google Chrome over other web browsers, as the React Developer Tools is a Chrome dev tool extension for the open-source React JavaScript library.
It allows you to inspect the React components hierarchy in the Chrome developer tools. (Add it to Chrome: https://chrome.google.com/webstore/)
Installing Visual Studio
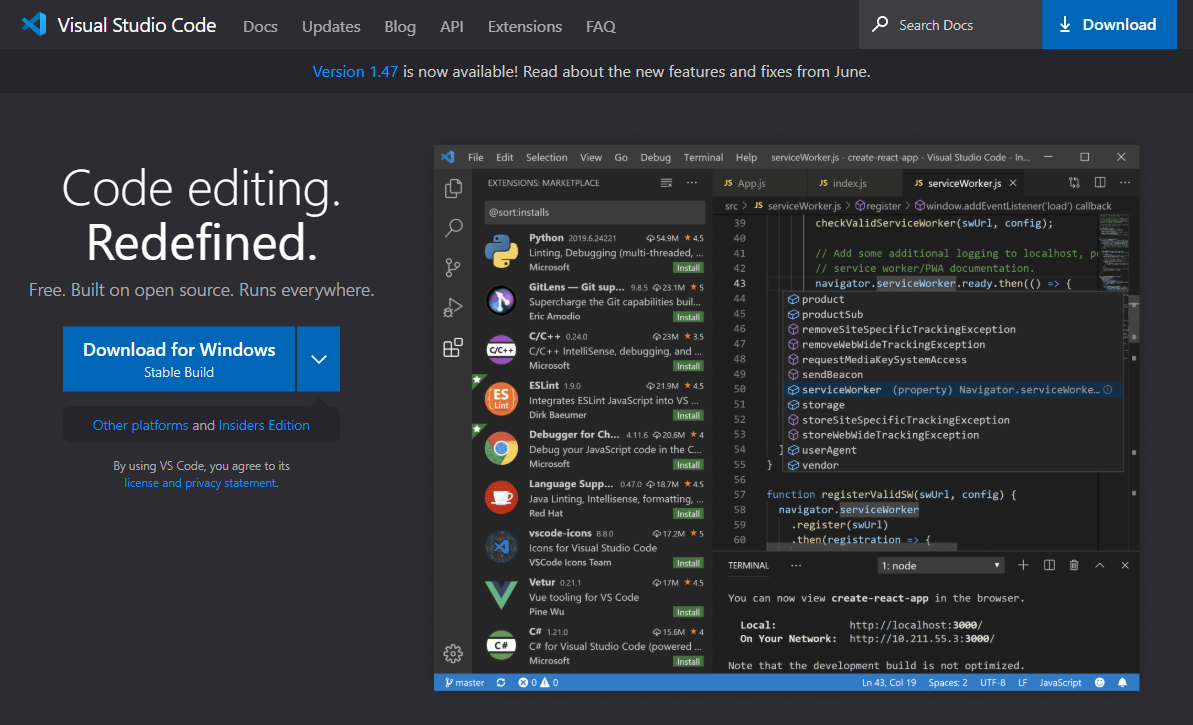
Next, you’ll need a code editor, and we’ll be using Visual Studio. Head over to http://code.visualstudio.com/ and install.
Installing Create React App
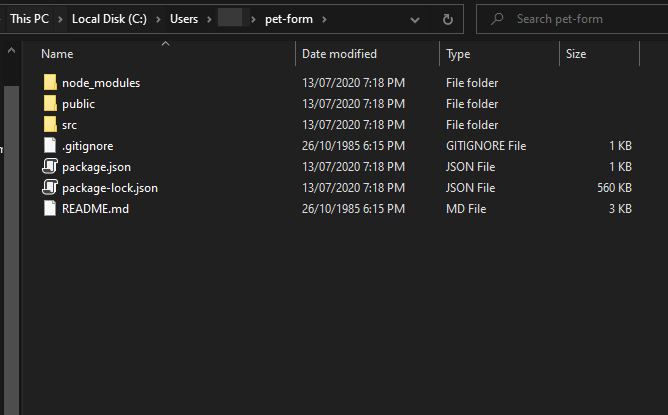
To install Create React App, open up the terminal and type in the command:
npm init react-app pet-form*
*[or whatever the name you want to associate with the directory]

…and that will create a directory with all of your React components needed to get started.
Data Flow – Part 1
In this lesson, we’re going to review how data flows within React by inspecting what are props and states and when to use them.
Probs vs. States
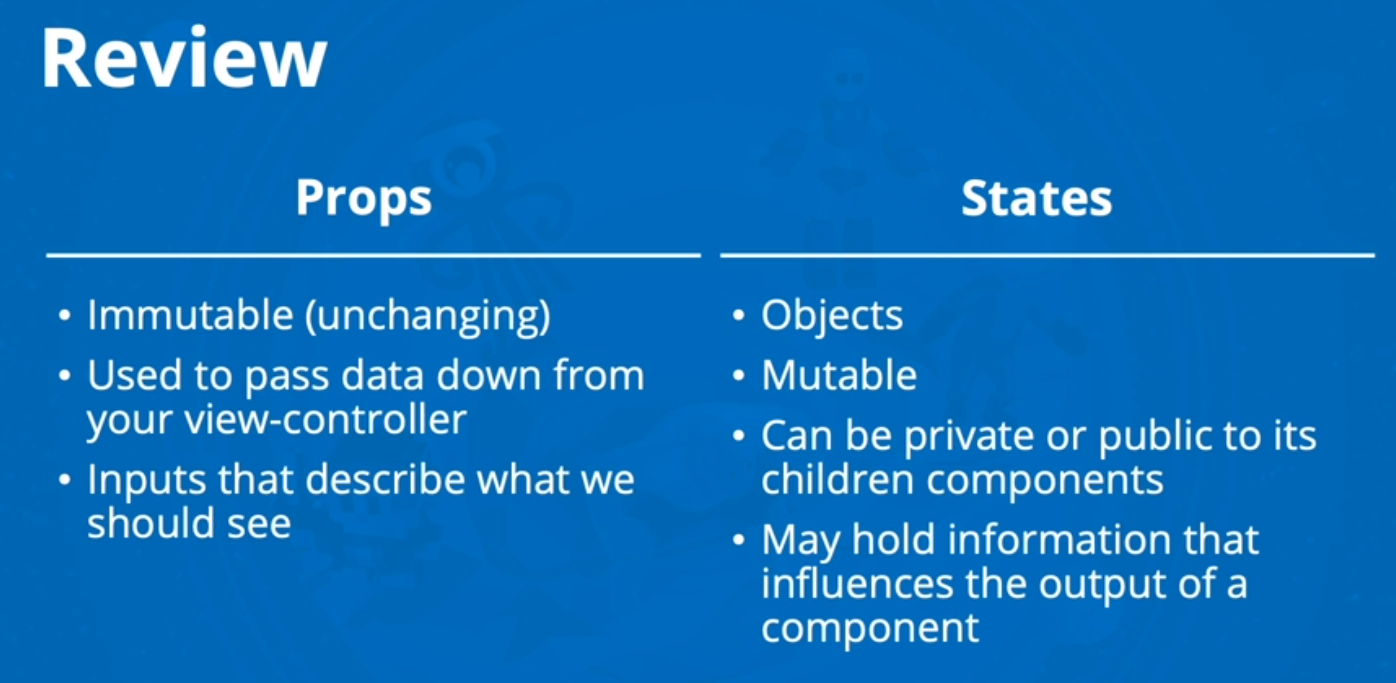
Props, short for properties, are immutable, meaning they are unchanging. They’re also used to pass data down from your view-controller, and our inputs that describe what we should see.
States are objects. They’re mutable, meaning they can be changed. They can be private or public to their children components and may hold information that influences the output of a React component.
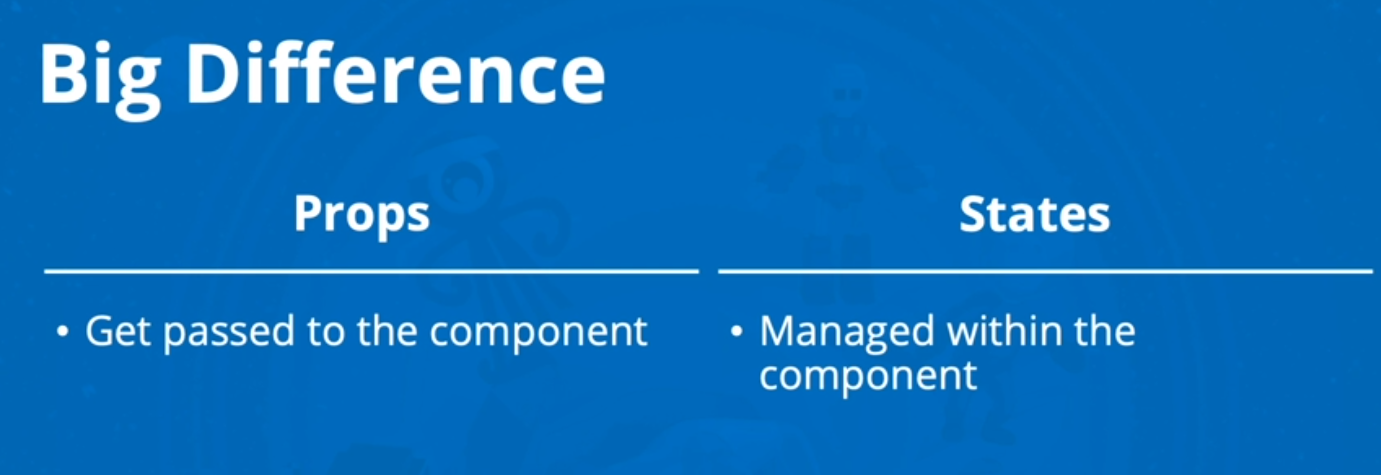
States and props are both plain JavaScript objects. While both hold information that influences the output of render, props get passed to the component (similar to function parameters), whereas states are managed within the component (similar to variables declared within a function).
Building a simple app
Let’s try building a simple app to see states and props in action.
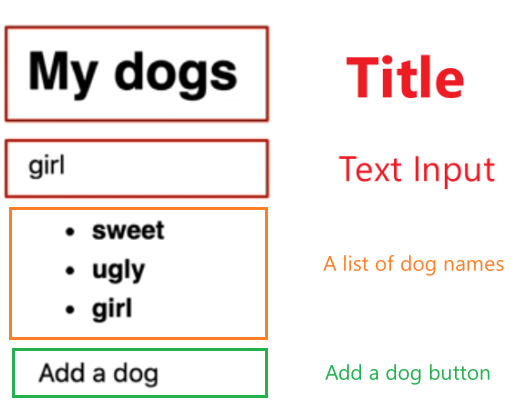
Our app will allow us to create a list of dog names, which will include a title, a text field, and an add button to add typed names to a list of those cool dog names.
Creating A React Project
Open up your terminal/command prompt, and type in your directory where you wish to put all your react projects.
For example, if you have a folder on the desktop called React:
cd Desktop/React
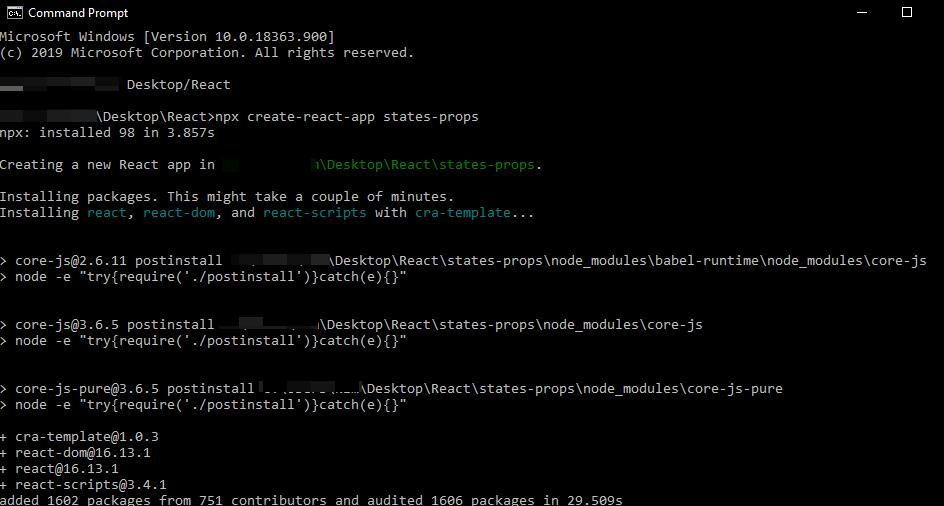
Then, use the Create React App command to generate a new project. We’re going to call the directory “states-props”.
nps create-react-app states-props
This will create a directory and install all the necessary packages.
Now we’ll move into that directory by typing in:
cd states-props
And the generator project contains some files we won’t need right now, so we’ll delete them by doing:
rm src/App.* src/index.css src/logo.svg
Creating A DogApp.js
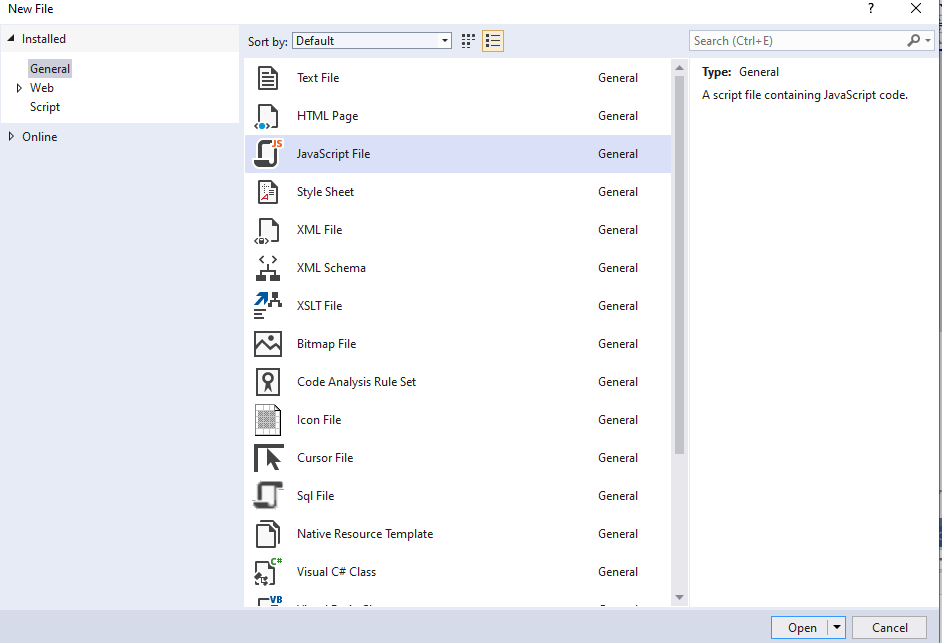
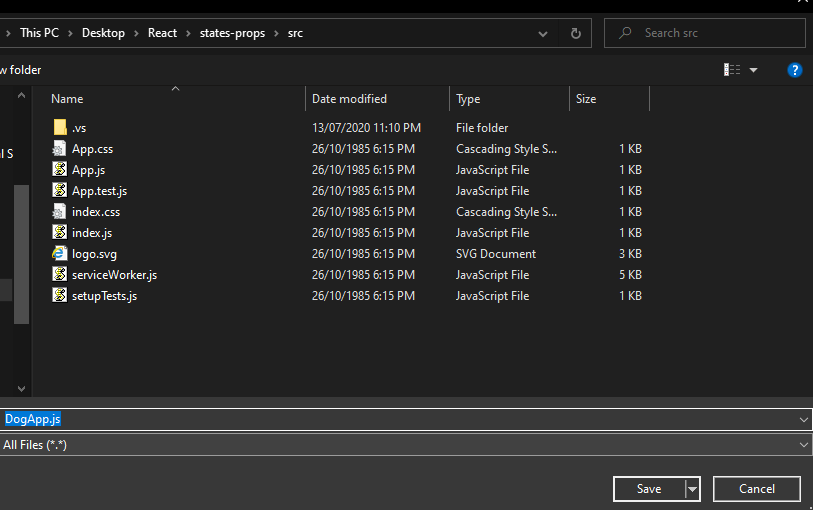
Next, let’s open up Visual Studio and create a new JavaScript file in ~/states-props/src.
First, we’ll need to import the React by typing:
// JavaScript source code
import React from 'react';
Then we’re going to create a class called “DogApp” that extends React.component:
// JavaScript source code
import React from 'react';

class DogApp extends React.Component {
In that render function, we’re just going to return a <div> with a heading “My Dogs” and a button “Add a dog”.
// JavaScript source code
import React from 'react';

class DogApp extends React.Component {

    render() {
        return (
            <div>
                <h1>My Dogs</h1>
                <button>Add a dog</button>
            </div>
        );
    }
}
And then go ahead and export default DogApp.
// JavaScript source code
import React from 'react';

class DogApp extends React.Component {

    render() {
        return (
            <div>
                <h1>My Dogs</h1>
                <button>Add a dog</button>
            </div>
        );
    }
}

export default DogApp;
Project Preview
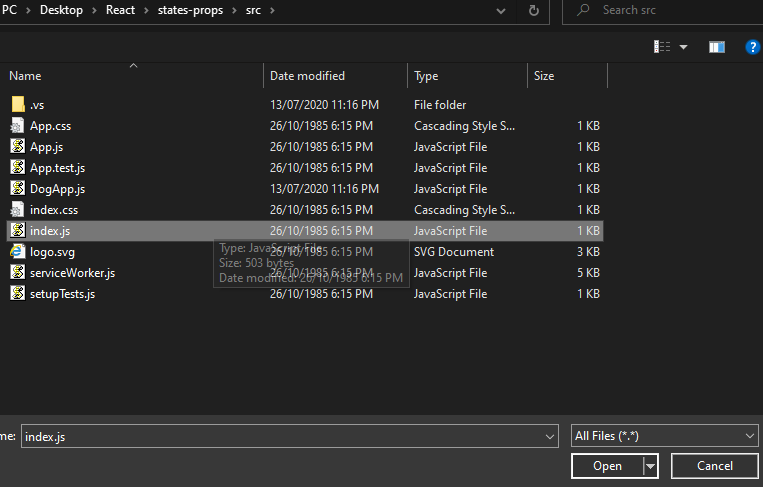
To see what we have so far, we’re going to open our index.js file:
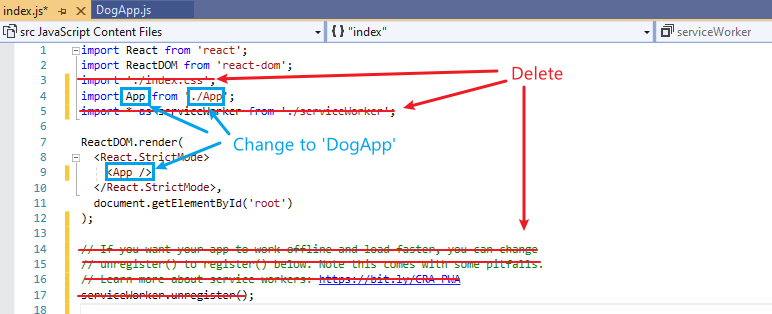
… and edit the file as below:
import React from 'react';
import ReactDOM from 'react-dom';
import DogApp from './DogApp';

ReactDOM.render(
  <React.StrictMode>
    <DogApp />
  </React.StrictMode>,
  document.getElementById('root')
);
Next, we’ll open up the terminal, and type:
npm start
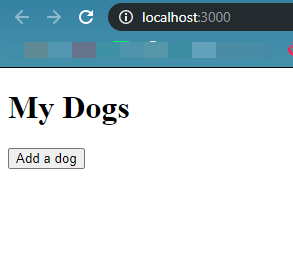
Then once our project is loaded, we should be able to see a title and a button.
Data Flow Part 2
In this lesson, we’ll continue to build out our cool dog app.
Review
Remember, the objective of this app is to show States are:
- Objects
- Mutable (changing)
- Can be private or public to its children components
- May hold information that influences the output of a component
Creating A State
Open up “DogApp.js” and create a state above our render function, by typing:
state = {}First, we’ll add two properties to the state object.
    state = {
        nameOfNewDog: '',
        dogs: []
    }
One is “nameOfNewDog”, which will hold the new name for your dog. Then, we’ll create the “dogs” array, which will hold a list of entered dog names.
In our render method, we’ll add an input tag with an onChange event.
  render() {
        return (
            <div>
                <h1>My Dogs</h1>
                //The onChange event detects when the value of an input element changes. Here, we can bind a handleChange action to our input tag.
                <input onChange={this.handleClick.bind(this)} name="nameOfNewDog" />
        );
    }
Let’s also add an onClick event to our button tag and bind a “handleAddDog” click action to it.
The .bind() method allows us to pass the context we want to bind the function to (in this case, handleChange and handleAddDog), but it does not immediately run the actions. Instead, a copy of the action with the switch context is returned. This copy can then be run whenever you want. Note that both functions will be modifying the state object.
In our handleChange method, we can use this.setState method to set the nameOfNewDog to the inputted value.
    handleChange(e) {
        this.setState({
            nameOfNewDog: e.target.value
        });
    }
Then, in our handleAddDog click, we create an if statement that makes sure the input isn’t empty.
    handleAddDogClick() {
        if (!this.state.nameOfNewDog) {
            return;
        }
    }
And then, we use the this.setState to make sure that on the click of the button, nameOfNewDog string becomes empty, and we add that inputted value to our dogs array.
 handleAddDogClick() {
        if (!this.state.nameOfNewDog) {
            return;
        }

        this.setState({
            nameOfNewDog: '',
            dogs: [...this.state.dogs, this.state.nameOfNewDog]
        });
    }
About this.setState
Note that the way we use this.setState here can be used to modify any property in a react state object.
In traditional JavaScript, you would typically modify the object directly, but we do not recommend modifying the state directly because may cause it to get overwritten and create inconsistencies in the app. this.setState doesn’t modify the state directly but creates a pending state transition.
Another important thing to note is when you’re updating your react state tree, it only modifies the first level of the property.
Displaying State Data
So far, we’ve discussed what react states are, and how to add, update the data within them. Your next question might be, How do we display the data we’ve saved in the state?
    render() {
        return (
            <div>
                <h1>My Dogs</h1>
                <input onChange={this.handleChange.bind(this)} name="nameOfNewDog" />

                <ul> //The HTML <ul> element represents an unordered list of items, typically rendered as a bulleted list.
                    {this.state.dogs.map((dogs, i) => (
                        <li key={`${dogs}_${i}`}>
                            <b>{dogs}</b>
                        </li>
                    ))}
                </ul>

                <button onClick={this.handleAddDogClick.bind(this)}>
                  Add a dog
                </button>
                <button>Add a dog</button>
            </div>
        );
    }
With this code, we’ll be looping through the dogs array with the map method to create a list tag that outputs the name of the dogs we’ve entered.
Let’s save the project and open up the terminal to see what we’ve got. Remember to move into the relevant directory first:
cd Desktop/React/states-props
… and then run the app by typing:
npm start
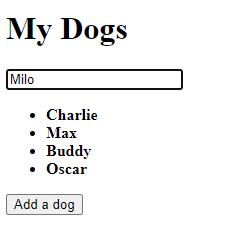
Now we have our input along with our button, and within the input, we can start typing names and adding them to our list.
Utilizing Props
Now that we have built a react application that utilizes state to save and display data, it’s time to take a look at how react props play with states.
Remember that Props are:
- Immutable (unchanging)
- Used to pass data down from your view controller
- Inputs that describe what we should see
In our input tag, let’s insert an input of type to equal text. And if we add another input named placeholder, it will make our input field look different to our user.
<input type="text" placeholder="Enter a dog name" onChange={this.handleChange.bind(this)} name="nameOfNewDog" /> //In this case, inputs equal props.
In the same file, let’s create a new component called Dog, which will expect a prop called name.
class Dog extends React.Component {
    render() {
        return (
            <li>
                <b>{this.props.name}</b>
            </li>)
    }
}
Now, we’ll update the code in the DogApp component where we display a list of dog names.
render() {
        return (
            <div>
                <h1>My Dogs</h1>
                <input type="text" placeholder="Enter a dog name" onChange={this.handleChange.bind(this)} name="nameOfNewDog" />
                <ul>
                    {this.state.dogs.map((dogs, i) => (
                        <Dog key={`${dogs}_${i}`} name={dogs}/>
                    ))}
                </ul>
                <button onClick={this.handleAddDogClick.bind(this)}>
                    Add a dog
                </button>
            </div>
        );
    }
All we’re doing here is passing the dog name that we’ve stored in our state object, and passing it as a prop to the dog component we’ve just created.
                <ul>
                    {this.state.dogs.map((dogs, i) => (
                        <Dog key={`${dogs}_${i}`} name={dogs}/>
                    ))}
                </ul>
The dog component will then display the input name and display the name in a list item HTML tag.
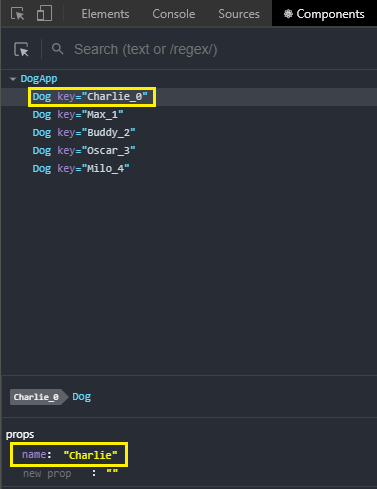
Let’s save and refresh the page. Now, if we take a look at our developer tools (Ctrl+Shif+I) and go to the Components tab…

…we’ll see that we have a higher-level DogApp component, and within that, we have our Dog component, which has props of name (i.e. Charlie, Max, Buddy…):
Unidirectional Data Flow
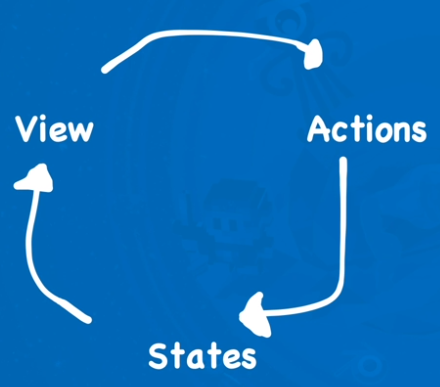
When we combine props and states, we get the concept of unidirectional data flow.
In general, this concept means that data has one and only one way to transfer to other parts of the application.
In react this means that state is passed to the view and to the child components, triggering actions.

Actions, triggered by the view, can update the state and the state change is passed to the view.
When to use States?
That leads us to the question: when do we use states? As a general rule, data stored in states should be referenced inside render somewhere.
Component states are for storing UI states, i.e. Things that affect the visual rendering of the page. Here are some examples:
- User-entered Input (values, boxes, form fields, etc.)
- Current or selected item (current tab, selected row, etc.)
- Data from the server (list of products, no. of likes, etc.)
- Open/closed state (expanded/hidden sidebar or module, etc.)
This makes sense because anytime the state is updated, the component will re-render. If modifying a piece of data does not visually change the component, the data shouldn’t go into a state.
Transcript
React Project Setup
Welcome back. In this lesson, we’ll be learning how to set up our environment for building our application. Don’t worry, there’s no boilerplate to clone from GitHub, no webpack config either. Instead, we’re using Create React App, a tool Facebook made. It provides a starter project and built-in build tools so we can skip to the fun part, creating our app.
The tools we’ll need are Node.js, NPM, Google Chrome, React Developer Tools, Visual Studio Code, Create React App.
First we’re going to install Node.js. This is an open-source server environment that allows you to run JavaScript on the server. Go ahead and to go Node.js.org. At the creation of this video, the latest is 14.3.0. Click the download link to download. Once it has completely downloaded, navigate to your download folder, unzip node package, and run the install.
NPM is a package manager for Node.js packages. Ww.npmjs.com hosts thousands of free packages to download and use. The NPM program is installed on your computer when you install Node.js.
Next, we’ll need Google Chrome or any modern browser, but I recommend using Google Chrome simply because we’ll be using the React Developer Tools, which is a nifty tool for debugging your applications. If you don’t have Chrome already installed on your system, just go ahead and open up any browser and Google “Chrome download.” The first link will take you to a page where you will be able to do just that.
Once you have installed Google Chrome, you’ll need to install React Developer Tools. This is a Chrome dev tool extension for the open source React JavaScript library. It allows you to inspect the React components hierarchy in the Chrome developer tools.
Next, you’ll need a code editor. The one I’ll be using is Visual Studio Code. Head over to code.visualstudio.com and install.
Finally, we’ll install Create React App by going to the terminal and typing the command npm init react app and whatever the name you want to associate with the directory, and that will create a directory with all of your React components needed to get started.
With our environment all set, we can get to coding. See you next time.
Data Flow – Part 1
Welcome back, at this point you have Node.JS, NPM, Visual Studio Code, React Developer Tool and Create React App installed. All of the tools are ready, but before we dive into the art of creating a form using React, let’s review how data flows within React by inspecting what are props and states and when to use them.
Props short for properties, are immutable, meaning they are unchanging, they’re also used to pass data down from your view-controller, and our inputs that describe what we should see.
States are objects, they’re immutable, meaning they can be changed. They can be private or public to it’s children components. And may hold information that influenced the output of a react component.
States and props are both plain JavaScript objects. While both hold information that influences the output of render, they are different in one important way. Props get passed to the component, similar to function parameters, whereas states are managed within the component similar to variables declared within a function.
Let’s try our hand at building a simple app to see states and props in action. Our app will allow us to create a list of cool dog names, which will include a title, a text field, an add button to add typed names, to a list of those cool dog names.
Open up your terminal, and in your desired directory, I have a folder on the desktop called React, where I’ll be putting all my projects. Use the create React app command to generate a new project. And that command is NPX create React app. I’m gonna call my directory states dash prompts. It will create a directory and install all the necessary packages.
From here we’ll move into that directory by doing sd states dash props, and the generator project contains some files we won’t need right now, so we’ll delete them. Or you could also just ignore them. The command to delete these files is rm source backslash app dot star source backslash index dot CSS source backslash logo dot cvg.
Open your project on Visual Studio Code, and in the source folder, create a new JavaScript file titled Dog App. First we’ll need to import the React by typing import React from React. Then we’re gonna create a class called Dog App that extends React dot component, in that render function we’re just going to return a div with a heading my dogs and a button, add a dog, and then go ahead and export default Dog App.
To see what we have so far, we’re gonna go back to our index .JS file and delete import index .js and change import app to import Dog App. Then within our render, we’re just going to change that to Dog App, and erase that service worker cause we don’t really need those files to run our program.
Next we’ll open up the terminal, and type NPM start. Then once our project lobes, we’ll see that we have a title called My Dogs and then a button that has a added dog tag, and we are on our way to building the coolest Dog App ever.
In the next lesson, I’ll show you how to add those states and prompts, update them and go ahead and list those dog names, that the user types in. See you next time.
Data Flow – Part 2
Welcome back. In this lesson we’ll continue to build out our cool dog app. Remember, the objective of this app is to show states are objects, are mutable, can be private or public to its children components, and may hold information that influences the output of a component.
Now, let’s create a state. Above our render function, go ahead and type state, equals, open and close parentheses. That’s how easy it is, but this state object is useless until we start adding some data to it. First, we’ll add two properties to the state object. One is nameOfNewDog that will hold the new name for your dog as you are typing. And the dogs array, which is going to be an array that will hold a list of entered dog names.
In our render method, we’ll add an input tag with an onChange event. The onChange event and react detects when the value of an input element changes. Here, bind a handleChange action to our input tag.
While we’re here, let’s also add an onClick event to our button tag and bind a handleAddDog click action to it. The bind method allows us to pass the context we want to bind the function to, in this case our handleChange and handleAddDog click actions. But it does not immediately run the actions. Instead, a copy of the action with the switch context is returned, this copy can then be run whenever you want. It is important to note that both functions will be modifying the state object.
Now we just have to write them. So, in our handleChange method we use the this.setState method to set the nameOfNewDog to the inputted value. Then, in our handleAddDog click, we create an if statement that makes sure the input is not empty. And then we use the this.setState to make sure that on the click of the button, nameOfNewDog string becomes empty and we add that inputted value to our dogs array.
Notice how we’re using this.setState. This is the correct way of modify any property in a react state object. In traditional JavaScript, you would typically modify the object directly, but that’s a big no-no in practice. This is because modifying the state directly may create a situation where those modifications may get overwritten and cause inconsistencies in the app. setState does not modify directly but creates a pending state transition.
Another important thing to note is when you’re updating your react state tree, it only modifies the first level of property.
So far, we’ve discussed what react states are and how to add, update, the data within them. Your next question might be, how do we display the data we’ve saved in the state? This is done really easily. With this code I’m typing now, we’ll be looping through the dogs array with the map method to create a list tag that outputs the name of the dogs we’ve entered.
Go ahead and save your project and open up the terminal to run it and see what we’ve got. So, just type npm start and it will run our server and take us to our Google Chrome web browser. And from there we see that we have our title. Now we have our input, along with our button, and within the input we can start typing names and adding them to our list.
So far, we’ve built a react dog application that utilizes state to save and display data. Now we can take a look at how react props play nicely with states. Remember, props are immutable, meaning unchanging. They are used to pass data down from your view-controller, and are inputs that describe what we should see.
In our input tag, let’s insert an input of type to equal text. And if we add another input-named placeholder, it will make our input field look different to our user. Inputs, in this case, equal props. It works the same way with react components.
In the same file let’s create a new component called Dog. Dog will expect a prop called name. Now update the code in dog app component where we display the list of dog names. All we are doing here is passing the dog name that we’ve stored in our state object, and passing it as a prop to the dog component we’ve just created. The dog component will then display the input name and display the name in a list item HTML tag.
Then we go ahead and open up our terminal again, hit npm start, and our application builds out. We still have our My Dogs title with our input. And when we go ahead and type our names in there it adds to our list.
If we take a look at our developer tools, we’ll see that we have a higher level dog app component and within that we have our dog component, which has props of name, which is the first one, CeCe, and the second one, Coolest Dog Ever.
When we combine props and states, we get the concept of unidirectional data flow. In general, this concept means that data has one and only one way to transfer to other parts of the application. In react this means that state is passed to the view and to the child components. Actions are triggered by the view, actions can update the state, and the state change is passed to the view and to the child components. And it just goes around and round like that.
That leads us to the question: when do we use states?
As a general rule, data that is stored in states should be referenced inside render somewhere. Component states is for storing UI states. Things that affect the visual rendering of the page. This makes sense because anytime state is updated, the component will re-render. If modifying a piece of data does not visually change the component, the data shouldn’t go into a state.
Here are some things that makes sense to put in a state. User-entered input, such as values, text boxes and other form fields. Current or selected item, the current tab, the select row. Data from the server, so things such as a list of products, the number of likes on a page. And open/closed state, so a module open or closed, or a sidebar, expanded or hidden.
And there we have it, our data flow lesson is complete. In our next lesson we’ll go over input controls. See ya next time.
Interested in continuing? Check out the full Craft Web Forms with React course, which is part of our Full-Stack Web Development Mini-Degree.
