You can access the full course here: Project-Based Next.js – Games Website
Part 1
Our goal here is to create an app that contains a homepage and a game page. The home page displays the Zenva logo and a few games that we have “created” with an image, title, and description for each. The game page will showcase one of the games that the user has selected by retrieving information from the home page about the chosen game. Much of this project will be reapplying what we covered in the previous sections to our final project. The final homepage will look like this:
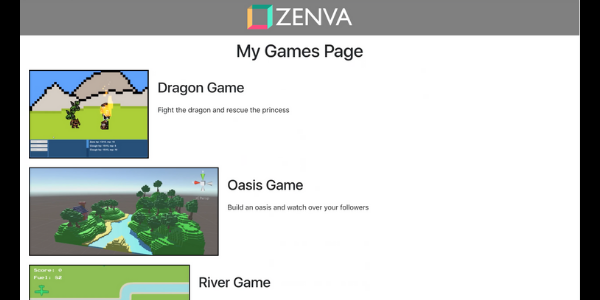
And the final game page will look like this for the Dragon Game:
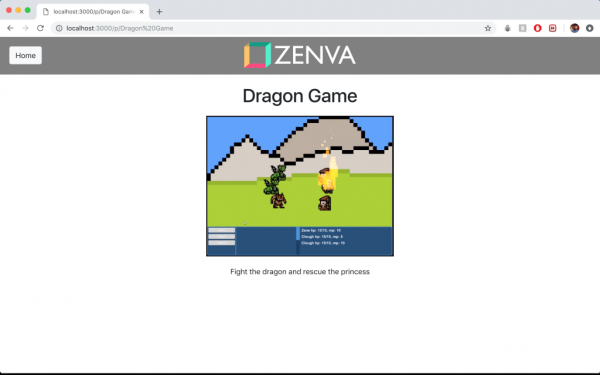
Part 2
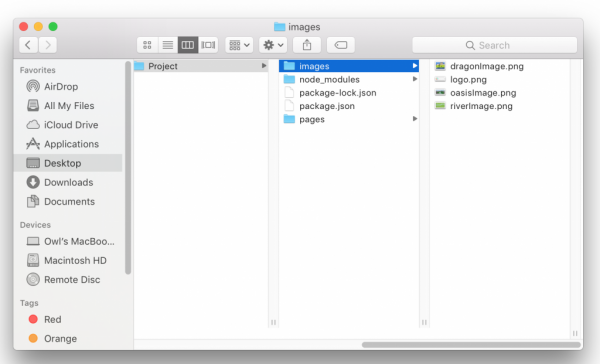
We will start by setting up a basic project (as outlined in the above tutorial: Installing Next.js and Running a Project) and adding some images to an images folder. The final directory system should look something like this:
Part 3
Note that I have added the Zenva logo and a few screenshots of games that I got from Zenva. Next, we have to install the next-images library in order to display images in our project. We do so by running the terminal command:
npm install --save next-images
Next, we need to create a ‘next.config.js’ file and add the code to it:
const withImages = require('next-images')
module.exports = withImages()
We will create some variables to represent the images that we need in “index.js”. We will put these at the top as imports:
import logoImage from '../images/logo.png';
import dragonImage from '../images/dragonImage.png';
import oasisImage from '../images/oasisImage.png';
import riverImage from '../images/riverImage.png';
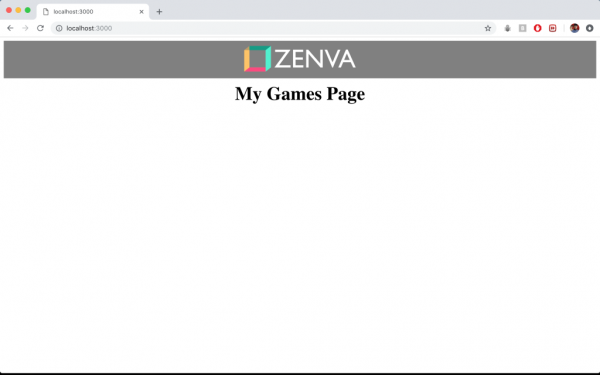
Next, we will create the header which is just a grey bar with the Zenva logo and add a heading. We will also add styling. “Index.js” should now look something like this:
import logoImage from '../images/logo.png';
import dragonImage from '../images/dragonImage.png';
import oasisImage from '../images/oasisImage.png';
import riverImage from '../images/riverImage.png';

export default () => (

    <div>
        <header>
            <img src={logoImage} alt='logo' id='logoImage' />
        </header>
        <h1>My Games Page</h1>
        <style jsx global>{`

            header {
                background-color: grey;
                height: 80px;
                text-align: center;
                padding: 10px;
            }

            #logoImage {
                height: 60px;
            }

            h1 {
                text-align: center;
                font-size: 40px;
                margin: 10px;
            }

        `}</style>
    </div>

)
With the output looking like this:
Transcript 1
What is up, everyone? Welcome to the second half of our intro to Next.js course. This will be focused entirely on the final project, which will be essentially a static webpage that displays some games that we have developed. So don’t necessarily have to have developed these games. It’s kind of like a mock webpage.
So, the steps we’ll take are gonna be to first create the project and add some images. We’ll then import the images into the project itself and we’ll work on how to display them. Then we’ll build some custom display blocks to display the image, title, and description of each of the games. We’ll then build up a second page that’ll be used to display the specifics of a single game. Then we’ll apply some Bootstrap and custom styling and finish up by masking the URL with server site support. So just to quickly recap, this is kind of what the game looks like.
We’ve got our games page here. Three different games to choose from. And if we click on each of them, it will take us to the game itself and we can just go home. It just kind of provides a better overview of that single game. Okay, so hope you guys are very excited. I’m really excited about this project. I thought it was actually really cool developing this with Next.js. It’s super easy and at this point, you have all the necessary tools to begin and finish off this project. So, thanks for watching. Let’s get started right away by setting our project up.
Transcript 2
What’s up everyone and welcome to the first section of our project. Here we’re just going to do some basic setup. We’ll start a new Next.js project and we’ll import some images to use.
So let’s head on over to our IDE right here. So I got again sublime text starts up at an empty instance. We will first need to turn to terminal or command prompt for you Windows users. And we’ll want to first decide where we want to save this. So I’ll show you in Finder where I want mine. It is – let’s actually just get rid of that second window. It’s just going to be under desktop again Zenva, Next.js, we’re gonna go into course, practice.
Actually we’ll not put in practice. We’ll start a new project right here. So, I’m going to do that now. I’ll just navigate to where I need to get to and next, okay, so if I do it in ‘ls’, I got course and samples put a cd into the courses itself and here I’ve just got my practice project. Okay, so I’m now going to make it a directory called Project and I’m going to work in here so you’ll want to work in whichever directory you just created it doesn’t really matter too much what you call it for now, just something that makes sense. We’re going to start by initializing NPM. So, we’re going to do NPM init-y. This will create our package.json file. So that’s cool.
We’ll then need to install the react and the next packages. So, we’ll NPM- in fact let me move that up for you guys. NPM install and then we’re going to save it. So, –save react-dom and then next like this. Okay, so this is the same basic setup that we performed when we were doing our practice setup initially. Okay, so this is going to install react functionality as well as react-dom functionality and of course the next package as well. So, after this we’ll need to create a pages directory and I think mine is just being a little bit slow because my internet is slow right now, but once that’s done again we’ll create a pages directory and then we’ll start by putting index file inside of that. Okay, good stuff.
So, we’ll make a directory now called pages. Okay, so if we do an ls this is what things should look like we’re going to I guess we could cd inter pages although it doesn’t really matter too much. So, we want to first open package.json before we create our index files. So let’s go on over to again Sublime Text. Were just going to go ahead and open something. This can be in our Next.js into course and again into that project and of course, we’re just going to open up package.json. Okay, so need to add a couple lines to our script section we’ll be modifying these as we go, but for starters we’ll need to add something to dev build and start. Okay, so development is simply going to be I believe just one next like so.
We want to enable the build command. That’s just going to be next build for now and then we’ll want to enable the start command that is going to be for next start like so. Okay, so we’ll definitely need to modify start and probably build at some point I think even dev as well but for now that’s going to be good enough to get our project up and running.
Okay so, the next thing we want is an index so- let’s just get rid of that untitled one an- index.json. So let’s create – or rather index.js – so let’s go ahead and save this right off the bat save that as index.js and we want to make sure again that it is in our pages directory. Okay, so for now we’ll just put something here. It doesn’t really matter too much because we’re going to be actually implementing the proper page in a bit but we’ll just export a default like this and then we can just put whatever we want in here.
We’ll I guess start off with just a basic div like so and then within that div we want a header at some point we can just do an h1 like this and it’s just going to say Game Page cause we know- or Games Page maybe because we know that this is exactly what it’s going to say at some point in time. In fact, I think we actually have the same My Games Page maybe that makes more sense. Okay, so we’ll give this a save that is good enough for now.
And the next step that we want to do is just select some images okay, and these we are going to be using throughout. So, if you remember back to when I showed you the demo we had the Zenva logo up top and then we had 3 different games images so we can really choose whichever images you want honestly if you’re just using it for your own personal project you can just pull them from google, you can use something that’s open-source or you can actually take some pictures of some games that you’ve developed and use those.
I would encourage the latter of those 3 options if you have actually built some games yourself because the idea of this is to be able to showcase your own games. So, I’ve got some games or some images picked out I think I’ve- actually I think they might still be under downloads. I got permission from Zenva to use these actually. So, we’ve got the Zenva logo and we’ve got a few different images to choose from I think in that demo I used this one, I used this one, and the oasis one. So, we’re just going to cop those.
So, we want this one and that one and then I think it’s this one and that one an I’m just going to go ahead and copy those and I’m going to pull them into my project there. So, that’s going to be again in Next.js we are going into the Course, into the Project. I’m going to create a new folder called images and I’m just going to place them right in there.
Now I’m not too happy with these names I want to make them more simple so I’m just going to call this something like oasisimage. Okay, this is going to be something like, I don’t know, drangonimage and we’re going to make sure that png is lower case and this one is just going to be like river image or something, it doesn’t matter again too much what we call these as long as we know what they’re referring to and so once you’ve done that once you’ve got some images I think we can actually leave this as is. So, lets just give this a quick test run to see if its working out, we’ll want to go into the terminal. Okay we’re going to do an npm run dev, okay this should hopefully compile everything okay and it will run the app as it stands right now on local host 3000.
Okay, so we’re just going to open up a new window okay and I’m just going to go to local host 3000 and as you can see My Games Page. So we know that its running fine and that is the basic project setup so just to quickly recap we’ve got an index.js and we also have this package.json we added the necessary scripts right here in our project we have 3 images in an images folder and of course index.js is in stuck in pages.
Okay, so the next section we’re going to be working on importing the images into our project we’ll actually need to install a special library to get access to the functionality that will display images and then we’ll work on displaying images in our project. Okay, so thanks for watching see you guys at the next one.
Transcript 3
What’s up everyone and welcome to the next section. This’ll be on importing images into our project. So we’ll just import the images that we added to that images folder and we’ll work on displaying them within our project itself. Okay?
So let’s head on over to the code. This is what it looks like, we’ve just got index dot JS packaged on JSON. This is what our project looks like. This is my games page. Really simple right now. Okay, so before we go any further we need to make sure we have all the images we want. I think I actually left one image out. Yeah, I did. That was the logo. So let me just grab that now. Okay, actually I believe this is in downloads for me. I do want this logo in my project so I’m actually just going to copy that and bring it over to. Okay, cool stuff.
So now we’ve got my four images. These are gonna be used to display the three games and then obviously the logo up top. So we’ll now need to add the library that will help us to import and use images in our project. So let’s just kill this command right now. We’re going to, oops. I’m not sure why that came up. We’re going to just clear that off. And we’re going to install the next images library.
So this’ll be an NPM install, dash, dash, save. Next dash images. So it should say actually, and some of you may be experiencing a bunch of problems, where if you try to install something it comes up with a bunch of errors here. Likely, that’s because you don’t have administrative privileges. So if you’re using windows, again, run the command prompt or power shell as an administrator. That’s one of the options you can do whenever you go to open it, you can right-click and run as an administrator. Or if you’re using mac or lennox then you can simply add sudo to the beginning of any of your commands and that should allow you all the necessary permissions.
Okay, so this will install that library. I think we should see some changes if we go to package dot J son. Yeah, we get next images there and we do need this library to be able to display images in our projects. All right, so before we can use our images there’s gonna be one more step we need to take. That is going to be adding our index dot config dot JS file and specifying that we’re using the images. This next images library.
So we’re going to go ahead and create a new file here. Let’s give this a save. That was command, shift, save, by the way. Or you can just save as. And this is just gonna go into the project root, okay? This is gonna be our next dot config dot JS file. So in here we’re going to say that we’re acquiring the next images library so we’re gonna do constant with images. This is going to be equal to require next dash images, like so. So that’s basically that library we just installed. And then we’ll do module dot exports. It’s going to be equal to with images and then that should be just that MT dictionary, there. So let’s just do that, okay.
So this should be good to go. I think this shouldn’t give us errors. If we do get any errors or it’s not working then we’ll need to eliminate those curly braces. Otherwise it should be fine. So then probably what we’ll want to do in order to gain easy access to our images is just add them as imports up top. So this is where we need to know exactly where we’ve saved everything in our project. And where it is relative to our index dot JS file.
So index dot JS is here in pages but our images is up a directory, into images and then we get access to these ones here. So the way in which we import them is first saying import and then we’ll name a variable, for example, if I want my logo, I might call this my logo image. And then I’m going to say this is not equals. This should be – import this from and then the actual location itself. So, in this case, I need to go up or from pages I need to go up a directory so dot, dot, slash. That’ll bring me to here. Then I want to go into images. Slash. And then the name of that image. In this case it’s just logo dot PNG.
So you do wanna make sure that you have the correct extension PNG or JPG. And, in fact we might as well do the others right now. Okay, so we’ve got a logo images, we’ve called that one dragon image. Then oasis image. Oasis and finally river image.
And then, of course we’ll want to import the respect images. So in this case this is dragon image, then oasis image, and finally river image. Okay, good stuff. So we’ll give that a save. And now let’s just display the logo image for now. So within our header here, or rather within this div, not within the header, we’re going to create another div but this is actually gonna be a type header. So header acts very much like a regular div, in fact, it acts exactly the same as a regular div, it just communicates clearer. So this is just a div that’s going at the top of my page called header.
Okay, so within this I’m going to put my logo but we know that logo is kind of got a white background so let’s just take a quick look at it. So this logo, it actually says zenva here but it’s kinda hard to see. In fact, let’s display this first and then I’ll change the background color to gray so that we can actually see it.
So we want an image this time. Okay? We want to first provide a source equal to something, okay? And then we’ll provide an alternative equal to something just in case the image isn’t being displayed. And I’m gonna give this actually an idea as well because I’ll likely need to modify some of the aspects. So this is just gonna be my logo image here. Okay so the source is going to be one of these, specifically this one.
So I figure it’s probably best just to add the strings up top and then just simply add them in here like this. Okay? So then rather than a string, we can simply just put in our logo image variable. We’ll converse to the string and it’ll use that as a source. The alternative image can just be the logo. On alternative imagery, alternative text. The ID logo image for now that is fine. So let’s give this a save. And let’s get this guy up and running. So let’s go to terminal, NPM run dev again. Because we’re just running the development version. And so let’s go on back to a local host. Okay, so check that out.
So we’ve got our image displayed very clearly. In fact a little too clearly because it’s quite massive. Okay, so we’ll obviously need to make it a bit smaller and we want to just up top with that gray header background so I figure we might as well add the styles right now. It won’t take very long at all. So let’s add that style right now. It’s gonna be style JSX. Okay, and then we’ll close off that style tag. We’ll need to put these in curly braces. And we’ll need these kind of weird slanted quotes as well. Remember, regular quotes might cause you some problems.
Okay, so… Because we put our header within a header tag rather than a div tag, it’s nice that we can actually just call upon our header like so. And we can do what we want here. So I’m gonna set the background color to be equal to gray. And I’ll set the height equal to, I think 80 pixels should do it.
And I want to center the image within it so if I actually just do a text align center, that will center the image up horizontally. So let’s take a look at the image, itself. We’re gonna get it by its ID, so hashtag logo image like so. For this we’re actually just gonna add a height. Maybe we’ll try 60 pixels. That way it won’t take up the full height of this and the width will also adjust to that height as well. Try to maintain the same aspect ratio.
So if we give this a save now, let’s see if we get those nice changes being made. Okay, so check that out. That looks a lot better. We probably wanna bring it away from the top a little bit so I’m actually just gonna add a bit of padding to header. 10 pixels should do. Okay. So that just brings it down a bit. But now we have a bit too much space on the bottom so maybe let’s try 60 pixels. Okay. So that looks pretty good. We’ve got this logo centered, you can see it very clearly. We’ve got that gray bar up top. My gamed page obviously needs to be centered as well so we might as well just do that now. H1, oops, not like that.
We just want H1 like that. And we’re just gonna do text, align, center. Okay. And that should just bring it to the center of the page. All right, good stuff. So, that is how you add images to your project. So we learned how to install that next images library. We learned how to import images here. We have to, again create that next dot config file and add the requirements. And then we kinda just styled our page up a bit and displayed our logo in this header bar on top. Okay, so the next goal is going to be to work on those three boxes that we saw at the bottom that contain the game images and then the name and the description respectively.
And I think we should be able to get that all done in the next section but I don’t want to run it too long. So if we need to, we can break into two parts. Okay, as always, thanks for watching. We’ll see you in the next one.
Interested in continuing? Check out the full Project-Based Next.js – Games Website course, which is part of our Full-Stack Web Development Mini-Degree.
