
Famo.us Fundamentals
You can download the tutorial source code here.
Getting Ready
In this tutorial we are going to be taking a look at the JavaScript framework, Famo.us. Before we start, we should take a quick look at our directory structure:

As you can see, we are working with only a single JavaScript file (we will be importing the famo.us JavaScript framework inside of our HTML5 file) and a single HTML file.
Let’s take a look at our HTML5 file:
							Famo.us

							<!-- famo.us -->


 <!-- our app code -->
So, once you have created your ‘index.html’ file and saved it, it’s time to create our ‘js’ directory and create our ‘main.js’ file inside the directory.
The Render Tree
Before we get started coding in JavaScript, let’s talk about The Render Tree. In famo.us, we rarely work directly with the HTML DOM. Instead, we have something called The Render Tree, which bypasses several performance issues associated with working directly with the DOM. The Render Tree is a JavaScript representation of the DOM.
The body element in the DOM is referred to as the root of The Render Tree and this is a context, we create the context via the Famo.us Engine. Let’s take a look at this in code (this will go at the top of your JavaScript file):
					/* import dependencies */
					var Engine = famous.core.Engine;
					var Surface = famous.core.Surface;

					/* creating the main context, using the famo.us Engine	*/
					var context = Engine.createContext();
When the above code is executed (the HTML5 file is loaded into the browser) we can see the DOM and it will look something like this:
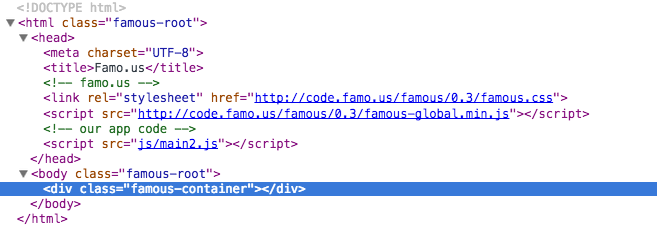
Notice the class that was added to the body element and the div with the class of ‘famous-container’ that was added to the DOM.
Creating a Surface
In famo.us we represent and present an element in our HTML DOM with something called a Surface. Surfaces are instantiated from the Surface class, then added to the Context. Add the following code to your JavaScript:
					/* create a new Surface-- instantiated from the Surface class */
					var circle = new Surface();

					/* add the surface to the context */
					context.add(circle);
If we take a look at our DOM now, we see something like this:

The Options Object
When we instantiate our Surface, we can pass in an Options object, this will allow us to add sizes, content, classes and CSS properties to our Surface. Let’s replace our current instantiation of the Surface with the following code:
					/* creating a new Surface-- instantiated from the Surface class */
					var circle = new Surface({
						/* passing in an 'options' object that defines the content for the surface */
						size: [300, 300],
						content: "
My Surface
“,
classes: [‘my-circle’],
properties: {
/*
instead of using dashes, like we would in CSS- we use camel casing
*/
textAlign: “center”,
color: “white”,
backgroundColor: “#1abc9c”,
fontSize: “40px”,
padding: “40px”,
borderRadius: “50%”
}
});
As you can see, we have given our Surface a size, some content, a class and some properties (which is also an object).

State Modifiers
In famo.us, we use something called a StateModifier (and add it to the Context) to manipulate a Surface’s position (in conjunction with a Transform object). Let’s take a look at instantiating a StateModifier and adding it to the Context:
Firstly, we must import the dependencies (Transform will be used to manipulate the Surface’s position):
					/* Transform is used in the stateModifier, for the transform property */
					var Transform = famous.core.Transform;
					/* used to translate or move a surface */
					var StateModifier = famous.modifiers.StateModifier;
Now, let’s instantiate the StateModifier and manipulate the Surface’s position:
					var stateModifier = new StateModifier();
					stateModifier.setTransform(
						Transform.translate(100, 400, 0)
						/* starts at top left, so our circle will be 100px from the left and 400px from the top of the document */
					);
Where we were adding the Surface to the Context, let’s replace it with the following code:
					/* adding the StateModifier to the Context */
					context.add(stateModifier).add(circle);
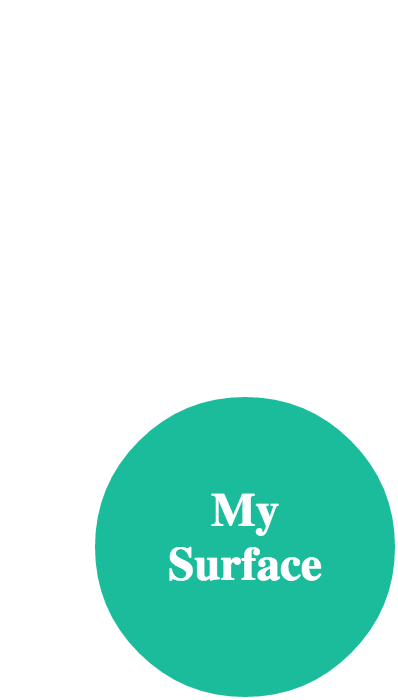
We should end up with our circle down the bottom left of the browser:
Animations
To get ready for working with animations, we must import the Easing dependency:
var Easing = famous.transitions.Easing;
After we have our import included into the top of our JavaScript file, we can add some animation code into our setTransform() method of the StateModifier Object that we have. So, replace the first setTransform() method that we have so far and add the rest of the code that follows:
					stateModifier.setTransform(
						Transform.translate(100, 400, 0),
						{duration: 2000, curve: 'easeInOut'}
						/* starts at top left and animates to the translate properties position */
					);
					stateModifier.setTransform(
						Transform.translate(400, 200, 0),
						{duration: 4000, curve: Easing.inOutSine},
						/* starts at top left and animates to the translate properties position */
						function(){
							circle.setContent("DONE");
						}
					);
As we can see, we are using two different ‘curve’ properties for our animation. The duration property is in milliseconds. We are also adding a callback function to our second animation (the animations will execute in the order they are in, in the JavaScript file) to set the content of the circle to “DONE” when the animation is complete.
Screen 1:
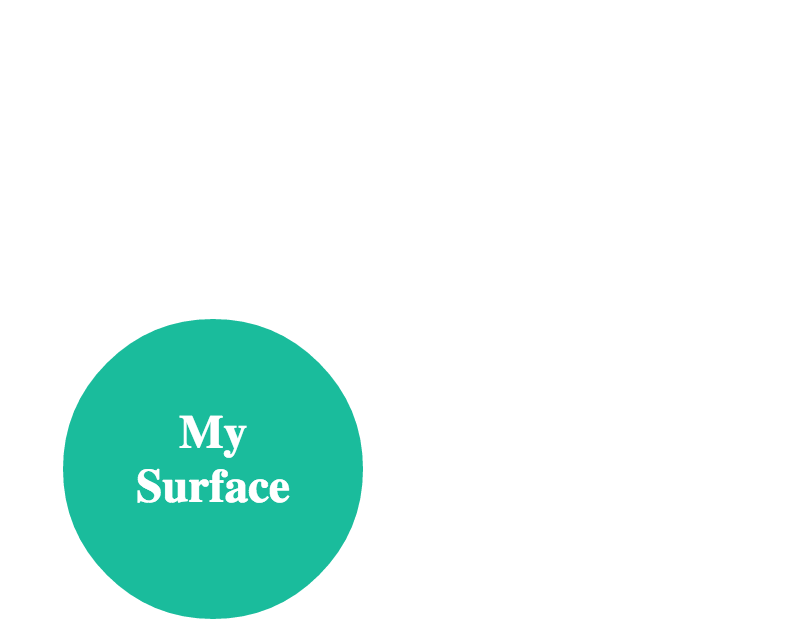
Screen 2:

Events
Let’s duplicate our working directory (the directory containing our HTML5 and JavaScript) and then empty the JavaScript duplicate, so we can start fresh for the Events section of this tutorial.
Let’s import our dependencies and create our main context like we did previously:
					/* import dependencies */
					var Engine = famous.core.Engine;
					var Surface = famous.core.Surface;
					/* creating the main context, using the famo.us Engine	*/
					var context = Engine.createContext();
Now let’s create our Surface and add it to the context:
					/* create a new Surface-- instantiated from the Surface class */
					var box = new Surface({
						/* passing in an 'options' object that defines the content for the surface */
						size: [400, 400],
						content: "
My Surface
“,
/*
can pass in a string, HTML or a DOM element.
can also use setContent() method of surface to set content
*/
properties: {
/*
instead of using dashes, like we would in CSS- we use camel casing
*/
textAlign: “center”,
color: “white”,
backgroundColor: “#3498db”,
fontSize: “30px”,
padding: “30px”,
}
});
/* add the surface to the context */
context.add(box);
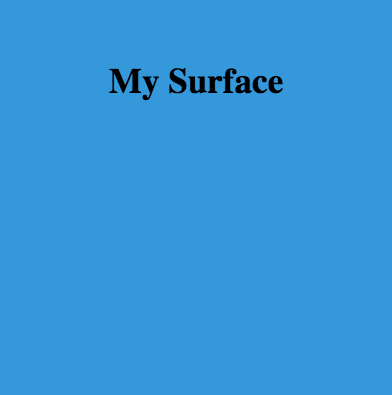
Now, let’s handle a ‘mouseover’ event, using the on() method of our Surface. When the user ‘mouses-over’ the surface we are simply changing the text color on the Surface, I have also listed some other events within the famo.us framework:
					/* Adding an event handler for the 'mouseover' event */
					box.on('mouseover', function(){

						box.setProperties({
							color: "#000000"
						});

						/*
							===
							Other Events
							===
							click
							mousedown
							mousemove
							mouseup
							mouseover
							mouseout
							touchstart
							touchmove
							touchend
							touchcancel
							keydown
							keyup
							keypress
						*/

					});
When you ‘mouseover’ the surface, the color of the text should change to black:
I hope you have enjoyed this starter tutorial on the famo.us framework. Let us know how you went, by leaving a comment below.