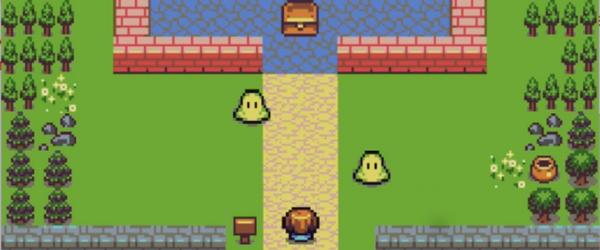
In this tutorial, we’re going to be creating an Augmented Reality (AR) app to teach the life cycle of a butterfly. It involves 4 image targets that will each project a 3D model of certain point in the life cycle (eggs, caterpillar, cocoon, butterfly). To finish (or win shall we say), the user has to position the 4 models in order of the life cycle.
We’ll be using image targets. These are images that the app can identify and then project whatever you want on them. In our case, we’re using 4 different image targets, with each having either eggs, a caterpillar, a cocoon or a butterfly on it. Each image target also has to look different from the others, as that’s how the app knows which target is for which model.
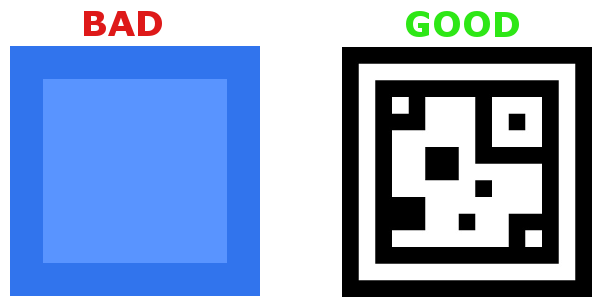
The best types of targets are ones with lots of “points” that the app can identify and lock on to. This involves creating high contrast targets, with many edges and patterns that stand out. A good type of target for example would be a QR code, which is similar to the ones we’ll be using in this tutorial.
Project Files
You can download the project files here. They contain the script, models and target images. The EasyAR SDK isn’t included though due to the large file size. You can learn how to install it in this tutorial.
Setting up the EasyAR SDK
We’re using EasyAR for this project which requires a licence key. First, go to easyar.com and create an account. Once that is done, you will need to go to the Develop Center which you can now click next to where you signed up.
 In the Develop Center, you now need to create your licence key. Do that by clicking on the “Add SDK Licence Key” button.
 We only need the basic licence, so select “EasyAR SDK Basic: Free and no watermark”.
 For this project we’re going to call it “AR Butterfly Lifecycle”. We’re not publishing on IOS so we can leave the Bundle ID blank, yet we do have to fill in the PackageName as we’ll be doing the same in the Unity project. The format of a PackageName is: “com.[Company Name].[Project Name]”
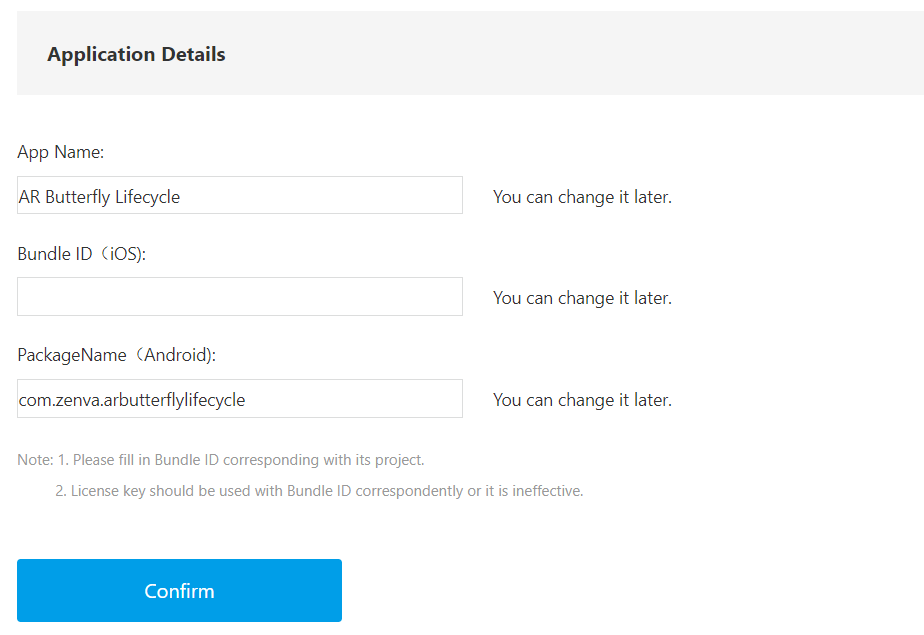 When all the information is filled in you can press the “Confirm” button to create your licence key. It will send you back to the previous page where you should see the project in the list. Click on the name and it will take you to your key.
Your SDK licence key is what you need for EasyAR to work. So copy the key or keep the page up as we’ll be needing it soon.
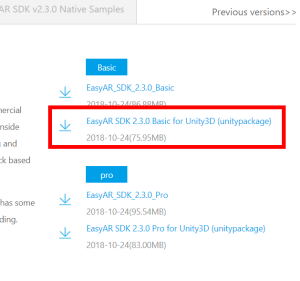
 Now we can download the SDK to use in Unity. For that, we need to go to the Download page on the EasyAR website. On the right hand side is a list of downloads. We’re going to be downloading the “EasyAR SDK 2.3.0 Basic for Unity3D (unitypackage)” one. It’s around 75mb, so while that’s downloading we can start to setup the Unity project.
Setting up the Unity Project
Create a new 3D Unity project. In the scene, we want to remove the “Main Camera” as we won’t be needing that.
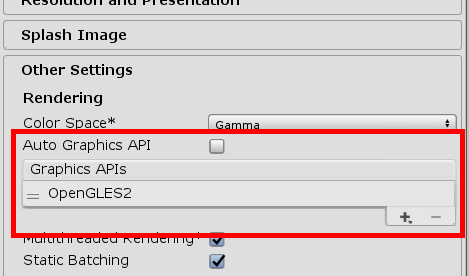
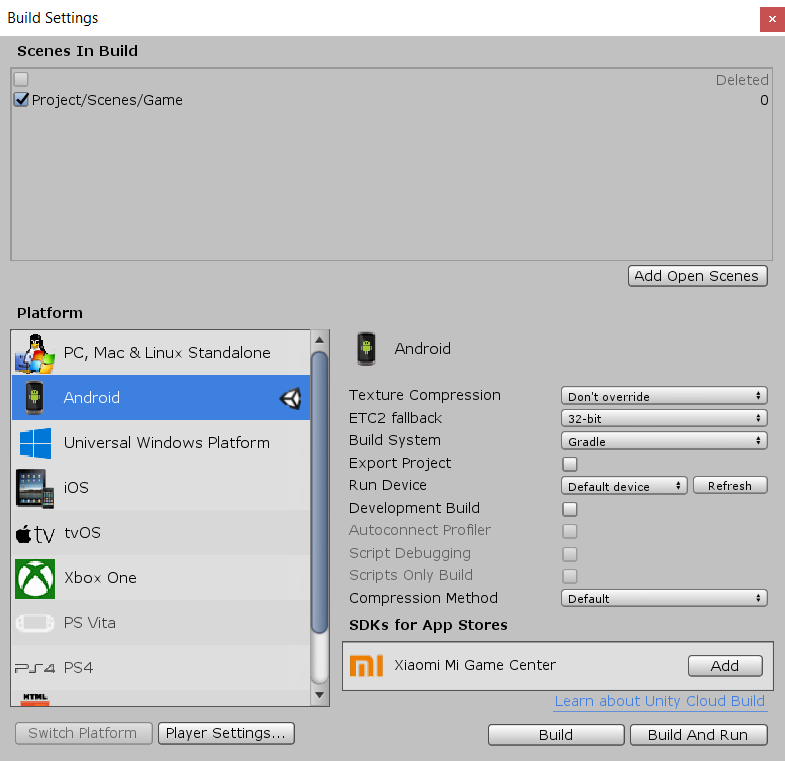
To setup for mobile, we first want to change the platform to Android. To do that, go to the Build Settings screen (File > Build Settings…), click on Android then the “Switch Platform” button. Now we need to change our graphics API so that EasySDK can work. Navigate to Player settings (Edit > Project Settings > Player), make sure you’re on Android Settings, then go down to the Other Settings tab. Here, you want to un-tick “Auto Graphics API” and add “OpenGLES2” to the Graphics APIs list.
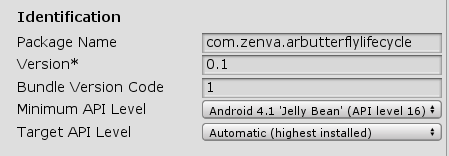
In the same tab, scroll down and you should see “Package Name”. Enter the same package name from earlier when we were creating out licence key.
Once the EasyAR download has completed, open the .zip file and extract the unitypackage file. You should then be able to drag and drop that file into your project window in Unity or (Right Click Project Window > Import Package > Custom Package) and it should begin to import.
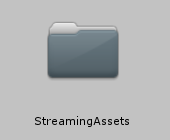
We’re going to be now importing our target images. When using the app, it can identify specific images in the real world and use that as a platform to show a model, animation, etc. We need to store these images also in the project so that the app will know what to look for. Right now, we’re going to create the folder. In the Project window (Right Click Project Window > Create > Folder) create a folder called “StreamingAssets”. It must be named exactly this, so that EasyAR can find it.
You can download the 4 custom target images and the rest of the project here if you haven’t already.
With these 4 .jpg images, you want to put them into the “StreamingAssets” folder we created before.
Creating the Scene
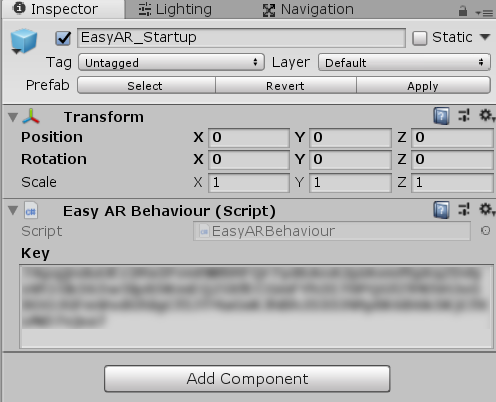
Now we can begin to actually create the scene. Drag the “EasyAR_Startup” prefab into the scene (EasyAR > Prefabs). Clicking on the object, you will see in the Inspector that you need to enter in a key. Copy and paste the licence key from earlier into the “Key” text box like this.
Now we’re going to begin creating our targets. Drag 4 “ImageTarget” prefabs into the scene (EasyAR > Prefabs > Primitives), one for each stage of the butterfly.
A good thing to do would be to rename them, so you know which is which (Eggs, Caterpillar, Cocoon and Butterfly).
Do the following for each image target… Click on it and locate the “Image Target Behaviour” script on it as we’ll be needing to edit a few things.
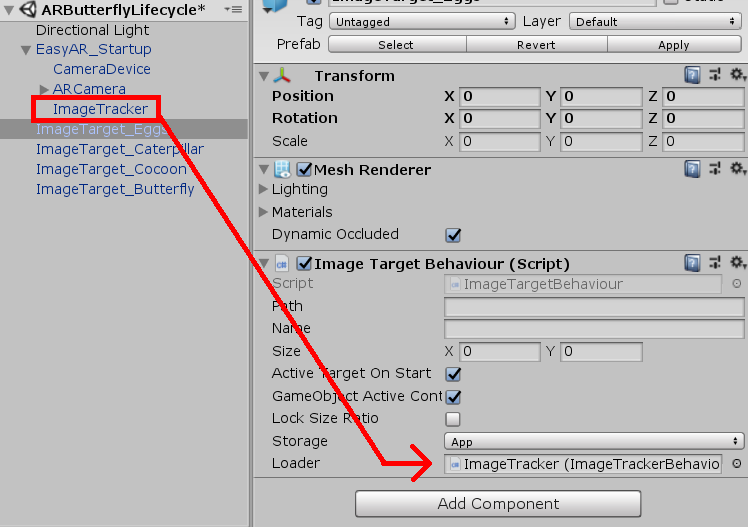
First, for the “Loader” we need to set that to the “ImageTracker” which is a child of the “EasyAR_Startup” object.
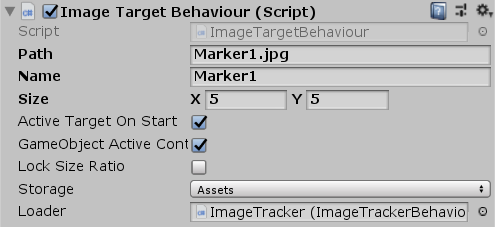
For the “Path”, write down the file path to the image. Since we directly put it into the StreamingAssets folder, we just write down the file name and extension. In “Name” we want to just write out the file name. Make sure to fill out the right name for each target (Marker1, Marker2, etc). For the size, we can set that to 5×5 and we need to change “Storage” from App to Assets.
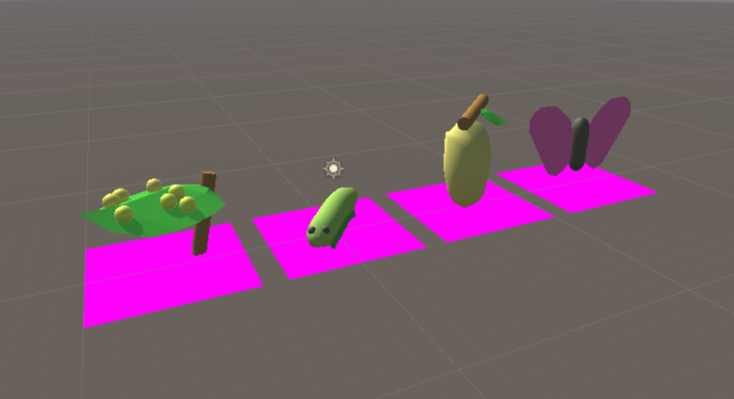
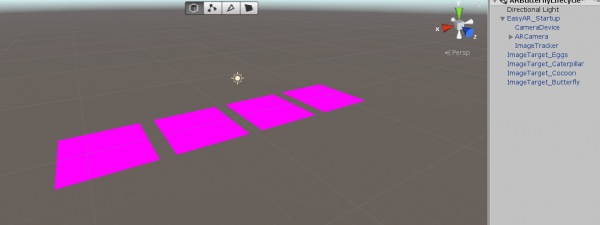
Now should see a pink square under the targets. Separate them horizontally, as it will be easier to work on the models and assets that go into each of them.
 If you haven’t already, you can download the butterfly models and rest of the project here.
Make sure that everything you want to be visible on the target is a child of that image target.
Creating the Script
Now it’s time to create the script which will check to see if the targets are in the correct order.
In the scene, create a new GameObject and call it “_GameManager”. Then create a new C# script called “PositionChecker” and attach it to the object. Now open it up and let’s begin scripting.
Since we’re also going to be doing UI stuff, we need to include…
using UnityEngine.UI;
… with all our others at the top of the script.
Now onto variables. We’re only going to be needing 2.
// targets
public GameObject[] targets;

// text
public Text screenText;
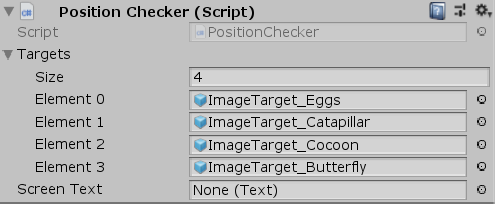
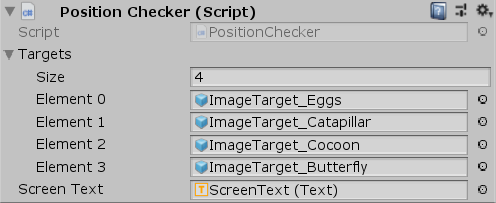
- “targets” is a GameObject array, which we will put the 4 image targets we made before into. Make sure that they’re in order though, egg, caterpillar, cocoon, butterfly… as they need to be for the script to work correctly.
- “screenText” is the on screen Text element that we will use to tell the player if they’ve won, or if the order is incorrect.
Now onto the main function that manages pretty much the whole app… “CheckPositions”. It’s pretty large, so we’ll go through it bit by bit.
// checks the positions of the targets to see if they are in the correct order
// if they are, then the player wins the game
public void CheckPositions ()
{
    bool correctPosition = true;

    float prevX = 0.0f;
    float currX = 0.0f;

    for(int index = 0; index < targets.Length; ++index)
    {
        // current x
        currX = Camera.main.WorldToScreenPoint(targets[index].transform.position).x;

        // skip the first one
        if(index > 0)
        {
            // exit loop if wrong order
            if (currX <= prevX)
            {
                correctPosition = false;
                break;
            }
        }

        // update previous x
        prevX = currX;
    }

    // display win or incorrect text depending on the above results
    if(correctPosition)
        SetOnScreenText("You Win", Color.green, 5.0f);
    else
        SetOnScreenText("Incorrect Order", Color.red, 1.0f);
}
We first create our 3 temporary variables. “correctPosition” is a boolean which will determine if we win or not, and it can be changed throughout the process of this function. We’re going to be looping through all the targets, so “prevX” will be the X position of the target before and “currX” will be the X position of the target we’re looking at.
bool correctPosition = true;

float prevX = 0.0f;
float currX = 0.0f;
Now we loop through and check each of the 4 targets. First, we get the on-screen X position of the target. If this is the first target, we can’t really compare it to anything so we just skip it. For the others though, if their X position is less than or equals to that of the previous target, then the order is incorrect. We set “correctPosition” to false and break the loop. Otherwise, we set “prevX” to our “currX” to compare with the next target.
for(int index = 0; index < targets.Length; ++index)
{
    // current x
    currX = Camera.main.WorldToScreenPoint(targets[index].transform.position).x;

    // skip the first one
    if(index > 0)
    {
        // exit loop if wrong order
        if (currX <= prevX)
        {
            correctPosition = false;
            break;
        }
    }

    // update previous x
    prevX = currX;
}
Now we check “correctPosition” to see if it’s true or not. If it is, then we set the on-screen text to say “You Win”, otherwise we set it to say “Incorrect Order”.
// display win or incorrect text depending on the above results
if(correctPosition)
    SetOnScreenText("You Win", Color.green, 5.0f);
else
    SetOnScreenText("Incorrect Order", Color.red, 1.0f);
“SetOnScreenText” is the function which displays the text on screen. It takes in a string with the text to show, a color to set to the text and a duration.
We then invoke the function “DisableOnScreenText” which disables the text after the duration has ran out.
    // displays text on the screen for a set period of time
    void SetOnScreenText (string textToDisplay, Color color, float duration)
    {
        screenText.enabled = true;
        screenText.text = textToDisplay;
        screenText.color = color;

        CancelInvoke("DisableOnScreenText");
        Invoke("DisableOnScreenText", duration);
    }

    // disables the on screen text
    // called from SetOnScreenText() after the duration has ran out
    void DisableOnScreenText ()
    {
        screenText.enabled = false;
    }
Now going back to the “_GameManager” object, you can drag and drop the 4 image targets into the “targets” array. Make sure that these are in order.
UI Canvas
We have the code for the UI, now we need to create it. First, right click in the Hierarchy and create a new Canvas (Right Click Hierarchy > UI > Canvas). Clicking on the Canvas, we’re going to change its “Canvas Scaler” options. Set “UI Scale Mode” to “Scale With Screen Size”. This is going to make it so the UI elements don’t stay the same size in pixels, rather they scale up based on how large the screen is. This will prevent small buttons on phones with high pixel density and large buttons on phones with a low pixel density.
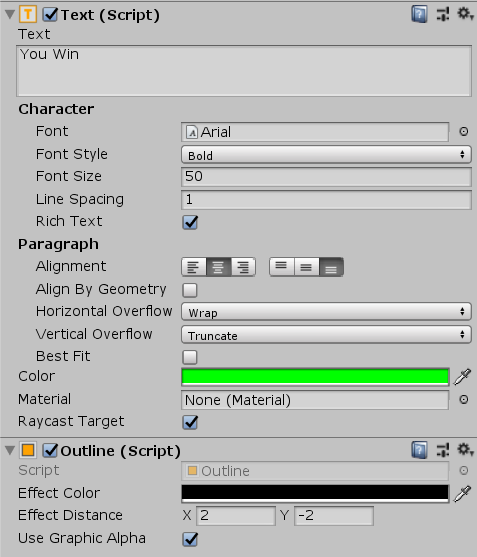
Now right click on the Canvas and create a new Text element (Right Click Canvas > UI > Text). Make sure your Text’s components are the same as the one below, adding an Outline component so the text contrasts against bright objects.
A good way of editing UI elements on the Canvas, is to go into 2D mode. You can do this by selecting the “2D” button at the top of scene view, just right of the drop down where it says “Shaded”.
We’re also going to put the Text at the top of the screen like this.
 Finally for the Text, we need to select the “_GameManager” object and drag the Text object into the “screenText” variable.
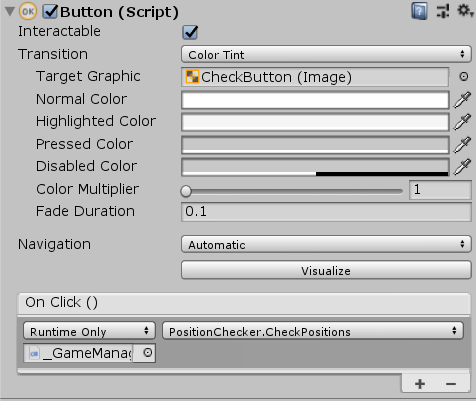
Now we’re going to create a button which will be used to check if the positions are correct. Right click the Canvas and create a new button (Right Click Canvas > UI > Button). All you will need to do here is add the “CheckPositions” function to the “On Click” event. To do this, click on the little “+” sign, drag in the “_GameManager” object and select the “CheckPositions” function.
Position that button at the bottom center of the screen and resize it to how you like. You can also resize the text object which is a child of the Button.
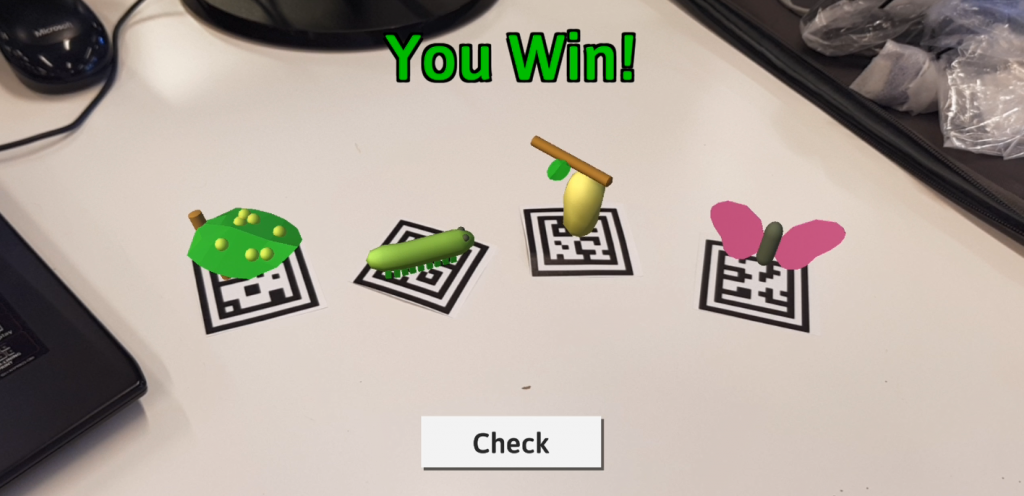
Your screen should look something like this.
Building
We’ve now finished making the app! All we need to do now is build. If you’ve ever built a game onto an Android device before, you can skip this section. If not, there’s a few things you’ll have to do first.
- Install the Android SDK.
- Install the Java JDK.
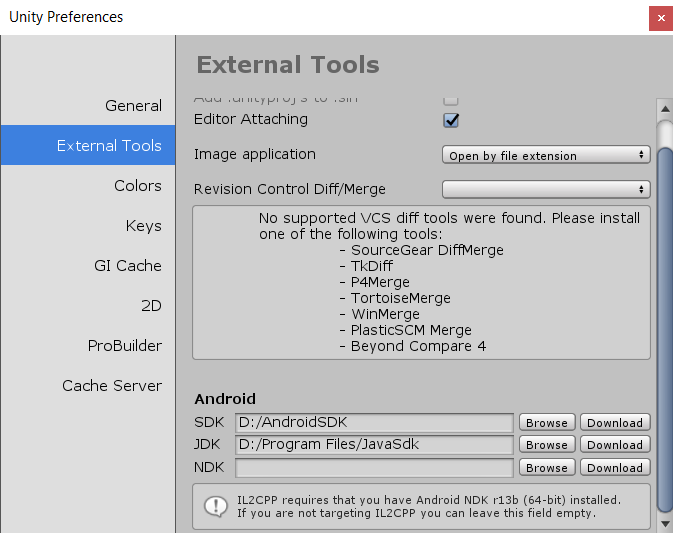
Once that is done, navigate to the Unity Preferences window (Edit > Preferences), then click on the “External Tools” button on the side.
Link your Android SDK and Java JDK like below.
 If you want to build directly to your Android device, make sure it’s plugged in and that Developer settings and USB debugging is enabled.
Now you can go to the Build Settings window (File > Build Settings). Click on “Add Open Scenes” to add your current scene to the build. Then click on “Build and Run”. After you choose a name for your APK, it should start to build your game and when it’s done, launch it on your Android device.
 The example below shows the app recognizing the 4 image targets and making the models appear. This example was done on a computer screen, although the intended way would be to print out the targets and cut them out.


