You can access the full course here: Project-Based Oculus Avatars and Platform SDK
Oculus App
For this project, you’ll need and existing Oculus account. Login to it and navigate to the Developers page. Here, click on the Manage button.
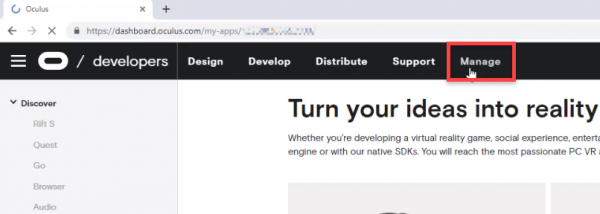
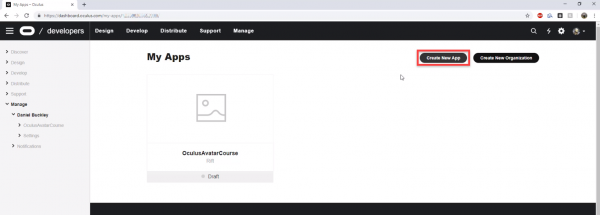
This will take you to the My Apps page. If you haven’t setup an organisation yet, it will ask you to. Once you do that though, we can create a new app by clicking on the Create New App button.
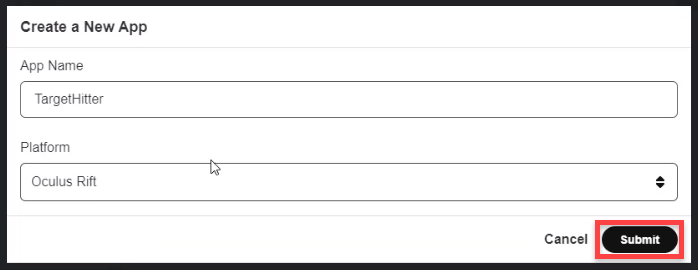
Name the app anything you want and select the platform your developing for. After that, click Submit.
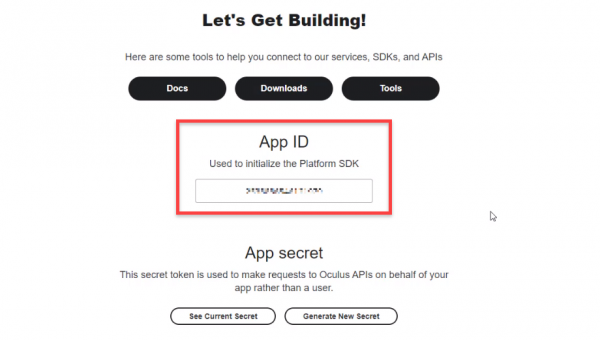
You should now be on the Getting Started API page. Here, all we need is the App ID for when we get into Unity.
Creating a Leaderboard
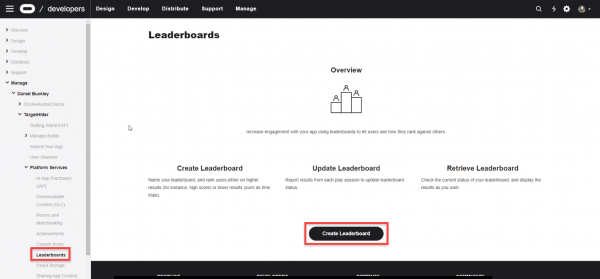
To create a leaderboard, let’s go to the Leaderboards page ( AppName > Platform Services > Leaderboards ). Here, we can click on the Create Leaderboard button.
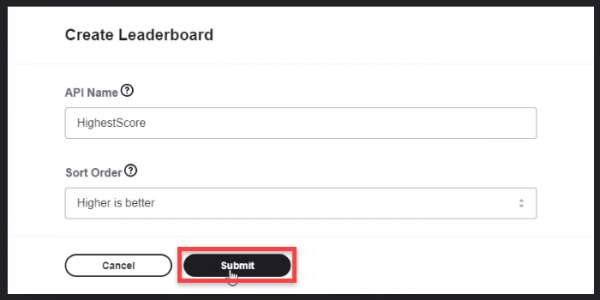
The API Name is what we’re going to need in order to access the leaderboard in Unity. Set the sort order to higher is better then click Submit.
In the next lesson, we’ll be hopping into Unity and setting up our project.
Transcript
Hey everyone. In this lesson, we are gonna be setting up a Oculus app to actually to be able to develop inside of Unity – an app that we can then run on our Oculus device.
So, here I am on the developer.oculus.com website. And if you’ve never set up a developer account yet, it’s fairly easy, we just need to click on this Manage button here, at the top. And it will take us over to the My Apps page. Now, if you haven’t set up an organization or set up the developer stuff yet, then there should be a thing here, that just tells you to enter in a name for an organization and then it will take you to where you can create a new app.
So, here I’m gonna select Create New App. I’ve already got one right here, but we’re gonna create a brand new one. So, I’m gonna click Create New App, I’m just gonna call it TargetHitter. And for the platform, I’m gonna change this to Oculus Rift, since I am developing it for the Rift. If you are choosing to go for Go or Gear VR, you can select that one, but we’re gonna go for Rift for now. So I’ll select that and then I’ll click Submit.
And here we are, we are now on this page here, which is, pretty much, all the information for an app. Over here, we have our App ID, which is what we actually need. So we’re just gonna select this, copy it to our clipboard, and this is what we need inside of Unity in the next lesson when we actually start to set up the project. So make sure you have this App ID here on hand.
While we’re here, let’s also go to our Leaderboards and create our high score leaderboard. To do that, we can go in the right hand side here. Select Platform Services, and then down here in Leaderboards we can select that and it will take us to where we can create leaderboards. And just like any other game leaderboards allow you to rank players based on a score or, really, whatever you want. We’re gonna be basing the ranks off, basically, the player’s high score, so the player with the highest score is higher up on the leader board, and the players with the lowest scores are lower down on the leaderboard. So, we can just click on Create Leaderboard here.
And the name for the API, this is basically what our leaderboard is gonna be called. I will just call this one HighestScore, right here. And down here, in the Sort Order, we have to select Higher is better or Lower is better. We’re doing Higher is better, since the higher the score the better the rank is then. But if you’re doing something that was time based, maybe, you then probably want Lower is better. But for us, we’re gonna select Higher is better and then click on Submit. And here we are, we have our Leaderboards set up. The only thing we need from here is the API name, but we’re not doing that until a bit later on in the course. So we can just leave this here for now. But, it’s all set up and ready to go.
And on the left hand side here, we can see, basically, the hierarchy for this all. We have the Manage tab, which we selected earlier. We then have our organization name, and then we have our apps here. This is one I created before. And we have our TargetHitter up here. So I could select that, it will take us back to this page here where we can then enter in a bunch more information, we can add some screenshots, content writings, we can upload the app, we can set pricing. And then submit it, later on, if you do wish to actually submit this to the Oculus Store.
But, for us, we’re just gonna be testing it inside of Unity. And the only thing we need to test, the only thing we need from here to test inside of Unity, again, is going to be the Oculus App ID. And to do that, we can just click on Get Started API and select our App ID right here.
So, in the next lesson, we’ll be hopping inside of Unity and actually setting up the project, importing the assets we need, and then getting up a basic sort of structure for the project. So I’ll see you all then, in the next lesson.
Interested in continuing? Check out the full Project-Based Oculus Avatars and Platform SDK course, which is part of our Virtual Reality Mini-Degree.
