You can access the full course here: Intro to Game Development with Unity
Unity Materials
What is a Material?
Materials define how an object looks. Is it metal, plastic, wood, rough, soft, translucent? Materials allow you to define the specific characteristics of an object. A car has a metallic material. A tree has a rough and textured material.
Creating a Material
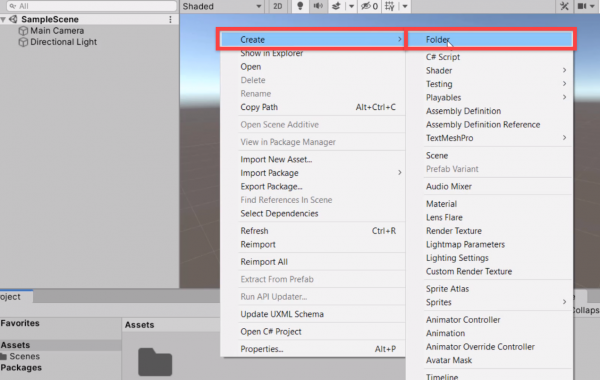
Let’s go down to the Project Browser and create a new folder to store all of our materials. Right click in the Project Browser and select Create > Folder. Call the folder Materials.
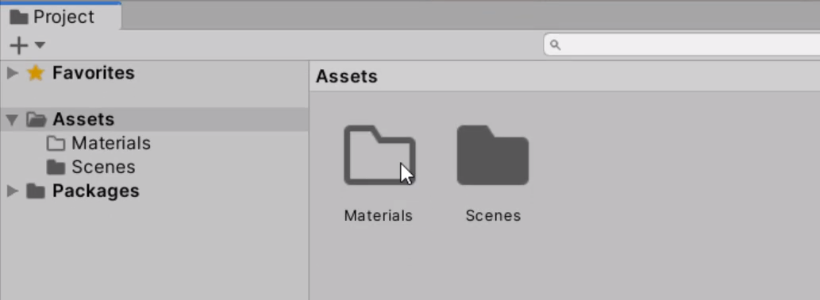
Next, we want to double-click the folder to open it up. Inside, let’s create a new material. Right click and select Create > Material. Call the material MyMaterial.
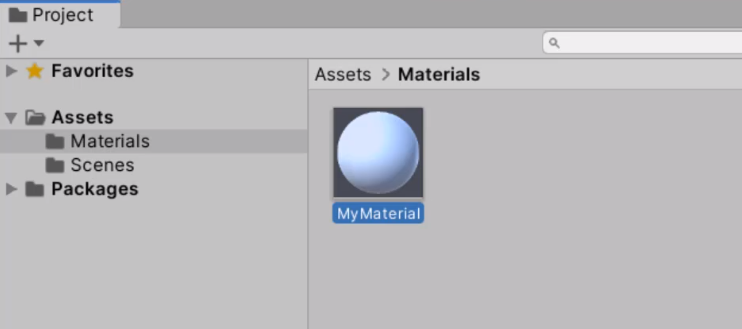
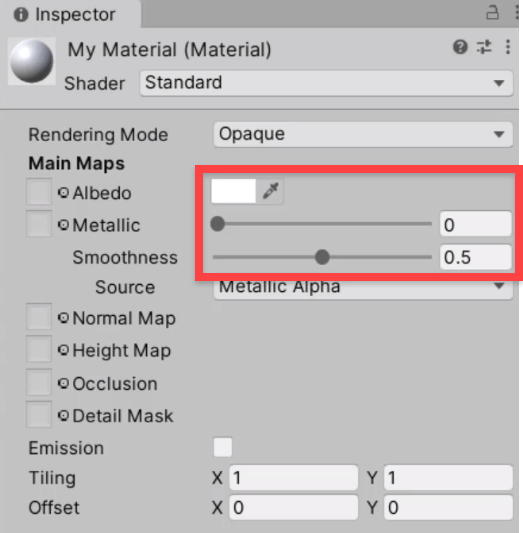
You’ll see that if we select the material, something happens in the Inspector. It displays all of the internal workings of the material. Here, we can modify the properties.
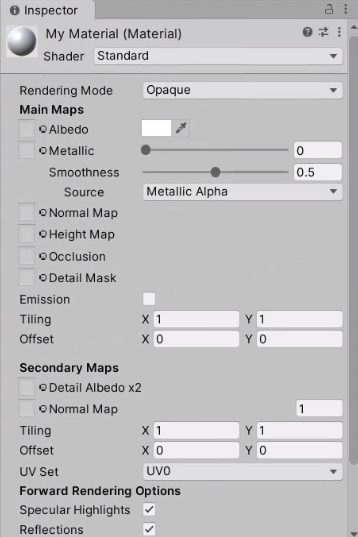
Let’s look at a few properties.
- Albedo is the direct color of the material. You can give it a texture or change the color.
- Metallic is a slider that ranges from 0.0 to 1.0 and defines how metal-like the material looks.
- Smoothness is a slider that ranges from 0.0 to 1.0 and defines the roughness of the material.
Try experimenting with these values.
Applying the Material
Now let’s apply this material to an object. In the Hierarchy, right click and select 3D Object > Sphere to create a new sphere GameObject. Let’s then go down to the Project Browser and drag the material on top of the sphere in the Scene View.
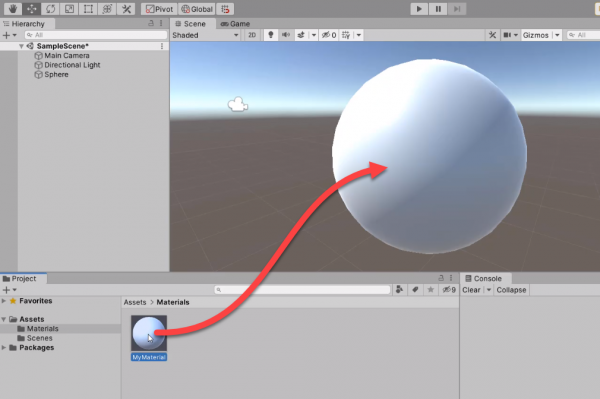
You’ll see that nothing really happens and that’s because the material is blank. Select the material and go over to the Inspector.
- Set the Albedo Color to red
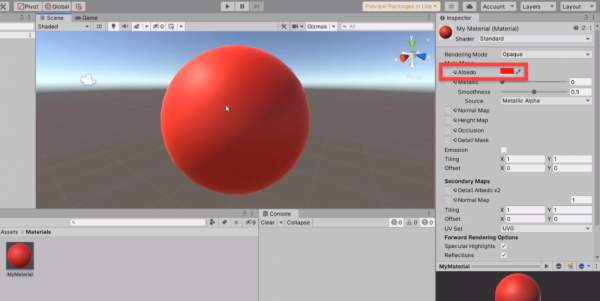
Here’s what it looks like with a Smoothness of 1.
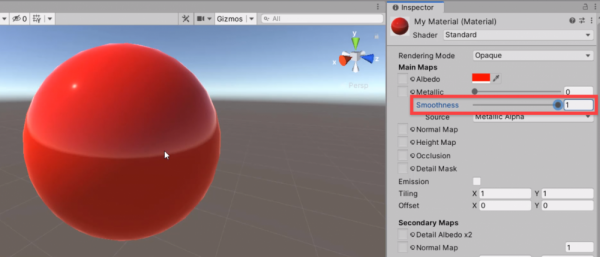
Here’s what it looks like with a Metallic of 1.
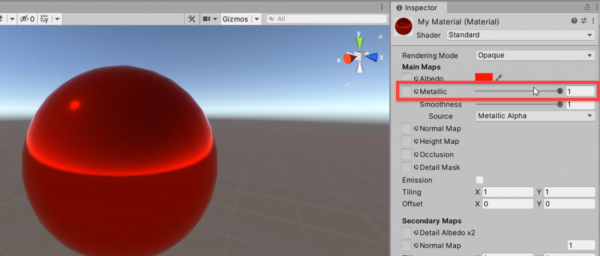
Next to the Albedo property, click on the small circle. This allows us to select a texture.
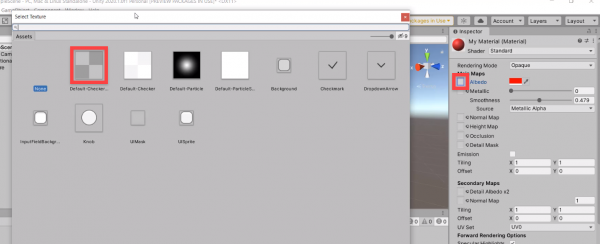
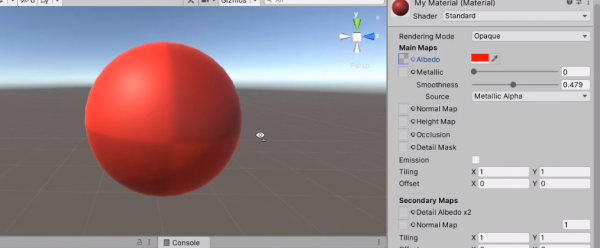
A texture is an image that’s wrapped around an object.
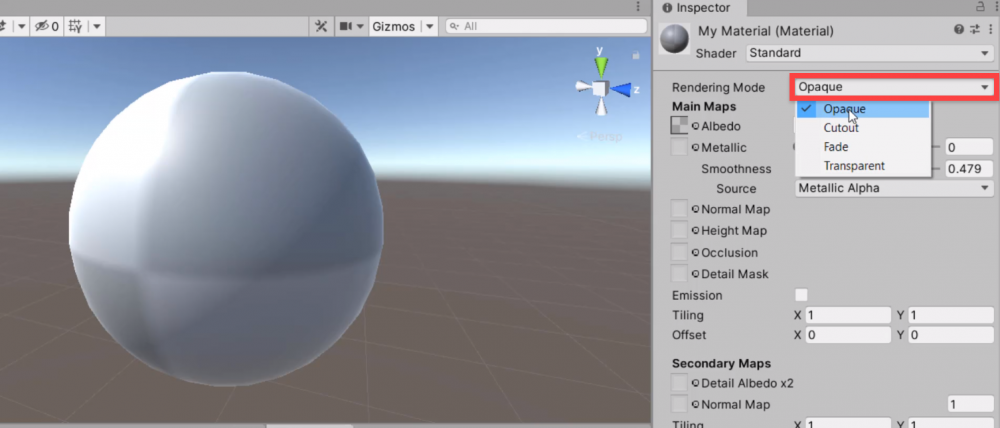
Materials also have a rendering mode. This defines how an object is rendered along with others around it. Right now, we have a rendering mode of Opaque. This means that the object is solid and not see through. We can change it to Transparent. This means we can change the opacity of the material and see through it.
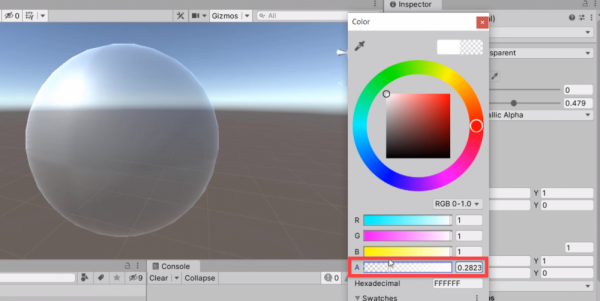
With Transparent selected, we can modify the Albedo Color. If we modify the A (alpha) value, this will change how see through the material is.
Challenge!
Create a material which you could apply to a car, with the following parameters:
- Green
- Shiny
Challenge Solution
Here’s how we can complete the challenge:
- Create a new material called GreenCar
- Set the Albedo Color to green
- Set the Metallic to 1.0
- Set the Smoothness to 1.0
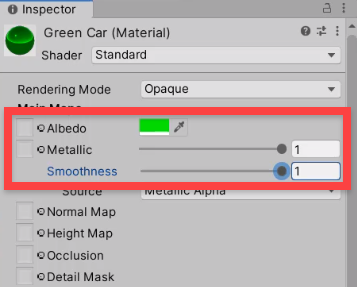
Next, create a new sphere object and drag on the material to apply it.
Transcript
Welcome back, everyone. In this lesson, we are going to be looking at materials inside of Unity.
So first of all, what is a material? Well, materials define how an object looks. Is it metal? Is it plastic? Wood, rough, soft, translucent? Materials are the properties that we apply to an object in order for it to look a certain way. So now let’s hop over to Unity and begin looking at how we can actually create a material.
Okay, here we are inside of Unity. Now, the first thing I want to do is go down to my Project Browser here. And what we’re gonna do in our Project Browser is create a new folder to store all of our materials. Because with our materials, we need to store them inside of a folder, because a material is an asset. So to create a new folder, I’m going to right click here in the Project Browser. Go up to Create, and then Folder. Then we can give this folder a name. I’m gonna call this one Materials.
So let’s double click to open it up. And inside of our Materials folder, we want to create a brand new material. And to do that we can right click, and right clicking here in the Project Browser basically brings up this menu, which allows you to interact with it. You can create new objects, you can import assets, you can do a lot of different things here. So we’re gonna go up to Create, and then we are gonna go to where it says Material right here. And like with a folder, we can give this material a name. I’m gonna call this one MyMaterial. And of course, if you were creating specific materials, then you would give them names such as wood, maybe grass, depending on what that material is.
Okay, so we’ve created our material, and straight away you may see that if it is selected, over in the Inspector, we have a lot of information being displayed to us, because the Inspector not only shows us the insides of game objects, it also shows us the inside of whatever asset we have selected. And with material, we can modify its properties over in the Inspector.
So if we look over in the Inspector, you’ll see there are a number of different things. But to see all that changed in action, we should create a Game Object. So I’m gonna go over to our Hierarchy here. I’m gonna right click, and I’m gonna go 3D Object, and let’s create a sphere. Okay, there we go. We got a sphere on screen right now.
Now I’m gonna go down, I’m gonna select the MyMaterial again. And what I’m gonna do is I’m gonna change a value in here. You see where it says Albedo? This is basically the appearance, the color of the object. What color is basically being displayed on this material. You’ll see next to it here we have this color box, a color selector. And what we can do is just left click on the white box like so, and it brings up a color picker where we can basically pick a certain color.
Now, let’s just say we wanna create a red sphere. Well, I’m just gonna drag up to the red like so. And then once we have red selected, you can see it has changed here in the material. We can click X on that window, and that color is applied. But we don’t have it applied to our sphere yet. And in order to do that, we can simply go to our Project Browser, click and drag on the material, and put it on top of the sphere like so, let go, and it is now applied to our sphere. Just like that. And now we have ourselves a red sphere.
So let’s go over to our Inspector right now, let’s select the MyMaterial, and have a look at some of these other properties. And now we can actually see it directly being applied to the sphere. So after Albedo, we have Metallic and Smoothness. Now, these define how light interacts with this sphere. Is it going to be reflective? Is it going to not be reflective? Is it going to be metallic?
So, pretty much the Metallic value, we can click and drag this slider from zero all the way up to one. And as you can see, our sphere starts to look a bit more metallic. So if you’re creating a car, you might want to have one on the Metallic value so it looks like a nice, shiny car. But I’m gonna bring that down to zero.
And let’s look at Smoothness. Now, Smoothness is basically the direct correlation to how reflective this sphere is. Is it going to reflect no light or is it gonna reflect all the light? Right now it’s on 0.5, so if we drag this down to zero, you’ll see that this sphere is now reflecting nothing. But if we drag it up even more to one, you’ll see that it is starting to reflect the surrounding skybox. We can see the horizon line here. We can see the sky here. The underneath the horizon right here, which looks like our skybox around us.
Okay, so if you want a super, super shiny metallic object, you’d probably want Metallic and Smoothness up to one, and there we go. But I’m gonna bring Metallic down to zero, and I’m gonna bring Smoothness down to around 0.5. Just ’cause it looks kind of nice, like so.
Something else you may want to keep in mind is if you want a texture applied to your material, such as like an image, maybe you want some grass texture, maybe you want a brick texture for a wall, you can go over to where it says Albedo. And next to Albedo there is a little square and a circle. If we click on this little circle with left mouse, it will bring up this window right here where we can select a texture.
And this is just gonna be a texture that is applied to the material. So we don’t really have any in our project just yet, but if I click on where it says Default-Checker right here, you’ll see if I click on X, we have this default checker texture applied with a red tint. This tint’s the albedo texture, so I can just select the color again, change this to white, and there we go. Okay, so we looked at getting ourselves a color, making it have a texture, seeing how shiny it can be.
Now let’s look at the rendering mode, which is something you may want to look at if you do want something that is see through. So, right now, our material is set to a rendering mode of opaque, which means that it is a solid object, we cannot see through it. But if we click on this drop down here, you’ll see there are a number of different things. And what we went to look at is Transparent down here.
If we select Transparent, straight away, nothing really happens. But if we click on our albedo color right here in the color picker, you’ll see at the bottom we have an R G B and A values. R for red, G for green, and B for blue. These are different color values which make up all the colors that we see. But what is A? Well, A stands for alpha, and that is the opacity or the transparency. Right now it’s at one for being fully opaque. But if we drag this slider down, you’ll see that we can start to see through the object. So if we put it at around 0.5, you’ll see that our sphere is now slightly translucent, we can actually see through it a bit.
All right, let’s have a bit of a challenge here. I want you to go ahead and create a material which you could apply to a car with the following parameters. It has to be green and it has to be shiny. So I want you to create a brand new material and have these properties, and then apply it to an object. So, I’ll be right back in just a second to see how you done.
Okay, so I hope you had a go at completing that challenge. Now let’s go ahead and look at how we can do just that. So, down here in the Project Browser, inside of our Materials folder, I’m gonna right click. I’m gonna go Create. I’m gonna go Material. I’m gonna call this material GreenCar.
Then what we want to do is go to the Inspector of the GreenCar material. I’m gonna change the albedo color here to be a nice green. You can use the circle here to change the hue. There we go, change it to green. And then I’m gonna drag the metallic all the way up and the smoothness all the way up. Now, let’s create a brand new sphere inside the hierarchy. I’m gonna right click, go 3D Object, Sphere. I’m just gonna move this over here a bit away from the other sphere that we already have. And I’m gonna drag on the GreenCar material like so.
And there we go. That is our material. Now, what I want you to do from here is just go ahead, experiment with various different material types. Maybe even explore some of the other options inside of the material that we didn’t look at. And just see what sort of things you can create, as there really are endless possibilities. So, thank you for watching, and I’ll see you all in the next lesson.
Interested in continuing? Check out the full Intro to Game Development with Unity course, which is part of our Unity Game Development Mini-Degree.

