Tired of static assets? What about adding some animations to your games?
Well, for Unity developers, you’ve come to the right place.
In this tutorial, we will explore how to use animations in a scene.
Let’s jump into it!
Project Files & Requirements
The scripts for this lesson can be downloaded here
This tutorial is a good step for those who have read the tutorial on creating animations, which you can view here. However, no prior knowledge of animation is required.
That being said, it is assumed you have some basic knowledge of Unity, which you can learn via other tutorials or online courses such as the Unity Game Development Mini-Degree. If you’re an educator, you can also try out Zenva Schools which offers complete beginner-friendly courses alongside other fantastic tools for teaching in the classroom.

BUILD YOUR OWN GAMES
Get 250+ coding courses for
$1
AVAILABLE FOR A LIMITED TIME ONLY
Setting up the project
Open up Unity and create a new project. Create a folder called “Scenes” and save the current scene in that folder.
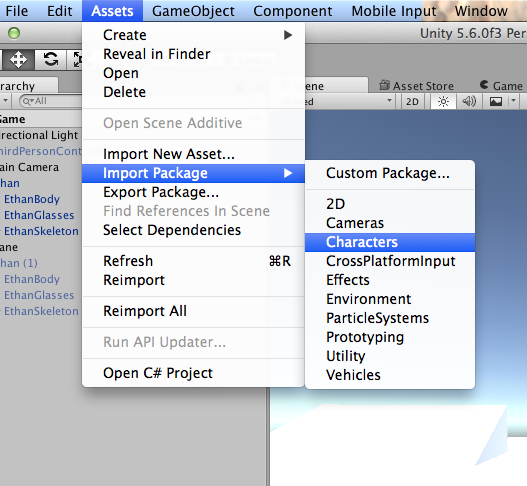
Go to Assets -> Import Package -> and select the “Characters” package.
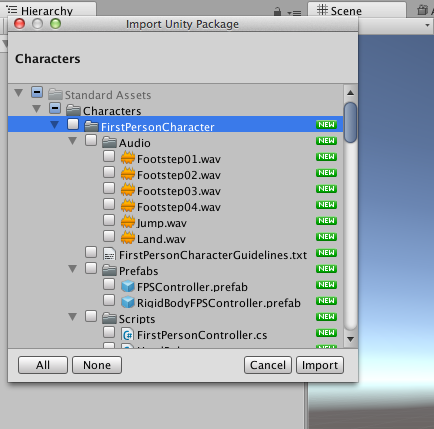
Uncheck the first person character since we won’t be working with that.
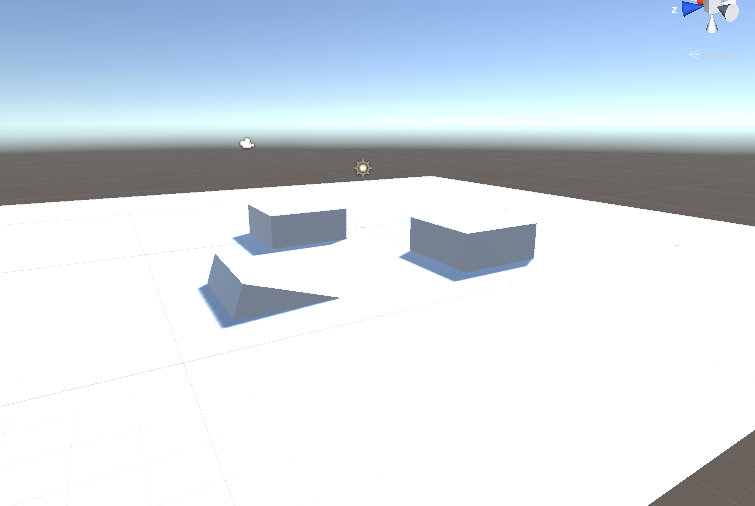
Now make a plane for the character to stand on. Next, make some cubes and ramps for our character to run and walk on
.
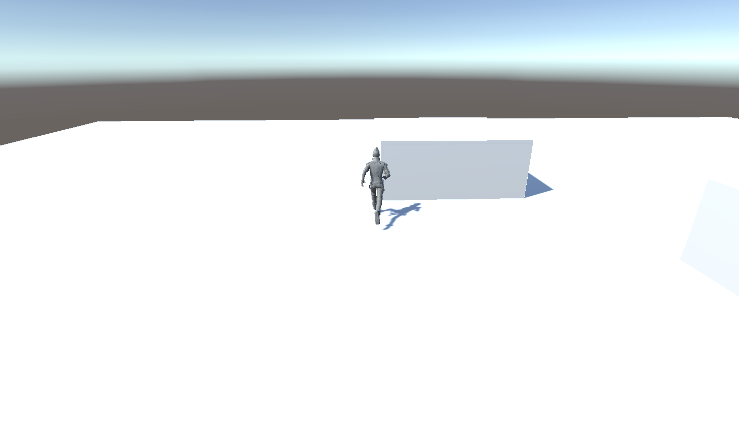
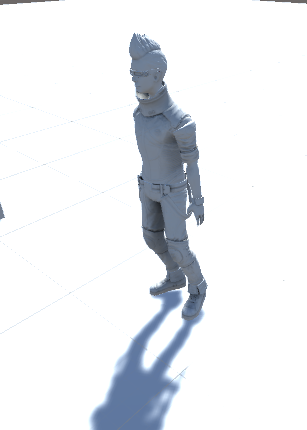
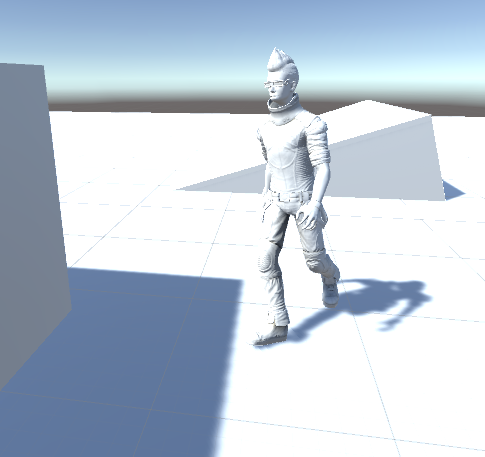
This is optional but, go ahead and drag in the “ThirdPersonController” into the scene. Play and look how the character moves. We are going to build, from scratch, a character that moves similar to this.
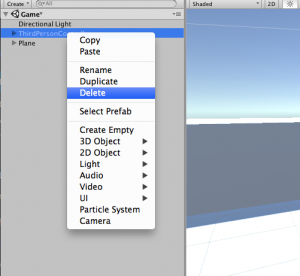
Once you have got a feel for how the character moves, ThirdPersonController is no longer needed and you can delete it.
The Animator
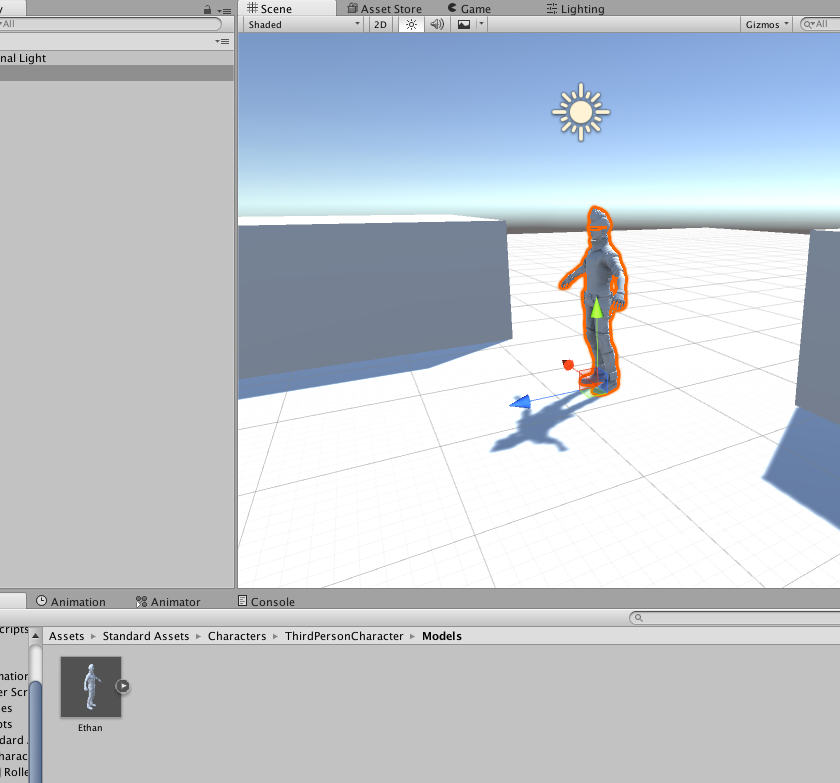
Navigate in your project files to Standard Assets -> Characters -> Models and drag in the “Ethan” model.
Then create a folder called “Animation”.
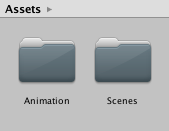
Right click and go to Create -> “Animator Controller”.
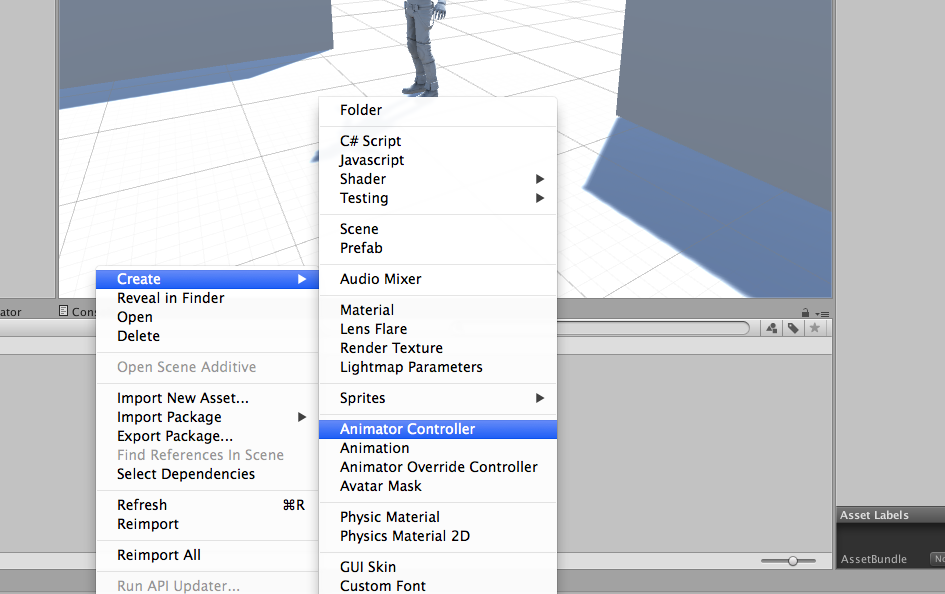
Name it “Ethan”. Drag our new Animator Controller onto the Ethan model.

The Animator Controller allows you to assign multiple animations to a model. For humanoid characters, such as ours, it requires something called an “Avatar”. Click on the circle next to the Avatar field and find the “EthanAvatar”. Lets have a look at the Avatar.
![]()
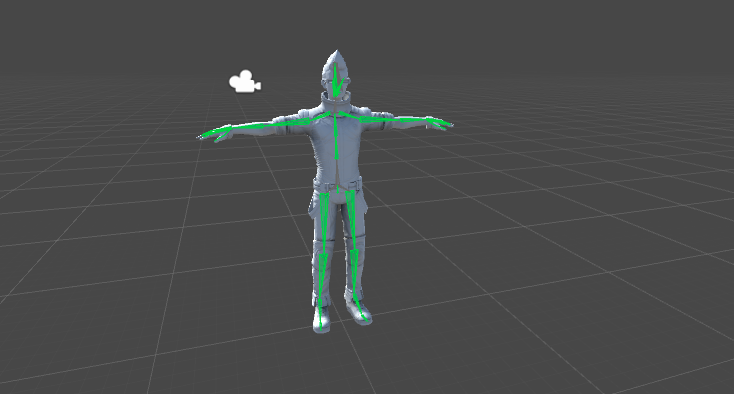
Click “Configure Avatar”.
![]()
As you can see, the Avatar is just a way for Unity to find and configure the bones in the model.
![]()
Press done and go back to the Ethan model. Let’s look at some of the settings in the Animator component.
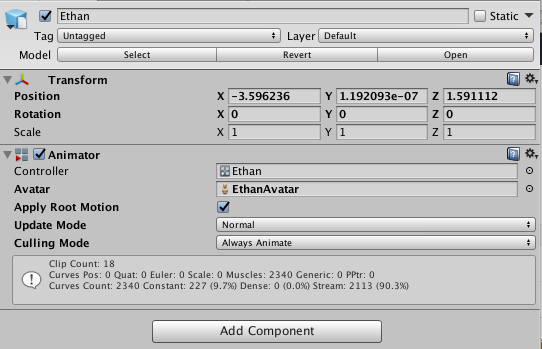
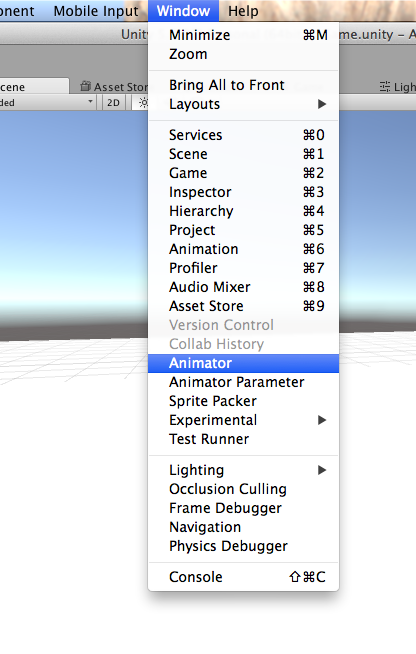
The “Apply Root Motion” boolean determines if Unity will use the movement in the animation or a script. For example, say I have a script that makes my character move forward. I have an animation attached of the character running in place. Since the script is moving the character not the animation then I would want Root Motion set to false. However, as we will see soon, we want to enable Root Motion in this case. With “Update Mode” you can determine how you want your animations to play. Such as with physics, with a fixed speed, or just normal. Culling mode allows you to determine if you want to keep animating even off screen. With the Ethan model selected, navigate to the “Animator” tab.
Here is where we add in the animations that will effect our model.
States
In your Project tab set the filter for animations.
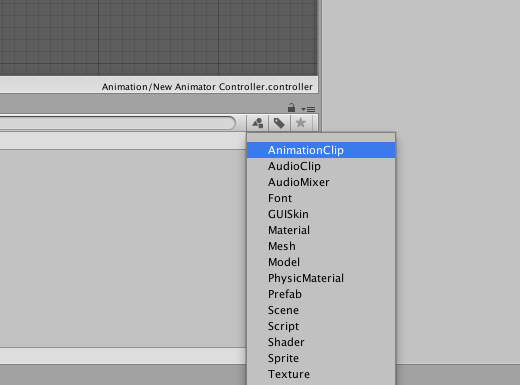
Look for “HumanoidIdle,” “HumanoidWalk,” and “HumanoidRun.”
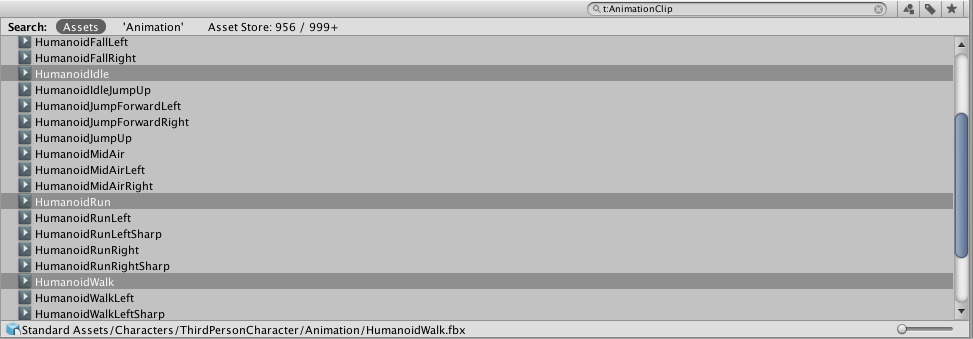
Drag these three into your Animator tab. Now there are three new boxes in our tab, those are the animations known as State Machines. Also, notice how one of the boxes is orange.
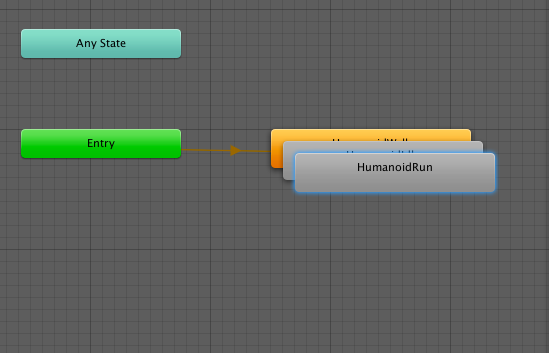
The orange one is the first one you selected in your Project tab. That is known a “Default State”. We want the “HumanoidIdle” to be the Default State. To do this right click on “HumanoidIdle” and select “Set as Layer Default State”.
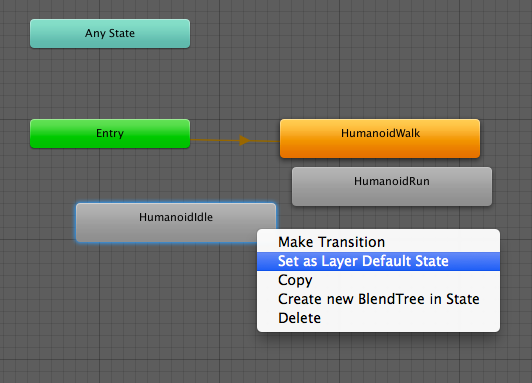
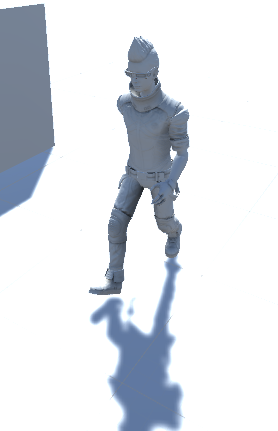
See how the Default State has an orange arrow coming from the box that says Entry. This means that as soon as the game starts it will go to the Default State. Press play and see what happens. Our model is idling!
That is pretty neat, but it makes for a really boring game. We want our character to be able to run and walk around the scene. To do that, right click on the Default State and select “Make transition”. Then click on the “HumanoidWalk” state.
![]()
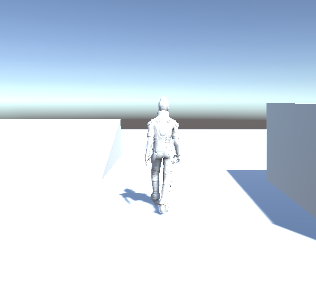
Now press play and look what happens. Ethan idles for a bit then starts walking.
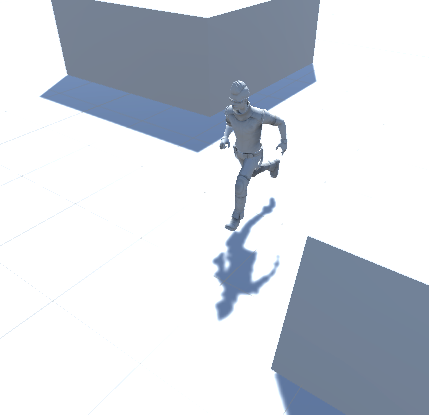
Now do the same thing for the run state. Then press play and see what happens. Our player idles, walks, then runs.
Parameters and Transitions
We have our model animating but it lacks control. It idles and runs without us doing anything. The way we add control is through Parameters. Parameters are variables that are defined within the animator that scripts can access and assign values to, this is how a script can interact with the Animator. There are three types: Int (or Integer), Float, Boolean, and Trigger.
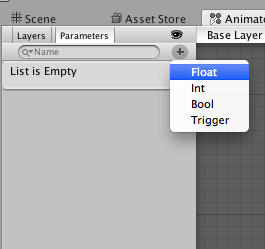
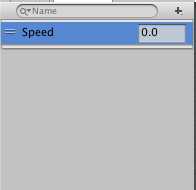
All of them are pretty self explanatory except for Trigger. A trigger is like a boolean but as soon as it is set to true it immediately goes back to false. We will realize it’s usefulness soon. For now make a float parameter and call it Speed.
Then click on the idle to walk transition and set the condition to be if Speed is greater than 0.5. This means that it will only transition if Speed is greater than 0.5.
![]()
Then click on the walk to run transition and set the condition to if Speed is greater than 0.9. Now play, increase or decrease the Speed parameter to see what happens.
Okay not too bad but could use some tweaking. First off I am going to go to each transition and uncheck “Has Exit Time,”
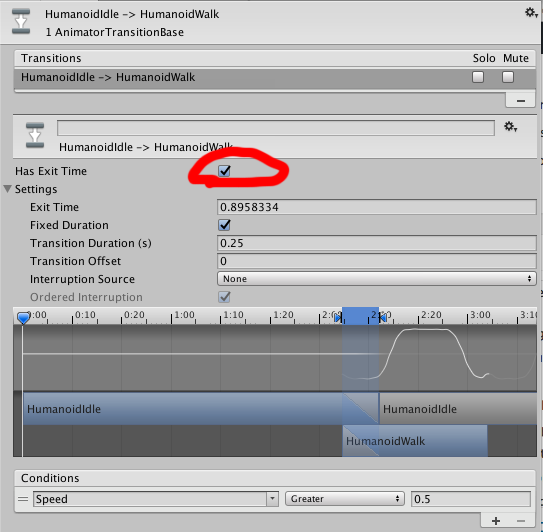
with this enabled the transition would go through the whole animation before transitioning. Which means there will be a delay if the player presses the run key. Second, make two other transitions (disabling Has Exit Time of course), one going from run to walk, and then walk to idle.
![]()
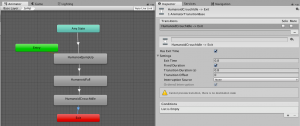
Set the Run to Walk condition to Speed is less than 0.9 and the condition of Walk to Idle to Speed is less than 0.5. Okay now that we have that done let’s look at the transition settings. Notice how you can preview the transition?
![]()
The blue section is where and how long the transition will be. You can change at what point a certain clip will transition.
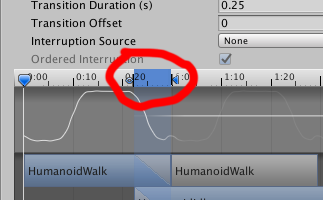
This can be used to make your transitions look more realistic. Open up Settings on a transition.
![]()
Exit time is how long before the transition starts to exit. With Fixed Duration enabled we can use the blue marker for transitioning. Transition Duration is pretty self explanatory, the length of the transition! Interruption Source is pretty interesting. If a transition’s condition becomes false as it is transitioning, it has been interrupted. When Interruption Source is set to None it can be interrupted be the Any State (which we will look at later). When set to Current State it will go through the transition then be interrupted. Next State runs the next transition then can be interrupted. Current State Then Next State runs the current transition then the next transition before being interrupted. Next State Then Current State is basically the reverse, if an interruption occurs it runs the next transition then the current transition. It doesn’t matter what you set these settings to because we will actually not be using it!
Blend Trees 1D
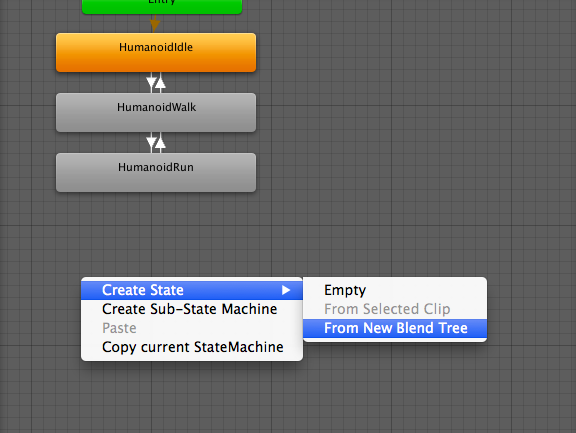
This locomotion system works but it isn’t very modular. We can’t add turning left or right very easily. A better and cleaner way to do this would be through Blend Trees. Blend Trees are a way to blend multiple animations together smoothly in varying degrees. To make a Blend Tree right click in the Animator and select Create State -> From New Blend Tree. Name it “Locomotion” or “OnGround”.
Double click on it, add three motion fields and put the three animations in it idle, walk, run.
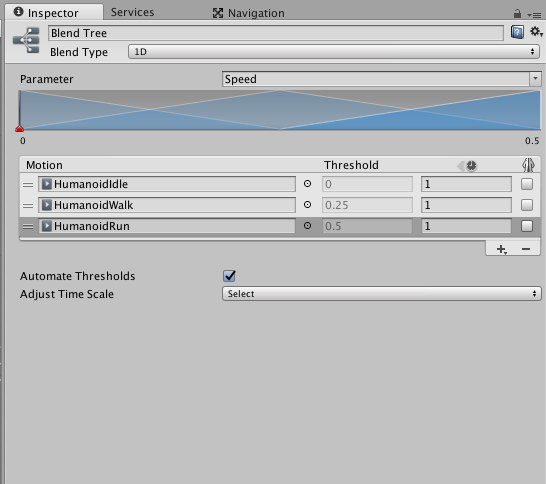
The thresholds are already setup for us but if you want to customize them uncheck “Automate fields”. Basically, it is everything we have already done but in a nicer format. When the Speed parameter gets over 0.5 the character walks, when Speed equals 1 the character runs. Go back to the Base Layer and delete the three other states.
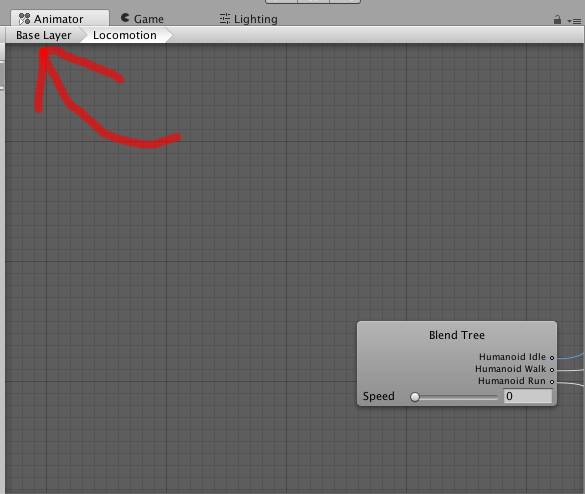
Then make a transition (unless it does it for you) from entry to our Locomotion Blend Tree.
![]()
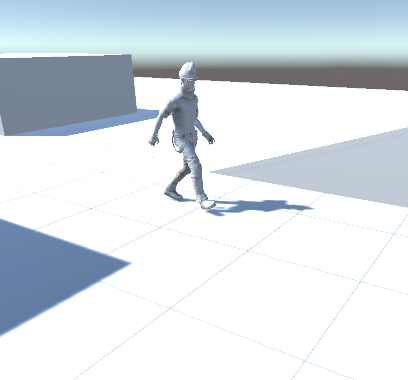
Now play and see what happens. Looks good, if you notice it blends the walk and run animation together if Speed is between 0.5 and 1.
Making Our Character Turn
So our character can run, walk, and idle but it isn’t very exciting. Unless you have a game where the character only runs forward (which, who does?) it isn’t even remotely useful. We need our character to be able to turn left and right (obviously!). In order to do this go back to our Locomotion Blend Tree and set the type to “2D Freeform Cartesian.” A Blend Tree has five different types of blending modes: 1D, 2D Simple Directional, 2D Freeform Directional, 2D Freeform Cartesian, and Directional.
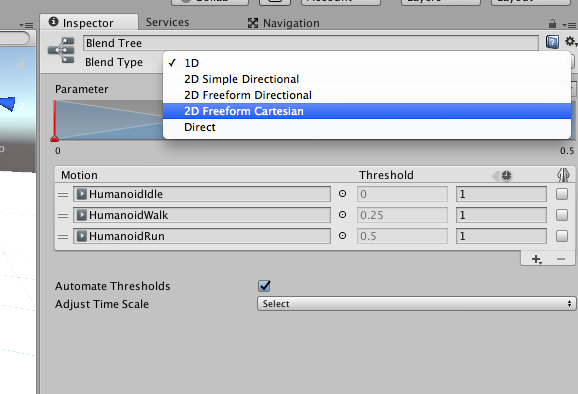
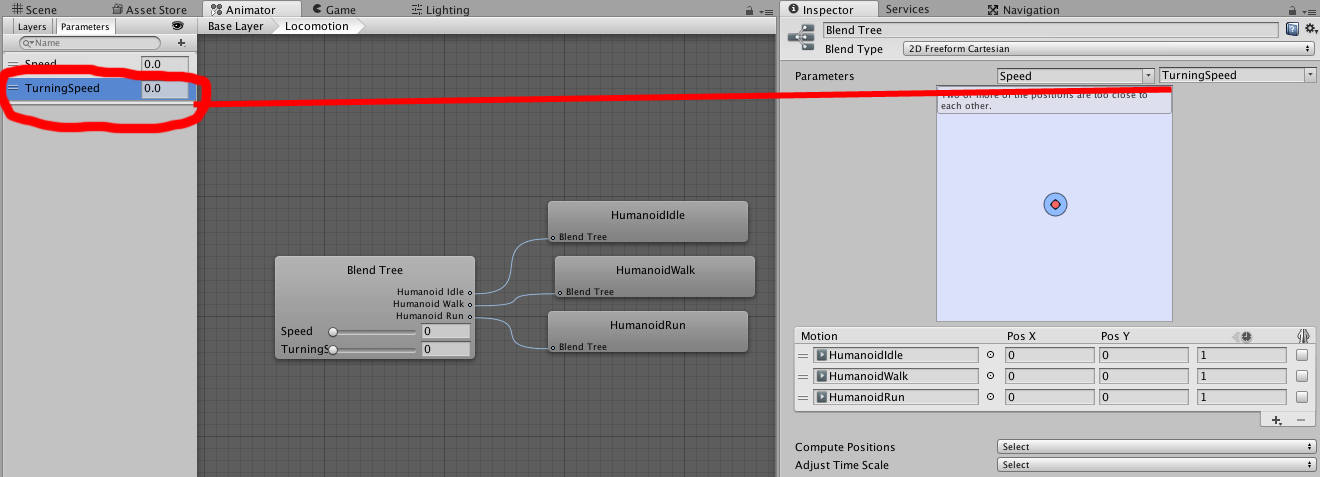
We have already looked at 1D. 1D uses just one parameter to check with, while any of the other types require two. 2D Simple Directional is if you need something slightly more complicated than 1D. An example would be if you just need Walk Forward, Walk Right, or Walk Left motions. 2D Freeform Directional is slightly more complicated. It would be able to handle, Walk Forward, Run Forward, Walk Right, Run Right etc. 2D Freeform Cartesian adds another level of complexity to the mix. It allows Run, Walk, and Turning. Before we do anything though we need to create a new float parameter called “TurningSpeed” and put it in the other parameter slot.
Now these next steps may not make much sense but stick with me and hopefully I can explain it well enough. Add twelve more motion slots. Look for and assign these animations to it in this order:
“StandQuarterTurnRight”, “StandHalfTurnRight”, “HumanoidWalkRight”, “HumanoidWalkRightSharp”, “HumanoidRunRight”, “HumanoidRunRightSharp”, “StandQuarterTurnLeft”, “StandHalfTurnLeft”, “HumanoidWalkLeft”, “HumanoidWalkLeftSharp”, “HumanoidLeftRight”, and “HumanoidRunLeftSharp.”
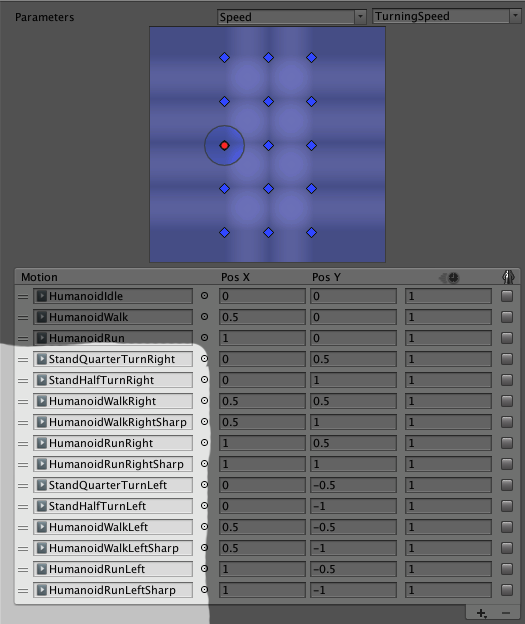
Then assign the values to look like the following:
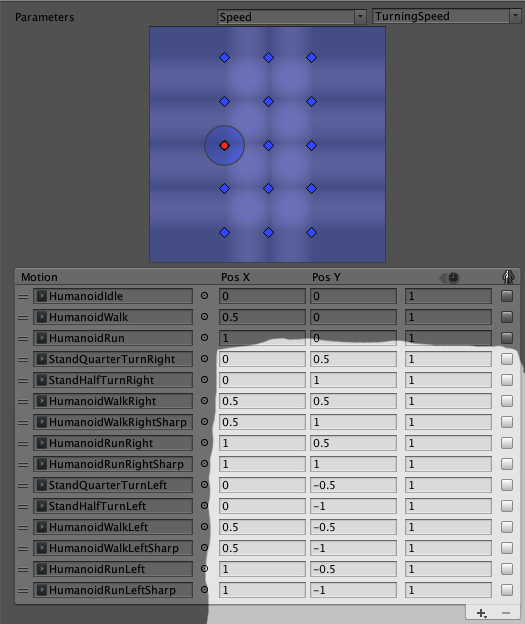
Your graph should look like this:
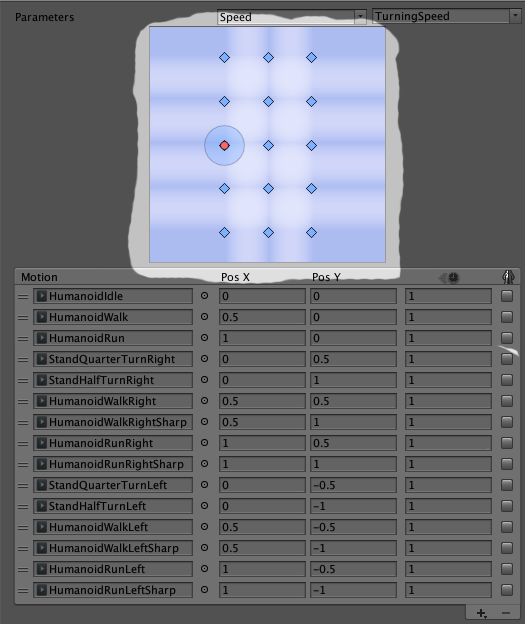
Okay, hopefully you are still with us after that huge list of unexplained tasks. If you did everything you can now play and change the values for Speed and TurnSpeed to see what happens.
Pretty neat! But why does it do that? To answer this you need to understand how 2D Freeform Cartesian works. Think of it like a graph. The Speed parameter is the x value and TurnSpeed is the y value. If the both values equal 0 then the player is standing still. If TurnSpeed is -1 the character turns left. If it is 1 the player turns right, all while blending between “StandQuarterTurnRight” or “StandHalfTurnRight.” If Speed equals 1 the player runs, 0.5 and the character walks. If TurnSpeed is 1 and Speed is 1 then the player runs right. If both equal 0.5 the player walks right. If you understand that then you should understand why we set the values to be what they are. Look at this graph for extra visualization:

Hopefully, this has cleared up most questions about 2D Freeform Cartesian. If not don’t worry! Just think about it, it’ll come to you.
The “Jumping” sub-state machine
In order to make our character jump we need a few things. A jump up pose, a fall pose, a landed pose, a way to check if the player presses the jump key, and a way to check if we hit the ground. I am going to do the last two first. Create a new trigger called “Jump”.
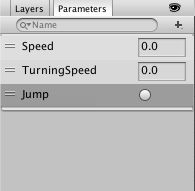
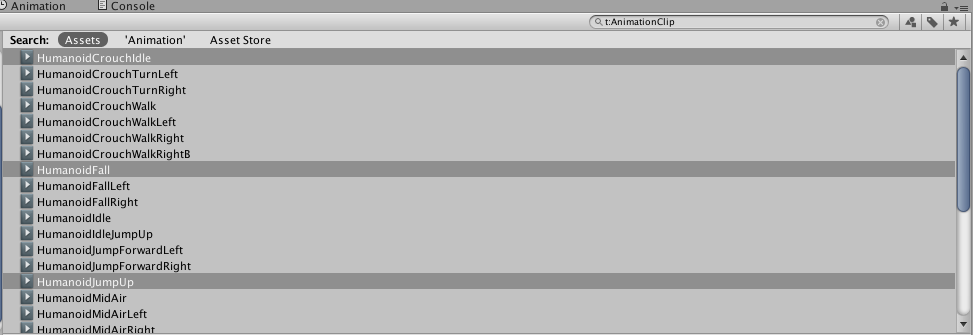
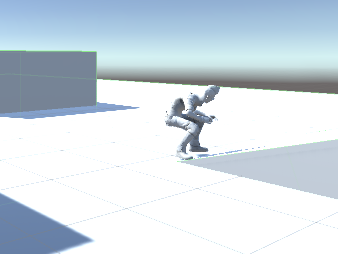
And then create a boolean called “grounded”. Okay that is done now we can move on. Filter search for the following animations “HumanoidCrouchIdle” (this is our landed pose), “HumanoidFall”, and “HumanoidJumpUp”.
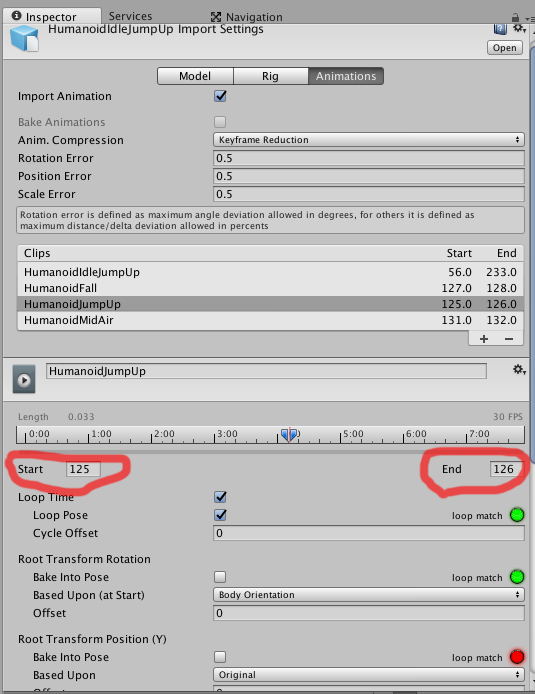
Before we drag those in we need to change something. If you preview one of the animations you will notice an unwanted twitch.
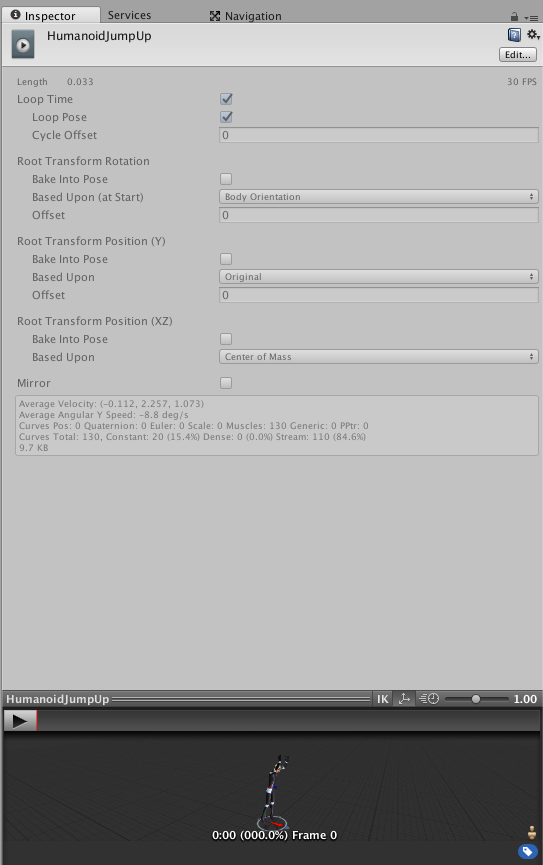
To fix this click edit, then set the motion to be only one frame long.
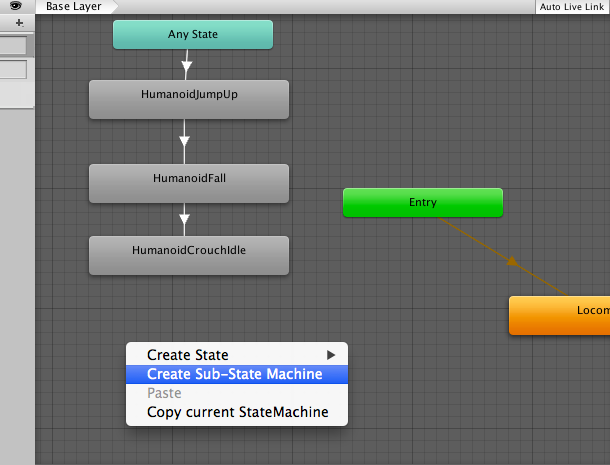
But we still can’t drag them in yet! We first need to create something called a Sub-State Machine. A Sub-State Machine is a bunch of motions put together that act as one. This is a good thing to use for jumping actions since a jump action isn’t really just one action but a bunch of them put together. Right click in the animator and press “Create Sub-State Machine”.
Name it jump. Now drag all our Jump poses onto the new Sub-State Machine.
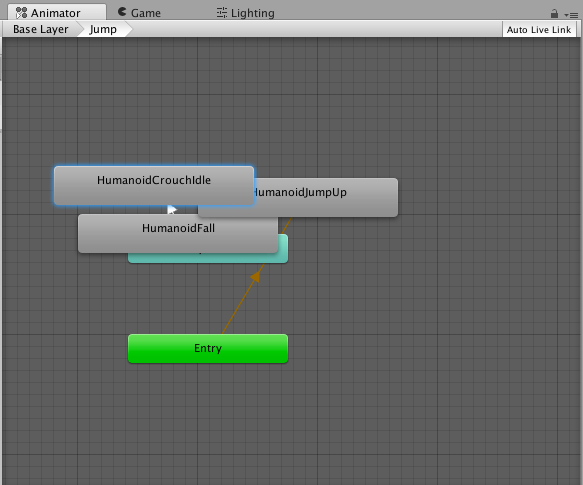
Now we can start constructing our Jump action. Make a transition from Any State to the JumpUp pose. The Any State is a very useful tool. It will transition into a motion, if the condition is true, regardless of where that motion is. Set the condition to be our Jump trigger. Then make a transition from JumpUp to Fall. Make a Fall to Crouch transition but remember we only want it to transition if it hits the ground. Set the condition to be if grounded equals true and uncheck Has Exit Time. Where do we transition to after this? From crouch into the Exit state. When something transitions into the Exit state on a Sub-State Machine it will go back to the Entry state in the Base Layer.
Okay, we have our Jump action setup! Although we still need to add physics, play and tweak the settings to get the look you’re after.
Scripting Our Animator
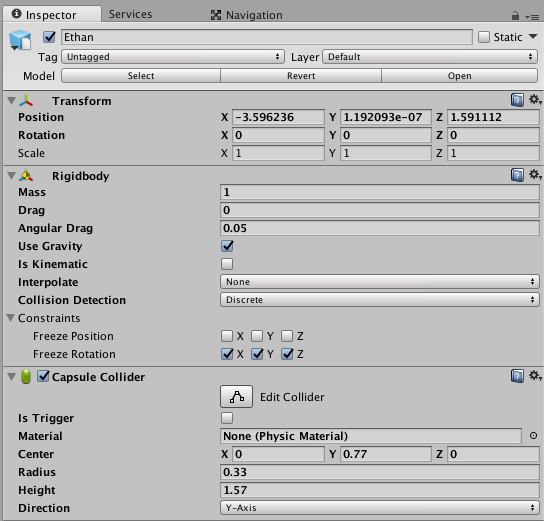
Now we come to the last and arguably most important part of this lesson, scripting. We have already seen how pretty much everything in the Animator is controlled by parameters. So our script should control those parameters. Before we start we need a capsule collider and a Rigidbody on our character. Set the capsule collider to roughly surround our character.

Then create a new script called “PlayerController”. The way we control parameters through script is first getting access to the Animator:
private Animator thisAnim;

Start (){
    thisAnim = GetComponent<Animator>();
}
Then write something like the following command:
thisAnim.SetTrigger ("Jump");Let’s think about what we need to do. First, we need a forward and backward input:
void Update (){
var v = Input.GetAxis ("Vertical");
thisAnim.SetFloat ("Speed", v);
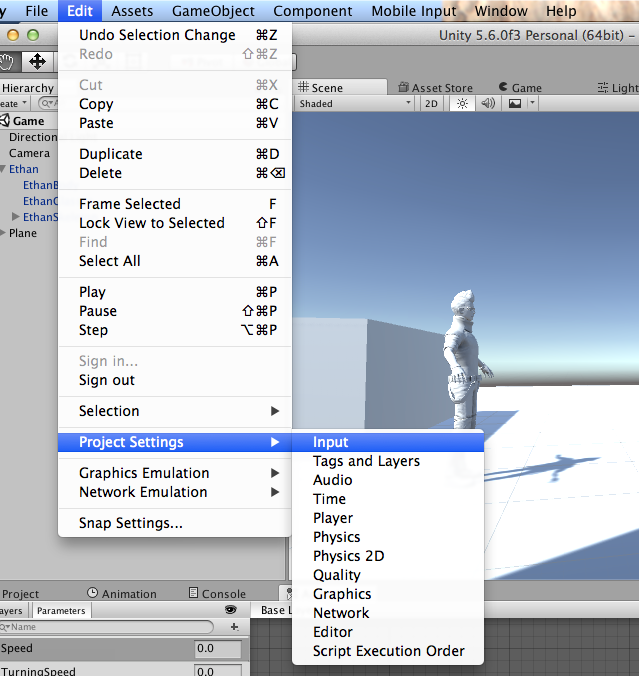
}Use the Unity Input axis Vertical, which by default is the up and down arrows, then put it in a variable and assign that variable to the parameter “Speed”. The Input settings can be configured here:
Next we need a turning input:
void Update () {
	var h = Input.GetAxis ("Horizontal");
	var v = Input.GetAxis ("Vertical");
	thisAnim.SetFloat ("Speed", v);
	thisAnim.SetFloat ("TurningSpeed", h);
}
We use the axis Horizontal, which by default is the left and right arrows, just like we used the Vertical axis only this time assigning it to TurningSpeed. Play and see what happens.
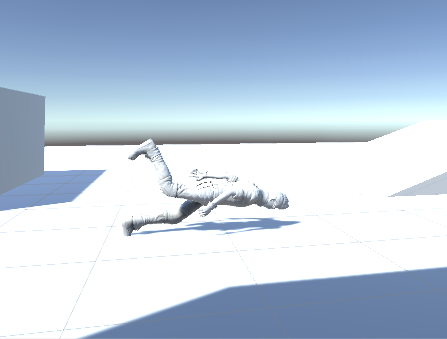
Okay our character does a face plant. To fix this, constrain our rotation on the X, Y, and Z axis.
Now play and see what happens.
Wow, just wow. It looks really good! Now we just need to add the jumping input. In order to jump we need a Rigidbody to act force upon, trigger the Jump parameter, check to see when our character lands, and set “grounded” to be true if the player does land. First, we get the Rigidbody and trigger jump with the input button “Jump”:
private Animator thisAnim;
private Rigidbody rigid;
public float JumpForce = 500;

void Start () {
	thisAnim = GetComponent<Animator> ();
	rigid = GetComponent<Rigidbody> ();
	}
 void Update () {
         var h = Input.GetAxis ("Horizontal");
         var v = Input.GetAxis ("Vertical");

         thisAnim.SetFloat ("Speed", v);
         thisAnim.SetFloat ("TurningSpeed", h);
         if (Input.GetButtonDown ("Jump")) {
             rigid.AddForce (Vector3.up * JumpForce);
             thisAnim.SetTrigger ("Jump");
         }
}
“Jump” by default is set to the space bar in the Input Manager. Then we raycast downwards to see if we have hit the ground while changing the value of “grounded”:
if (Physics.Raycast (transform.position + (Vector3.up * 0.1f), Vector3.down, groundDistance, whatIsGround)) {
	thisAnim.SetBool ("grounded", true);
	thisAnim.applyRootMotion = true;
} else {
	thisAnim.SetBool ("grounded", false);
}
This part needs a float, for how far down check for ground, and a layer mask, to define what ground is. A Layer Mask is a way to group objects, kind of like tags. Declare those here:
private Animator thisAnim;
private Rigidbody rigid;
public float groundDistance = 0.3f;
public float JumpForce = 500;
public LayerMask whatIsGround;
This is the full script:
using System.Collections;
using System.Collections.Generic;
using UnityEngine;

public class PlayerController : MonoBehaviour {
	private Animator thisAnim;
	private Rigidbody rigid;
	public float groundDistance = 0.3f;
	public float JumpForce = 500;
	public LayerMask whatIsGround;

	// Use this for initialization
	void Start () {
		thisAnim = GetComponent<Animator> ();
		rigid = GetComponent<Rigidbody> ();
	}

	// Update is called once per frame
	void Update () {
		var h = Input.GetAxis ("Horizontal");
		var v = Input.GetAxis ("Vertical");

		thisAnim.SetFloat ("Speed", v);
		thisAnim.SetFloat ("TurningSpeed", h);
		if (Input.GetButtonDown ("Jump")) {
			rigid.AddForce (Vector3.up * JumpForce);
			thisAnim.SetTrigger ("Jump");
		}
		if (Physics.Raycast (transform.position + (Vector3.up * 0.1f), Vector3.down, groundDistance, whatIsGround)) {
			thisAnim.SetBool ("grounded", true);
			thisAnim.applyRootMotion = true;
		} else {
			thisAnim.SetBool ("grounded", false);
		}

	}

}
Make sure WhatIsGround is set to Default. Play and see what happens.
Yes! It looks amazing!
Conclusion
Wow! We have covered a lot, and hopefully by now you have a good understanding of the Unity Animator! The Animator was made to be rather robust and allow us to add all those moving bits that make games engaging. Of course, though, you can take your skills even further. For example, maybe you could learn about adding footsteps along with your animated character? 😉
Of course, you can also explore more about making games in general through other Unity learning resources. Even schools can take advantage of platforms like Zenva Schools to add Unity to the classroom.
Either way, I hope this tutorial was helpful and that you get an understanding of how complicated but fun the Unity Animator is.
Keep making great games!
BUILD GAMES

FINAL DAYS: Unlock 250+ coding courses, guided learning paths, help from expert mentors, and more.