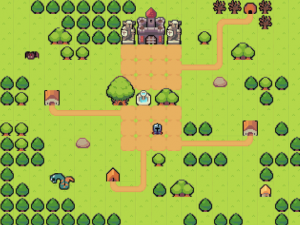
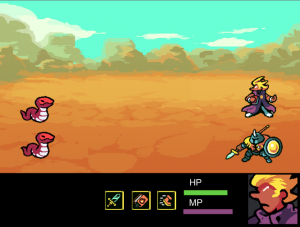
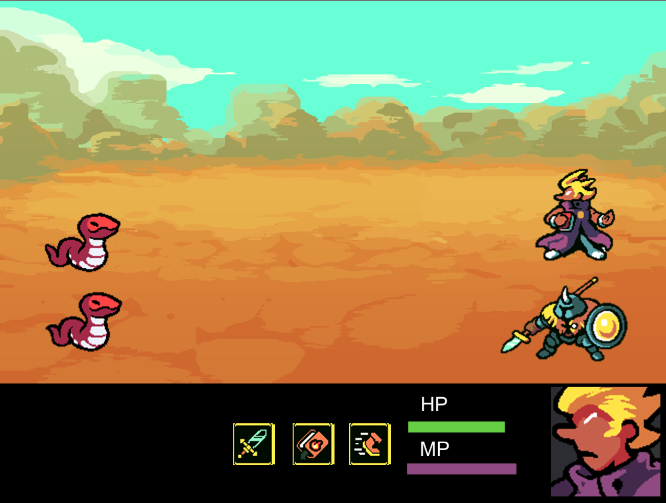
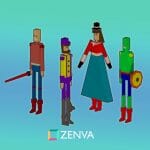
In this tutorial, we are going to build an RPG game using Unity. Our game will have three scenes: a title scene, a town scene, that represent the game world, where the player can navigate and find battles, and the battle scene. The battles will have different types of enemies, and the player units will have different actions such as: regular attack, magic attack, and running from the battle.
In order to follow this tutorial, you are expected to be familiar with the following concepts:
- C# programming
- Using Unity inspector, such as importing assets, creating prefabs and adding components
- Basic Tiled map creation, such as adding a tileset and creating tile layers
Before starting reading the tutorial, create a new Unity project and import all sprites available through the source code. You will need to slice the spritesheets accordingly.
Source code files & Requirements
You can download the tutorial source code files here.
The sprites used in this tutorial are from the Superpowers Asset Packs by Pixel-boy. All sprites are available under the Creative Commons Zero (CC0) license. So, you can use them in your games, even commercial ones.
Tutorial Requirements
Before beginning, it is assumed that you have the basics of Unity under your belt. If not, you can feel free to check out some of our other Unity tutorials first. Alternatively, you can also jump into more comprehensive online courses designed to take you from zero to industry-ready developer.
For teachers, you may also want to check out Zenva Schools. This platform made specifically for classroom usage offers several Unity-based courses (alongside other in-demand digital technologies topics). There are also plenty of useful features for classrooms including classroom management tools, reporting, course plans, and more.
Title Scene
Background canvas
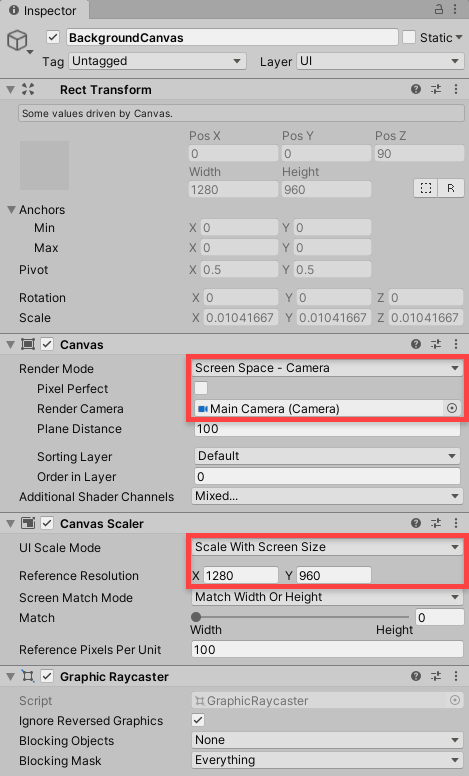
First of all, we are going to create a Canvas to show the background image in the Title Scene. You can do that by creating a new Canvas called BackgroundCanvas, and setting its render mode as Screen Space – Camera. In order to do so, we need to specify the camera of the canvas, which will be our main camera. Also, the UI Scale Mode (in Canvas Scaler) will be set to follow the screen size, with a reference resolution of 1280×960.
After doing that, we create a new Image object as a child of this canvas. The source image will be the background image, and we can set its native size in order to properly show it.
HUD canvas
Now, we need another Canvas to show the HUD elements. In the Title Scene, those elements will be a title text, and a play button.
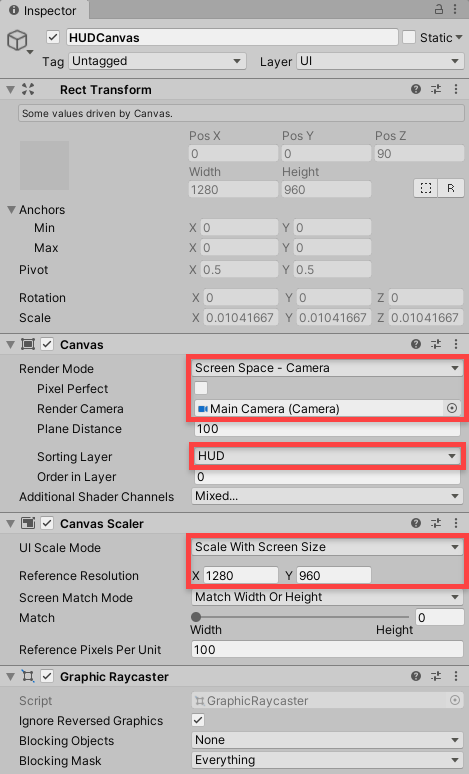
Let’s start by creating another Canvas following the same process as the BackgroundCanvas. However, in order to show this canvas over the background one, we need to properly set its sorting layer. We are going to create another layer called HUD, and put the HUDCanvas on this layer.
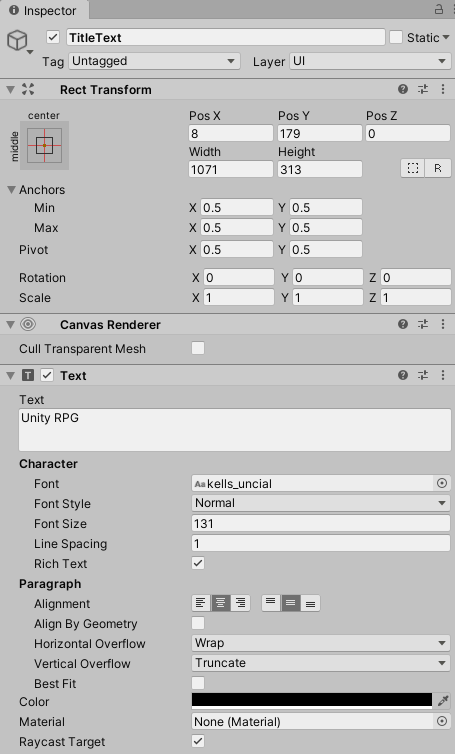
Finally, we need to create the two HUD objects. The first one is a Text, while the second one is a Button. For the Text object we only need to set its message. On the other hand, for the Button object we need to set its OnClick callback.
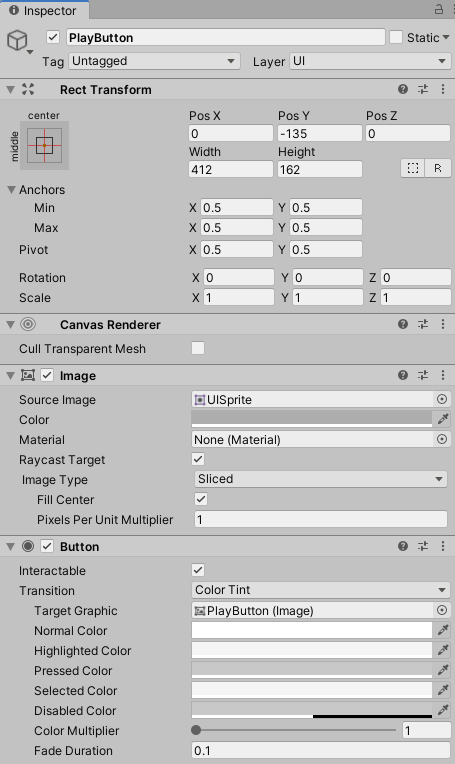
The PlayButton object will have the following ChangeScene script for the OnClick callback. This script will simply define a method to start a new scene given its name. Then, we set the OnClick callback of the play button to call the loadNextScene method with “Town” as parameter.
public class ChangeScene : MonoBehaviour
{
    public void loadNextScene (string sceneName)
    {
        SceneManager.LoadScene(sceneName);
    }
}
Player party
In our game, we want to keep the player units data saved even when changing scenes. In order to do so, we are going to create a PlayerParty persistent object, which won’t be destroyed when changing scenes. You will also need to properly set its position so that it will be created in the correct position in Battle Scene.
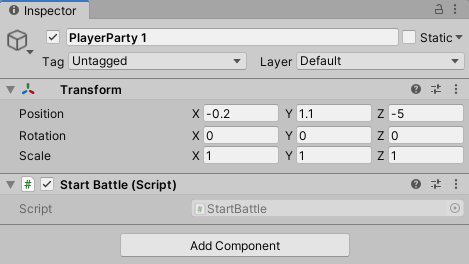
In order to keep the PlayerParty alive when changing scenes, we are going to use the following script, called StartBattle. This script keeps the object from being destroyed when changing scenes in the Start method. It also adds a callback when a new scene is loaded and set the object as inactive, so that it won’t be shown in the title screen.
The configured callback (OnSceneLoaded) checks if the current loaded scene is the Title scene. If so, the PlayerParty object must be destroyed, to avoid duplicates. Otherwise, it should be set as active if the current scene is the Battle scene.
public class StartBattle : MonoBehaviour
{
    // Use this for initialization
    void Start ()
    {
        DontDestroyOnLoad(this.gameObject);
        SceneManager.sceneLoaded += OnSceneLoaded;
        this.gameObject.SetActive (false);
    }

    private void OnSceneLoaded (Scene scene, LoadSceneMode mode)
    {
        if (scene.name == "Title")
        {
            SceneManager.sceneLoaded -= OnSceneLoaded;
            Destroy(this.gameObject);
        }
        else
        {
            this.gameObject.SetActive(scene.name == "Battle");
        }
    }
}
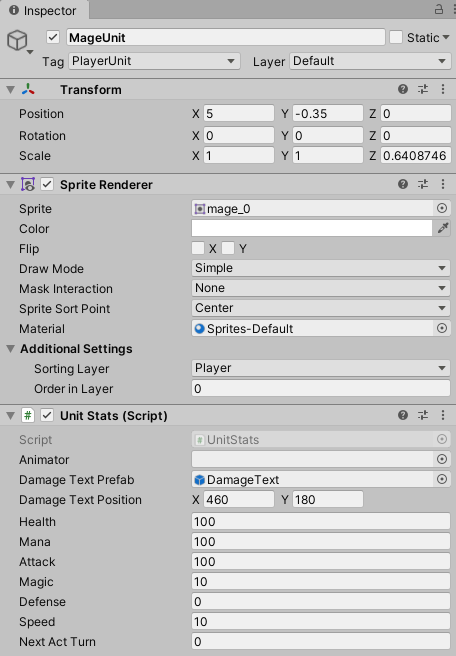
Also, the PlayerParty will have two children to represent the player units. So, first let’s create a PlayerUnit prefab with only a few things for now. Later on this tutorial, we are going to add the rest of its behavior.
For now, the PlayerUnit will have only the Sprite Renderer and a script called UnitStats, which will store the stats of each unit, such as: health, mana, attack, magic attack, defense and speed.
public class UnitStats : MonoBehaviour
{
    public float health;
    public float mana;
    public float attack;
    public float magic;
    public float defense;
    public float speed;
}
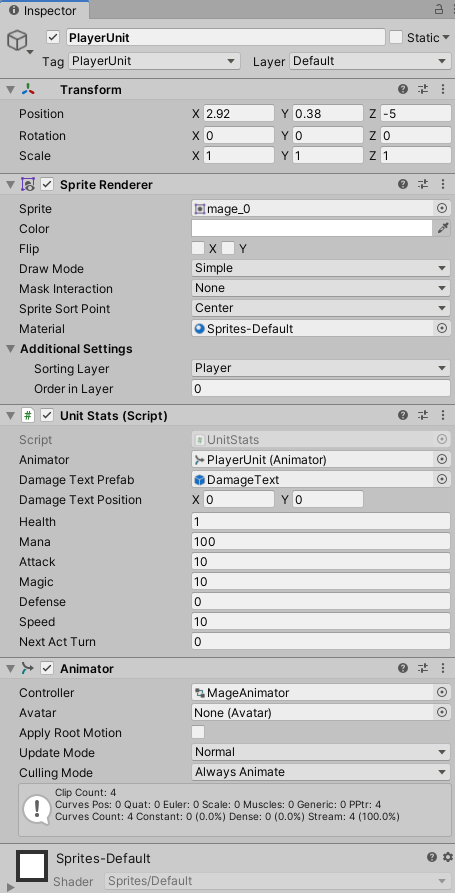
The figure below shows the example of one player unit, called MageUnit. In this example the UnitStats script has other attributes, which will be used later (such as Animator and Damage Text Prefab), but you can ignore those attributes for now.
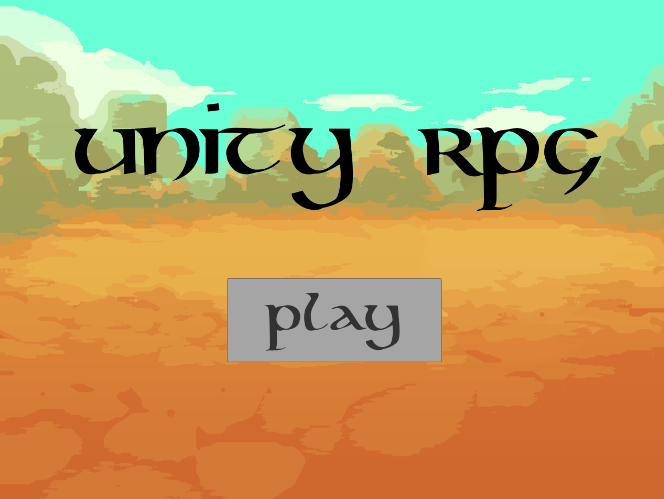
By now, you can already try running your game with the Title scene. You can create an empty Town scene only to test the play button.
Town Scene
We will start by creating the Town Scene. So, create a new Scene in your project and call it Town.
Creating our Tilemap
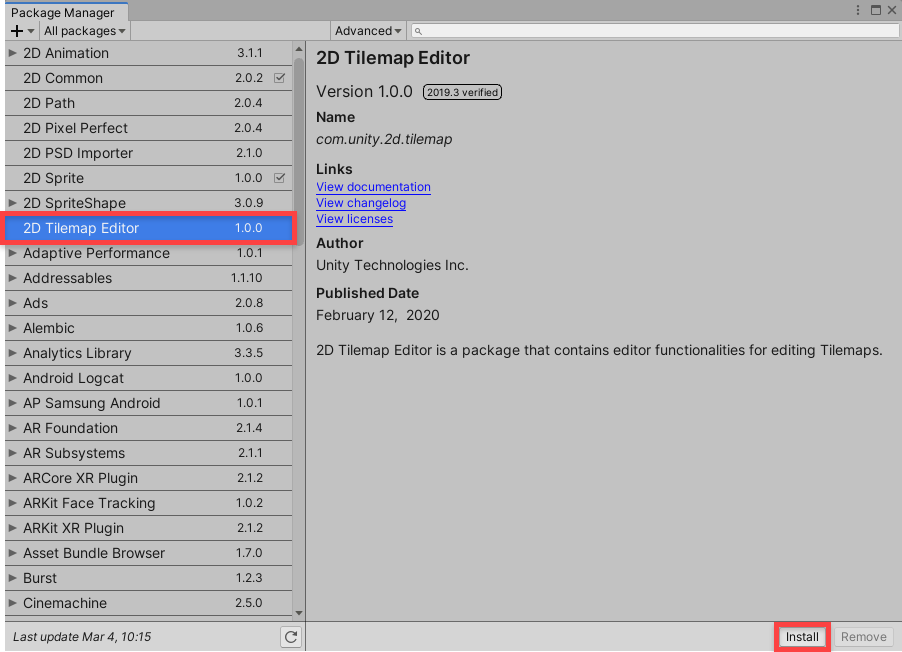
The Town scene will have a tilemap for us to walk around. To begin, let’s download the 2D Tilemap Editor package in the Package Manager (Window > Package Manager).
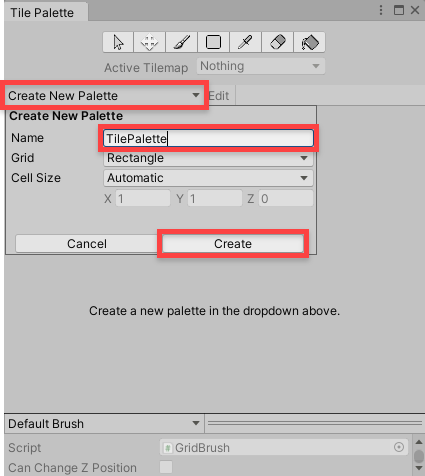
Then open the Tile Palette window (Window > 2D > Tile Palette). Here, create a new palette and save it in a new folder called Tilemap.
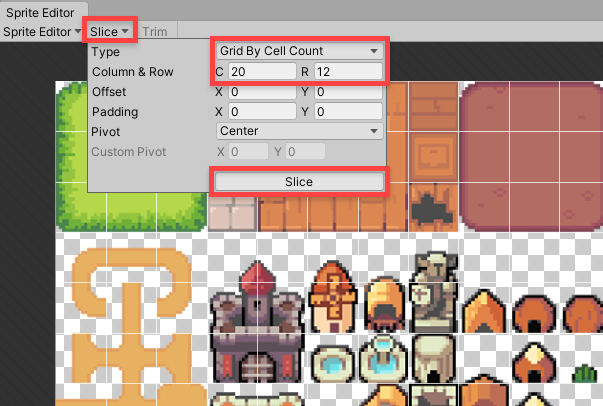
Now we need to go to our tilemap image. Set the “Sprite Mode” to Multiple, the “Pixels Per Unit” to 64, then click “Sprite Editor”.
Here, we want to slice the image up into 20 columns and 12 rows.
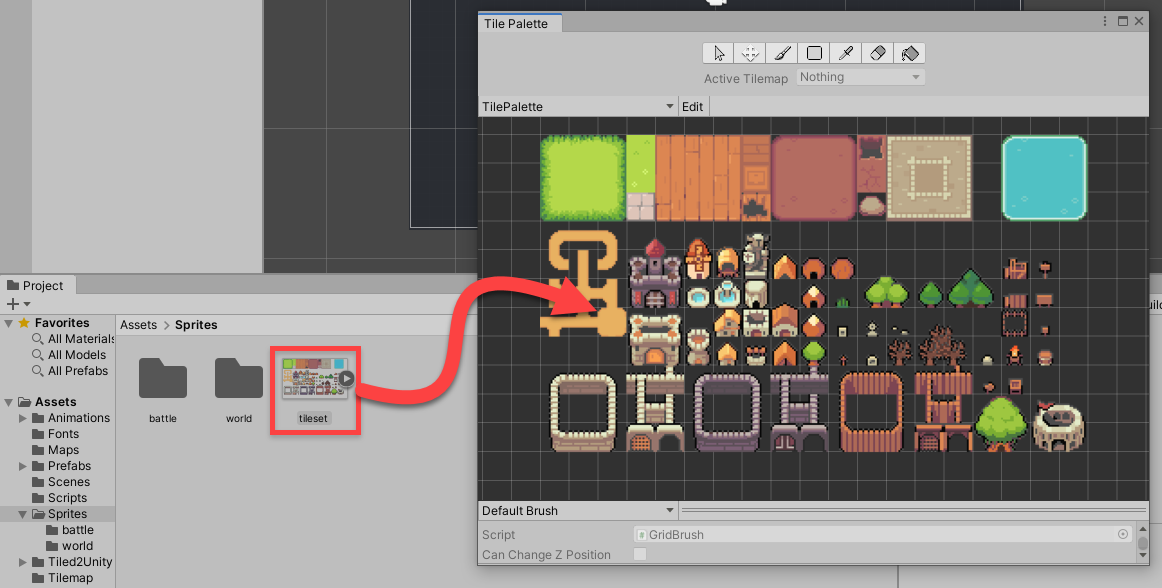
Then we can drag our tileset into the window to create the tiles.
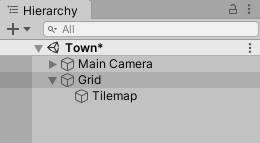
In the Town scene, right click and create a 2D Object > Tilemap.
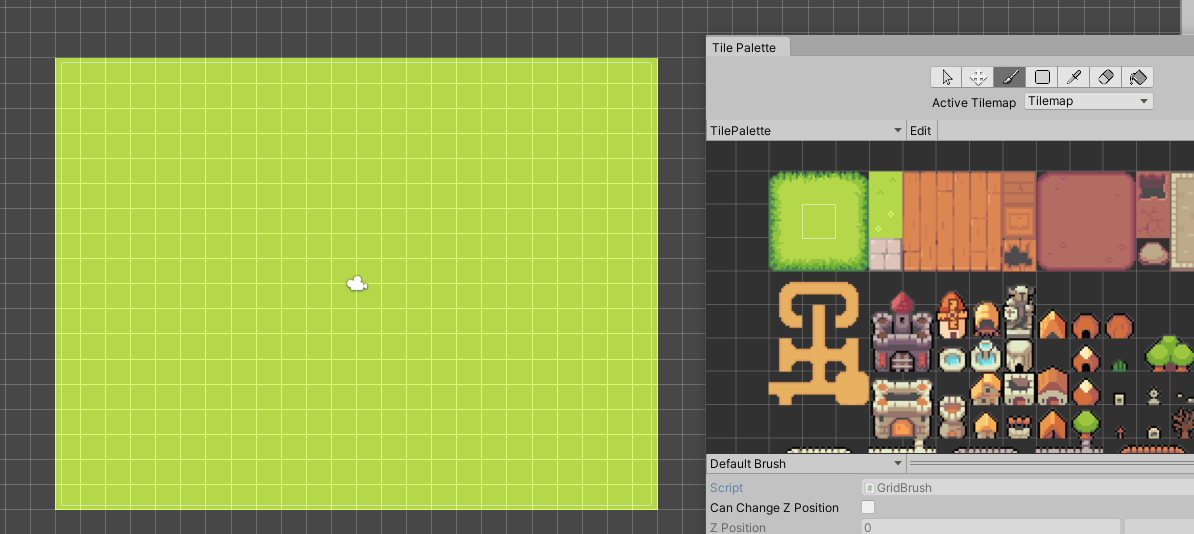
Now, we can select a tile and draw it on the tilemap. Let’s create a grass background.
In order to layer tiles, we can create a new tilemap for anything above the grass.
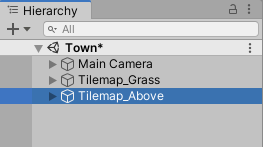
Set the grid child object’s sorting layer to 1.
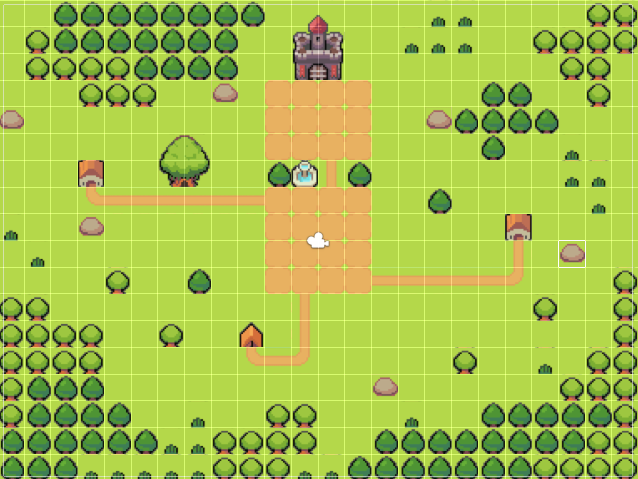
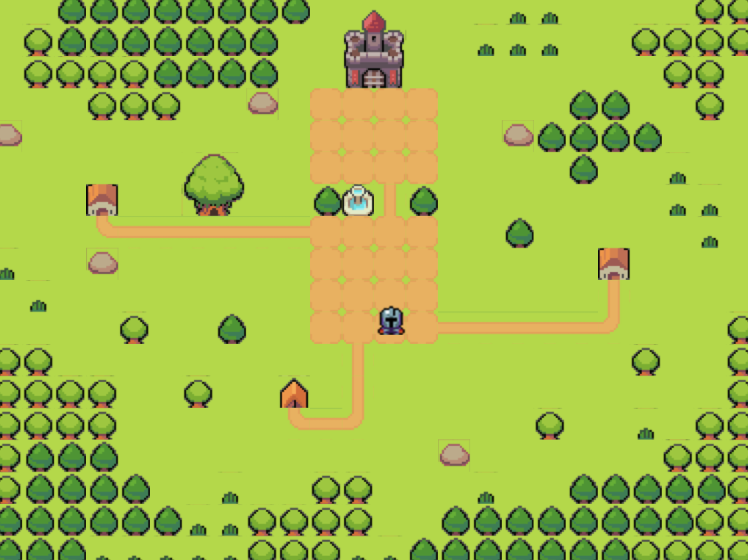
Create a scene, something like this.
Player prefab
Now that we added our town map to Unity, we are going to create a Player prefab. The player will be able to move around the town, and must collide with the collidable Tiles.
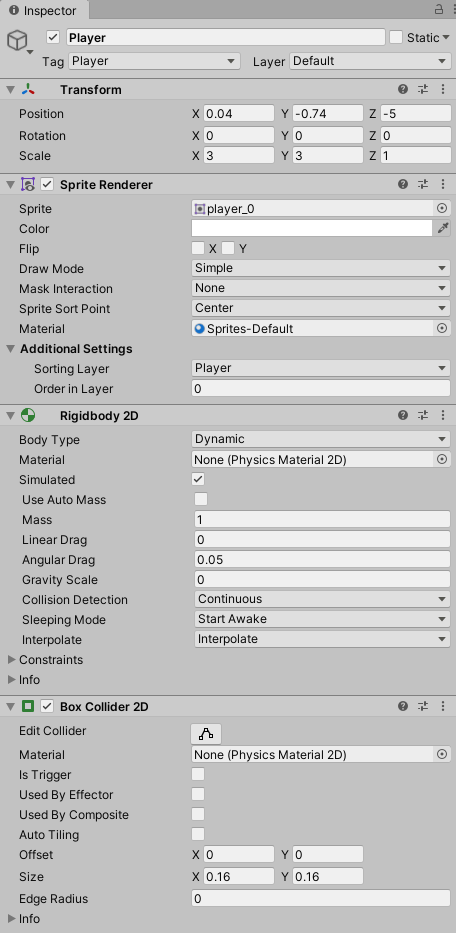
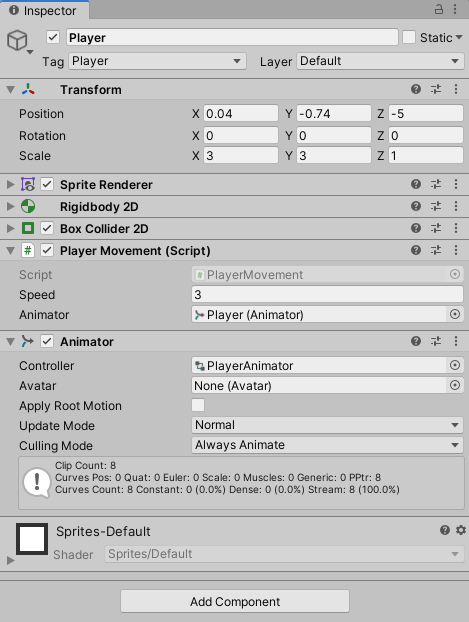
So, let’s start by creating a GameObject called Player, adding the correct sprite renderer, a Box Collider 2D and a Rigidbody 2D as shown below. Observe that we need to set the Gravity Scale attribute of the Rigidbody2D as 0, so that the Player won’t be affected by the gravity.
We also need to create the Player animations. The Player will have four walking animations and four idle animations, one for each direction. So, first, we create all the animations naming them IdleLeft, IdleRight, IdleUp, IldeDown, WalkingLeft, WalkingRight, WalkingUp and WalkingDown.
The next thing we need is the player animator. So, we create a new animator called PlayerAnimator and add all the created animations to it. Once we add the animator to the Player object in the inspector, we can create its animations using the Unity animation window and the player spritesheet. The figure below shows the example of the WalkingUp animation.
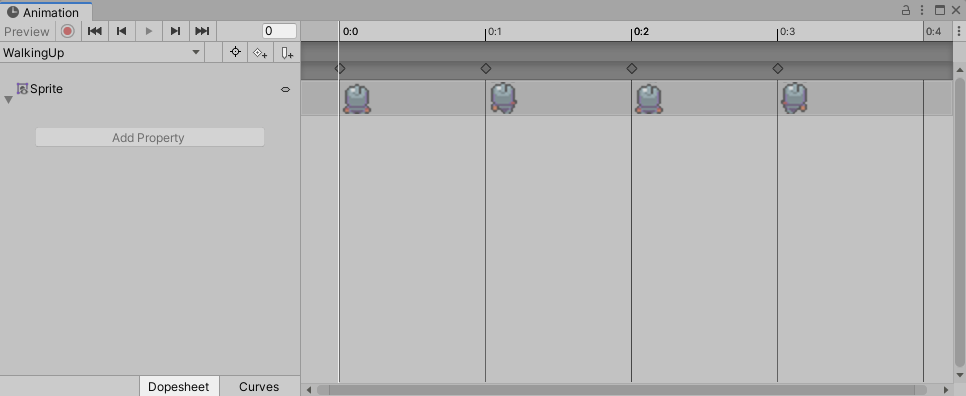
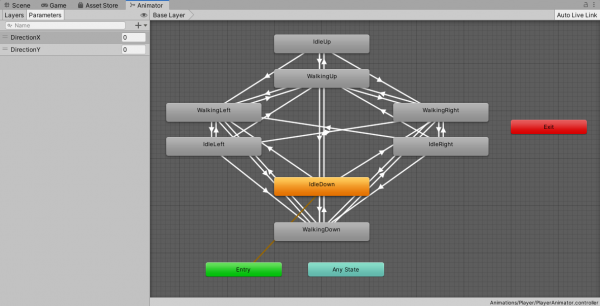
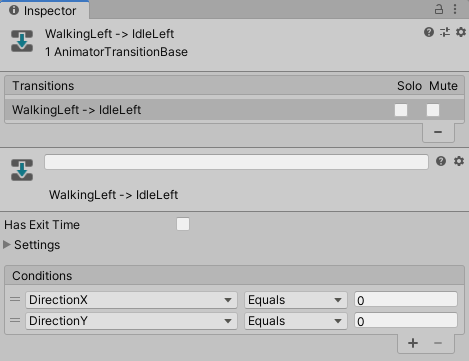
Now we need to configure the animation transitions in the player animator. The animator will have two paremeters: DirectionX and DirectionY, which describes the current direction of the player movement. For example, if the player is moving to the left, DirectionX is equal to -1, while DirectionY is equal to 0. Those parameters will be correctly set later in a movement script.
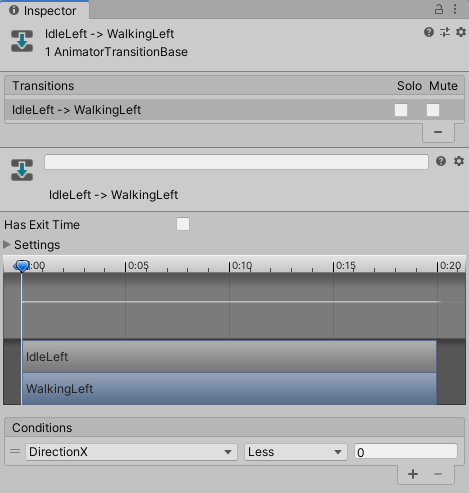
Each idle animation will have a transition to each walking animation. The direction parameters should have the values according to the animation direction. For example, the Idle Left animation will change to Walking Left if DrectionX is equal to -1. Also, each walking animation will have a transition for its correspondent idle animation. Finally, if the player changes its walking direction without stopping, we need to update the animation. So, we need to add transitions between the walking animations as well.
In the end, the player animator should look like the figure below. The next figures show examples of transitions between animations (IdleLeft -> WalkingLeft and WalkingLeft -> IdleLeft).
Now let’s create the PlayerMovement script. All movement happens in the FixedUpdate method. We use the horizontal and vertical axis inputs to check if the player should move horizontally or vertically. The player can move to a given direction if it is not already moving to the opposite direction. For example, it can move to the left if it is not already moving to the right. We do that for both vertical and horizontal directions. When moving to a given direction, we need to set the animator parameters. In the end, we apply the velocity to the Player Rigidbody2D.
public class PlayerMovement : MonoBehaviour
{
    [SerializeField]
    private float speed;

    [SerializeField]
    private Animator animator;

    void FixedUpdate ()
    {
        float moveHorizontal = Input.GetAxis("Horizontal");
        float moveVertical = Input.GetAxis("Vertical");

        Vector2 currentVelocity = gameObject.GetComponent<Rigidbody2D>().velocity;

        float newVelocityX = 0f;

        if(moveHorizontal < 0 && currentVelocity.x <= 0)
        {
            newVelocityX = -speed;
            animator.SetInteger("DirectionX", -1);
        }
        else if(moveHorizontal > 0 && currentVelocity.x >= 0)
        {
            newVelocityX = speed;
            animator.SetInteger("DirectionX", 1);
        }
        else
        {
            animator.SetInteger("DirectionX", 0);
        }

        float newVelocityY = 0f;

        if(moveVertical < 0 && currentVelocity.y <= 0)
        {
            newVelocityY = -speed;
            animator.SetInteger("DirectionY", -1);
        }
        else if(moveVertical > 0 && currentVelocity.y >= 0)
        {
            newVelocityY = speed;
            animator.SetInteger("DirectionY", 1);
        }
        else
        {
            animator.SetInteger("DirectionY", 0);
        }

        gameObject.GetComponent<Rigidbody2D>().velocity = new Vector2(newVelocityX, newVelocityY);
    }
}
In the end, the Player prefab should look like the figure below.
For now, you can start your game and try moving the player around the map. Remember to check if the tile collisions are properly working.
Starting Battle
The player can start battles by interacting with enemy spawners. The enemy spawner will be an immovable object that, when touched by the player will switch to another scene called Battle Scene.
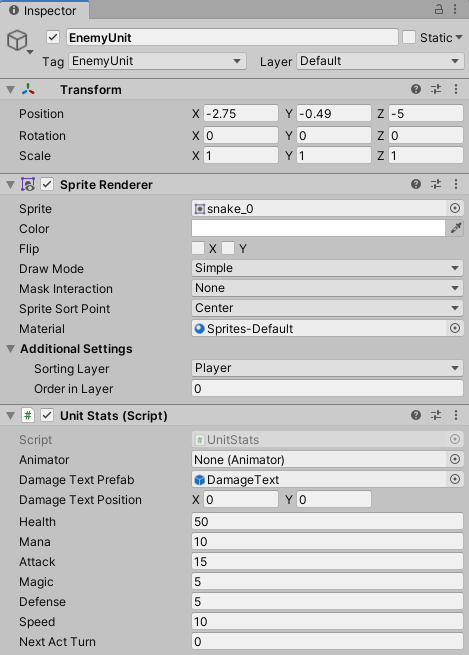
Also, the enemy spawner will be responsible for creating the enemy units objects in the Battle Scene. This will be done by creating an EnemyEncounter prefab, with enemy units as children. Like the player units from the Title Scene, for now we are only going to add the UnitStats script and the Sprite Renderer to enemy units. The figure below shows an example of an enemy unit. You can create the EnemyEncounter by creating a new prefab and adding the desired enemy units as children to it. You will also need to properly set its position so that it will be created in the correct position in Battle Scene.
So, let’s create a prefab called EnemySpawner. This prefab will have a collision box and a Rigidbody2D, in order to check for collisions with the Player prefab.
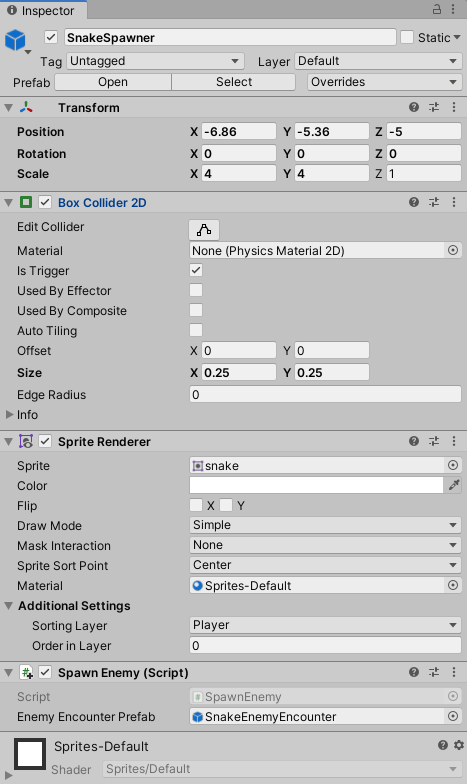
Also, it will have a script called SpawnEnemy as below. This script implements the OnCollisionEnter2D method to check for collisions with the Player prefab. We do so by checking if the other object tag is “Player” (remember to properly set the Player prefab tag). If there is a collision, it is going to start the Battle Scene and set a spawning attribute to true.
In order to create the enemy units in the Battle Scene, the script needs as an attribute the enemy encounter prefab, and the enemy spawner must not be destroyed when changing scenes (done in the Start method). When loading a scene (in the OnSceneLoaded method), if the scene being loaded is the Battle Scene, the enemy spawner will destroy itself and will instantiate the enemy encounter if the spawning attribute is true. This way, we can make sure that only one spawner will instantiate the enemy encounter, but all of them will be destroyed.
public class SpawnEnemy : MonoBehaviour
{
    [SerializeField]
    private GameObject enemyEncounterPrefab;

    private bool spawning = false;

    void Start ()
    {
        DontDestroyOnLoad(this.gameObject);
        SceneManager.sceneLoaded += OnSceneLoaded;
    }

    private void OnSceneLoaded (Scene scene, LoadSceneMode mode)
    {
        if(scene.name == "Battle")
        {
            if(this.spawning)
            {
                Instantiate(enemyEncounterPrefab);
            }

            SceneManager.sceneLoaded -= OnSceneLoaded;
            Destroy(this.gameObject);
        }
    }

    void OnTriggerEnter2D (Collider2D other)
    {
        if(other.gameObject.tag == "Player")
        {
            this.spawning = true;
            SceneManager.LoadScene("Battle");
        }
    }
}
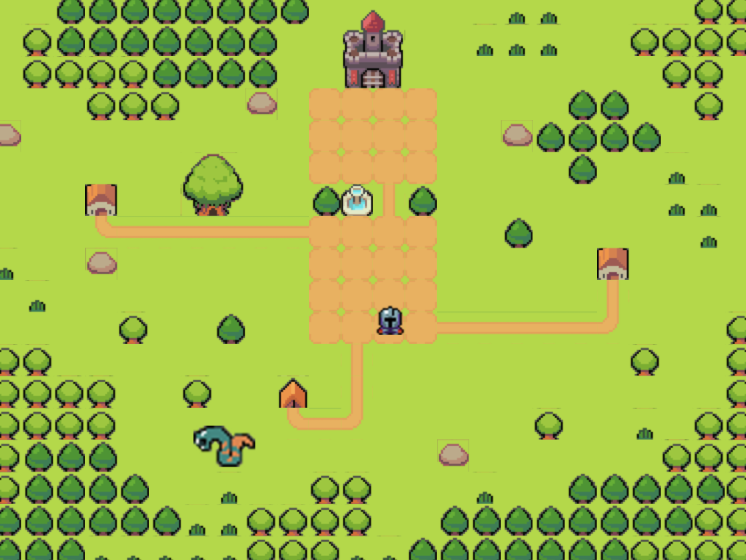
By now, you can try running your game and interacting with the enemy spawner. Try creating an empty Battle Scene to allow changing the scenes.
Battle Scene
Background and HUD Canvases
Let’s start by creating the canvases that we are going to use for Battle Scene. Similarly to Title Scene, we are going to use one for the background and another for the HUD elements.
The background canvas will be the same as for the Title Scene, so I’m not going to show its creation. The HUD canvas, on the other hand, will need a lot of elements to allow proper player interaction.
First ,we will add an actions menu, which will show the possible actions for the player. This will be an empty object used as parent of all action menu items. Each action menu item, by its turn, will be a button, added as child of the ActionsMenu.
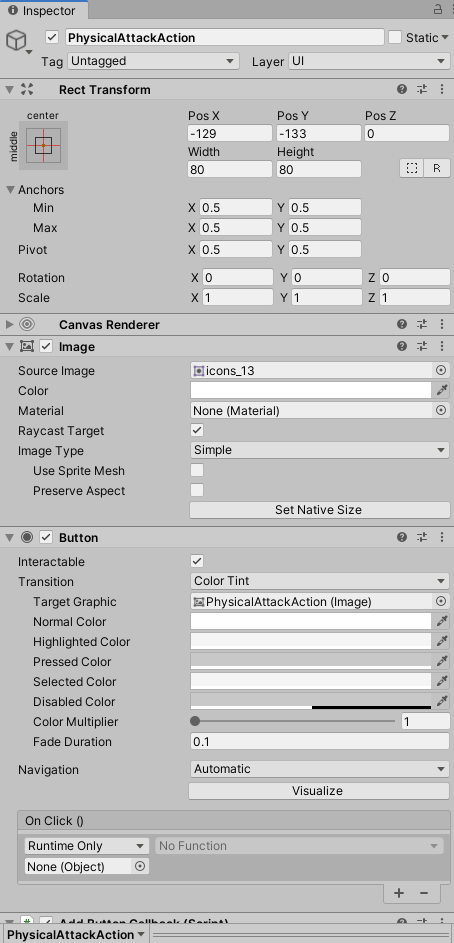
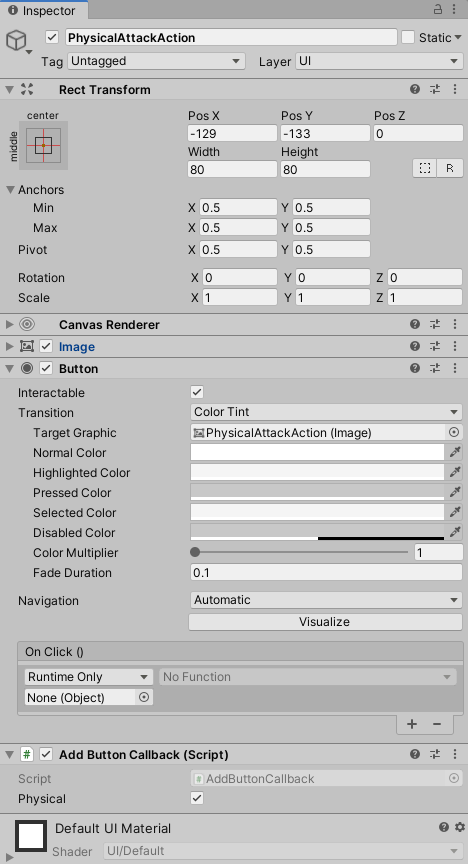
We are going to add three possible actions: attacking with physical attack (PhysicalAttackAction), attacking with magical attack (MagicAttackAction) and running from the battle (RunAction). Each action will have its OnClick event but, for now, we are not going to add it. The figure below shows only the PhysicalAttackAction, since the other ones will only change the source image for now. The source images for those menu items are from the icons Sprite, which was sliced in many icons.
The second menu we are going to add to the HUD canvas is the EnemyUnitsMenu. This menu will be used to show the enemy units, so that the player can choose one to attack. Similarly to the ActionsMenu, it will be an empty object used to group its menu items. However, the enemy menu items will be created by the enemy units, when the Battle scene starts.
In order to make the enemy unit to create its menu item, we need to create the menu item prefab. This prefab will be called TargetEnemy and will be a button. The OnClick callback of this button will be used to select this enemy as the target.
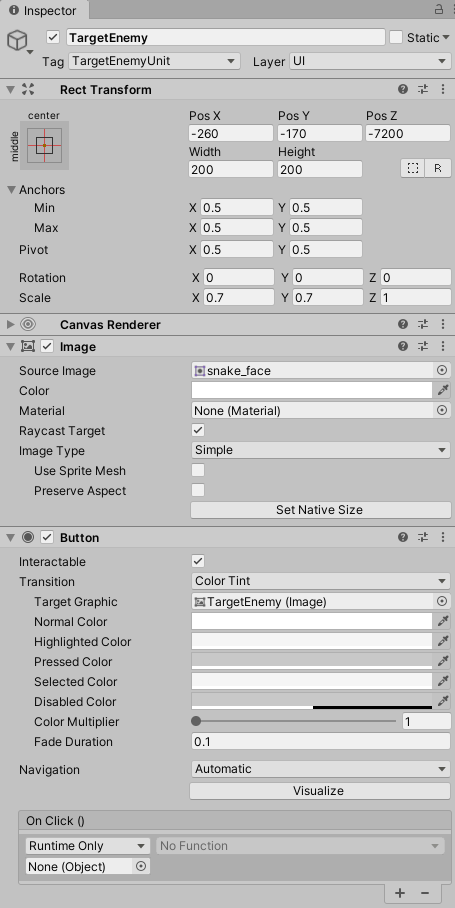
We need to add two scripts to the EnemyUnit prefab to handle its menu item: KillEnemy and CreateEnemyMenuItem.
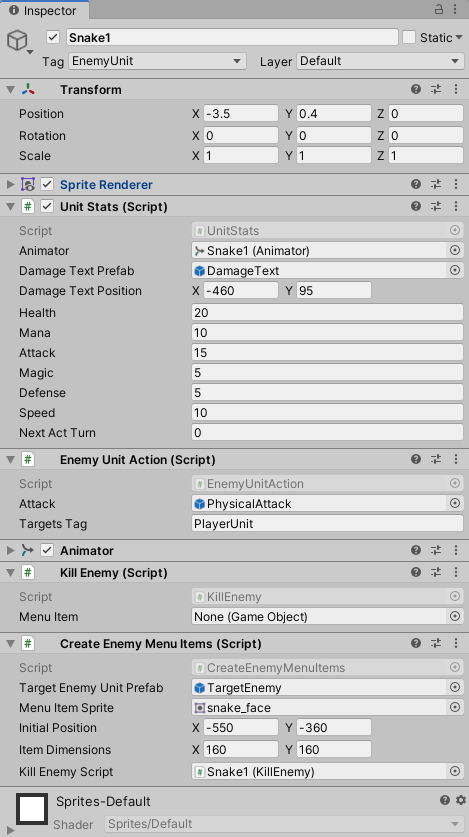
The KillEnemy script is simple. It will have as an attribute the menu item of this unit, and when the unit is destroyed (OnDestroy method), the menu item must be destroyed too.
public class KillEnemy : MonoBehaviour
{
    public GameObject menuItem;

    void OnDestroy ()
    {
        Destroy(this.menuItem);
    }
}
Now let’s create the CreateEnemyMenuItem script. This script will be responsible for creating its menu item and setting its OnClick callback. All this is done in the Awake method. First, the menu item position is calculated based on the number of existing items. Then, it is instantiated as children of EnemyUnitsMenu, and the script sets its localPosition and localScale. In the end, it sets the OnClick callback to be the selectEnemyTarget method, and sets the menu item as the one for this unit in KillEnemy.
The selectEnemyTarget method should make the player to attack this unit. However, we don’t have the code to do that now. So, for now we are going to leave this method empty.
public class CreateEnemyMenuItems : MonoBehaviour
{
    [SerializeField]
    private GameObject targetEnemyUnitPrefab;

    [SerializeField]
    private Sprite menuItemSprite;

    [SerializeField]
    private Vector2 initialPosition, itemDimensions;

    [SerializeField]
    private KillEnemy killEnemyScript;

    // Use this for initialization
    void Awake ()
    {
        GameObject enemyUnitsMenu = GameObject.Find("EnemyUnitsMenu");

        GameObject[] existingItems = GameObject.FindGameObjectsWithTag("TargetEnemyUnit");
        Vector2 nextPosition = new Vector2(this.initialPosition.x + (existingItems.Length * this.itemDimensions.x), this.initialPosition.y);

        GameObject targetEnemyUnit = Instantiate(this.targetEnemyUnitPrefab, enemyUnitsMenu.transform) as GameObject;
        targetEnemyUnit.name = "Target" + this.gameObject.name;
        targetEnemyUnit.transform.localPosition = nextPosition;
        targetEnemyUnit.transform.localScale = new Vector2(0.7f, 0.7f);
        targetEnemyUnit.GetComponent<Button>().onClick.AddListener(() => selectEnemyTarget());
        targetEnemyUnit.GetComponent<Image>().sprite = this.menuItemSprite;

        killEnemyScript.menuItem = targetEnemyUnit;
    }

    public void selectEnemyTarget ()
    {

    }
}
The final HUD elements we are going to add are those to show the player unit information, such as health and mana. So, we are going to start by creating an empty GameObject called PlayerUnitInformation, to hold all those HUD elements.
Then, we are going to add an image as child of this object called PlayerUnitFace. This element will simply show the face of the current unit. For now, let’s select any unit face.
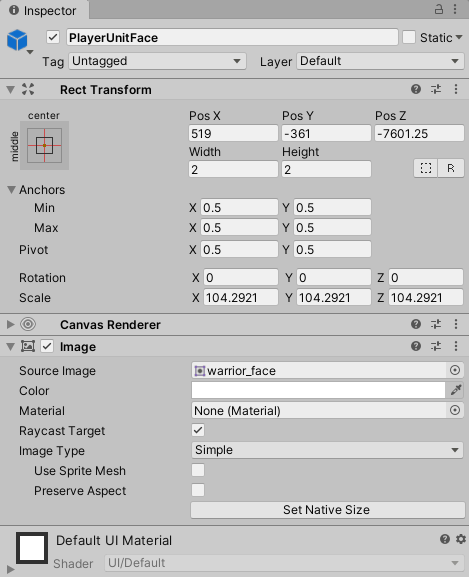
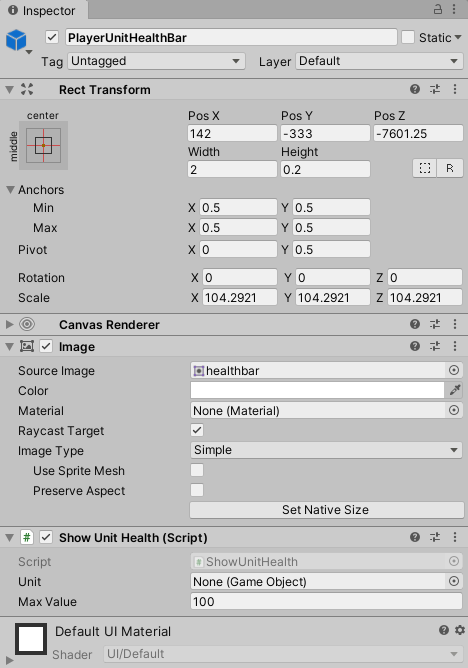
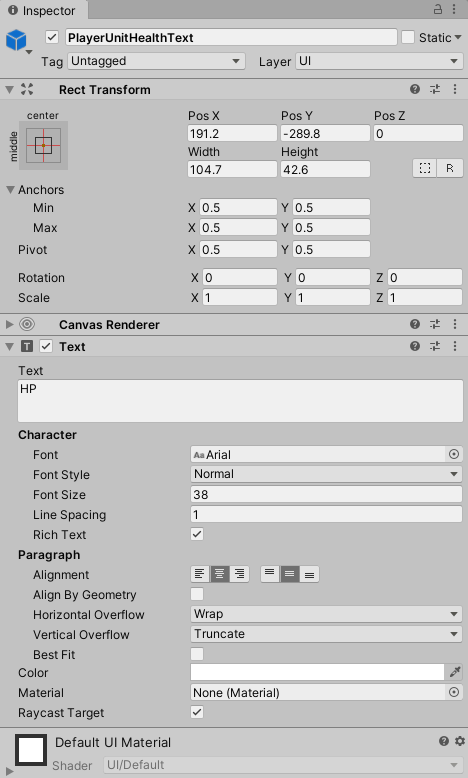
The next elements will be the health bar and its text. The health bar will be an image showing the health bar sprite, while the text will show the HP message. Finally we do the same for the mana bar, only changing the sprite and the text message. The figures below show only the health bar, since the mana bar is very similar.
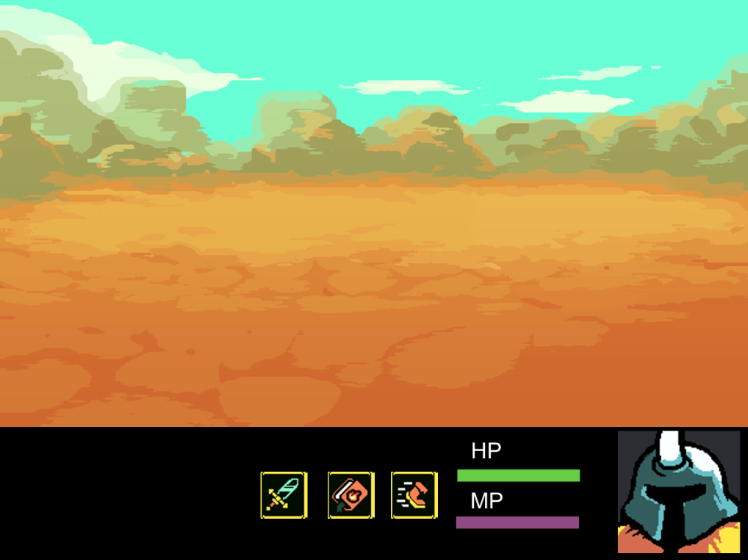
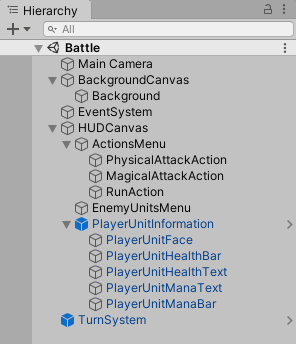
By now, your Battle Scene should look like this. This figure corresponds to the Scene viewer, and not the running game, since there is a lot of content we still need to add to properly run the Battle Scene. The righthand figure shows the objects hierarchy in the scene.
Units Animations
The next thing we are going to do is creating the units animations. Each unit will have four animatios: Idle, PhysicalAttack, MagicalAttack and Hit. So, let’s start by creating an animator for one of the player units (for example, the MageUnit), and adding it to its correspondent prefab.
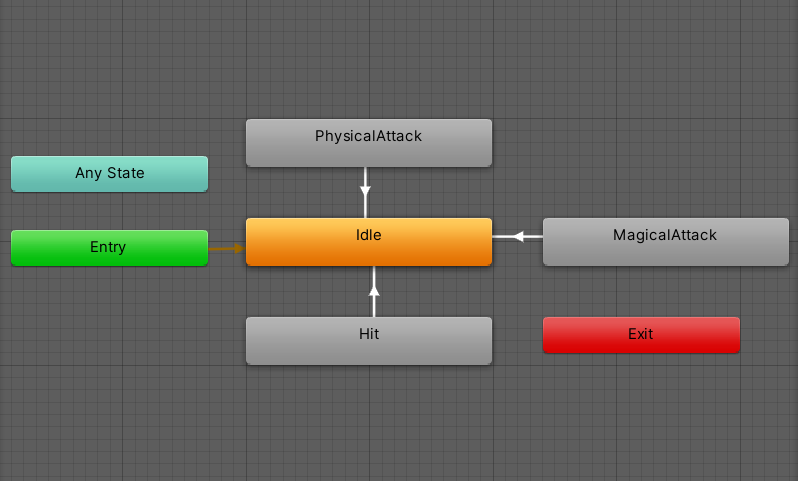
Now, if we select this prefab and open the Animator view, we can configure its animations state machine as below. We are going to create a state for each animation, with Idle being the default one, and all other ones having transitions to Idle when they end.
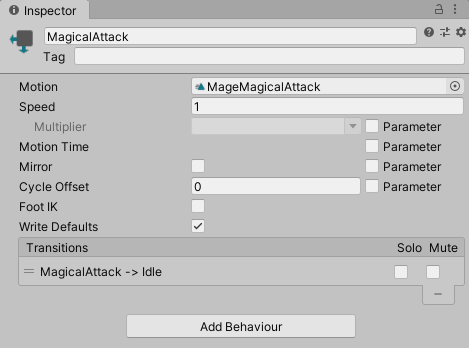
Now, we need to create the four animations to add them to their correspondent states. The figure below shows the MagicalAttack animation for MageUnit. You can create all animations following the same process with the animation view, so I’m not going to show them all. Also, you have to do the same for all units (including the enemy ones).
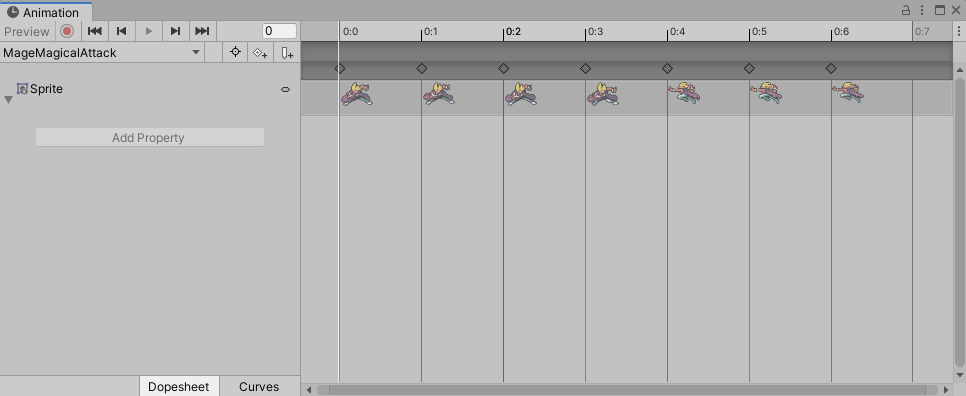
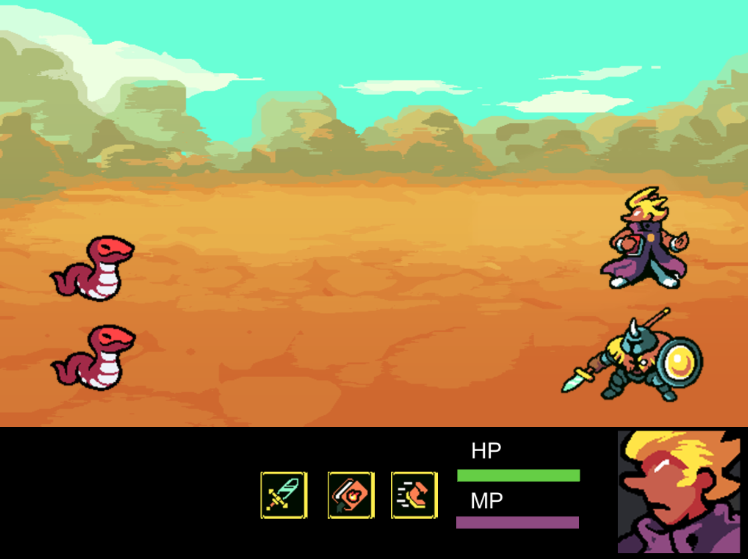
We still need to define when to play those animations. However, we are going to do so when adding more functionalities for the units. For now, the units will only play the Idle animation, as it is the default one.
If you play the game now, it should show the units with the Idle animation. However, remeber you have to play Title Scene and go until the Battle Scene, in order to see the units.
Turn-Based Battle System
The next thing we are going to add to our game is a turn-based battle system. So, let’s start by creating an empty game object with a script called TurnSystem.
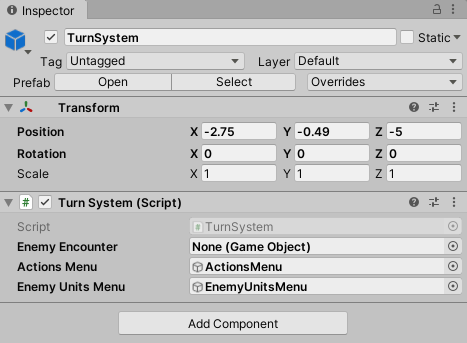
The TurnSystem script will keep a List with the UnitStats script of all units (player and enemy ones). Then, in each turn, it can pop the first element of the list, make the unit act and add it again to the list. Also, it needs to keep the list sorted according to the units acting turns.
This script is shown below. The UnitStats list is created in the Start method. This is done by iterating through all game objects with the tags “PlayerUnit” or “EnemyUnit” (remember to properly tag your objects). For each unit, the script gets its UnitStats script, calculate its next acting turn and add it to the list. After adding all units the list is sorted. Finally, the menus are disabled, since they will be used only on the player turns, and the first turn begins (by calling nextTurn).
The nextTurn method, by its turn, will start by removing the first UnitStats from the list and checking if it is not dead. If the unit is alive, it will calculate its next acting turn in order to add it again to the list. Finally, it will make it act. We still don’t have the acting methods of the units, so we are only going to print a message in the console for now. On the other hand, if the unit is dead, we are simply going to call nextTurn without adding it to the list again.
public class TurnSystem : MonoBehaviour
{
    private List<UnitStats> unitsStats;

    [SerializeField]
    private GameObject actionsMenu, enemyUnitsMenu;

    void Start ()
    {
        unitsStats = new List<UnitStats>();
        GameObject[] playerUnits = GameObject.FindGameObjectsWithTag("PlayerUnit");

        foreach(GameObject playerUnit in playerUnits)
        {
            UnitStats currentUnitStats = playerUnit.GetComponent<UnitStats>();
            currentUnitStats.calculateNextActTurn(0);
            unitsStats.Add (currentUnitStats);
        }

        GameObject[] enemyUnits = GameObject.FindGameObjectsWithTag("EnemyUnit");

        foreach(GameObject enemyUnit in enemyUnits)
        {
            UnitStats currentUnitStats = enemyUnit.GetComponent<UnitStats>();
            currentUnitStats.calculateNextActTurn(0);
            unitsStats.Add(currentUnitStats);
        }

        unitsStats.Sort();

        this.actionsMenu.SetActive(false);
        this.enemyUnitsMenu.SetActive(false);

        this.nextTurn();
    }

    public void nextTurn ()
    {
        UnitStats currentUnitStats = unitsStats [0];
        unitsStats.Remove(currentUnitStats);

        if(!currentUnitStats.isDead())
        {
            GameObject currentUnit = currentUnitStats.gameObject;

            currentUnitStats.calculateNextActTurn(currentUnitStats.nextActTurn);
            unitsStats.Add(currentUnitStats);
            unitsStats.Sort();

            if(currentUnit.tag == "PlayerUnit")
            {
                Debug.Log("Player unit acting");
            }
            else
            {
                Debug.Log("Enemy unit acting");
            }
        }
        else
        {
            this.nextTurn();
        }
    }
}
Before moving on, we need to implement the UnitStats methods we used in TurnSystem, so let’s go back to the UnitStats script.
First, the calculateNextActTurn method is responsible for calculating the next acting turn based on the current one. This is done based on the unit speed, as shown below. Also, we need to make UnitStats to extend the IComparable interface, and implement the CompareTo method, so that we can properly sort the UnitStats list. The CompareTo method will simply compare the acting turn of the two scripts. Finally, we need to implement the isDead getter, which will simply return the dead attribute value. By default, this attribute is false, because the unit is alive at the beginning of the game.
public class UnitStats : MonoBehaviour, IComparable
{
    public float health;
    public float mana;
    public float attack;
    public float magic;
    public float defense;
    public float speed;

    public int nextActTurn;

    private bool dead = false;

    public void calculateNextActTurn (int currentTurn)
    {
        this.nextActTurn = currentTurn + (int)Math.Ceiling(100.0f / this.speed);
    }

    public int CompareTo (object otherStats)
    {
        return nextActTurn.CompareTo(((UnitStats)otherStats).nextActTurn);
    }

    public bool isDead ()
    {
        return this.dead;
    }
}
For now, you can try playing the game again, to see if the turn message is being properly printed in the console.
Attacking Units
Now that we have our turn-based battle system we are going to allow units to attack each other. First, we are going to create Attack prefabs, which will be used by the units. Then, we are going to add the action scripts of both player and enemy units, so that they can properly attack. When receiving damage, units will show a Text prefab with the damage value.
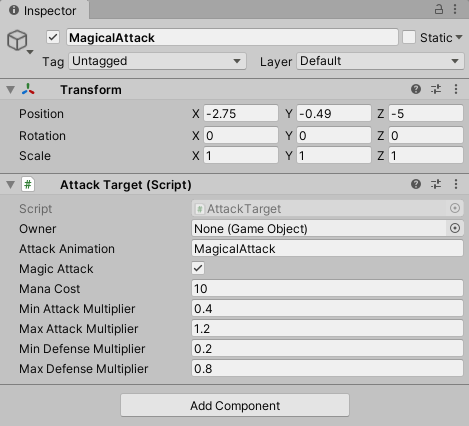
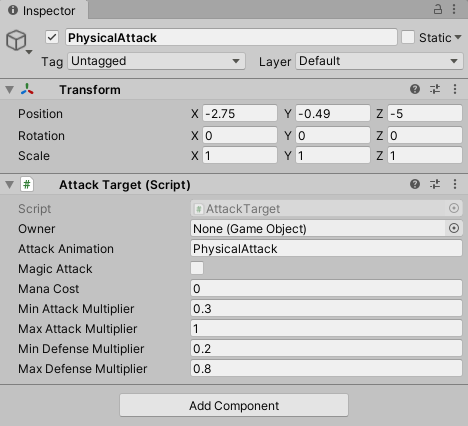
The Attack prefab will be an inivisible prefab with an script called AttackTarget. This script will describe the attack properties such as attack and defense multipliers and mana cost. Also, the attack will have an owner, which is the unit currently attacking.
First, the script checks if the owner has enough mana to execute the attack. If so, it picks random attack and defense multipliers based on the minimum and maximum values. So, the damage is calculated based on those multipliers and the attack and defense of the units. Observe that, if the attak is a magical attack (this.magicAttack is true), then it will use the magic stat of the unit, otherwise it uses the attack stat.
In the end, the script plays the attack animation, inflicts the damage to the target unit and reduces the mana of the owner accordingly.
public class AttackTarget : MonoBehaviour
{
    public GameObject owner;

    [SerializeField]
    private string attackAnimation;

    [SerializeField]
    private bool magicAttack;

    [SerializeField]
    private float manaCost;

    [SerializeField]
    private float minAttackMultiplier;

    [SerializeField]
    private float maxAttackMultiplier;

    [SerializeField]
    private float minDefenseMultiplier;

    [SerializeField]
    private float maxDefenseMultiplier;

    public void hit (GameObject target)
    {
        UnitStats ownerStats = this.owner.GetComponent<UnitStats>();
        UnitStats targetStats = target.GetComponent<UnitStats>();

        if(ownerStats.mana >= this.manaCost)
        {
            float attackMultiplier = (Random.value * (this.maxAttackMultiplier - this.minAttackMultiplier)) + this.minAttackMultiplier;
            float damage = (this.magicAttack) ? attackMultiplier * ownerStats.magic : attackMultiplier * ownerStats.attack;

            float defenseMultiplier = (Random.value * (this.maxDefenseMultiplier - this.minDefenseMultiplier)) + this.minDefenseMultiplier;
            damage = Mathf.Max(0, damage - (defenseMultiplier * targetStats.defense));

            this.owner.GetComponent<Animator>().Play(this.attackAnimation);

            targetStats.receiveDamage(damage);

            ownerStats.mana -= this.manaCost;
        }
    }
}
We are going to create two attack prefabs: PhysicalAttack and MagicalAttack, each one with its own multipliers.
Now we need to implement the reiceveDamage method, used in the AttackTarget script. This will be a method from UnitStats that, besides reducing the unit health, it will also show the damage using a Text over the unit’s head.
This method is shown below. First, it will simply reduce the unit health and play the Hit animation. Then, it will create the damage text (using this.damageTextPrefab). Observe that the damage text must be a child of the HUDCanvas, since it is an UI element, and we need to properly set its localPosition and localScale. In the end, if the unit health is less than zero, the script set the unit as dead, change its tag and destroy it.
public void receiveDamage (float damage)
{
    this.health -= damage;
    animator.Play("Hit");

    GameObject HUDCanvas = GameObject.Find("HUDCanvas");
    GameObject damageText = Instantiate(this.damageTextPrefab, HUDCanvas.transform) as GameObject;
    damageText.GetComponent<Text>().text = "" + damage;
    damageText.transform.localPosition = this.damageTextPosition;
    damageText.transform.localScale = new Vector2(1.0f, 1.0f);

    if(this.health <= 0)
    {
        this.dead = true;
        this.gameObject.tag = "DeadUnit";
        Destroy(this.gameObject);
    }
}
Now we can already implement the act method of the units. An enemy unit will always attack a random enemy with the same attack. This attack will be an attribute in EnemyUnitAction. In the Awake method we are going to create a copy of it for the unit and properly set its owner. We need to create a copy since we want each unit to have its own attack object instance.
Then, the act method will pick a random target and attack it. The findRandomTarget method, by its turn, will start by listing all possible targets given their tags (for example, “PlayerUnit”). If there is at least one possible target in this list, it will generate a random index to pick the target.
public class EnemyUnitAction : MonoBehaviour
{
    [SerializeField]
    private GameObject attack;

    [SerializeField]
    private string targetsTag;

    void Awake ()
    {
        this.attack = Instantiate(this.attack);
        this.attack.GetComponent<AttackTarget>().owner = this.gameObject;
    }

    GameObject findRandomTarget ()
    {
        GameObject[] possibleTargets = GameObject.FindGameObjectsWithTag(targetsTag);

        if(possibleTargets.Length > 0)
        {
            int targetIndex = Random.Range(0, possibleTargets.Length);
            GameObject target = possibleTargets [targetIndex];

            return target;
        }

        return null;
    }

    public void act ()
    {
        GameObject target = findRandomTarget();
        this.attack.GetComponent<AttackTarget>().hit(target);
    }
}
Player units, by their turn, will have two different attacks: physical and magical. So, in the Awake method we need to properly instantiate and set the owner of these two attacks. Also, we are going to set the current attack as the physical one by default.
Then, the act method will receive as parameter the target unit and will simply attack it.
public class PlayerUnitAction : MonoBehaviour
{
    [SerializeField]
    private GameObject physicalAttack;

    [SerializeField]
    private GameObject magicalAttack;

    private GameObject currentAttack;

    void Awake ()
    {
        this.physicalAttack = Instantiate(this.physicalAttack, this.transform) as GameObject;
        this.magicalAttack = Instantiate(this.magicalAttack, this.transform) as GameObject;

        this.physicalAttack.GetComponent<AttackTarget>().owner = this.gameObject;
        this.magicalAttack.GetComponent<AttackTarget>().owner = this.gameObject;

        this.currentAttack = this.physicalAttack;
    }

    public void act (GameObject target)
    {
        this.currentAttack.GetComponent<AttackTarget>().hit(target);
    }
}
Now, we can already call the enemy unit act method in the TurnSystem script. We still can’t do the same for player units, since we still need to properly select the current unit and its attack. This is the next thing we are going to do.
public void nextTurn ()
{
    UnitStats currentUnitStats = unitsStats [0];
    unitsStats.Remove(currentUnitStats);

    if(!currentUnitStats.isDead())
    {
        GameObject currentUnit = currentUnitStats.gameObject;

        currentUnitStats.calculateNextActTurn(currentUnitStats.nextActTurn);
        unitsStats.Add(currentUnitStats);
        unitsStats.Sort();

        if(currentUnit.tag == "PlayerUnit")
        {
            Debug.Log("Player unit acting");
        }
        else
        {
            currentUnit.GetComponent<EnemyUnitAction>().act();
        }
    }
    else
    {
        this.nextTurn();
    }
}
Selecting Unit and Action
We need to properly select the current player unit each turn. This will be done by adding the following script (SelectUnit) to the PlayerParty object. This script will need references to the battle menus, so when the Battle scene is loaded it is going to set them.
Then, we need to implement three methods: selectCurrentUnit, selectAttack and attackEnemyTarget. The first one will set a unit as the current one, enable the actions menu, so that the player can choose an action, and update the HUD to show the current unit face, health and mana (this last method will be implemented later).
The selectAttack method, by its turn, will call selectAttack for the current unit, and will change the current menu, by disabling the actions menu and enabling the enemies menu. The selectAttack method also needs to be implemented in the PlayerUnitAction script. This way, now that the player has selected an attack, it can select the target.
Finally, the attackEnemyTarget will disable both menus and call the act method for the current unit, with the selected enemy as the target.
public class SelectUnit : MonoBehaviour
{
    private GameObject currentUnit;

    private GameObject actionsMenu, enemyUnitsMenu;

    void Awake ()
    {
        SceneManager.sceneLoaded += OnSceneLoaded;
    }

    private void OnSceneLoaded (Scene scene, LoadSceneMode mode)
    {
        if(scene.name == "Battle")
        {
            this.actionsMenu = GameObject.Find("ActionsMenu");
            this.enemyUnitsMenu = GameObject.Find("EnemyUnitsMenu");
        }
    }

    public void selectCurrentUnit (GameObject unit)
    {
        this.currentUnit = unit;
        this.actionsMenu.SetActive(true);
    }

    public void selectAttack (bool physical)
    {
        this.currentUnit.GetComponent<PlayerUnitAction>().selectAttack(physical);

        this.actionsMenu.SetActive(false);
        this.enemyUnitsMenu.SetActive(true);
    }

    public void attackEnemyTarget (GameObject target)
    {
        this.actionsMenu.SetActive(false);
        this.enemyUnitsMenu.SetActive(false);

        this.currentUnit.GetComponent<PlayerUnitAction>().act(target);
    }
}
public class PlayerUnitAction : MonoBehaviour
{
[SerializeField]
private GameObject physicalAttack;
[SerializeField]
private GameObject magicalAttack;
private GameObject currentAttack;
public void selectAttack (bool physical)
{
this.currentAttack = (physical) ? this.physicalAttack : this.magicalAttack;
}
}
Now, we need to properly call all those three methods. The first one (selectCurrentUnit) will be called in TurnSystem, when it is a player unit turn.
public void nextTurn ()
{
    UnitStats currentUnitStats = unitsStats [0];
    unitsStats.Remove(currentUnitStats);

    if(!currentUnitStats.isDead ())
    {
        GameObject currentUnit = currentUnitStats.gameObject;

        currentUnitStats.calculateNextActTurn(currentUnitStats.nextActTurn);
        unitsStats.Add(currentUnitStats);
        unitsStats.Sort();

        if(currentUnit.tag == "PlayerUnit")
        {
            this.playerParty.GetComponent<SelectUnit>().selectCurrentUnit(currentUnit.gameObject);
        }
        else
        {
            currentUnit.GetComponent<EnemyUnitAction>().act();
        }
    }
    else
    {
        this.nextTurn();
    }
}
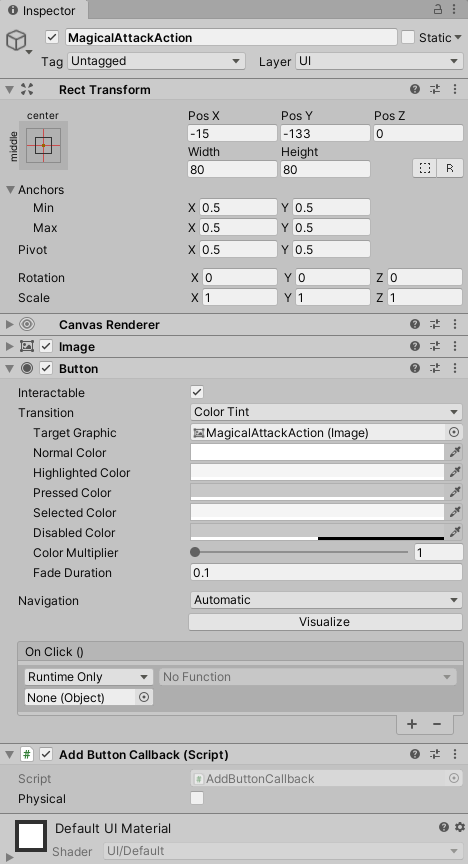
The second one (selectAttack), will be called by the PhysicalAttackAction and MagicalAttackAction buttons in the HUDCanvas. Since the PlayerParty object is not from the same scene as these buttons, we can’t add the OnClick callbacks in the inspector. So, we are going to do that using the following script (added to those buttons objects), which will add the callback in the Start method. The callback will simply call the selectAttack method from SelectUnit. This same script should be added to both buttons, only changing the “physical” attribute.
public class AddButtonCallback : MonoBehaviour
{
    [SerializeField]
    private bool physical;

    // Use this for initialization
    void Start ()
    {
        this.gameObject.GetComponent<Button>().onClick.AddListener(() => addCallback());
    }

    private void addCallback ()
    {
        GameObject playerParty = GameObject.Find("PlayerParty");
        playerParty.GetComponent<SelectUnit>().selectAttack(this.physical);
    }
}
The third method (attackEnemyTarget) will be called from the enemy unit menu item. When creating the CreateEnemyMenuItems script, we left the selectEnemyTarget (which is the button callback) empty. Now, we are going to implement it. This method is going to find the PlayerParty object and call its attackEnemyTarget method.
public void selectEnemyTarget ()
{
    GameObject partyData = GameObject.Find("PlayerParty");
    partyData.GetComponent<SelectUnit>().attackEnemyTarget(this.gameObject);
}
Finally, now we need to update the HUD to show the current unit face, health and mana.
We are going to use the following script to show the unit health and mana. This script will start its initial localScale in the Start method. Then, in the Update method it will update the localScale according to the current stat value of the unit. Also, it will have a method do change the current unit being showed and an abstract method to retrieve the current stat value.
public abstract class ShowUnitStat : MonoBehaviour
{
    [SerializeField]
    protected GameObject unit;

    [SerializeField]
    private float maxValue;

    private Vector2 initialScale;

    void Start ()
    {
        this.initialScale = this.gameObject.transform.localScale;
    }

    void Update ()
    {
        if(this.unit)
        {
            float newValue = this.newStatValue();
            float newScale = (this.initialScale.x * newValue) / this.maxValue;
            this.gameObject.transform.localScale = new Vector2(newScale, this.initialScale.y);
        }
    }

    public void changeUnit (GameObject newUnit)
    {
        this.unit = newUnit;
    }

    abstract protected float newStatValue();
}
Instead of directly using this script, we are going to create two other ones that specialize it, implementing the abstract method: ShowUnitHealth and ShowUnitMana. The only method in those two scripts will be newStatValue, which will return the correct unit stats (health or mana).
public class ShowUnitHealth : ShowUnitStat
{
    override protected float newStatValue ()
    {
        return unit.GetComponent<UnitStats>().health;
    }
}
public class ShowUnitMana : ShowUnitStat
{
override protected float newStatValue ()
{
return unit.GetComponent<UnitStats>().mana;
}
}Now we can add those two scripts to the health and mana bar objects. Another thing to do is to change their Pivot in the X coordinate to be zero, so that it will change the scale only on the right side of the bar.
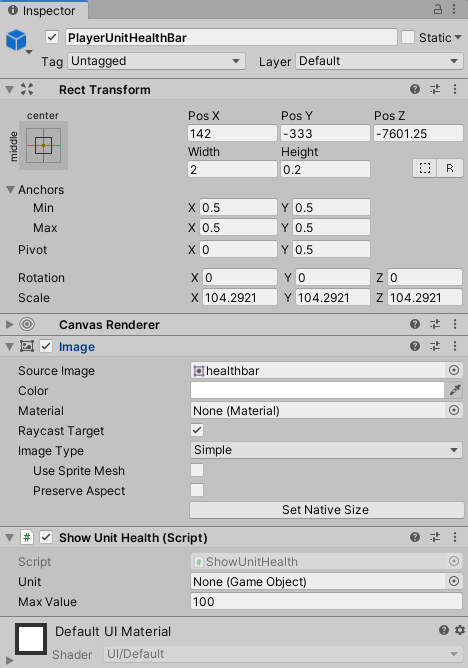
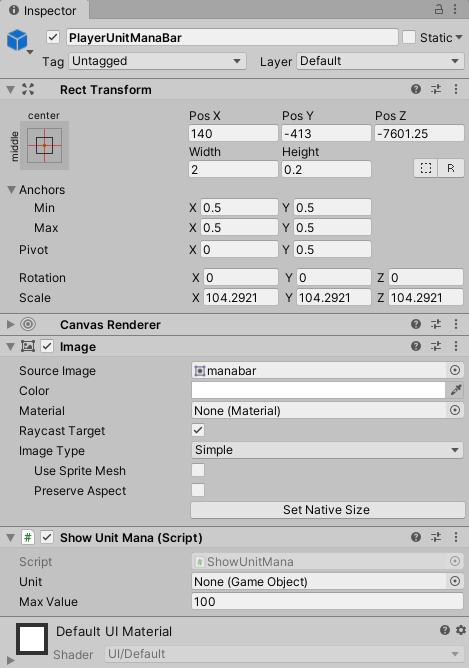
Finally, we need to call the changeUnit method in those scripts when the current unit changes. This will start in the selectCurrentUnit method of SelectUnit. After setting the actionsMenu as active, it will call a method called updateHUD for the current unit.
public void selectCurrentUnit (GameObject unit)
{
    this.currentUnit = unit;
    this.actionsMenu.SetActive(true);
    this.currentUnit.GetComponent<PlayerUnitAction>().updateHUD();
}
The updateHUD method, by its turn, will start by setting the sprite of the PlayerUnitFace object to be the current unit face (saved as an attribute of PlayerUnitAction). Then, it will set itself as the current unit in both ShowUnitHealth and ShowUnitMana.
[SerializeField]
private Sprite faceSprite;

public void updateHUD ()
{
    GameObject playerUnitFace = GameObject.Find("PlayerUnitFace") as GameObject;
    playerUnitFace.GetComponent<Image>().sprite = this.faceSprite;

    GameObject playerUnitHealthBar = GameObject.Find("PlayerUnitHealthBar") as GameObject;
    playerUnitHealthBar.GetComponent<ShowUnitHealth>().changeUnit(this.gameObject);

    GameObject playerUnitManaBar = GameObject.Find("PlayerUnitManaBar") as GameObject;
    playerUnitManaBar.GetComponent<ShowUnitMana>().changeUnit(this.gameObject);
}
By now, you can try playing the game to see if you can select different actions, and if the stats are being correctly updated. The only action from the menu that we still have to implement is the Run action.

Finishing the Battle
We still have to add ways of finishing the battle. There are three ways of doing that:
- All enemy units are dead, and the player has won the battle
- All player units are dead, and the player has lost the battle
- The player ran from the battle
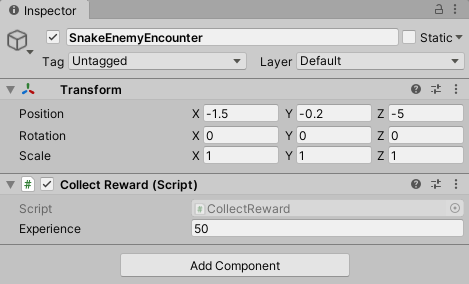
If the player wins the battle, it will receive a reward from the enemy encounter. In order to do that we are going to use the following script, which will be added to the enemy encounter object. In the Start method, it will set the enemy encounter in the TurnSystem object. Then, the collectReward method (which will be called from TurnSystem), will equally divide the encounter experience among all living player units.
public class CollectReward : MonoBehaviour
{
    [SerializeField]
    private float experience;

    public void Start ()
    {
        GameObject turnSystem = GameObject.Find("TurnSystem");
        turnSystem.GetComponent<TurnSystem>().enemyEncounter = this.gameObject;
    }

    public void collectReward ()
    {
        GameObject[] livingPlayerUnits = GameObject.FindGameObjectsWithTag("PlayerUnit");
        float experiencePerUnit = this.experience / (float)livingPlayerUnits.Length;

        foreach(GameObject playerUnit in livingPlayerUnits)
        {
            playerUnit.GetComponent<UnitStats>().receiveExperience(experiencePerUnit);
        }

        Destroy(this.gameObject);
    }
}
Now we need to implement the receiveExperience method used in collectReward. This will be a method from UnitStats used only to save the received experience. This can be used later to implement a level system in the game, but we are not going to do that in this tutorial.
public void receiveExperience (float experience)
{
    this.currentExperience += experience;
}
Finally, let’s call the collectReward method in TurnSystem. We are going to change the nextTurn method to check if there are still living enemy units, by finding the objects with the “EnemyUnit” tag. Remember that when a unit dies, we change its tag to “DeadUnit”, so that it won’t be found by this method. If there are no remaining enemy units, it calls the collectReward method for the enemy encounter, and go backs to the Town scene.
On the other hand, if there are no remaining player units, that means the player has lost the battle, so the game goes back to the Title scene.
public void nextTurn ()
{
    GameObject[] remainingEnemyUnits = GameObject.FindGameObjectsWithTag("EnemyUnit");

    if(remainingEnemyUnits.Length == 0)
    {
        this.enemyEncounter.GetComponent<CollectReward>().collectReward();
        SceneManager.LoadScene("Town");
    }

    GameObject[] remainingPlayerUnits = GameObject.FindGameObjectsWithTag("PlayerUnit");

    if(remainingPlayerUnits.Length == 0)
    {
        SceneManager.LoadScene("Title");
    }

    UnitStats currentUnitStats = unitsStats [0];
    unitsStats.Remove(currentUnitStats);

    if(!currentUnitStats.isDead ())
    {
        GameObject currentUnit = currentUnitStats.gameObject;

        currentUnitStats.calculateNextActTurn(currentUnitStats.nextActTurn);
        unitsStats.Add(currentUnitStats);
        unitsStats.Sort();

        if(currentUnit.tag == "PlayerUnit")
        {
            this.playerParty.GetComponent<SelectUnit>().selectCurrentUnit(currentUnit.gameObject);
        }
        else
        {
            currentUnit.GetComponent<EnemyUnitAction>().act();
        }
    }
    else
    {
        this.nextTurn();
    }
}
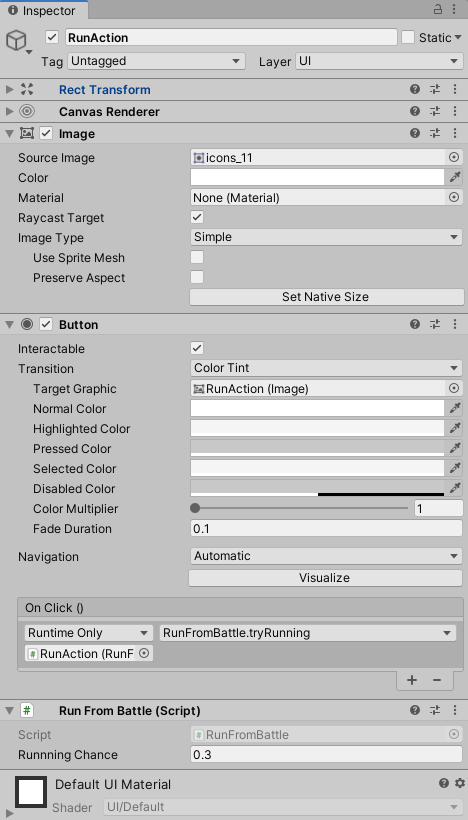
The last way of finishing a battle is by running from it. This can be done by selecting the run action in the actions menu. So, we need to attach the script below to the run button, and add its OnClick callback.
The RunFromBattle script will have a tryRunning method. This method will generate a random number between 0 and 1, and compare it with a runningChance attribute. If the generated random number is less than the running chance, the player successfully avoids the battle, and goes back to the Town scene. Otherwise, the next turn starts.
public class RunFromBattle : MonoBehaviour
{
    [SerializeField]
    private float runnningChance;

    public void tryRunning ()
    {
        float randomNumber = Random.value;

        if(randomNumber < this.runnningChance)
        {
            SceneManager.LoadScene("Town");
        }
        else
        {
            GameObject.Find("TurnSystem").GetComponent<TurnSystem>().nextTurn();
        }
    }
}
Finally, by now you should have everything working. Try playing battles until the end to check if everything is working. Now you can also try adding different enemy encounters and tuning some game parameters, such as units stats and attack multipliers.
Also, try adding things that could not have been covered in the tutorial, such as more intelligent enemies and a level system. You might also consider mastering techniques for mobile development and optimizing your game for use on a smartphone!
Of course, you may wish to explore other genres as well to expand your skills further. So don’t be afraid to seek out other online courses or even find Unity courses to integrate into the classroom.
The sky is the limit here, so don’t be afraid to experiment!
