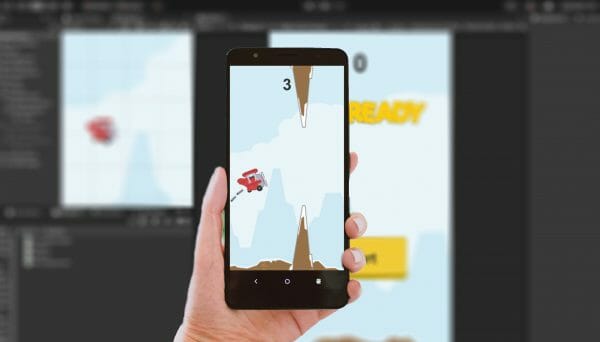
The mobile gaming industry is the largest video game industry – with over 2 billion active players worldwide. It is also the most diverse player base with people of all ages from all over the globe gaming on their smartphones. Those numbers are not likely to change for the foreseeable future, making the mobile gaming industry an exciting frontier for developers.
In this tutorial, we are going to be building a simple clone of the game “Flappy Bird” in Unity. Unity has powerful tools for developers wanting to make a mobile game and, in this tutorial, we’ll be building one from scratch. Follow along and take a step into the mobile game arena by learning how you can make your very own mobile game!
Project Files & Prerequisites
You can download the assets used for this project here. If you’d like to view the full finished source code, you can also download that link as well.
Also, before you start, do keep in mind this tutorial is intended for users who already know the basics of Unity. If you’ve never used Unity before, we recommend first starting with resources focused on that (as it’s super easy to swing back around to mobile games later).
Educators can also consider diving into Zenva Schools as well. This K12 platform is perfect for not only jumping into Unity with students, but provides features like classroom management and pre-made course plans for easy use in schools.
Setting Up For Mobile
Project Settings
You’re going to want to create a brand new 2D Unity project.

Before we do anything here, let’s talk about the setup we need to do before we start developing for mobile devices. The first is to change the build platform. If the top right of your project says something like this:

Then we need to change a few things. Right now, our project is set up to be a desktop game. We need to switch over to a mobile game. Go to File -> Build Settings to change our target platform.


Now notice that we’re given a few options when it comes to a mobile platform. We can either develop for Android or iOS. You can choose either platform just know that developing for iOS requires a computer running Mac OSX if you want to test on an iOS device. That being said, I’m going to choose Android. Once you’ve made your selection, hit “switch platform” and let Unity reconfigure your project.

Now we’re ready to start developing our game!
Screen Resolutions
Before we start putting game objects in our scene, we need to make sure we’re working in the right screen resolution. Because we are developing for mobile, we have less freedom when it comes to determining the resolution of our game. Mobile games can be in two different orientations, landscape or portrait. In the case of our project, we will be using portrait orientation. Go to the game tab and set the game view to a portrait resolution.

It doesn’t matter which portrait resolution you choose just so long as it is a portrait resolution. Once this is set, we don’t need to change it. We’ve got the right screen resolution set up and now we can begin building our game.
Importing Assets
You can download the assets we are going to be using for this tutorial here. Download, unzip, and import the “images” folder into your project folder.

If you look through the images file, you’ll notice there’s quite a lot to work with here. We’ve got backgrounds, obstacles, and even some UI. We’re mostly going to be working with the rocks, planes, and backgrounds but there’s lots of freedom in this asset pack to make this project your own. For now, let’s get started filling our scene.
Setting Up Our Sprites
In our scene, you’ll notice there’s a gizmo that shows the size of our camera and therefore the screen resolution we chose.

Everything inside that rectangle will be displayed on the device’s screen. It’s a helpful guide that we can use to scale and position images where we need them. With that said, go ahead and drag in an airplane, background, and ground image.


Before we get too far, be sure to save your scene as “GameScene” in the “Scenes” folder.

Scale the background to fit our scene.

We are going for a flappy bird sort of style so make sure your player is offset to the left side. Go ahead and rename the airplane image to “Player.”

Next, we need to set up our obstacles. For these, choose a pair of rocks from the “rocks” folder and drag them into our scene. Now you’ll notice that we can’t see our rocks because they’re behind the background.

This is because we haven’t straightened out the sorting order on our images. Since 2D games don’t technically have a Z depth, Unity renders all of them in a stack. We can then specify what order in the stack each image should be rendered. Right now, all of them are set to 0 so Unity just renders them all on the same layer.

To fix this, let’s have the background render order be -1, the player be 1, and the ground and rocks be 2.


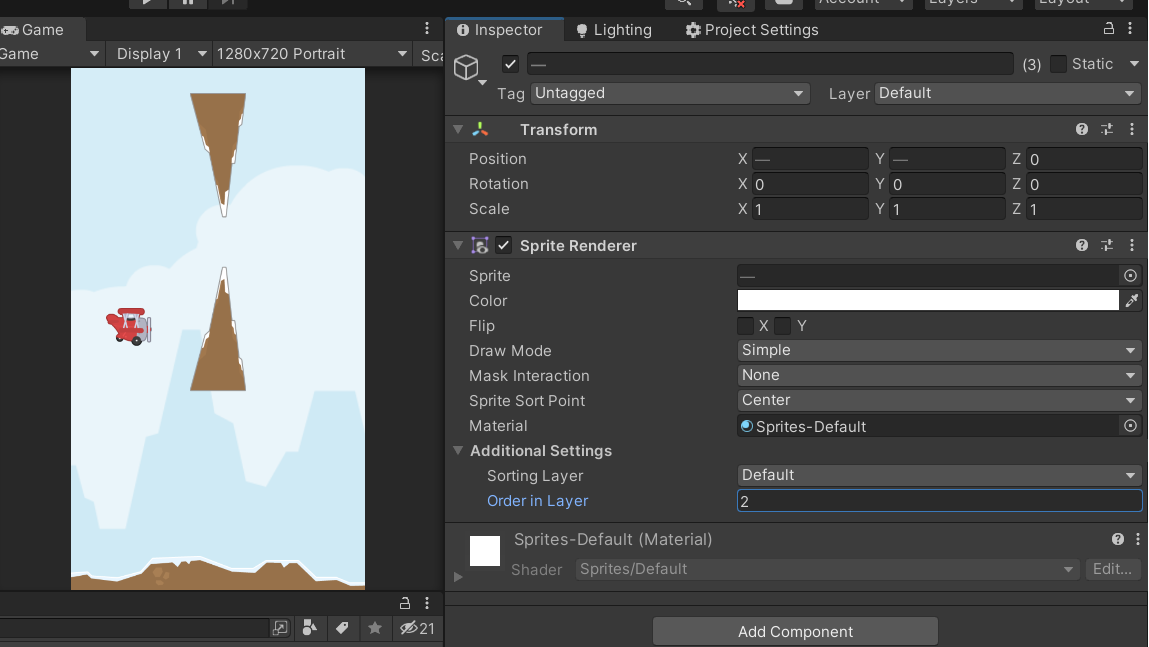
This way, we know that no matter where we position these images are at, they’re all going to be rendered in the right order.
Now that we’ve got our rendering order straightened out, position the rocks as if they’re an obstacle like this:
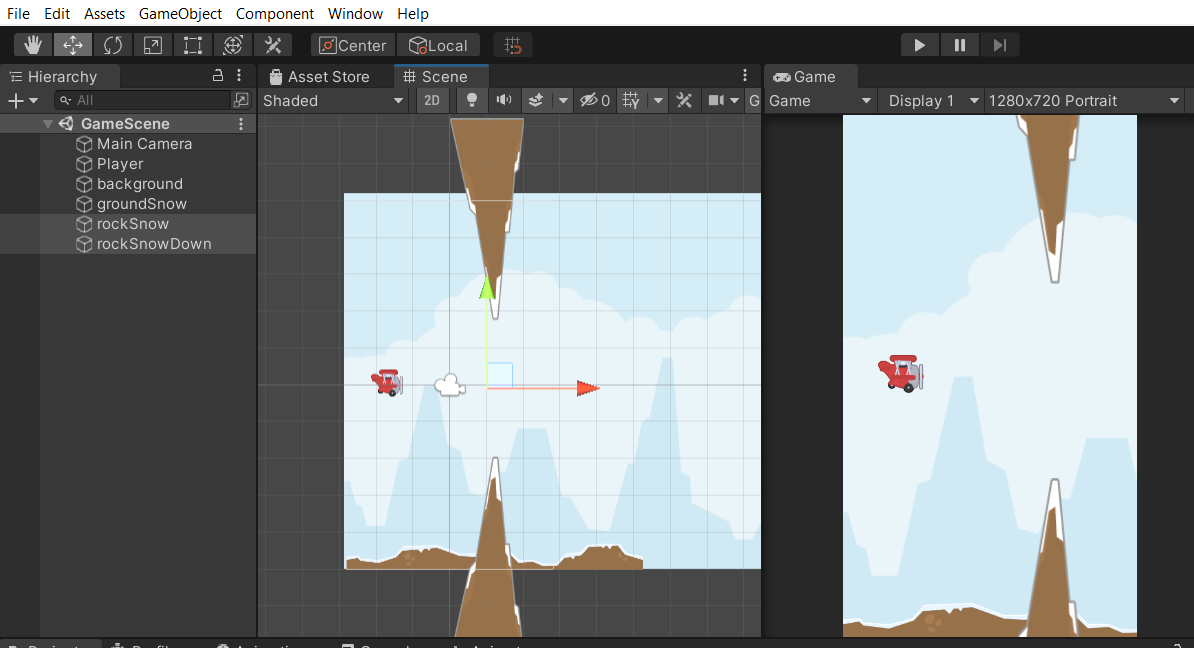
We want to leave plenty of extra room on the top and bottom of the rocks so scale and position them as needed. We want these obstacles all to be one object so create an empty game object called “Rocks” and make our two rocks parented to it.
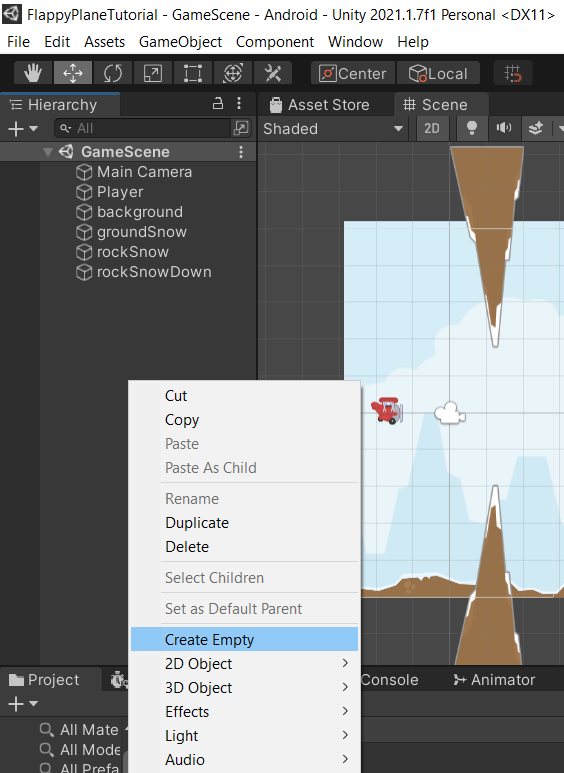
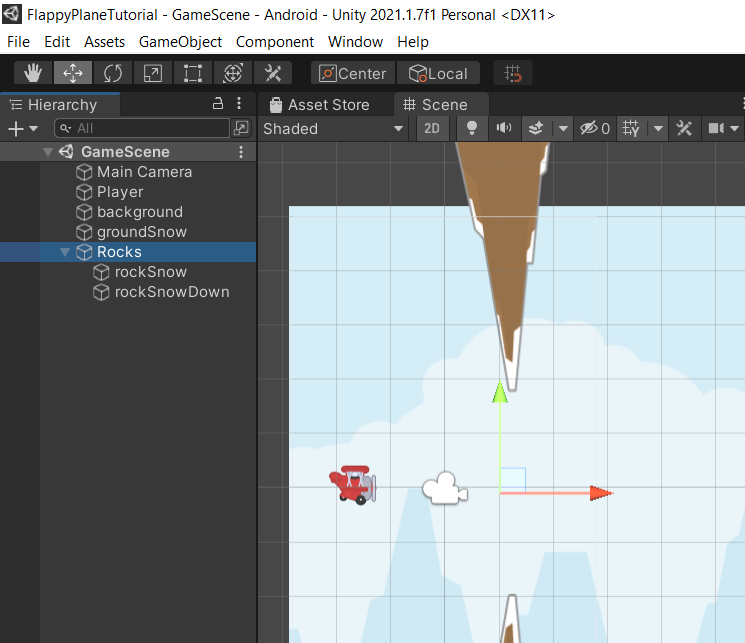
We want the origin of this empty game object to be about in the center of the two rocks so that we can spawn it easily. Once you’ve got it positioned correctly, create a new folder called “prefabs” and drag this “Rocks” object into the folder to make it a prefab.
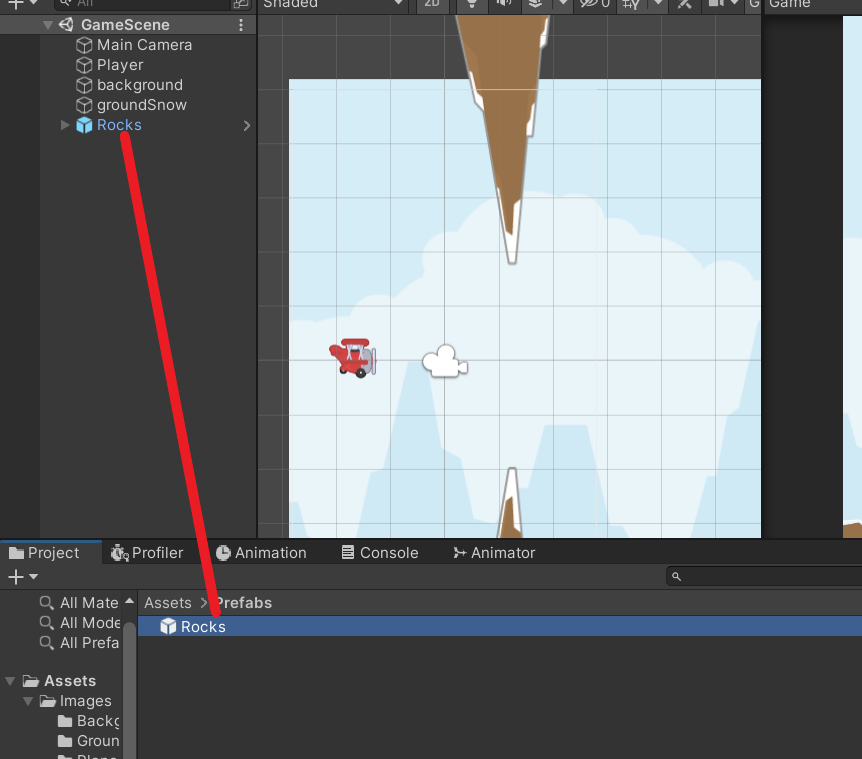
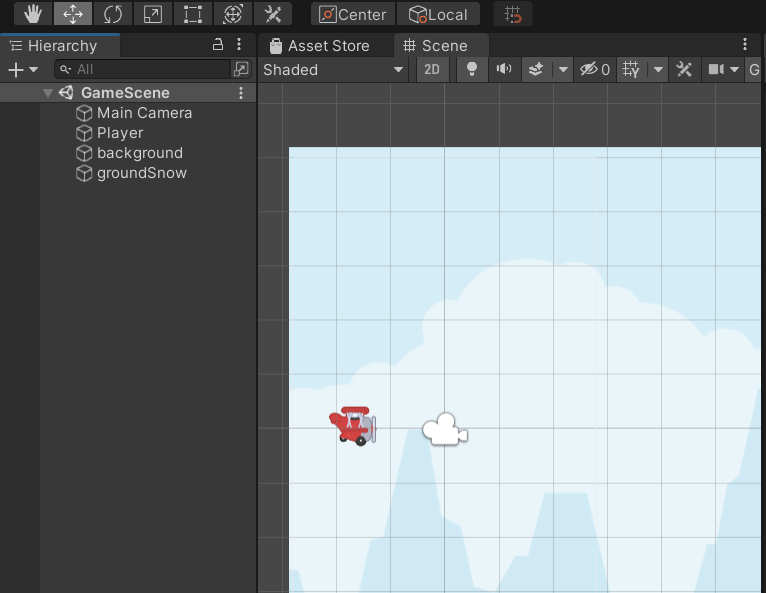
With all that done, we can delete the “Rocks” object and move on to coding!
Building The Player
There are a couple of things we know our airplane object is going to need. We know it needs physics and we know it’s going to collide with things. Therefore, we know our player needs to have a rigid body and a collider. Add a “Rigidbody2D” and a “Circle Collider 2D” to our player. You can leave the rigid body settings default but size the circle collider to roughly encompass the player.
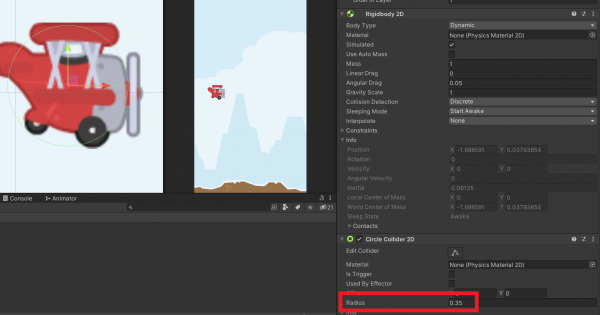
Next, create a folder called “Scripts” and create a new C# script called “Player” then drag that same script onto our player.
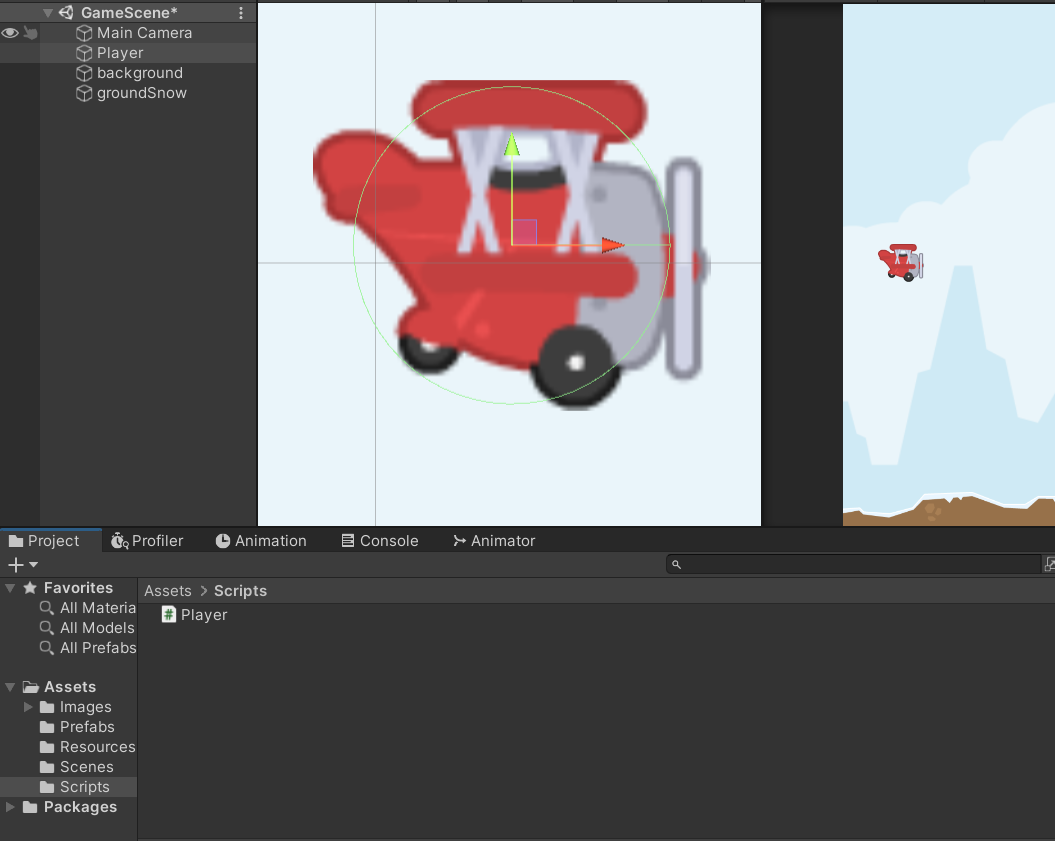
Now we’re ready to start coding our flight mechanic. Open up the Player script and let’s think about what needs to go in here. First off, we need to add an upward force to the plane. We can do this by using the “AddForce” method on the player’s rigid body. Next, we need to take touch input. There are a couple of ways to do this but we’re going to use “GetMouseButtonDown.” We can use this method because we’re going to be testing in the editor and Unity will allow “GetMouseButtonDown” to also work for touches. Our final script would look like this:
using System.Collections;
using System.Collections.Generic;
using UnityEngine;
public class Player : MonoBehaviour
{
    public float tapForce = 500;

    private Rigidbody2D playerRigidbody;

    // Start is called before the first frame update
    void Start()
    {
        playerRigidbody = GetComponent<Rigidbody2D>();
    }

    // Update is called once per frame
    void Update()
    {
        if (Input.GetMouseButtonDown(0))
        {
            playerRigidbody.AddForce(Vector2.up * tapForce);
        }
    }
}
It’s all fairly straightforward. We gain access to the player’s rigid body and apply an upward force if the user taps. Now when we go back to the editor and hit play, we can make our player fly!
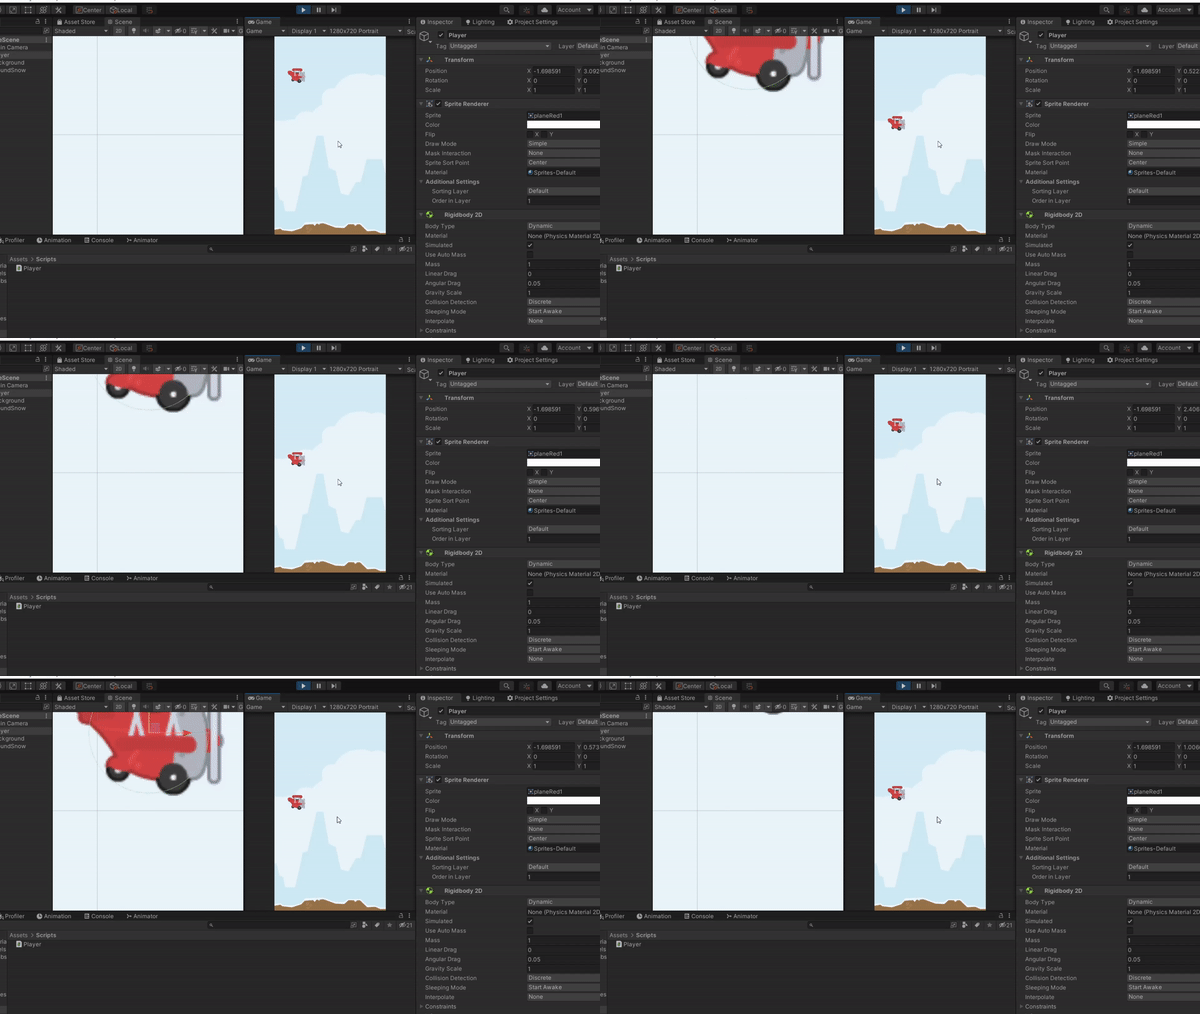
Now that the player can fly, we need to make obstacles for the player to avoid.
Creating Obstacles
Similar to what we did with the player, we need to give our rocks a collider. What is different about the rocks is that we don’t need physics, we just need a collider. Go to your prefabs folder and double-click on the rocks prefab. This lets us edit the prefab without it being in the scene. Add a Polygon Collider to both rock elements (not to the parent object).
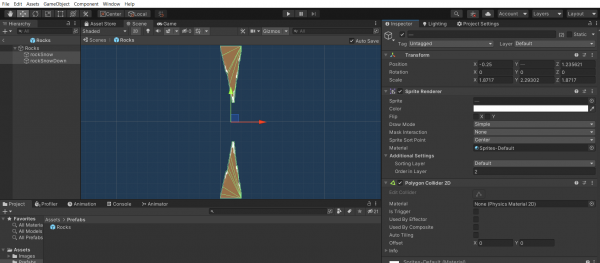
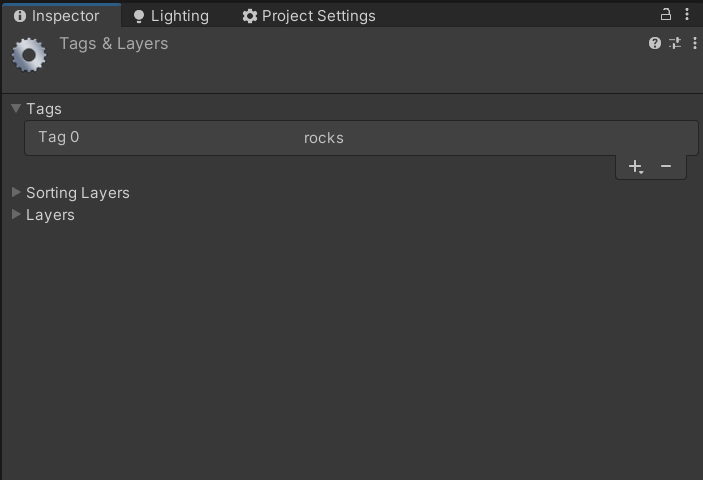
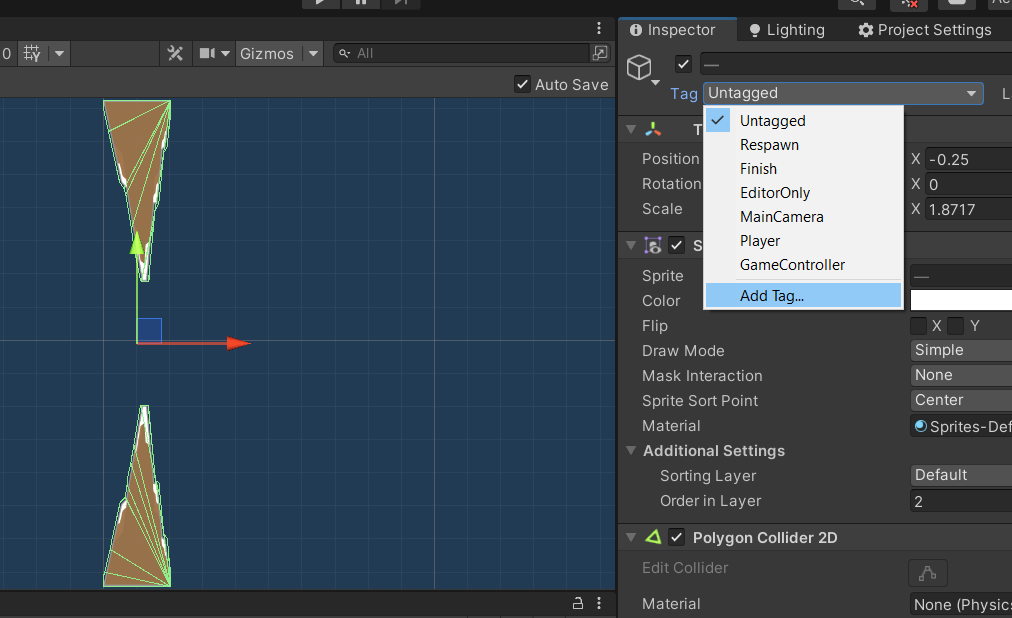
While we’re here, let’s create a new tag called “rocks” and tag each of the rock elements (not the parent object).
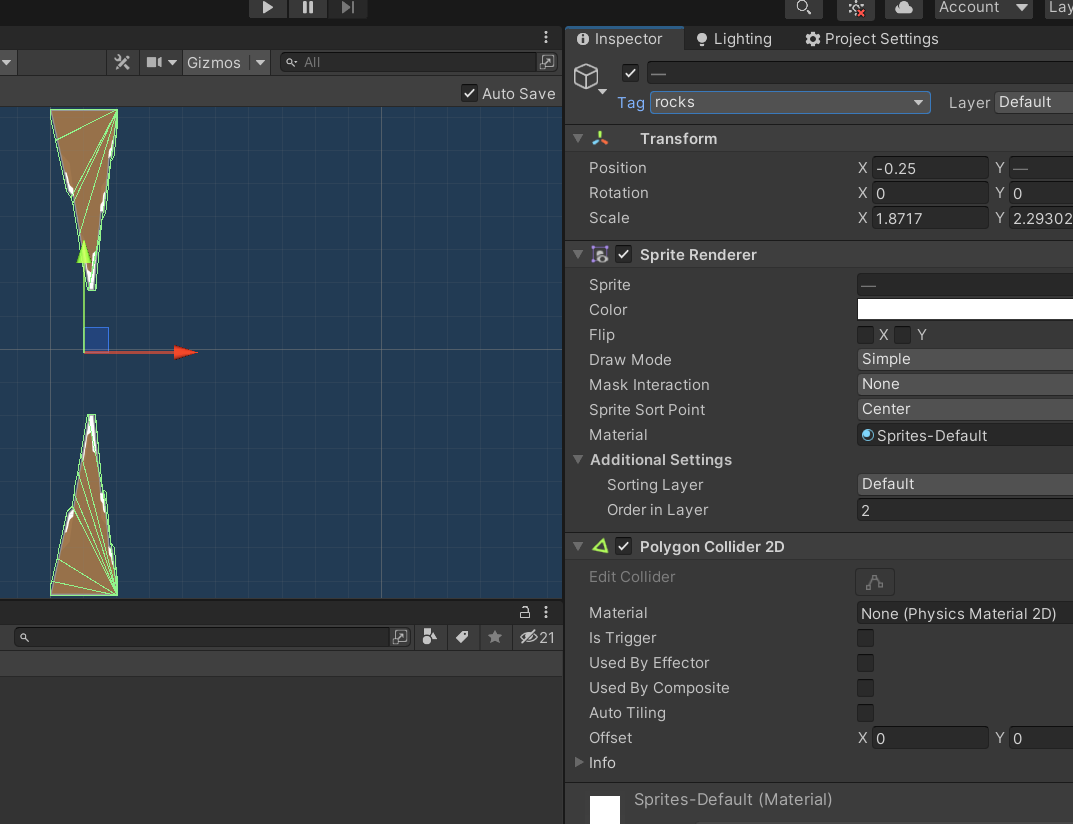
Let’s create a new script called “Rocks” and assign it to the parent object this time.
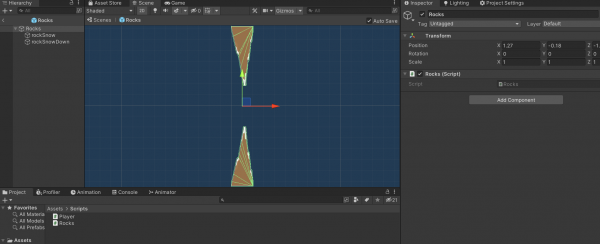
In this script, we only need to do a few things. We need the rocks to move towards the left at a steady rate and, once they’re off-screen, to simply delete themselves. The code for that looks like this:
using System.Collections;
using System.Collections.Generic;
using UnityEngine;

public class Rocks : MonoBehaviour
{
    public float speed = 5f;
    public int lifetime = 5;

    private void Start()
    {
        Invoke("DestroyThis", lifetime);
    }
    void Update()
    {
        transform.position += Vector3.left * speed * Time.deltaTime;
    }

    void DestroyThis()
    {
        Destroy(gameObject);
    }
}
Spawning Rocks
While this will have the rock move forward, we also need it to spawn into the world. Save out your prefab and let’s head back to the scene. Create a new empty game object called “RockSpawner” and place it on the right side of the scene outside of the view of the camera.
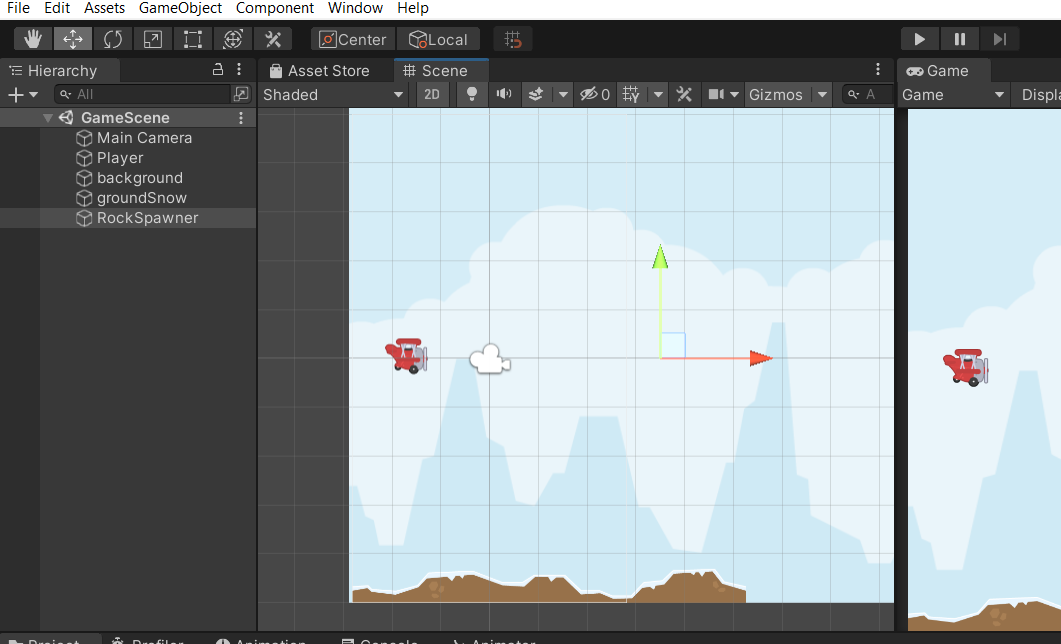
Create a new script called “RockSpawner” and assign it to the RockSpawner object.
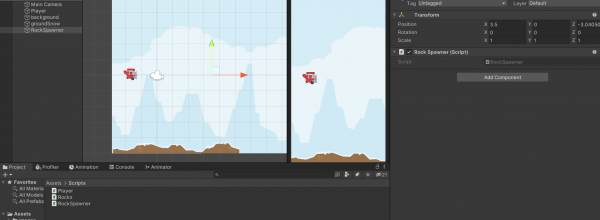
All we need this script to do is spawn the rocks at a steady rate. The code would look like this:
using System.Collections;
using System.Collections.Generic;
using UnityEngine;

public class RockSpawner : MonoBehaviour
{
    public GameObject rocks;

    public float frequency = 1;

    private void Start()
    {
        InvokeRepeating("SpawnRocks", 1, frequency);
    }

    void SpawnRocks()
    {
        Vector3 randomPos = new Vector3(transform.position.x, Random.Range(-2, 2), transform.position.z);

        Instantiate(rocks, randomPos, transform.rotation);
    }
}
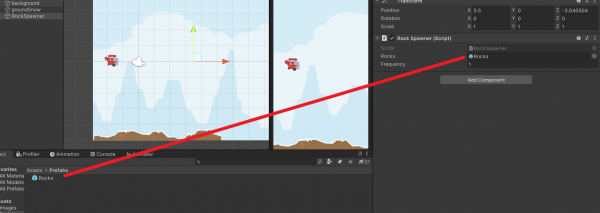
Notice that we are having the spawner spawn rocks at random y positions. The actual range of this you might have to tweak but this gives us a lot more variety when it comes to rocks spawning. Also, note that we are spawning the rocks at the position of the spawner. Keep that in mind if you want to tweak the exact position of the rocks. Now simply assign the “rocks” prefab to the “rocks” field on the RockSpawner and we’re all set!
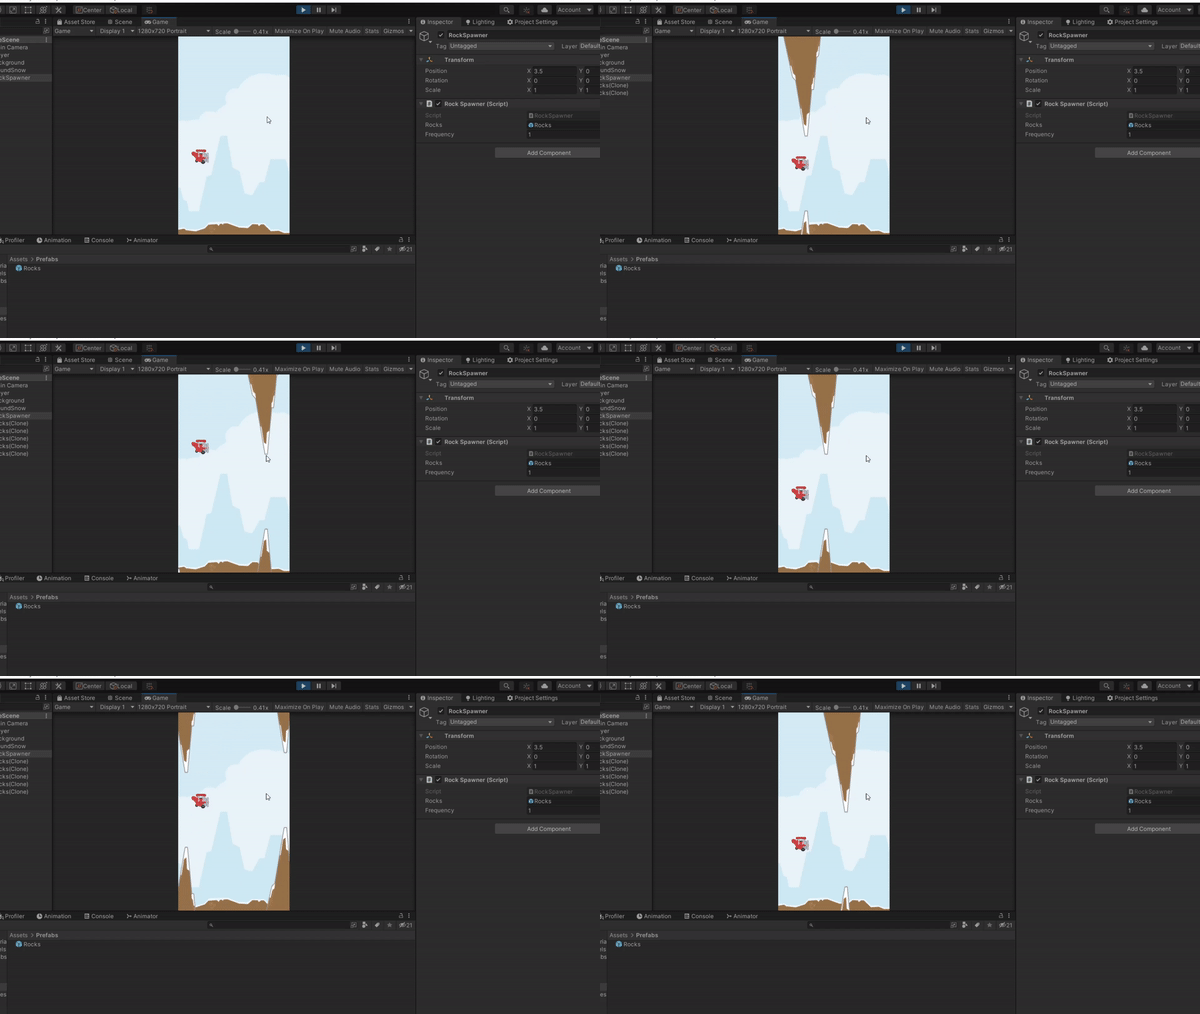
Now when we hit play, we have rocks to dodge!
Menu and Scoring
A game isn’t really a game unless there’s some sort of scoring system. The way we can score this game is by incrementing every time the player goes through an obstacle. To do this, we return to the rocks prefab and create a new box collider on the parent object that goes between the two rocks.

It’s is very important to set this collider to “trigger” which will allow the player to pass straight through. This collider isn’t going to be providing a barrier. It’s going to be acting as a trigger that will detect when the player passes through. To make this work in the code, we first go to the player script and add a new static integer called “score.”
using System.Collections;
using System.Collections.Generic;
using UnityEngine;
public class Player : MonoBehaviour
{
    public static int score = 0;

    public float tapForce = 500;

    private Rigidbody2D playerRigidbody;

    void Start()
    {
        playerRigidbody = GetComponent<Rigidbody2D>();

        //Reset the score everytime the game restarts

        score = 0;
    }

    void Update()
    {
        if (Input.GetMouseButtonDown(0))
        {
            playerRigidbody.AddForce(Vector2.up * tapForce);
        }
    }
}
Now we can go to the Rocks script and increment this score variable every time the player crosses into the new collider. We do this by using the “OnTriggerEnter2D” method.
using System.Collections;
using System.Collections.Generic;
using UnityEngine;

public class Rocks : MonoBehaviour
{
    public float speed = 5f;

    public int lifetime = 5;

    private void Start()
    {
        Invoke("DestroyThis", lifetime);
    }
    void Update()
    {
        transform.position += Vector3.left * speed * Time.deltaTime;
    }

    void DestroyThis()
    {
        Destroy(gameObject);
    }

    private void OnTriggerEnter2D(Collider2D collision)
    {
        if (collision.name == "Player")
        {
            Player.score++;
        }
    }
}
Displaying The Score
We do have a scoring system but unless we have a way to see it in-game, it isn’t useful. To do this, we need to create a text object called “Score” that goes at the top of the screen. Tweak the text until it looks right and anchor it to the top of the screen.
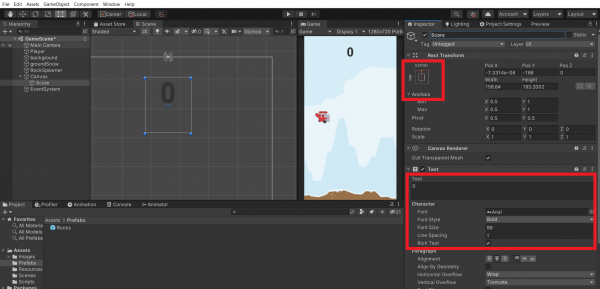
Now we can simply have the Player script display the score to this text object.
using System.Collections;
using System.Collections.Generic;
using UnityEngine;
using UnityEngine.UI;

public class Player : MonoBehaviour
{
    public static int score = 0;

    public float tapForce = 500;

    public Text scoreText;

    private Rigidbody2D playerRigidbody;

    void Start()
    {
        playerRigidbody = GetComponent<Rigidbody2D>();

        score = 0;
    }

    void Update()
    {

        //The Score text updates every frame

        scoreText.text = score.ToString();

        if (Input.GetMouseButtonDown(0))
        {
            playerRigidbody.AddForce(Vector2.up * tapForce);
        }
    }
}
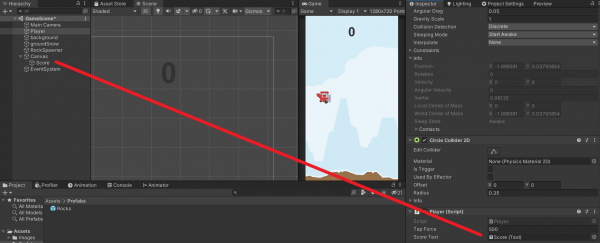
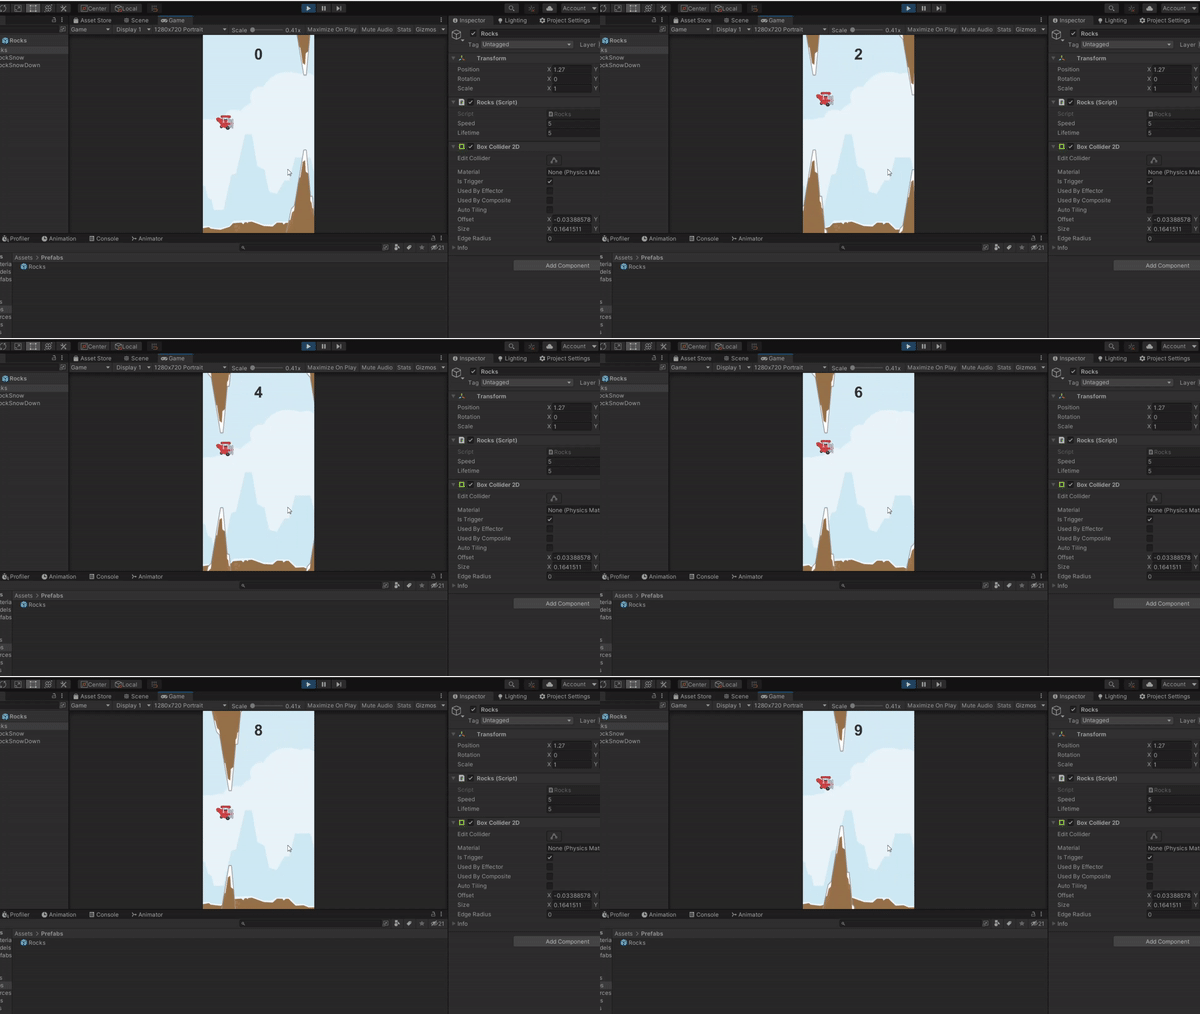
Once we assign the “Score” text object to the “scoreText” field on the Player script, we can see our score in-game!
Starting The Game
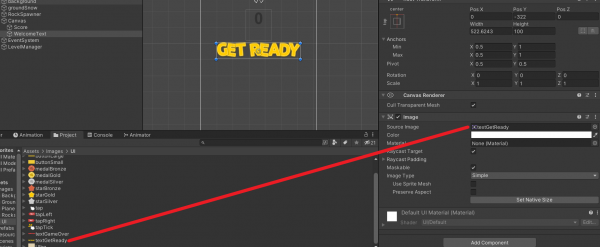
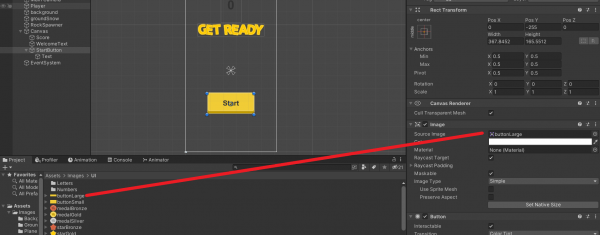
Having the player start the game as soon as the game is run makes the experience slightly jarring. We need a way to start the game from a start screen. We need a welcome text and a button to start the game. Create a new image called “WelcomeText” and drag the “textGetReady” object from the UI folder into the sprite field. Scale it so it fits the scene.
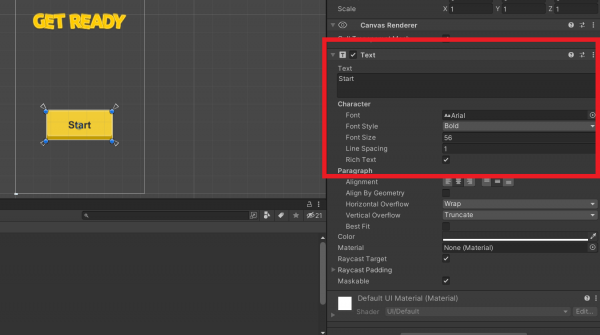
Next, we need a button. Create a new button object called “StartButton” and center it so it fits the scene. Drag the “buttonLarge” image from the UI folder onto the “SourceImage” field on our new “StartButton” object. Change and resize the text on the button so it reads “Start.”
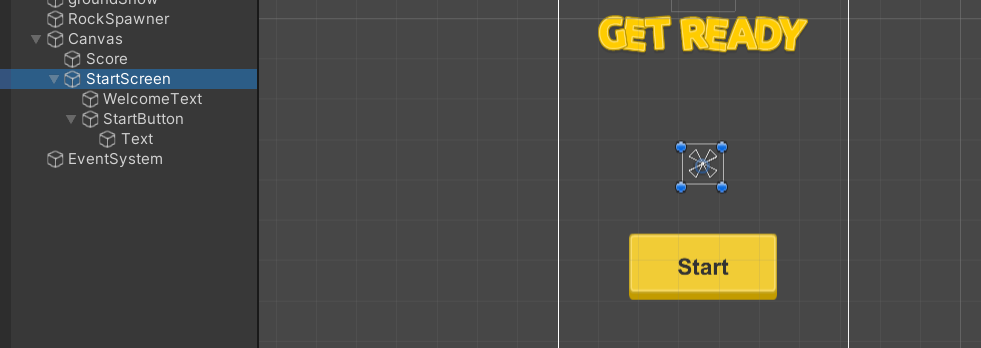
All of these elements need to be grouped together into one object. This way, we can disable all of them when the game actually starts. Create a new empty object inside of the canvas called “StartScreen” then make our new text and button a child of that object.
Now to actually make the start button work, we need to return to our Player script. Basically, when the player starts the game, we will have the game paused. When the player presses the “Start” button, we essentially unpause the game. All of this will make it as if the game has started. We can do this in code by changing the time scale of the game. In the Player script, we simply set the time scale to zero, effectively freezing everything in place. Then we create a second method that will be called by the start button that sets the time scale to 1.
using System.Collections;
using System.Collections.Generic;
using UnityEngine;
using UnityEngine.UI;

public class Player : MonoBehaviour
{
    public static int score = 0;

    public float tapForce = 500;

    public Text scoreText;

    private Rigidbody2D playerRigidbody;

    void Start()
    {
        playerRigidbody = GetComponent<Rigidbody2D>();

        score = 0;

        Time.timeScale = 0;
    }

    void Update()
    {
        scoreText.text = score.ToString();

        if (Input.GetMouseButtonDown(0))
        {
            playerRigidbody.AddForce(Vector2.up * tapForce);
        }
    }

    //Called externally

    public void SetGameTimeScale (float newScale)
    {
        Time.timeScale = newScale;
    }
}
Now we just need to wire everything up in the editor. The Start button needs two click events. One of them will be to set the time scale to 1 and the other will be to disable the start screen.
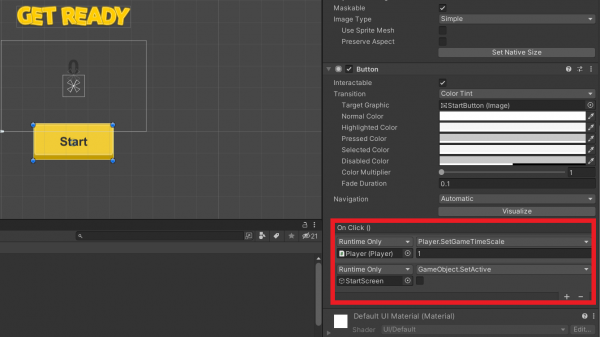
With that all set up, we have a working start screen!
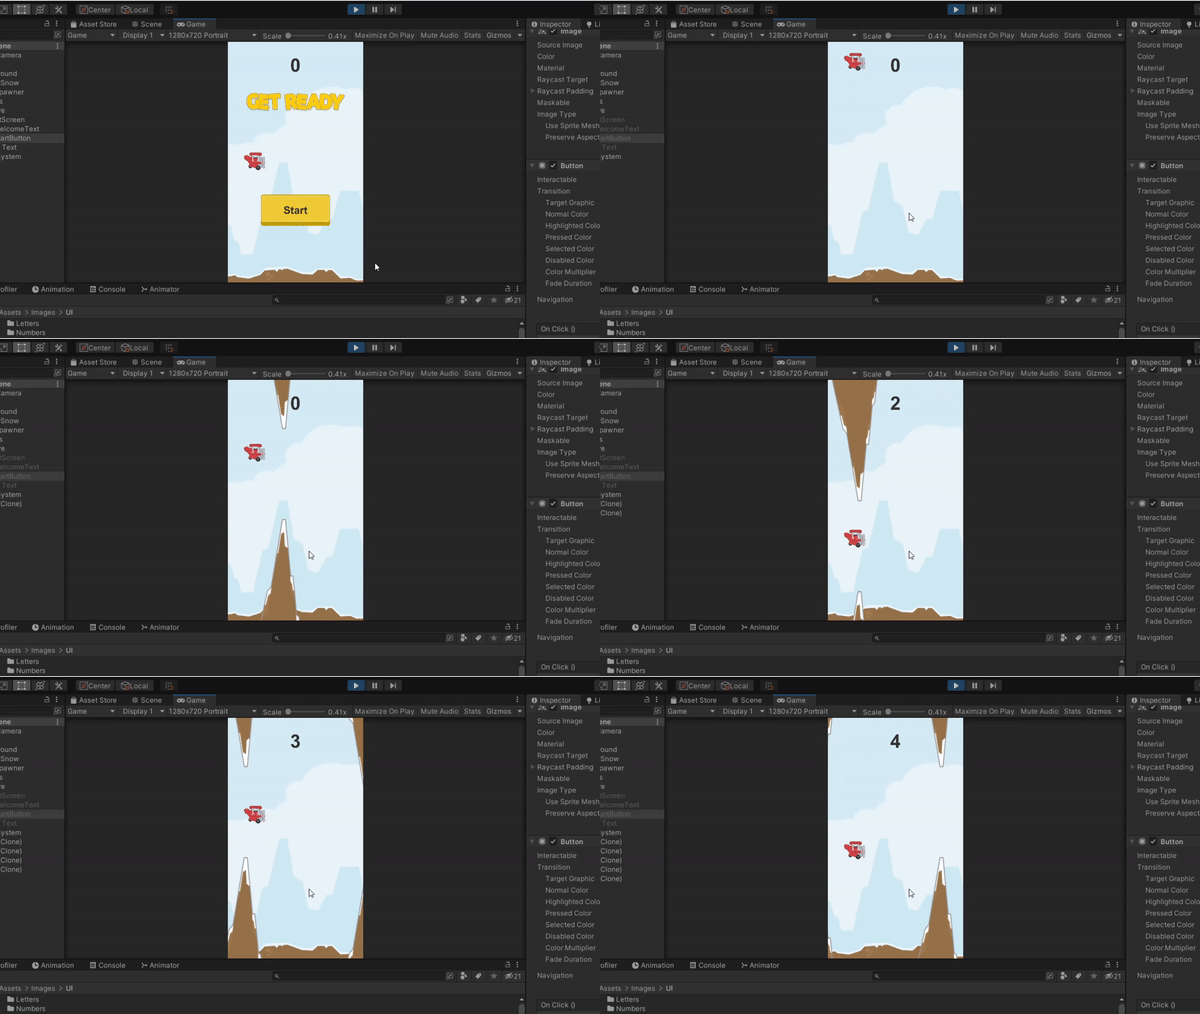
Restarting the Game
Right now, if you hit a rock in the game, the airplane just flies off-screen and the game keeps running.
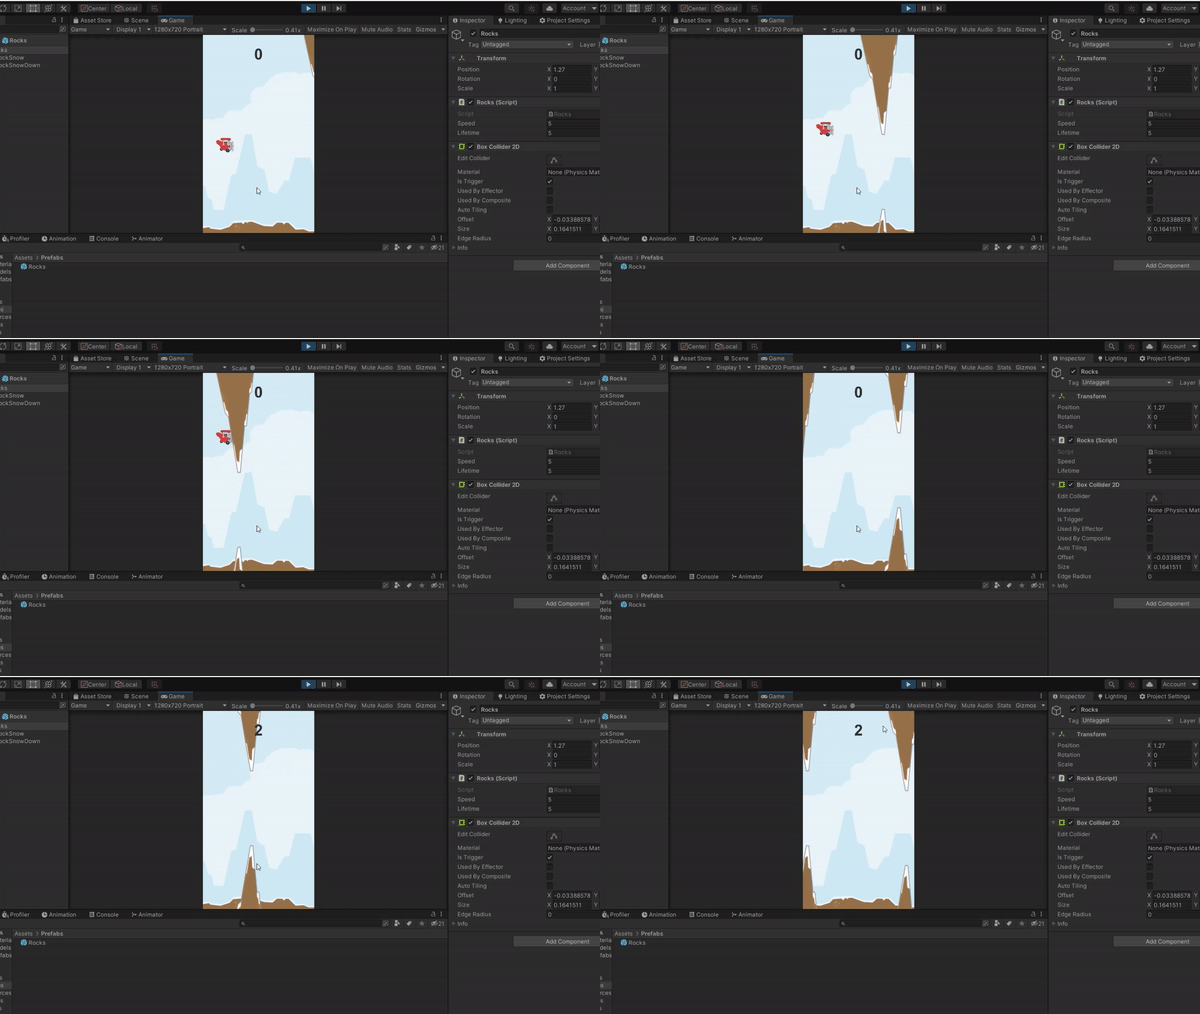
To fix this, let’s implement a screen that will let us reset the game when we lose. But before we even do that, we need a way to lose. As it is, the game keeps running. We can fix this by going back to the Player script once again and adding an “OnCollisionEnter2D” method.
using System.Collections;
using System.Collections.Generic;
using UnityEngine;
using UnityEngine.UI;

public class Player : MonoBehaviour
{
    public static int score = 0;

    public float tapForce = 500;

    public Text scoreText;

    private Rigidbody2D playerRigidbody;

    void Start()
    {
        playerRigidbody = GetComponent<Rigidbody2D>();

        score = 0;

        Time.timeScale = 0;
    }

    void Update()
    {
        scoreText.text = score.ToString();

        if (Input.GetMouseButtonDown(0))
        {
            playerRigidbody.AddForce(Vector2.up * tapForce);
        }
    }

    private void OnCollisionEnter2D(Collision2D collision)
    {
        if (collision.gameObject.tag == "rocks")
        {

            Time.timeScale = 0;
        }
    }

    //Called Externally

    public void SetGameTimeScale (float newScale)
    {
        Time.timeScale = newScale;
    }
}
As you can see, all we’re doing when we hit a rock is just setting the timescale back to 0, effectively pausing the game. But we want to do a bit more than that and this involves going back to the editor and creating another menu screen. This time we’re making a loose screen. It’s going to be very similar to the start screen except the words are tweaked a bit. They’re so similar I just went ahead and duplicate the StartScreen, renamed it, changed the button text from “Start” to “Restart,” and swapped out a different image. Also, this screen must be disabled by default once you’re done configuring it.
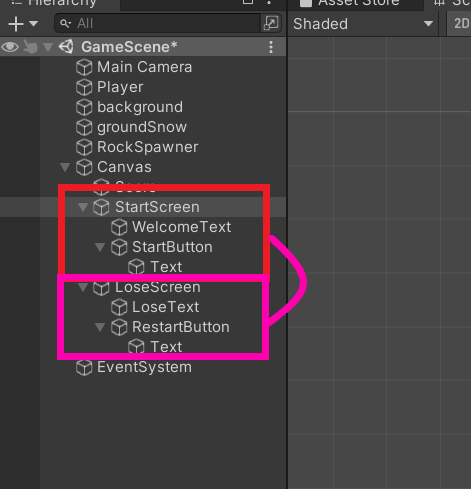
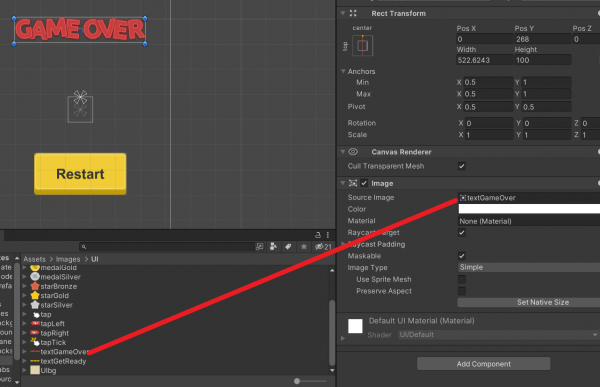
One major difference between the two screens is what the restart button does. We want it to completely reset the game. To accomplish this, let’s create a new empty game object called “LevelManager” and let’s create a new C# script with the same name attached to this object.
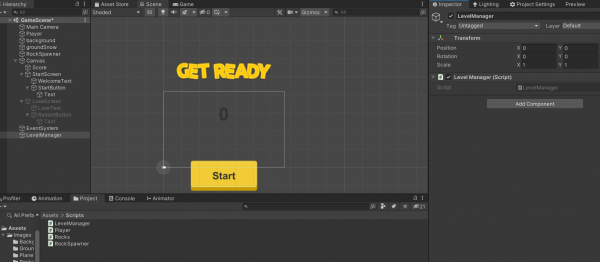
This will be a very simple script that only has one public method. This method will be the “ResetGame” method and it will be called by the restart button.
using System.Collections;
using System.Collections.Generic;
using UnityEngine;
using UnityEngine.SceneManagement;

public class LevelManager : MonoBehaviour
{
    public void ResetGame()
    {
        SceneManager.LoadScene(SceneManager.GetActiveScene().buildIndex);
    }
}
A simple but general method that will reset the current scene. We do that by passing in the current scene’s build index. Which is a good time to mention that this will only work if the scene is in the build settings. Go to File -> Build Settings and click “Add Open Scenes” to put our current scene in the build index.
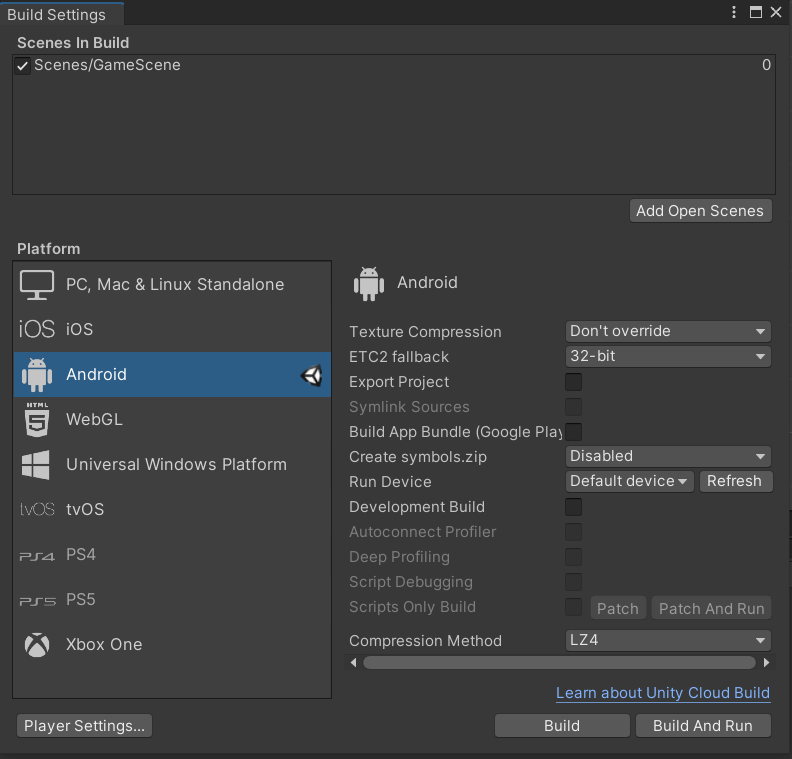
With all this done, the last thing we have to do is to enable the loose screen when the player hits a rock and to make sure the reset button calls the reset method. To enable the loose screen on collision, the Player script needs access to it and it needs to enable it in the OnCollisionEnter2D method.
using System.Collections;
using System.Collections.Generic;
using UnityEngine;
using UnityEngine.UI;

public class Player : MonoBehaviour
{
    public static int score = 0;

    public float tapForce = 500;

    public Text scoreText;

    public GameObject looseScreen;

    private Rigidbody2D playerRigidbody;

    void Start()
    {
        playerRigidbody = GetComponent<Rigidbody2D>();

        score = 0;

        Time.timeScale = 0;
    }

    void Update()
    {
        scoreText.text = score.ToString();

        if (Input.GetMouseButtonDown(0))
        {
            playerRigidbody.AddForce(Vector2.up * tapForce);
        }
    }

    private void OnCollisionEnter2D(Collision2D collision)
    {
        if (collision.gameObject.tag == "rocks")
        {
            looseScreen.SetActive(true);

            Time.timeScale = 0;
        }
    }

    //Called Externally

    public void SetGameTimeScale (float newScale)
    {
        Time.timeScale = newScale;
    }
}
Now, all we have to do is to make sure everything is assigned to their proper field. The reset button needs to call the “ResetGame” method and the player needs access to the game over screen.
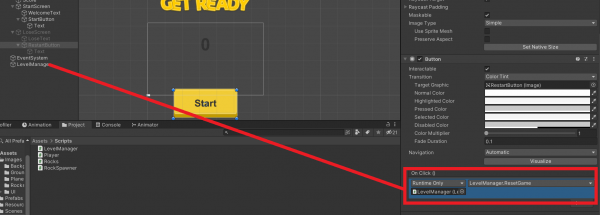 .
.
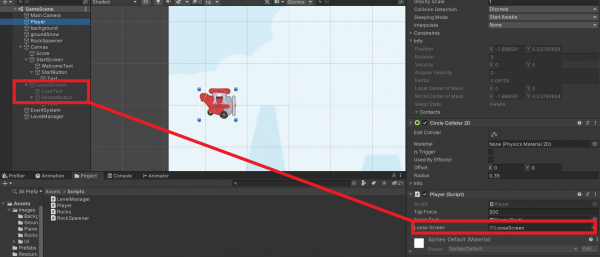
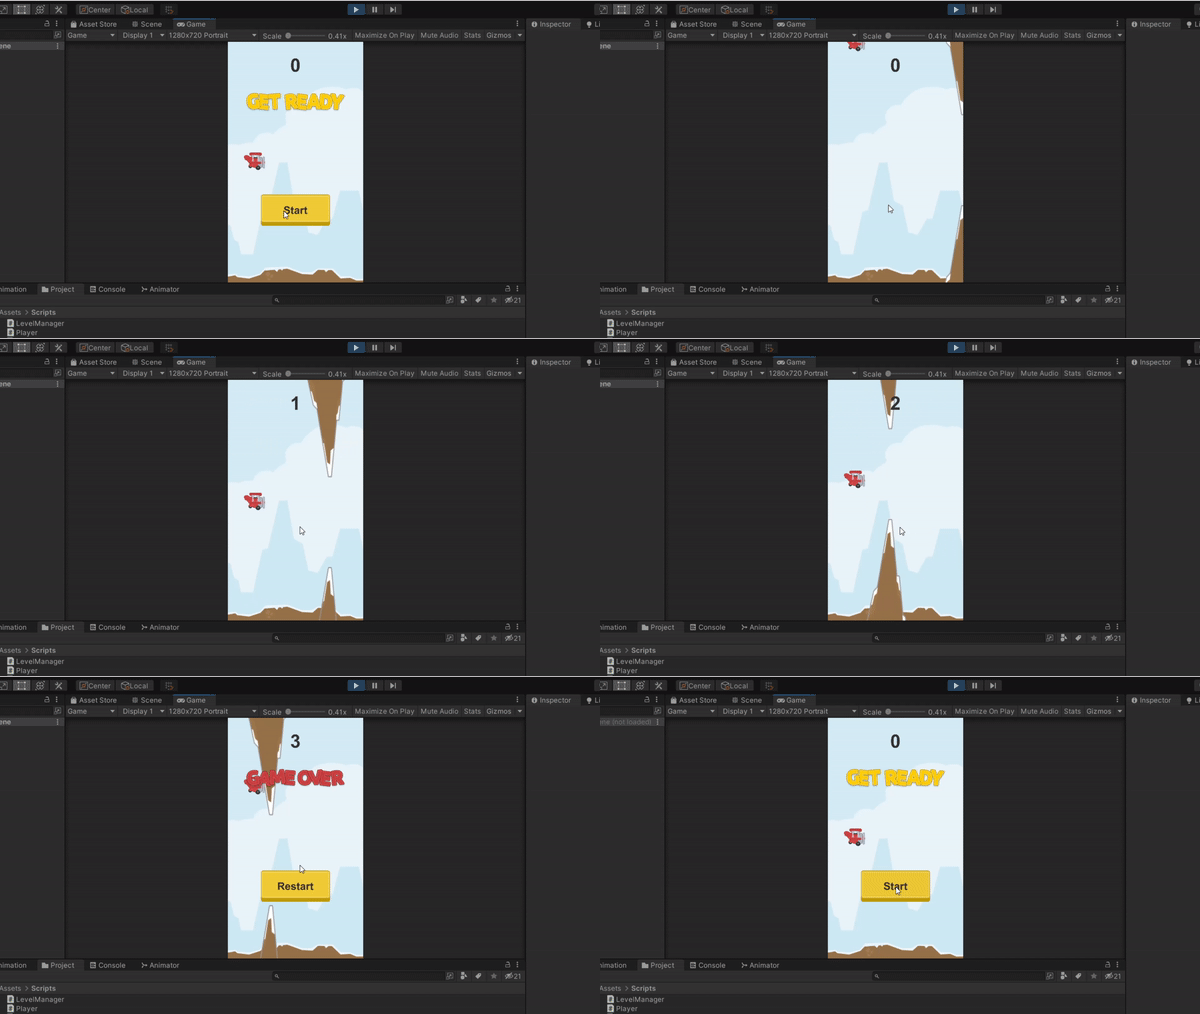
If all those things are done, we have a complete and working game!
Conclusion
The mobile game industry is not likely to get any smaller in the foreseeable future. Being competent in making mobile games will broaden your career or even enrich your own hobby. It also allows you to access a wider audience than the standard PC or console game.
Of course, there are a lot more directions you can go with mobile games. For example, with the project we just made you could expand the game we created by adding powerups, different kinds of obstacles, or maybe even a simple “character” select screen so users can have different sprites other than the plane. Mobile games are not limited by genre, though, so the sky is the limit in terms of what you want to develop!
There are also a lot of genres you can adapt to mobile games. So don’t be afraid to explore other Unity course topics. Teachers can also find plenty of resources with platforms like Zenva Schools to provide K12-suitable Unity material.
I hope you find this tutorial helpful in getting you started and familiar with this exciting video game market. If you’d like to download the project made in this tutorial, click this link.
Keep making great games!

