In an ideal world, exporting models from Blender into Unity for your 3D / virtual reality games should be a seamless, simple process. To be more precise, it shouldn’t require any thought or whatsoever.
At first, it feels like that is the case. You drag and drop a .blend file into Unity and the model shows up! But as people quickly realize when they go through the process, the devil is in the details!
This guide was created to take all pain from the process of importing simple Blender models into Unity, so that at least you know what works for sure and why that is!
As a quick note before you jump in, this tutorial does assume you have some basic familiarity with both Blender and Unity (at least the basics of interacting with the programs).
1. Coordinate differences
The first thing to keep in mind is that there are two main differences between the coordinate system of Unity and Blender.
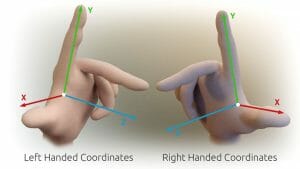
- Blender uses right handed coordinate system, whereas Unity uses a left handed coordinate system (see illustration below).
- In Blender, the Z axis points upwards, whilst in Unity, the Y axis points upwards.
Image credit: Primalshell, license CC BY-SA 3.0
2. Blender model settings
Say you created a nice-looking low poly tree in Blender, like so:
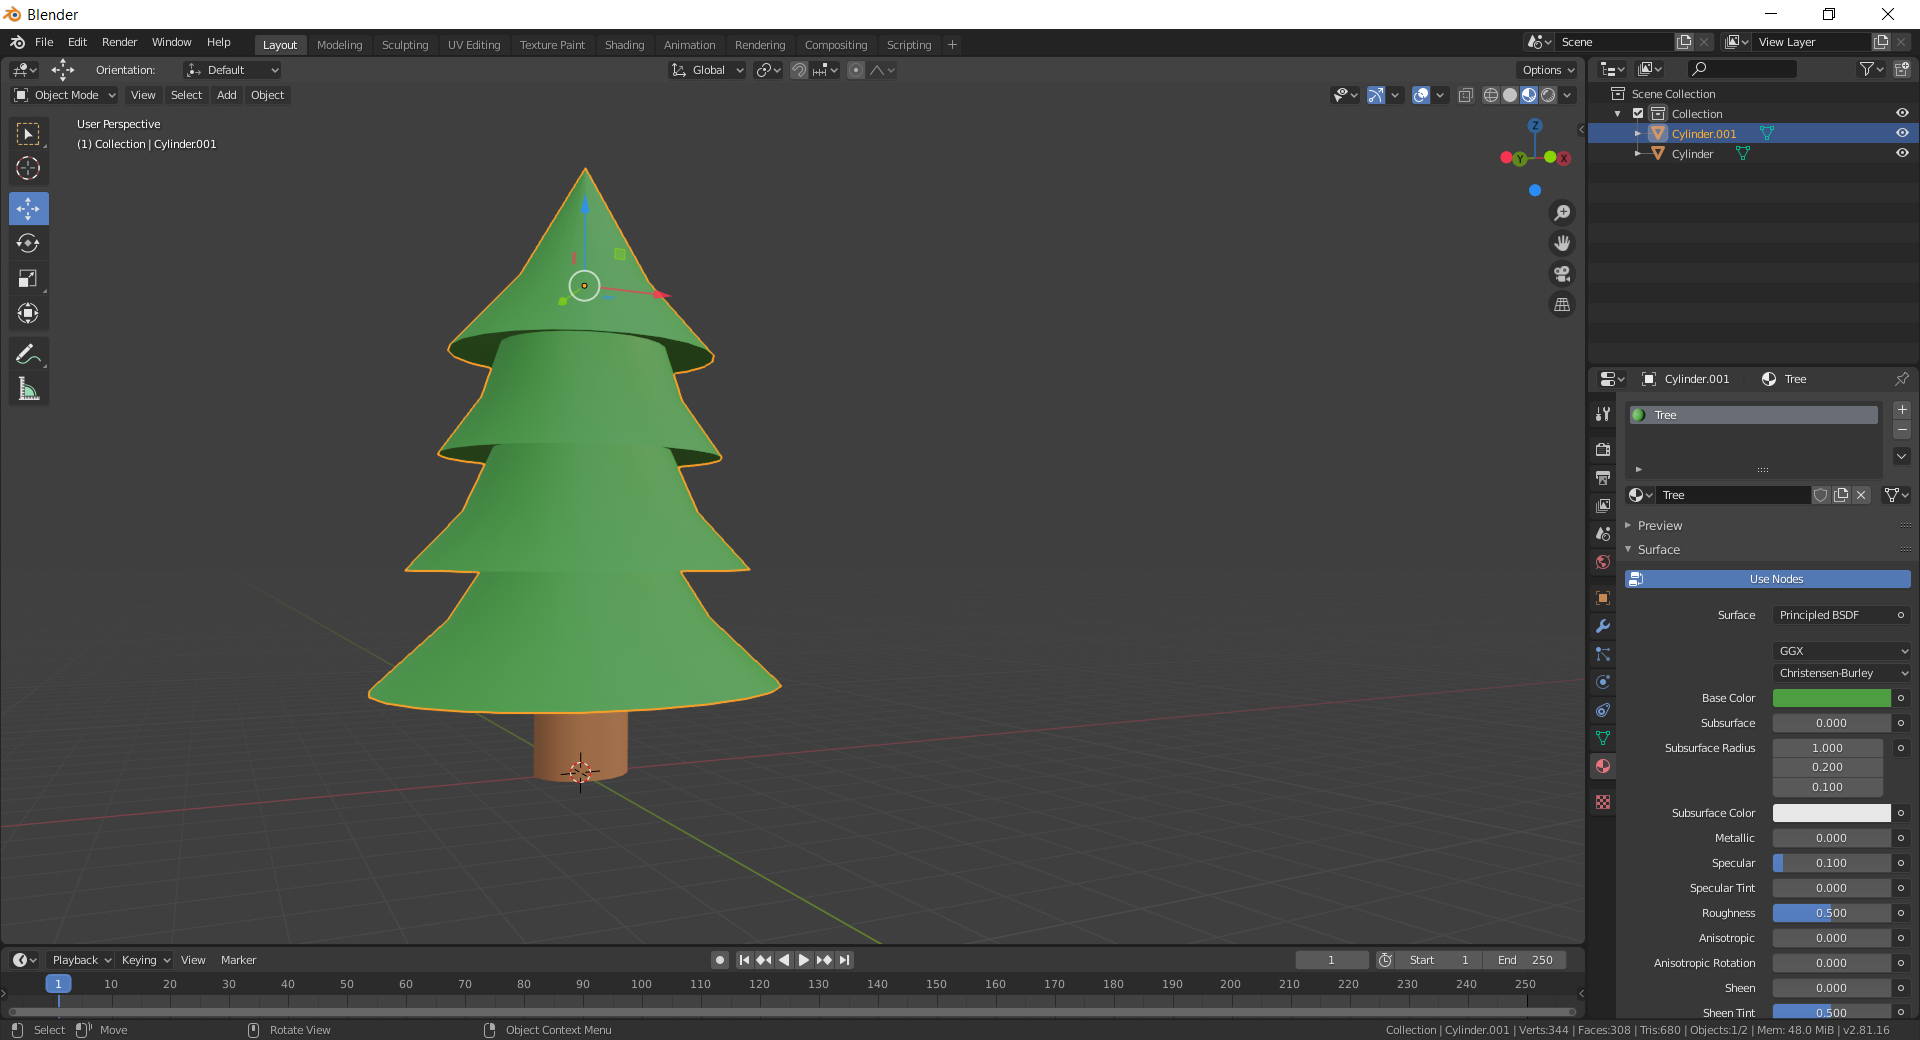
Basic check list before attempting any import:
- Delete the default Blender camera and lamp. We are not using Blender to create a rendered scene, we just care about the model, so unless you are indeed doing other things with your Blender file, you can remove these elements. Make sure to name your model as well.
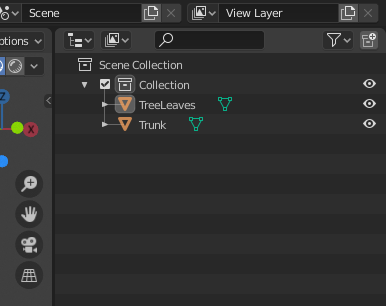
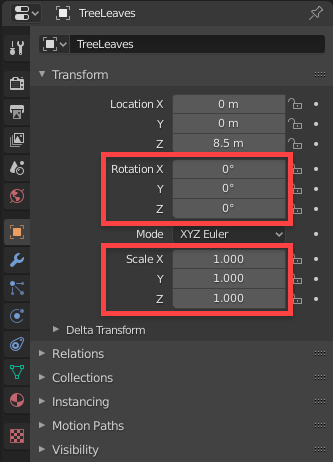
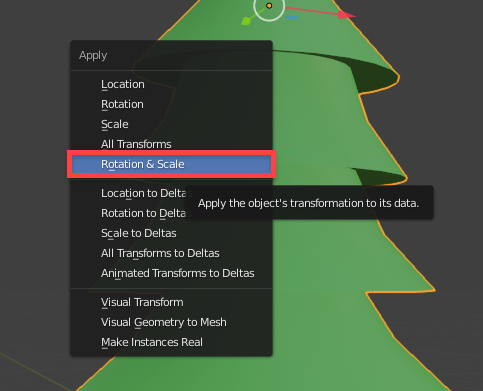
- Apply transforms. On the Transforms panel, the values for Rotation should show 0 and for Scale 1 on all the axes. Press Control + A > Rotation & Scale.
Why is this? In Unity you want to be able to apply transforms to your models. If they already come with weird numbers in there this will be confusing.
- Set the origin to a meaningful position. This might not apply to all cases, but for instance if in Unity you’ll have the floor on Y = 0 (Y as in vertical coordinate), and your Blender model (in this case, a tree) will go on ground level as well, it’ll be much easier if you set the origin in Blender to the base of your model.
To change the origin in Blender, select the Cursor tool and click where you want to place it. To be more precise, Open the View window and set the location of the 3D cursor manually.
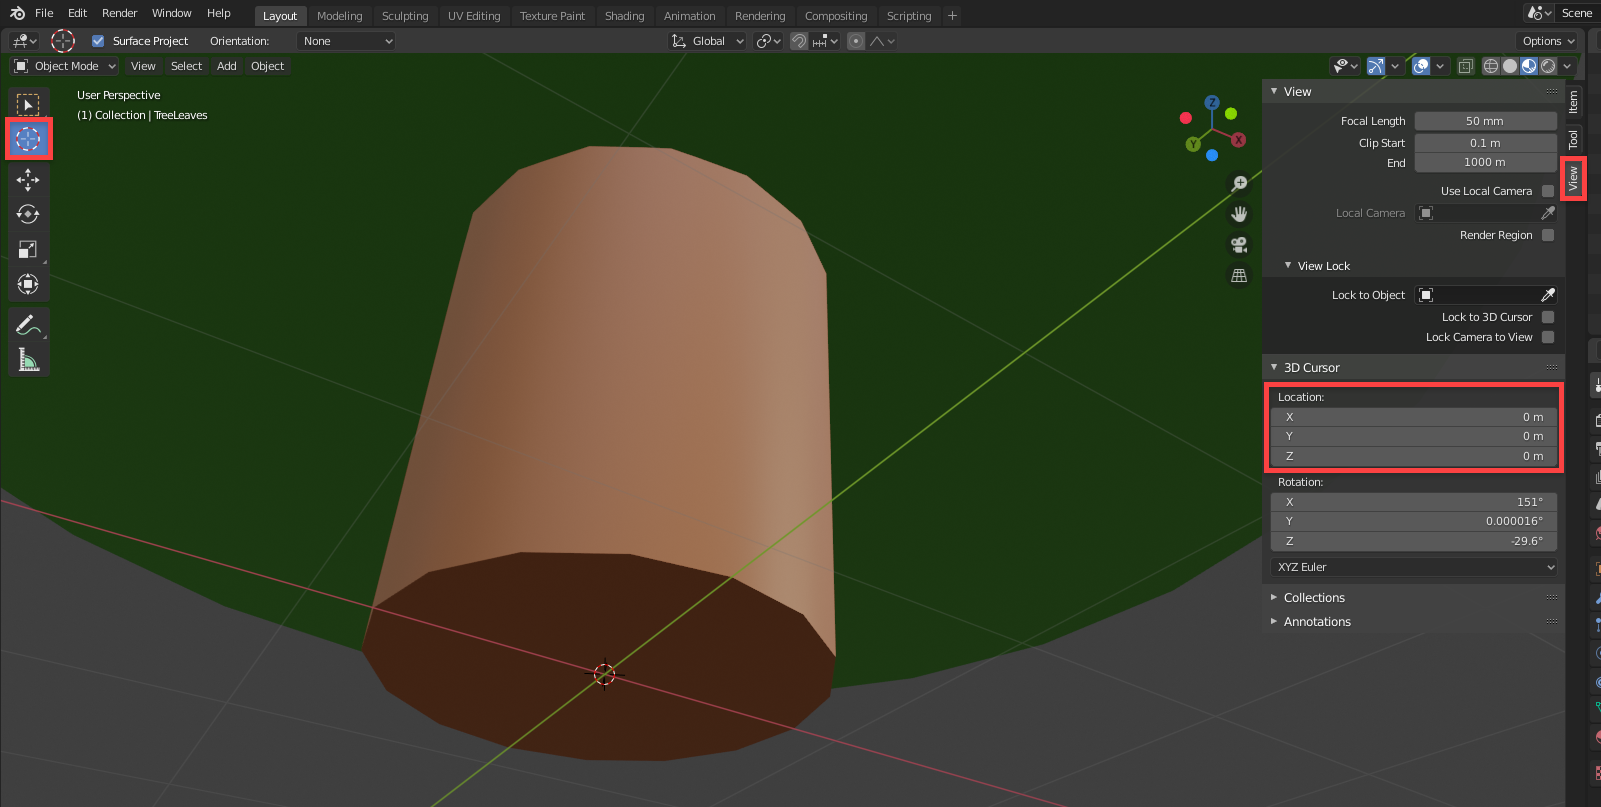
In order to set the origin of the model to the 3D cursor: select the model, then navigate to Object > Set Origin > Origin to 3D Cursor.
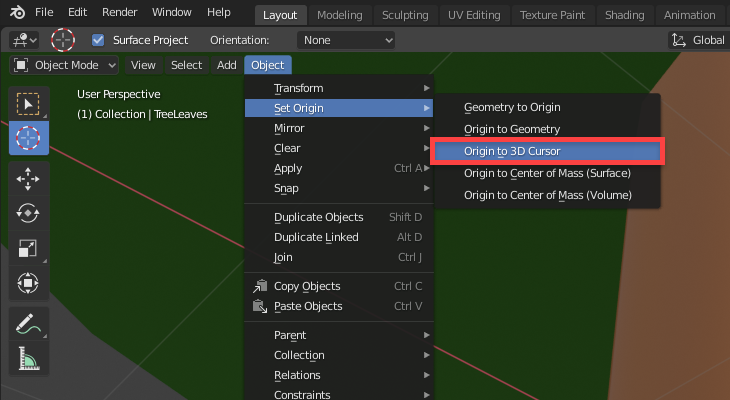
Why is this? If you set the origin to say the middle of the model, when you import it to Unity and drag them to your terrain / floor, the middle of the model will be on Y = 0, so you might have to drag your model up each time.
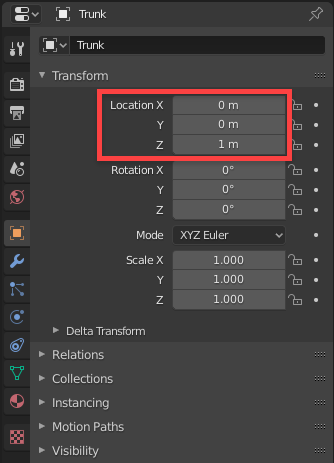
- Keep an eye at the location transform in Blender. When you place your model in Unity you will most likely move it around, so you don’t have to set the location transform in Blender to 0 as it won’t do much. However, if you have a really high number in there, the model will show far away in Unity as well, so keep an eye there and setting it to 0 won’t hurt.
- Make normals point outwards. Sometimes when importing a model into Unity, it appears as some faces are invisible. This is caused by the normals of those faces pointing inwards. If you are experiencing this issue try the following:
What is a normal? In a mesh, each face has a single vector which is perpendicular to the face. This vector is called a normal and it points to only one side of the face. Normals are used for rendering.
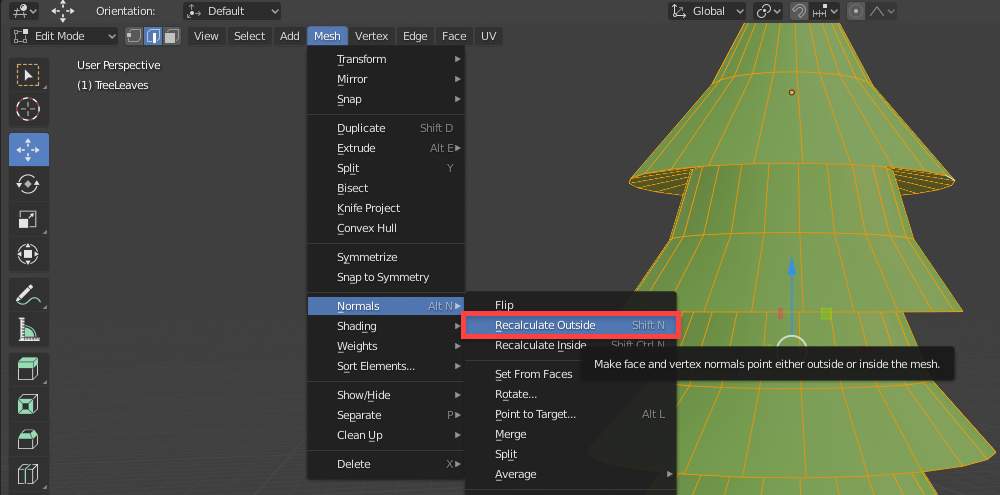
In your model, all normals should always point outwards. To do that, go to Edit Mode, select all faces, go to Mesh > Normals > Recalculate Outside.
What if I need to show both sides of a plane? Like a wall that separates two rooms for instance. In those cases you should use a cube mesh shape for instance, or duplicate the face (you can extrude the face and move it slightly to the other side), you should never have a single face that will be looked at from both sides.
What about backface culling? Unity only supports one-side rendering per face, so enabling/disabling backface culling in Blender won’t make a difference. Backface culling is when you explicitly tell your program that only one side of a face should be rendered.
3. Importing .blend files vs importing .fbx files
You have two main options to import a Blender file into Unity. There is no correct answer here, as different workflows and cases might find one approach better than the other one:
- Importing the .blend file directly into Unity
- Exporting a .fbx file from Blender, then importing this file into Unity
When you import a .blend file into Unity, what really happens behind the scenes is that Unity will call Blender’s export scripts to generate a .fbx file, and then import this file into Unity.
At first that sounds like both paths should be 100% equivalent. However, that is not the case!
3.1. Importing a blend file into Unity
Simply drag and drop the .blend file into a location inside your Assets folder in your Unity project. You can place the file there by many difference ways:
- Put it there using the File Explorer
- Drag and drop it into your Project tab
- Save your Blender project in there
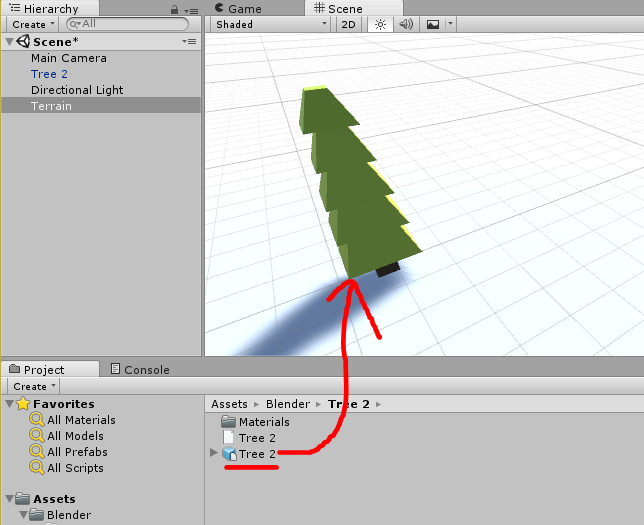
After that, simply drag and drop the asset into your Scene. The file to grab is the light blue box.
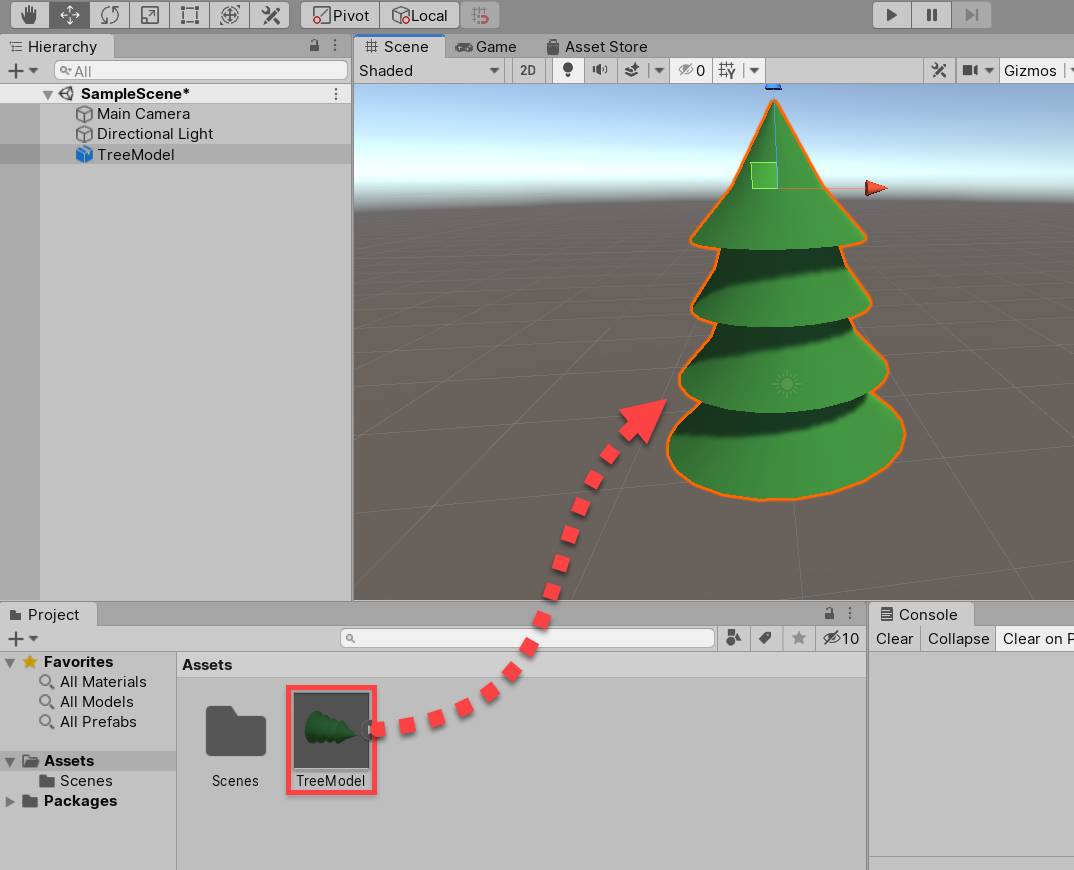
If you click on your newly created object and take a look at the transform panel, you will see that the scale is 1, and a rotation of “almost” -90 applied on X.
The X axis will be reversed from what you had in Blender. Whatever value of X was positive in Blender, will be negative in Unity. Usually this doesn’t matter, as the model looks exactly the same. Once the model is in Unity you can move and rotate at glance.
If you want the X coordinate to match, in Unity you have to apply a rotation of 180 degrees on Y. In this case, the Z axis still won’t not match given the different coordinate systems used in each program (the only way for all axes to match would be to “mirror” the model, for which you can easily give it a scale of to -1 in either X or Z in Unity).
3.2. Importing a fbx file into Unity
To export an fbx file, go to File > Export > FBX (.fbx).
To make sure that we’re not exporting anything we don’t need (camera, lights, etc), only select Mesh in the Object Types. If you have a rig for a character model, make sure to also select Armature (select multiple by holding down Shift).
Since Unity and Blender have different coordinate systems (Z and Y are flipped), we need to enable Apply Transform to make the transform coordinates work for Unity.
Now we can click the Export button to export the model to our desired location.
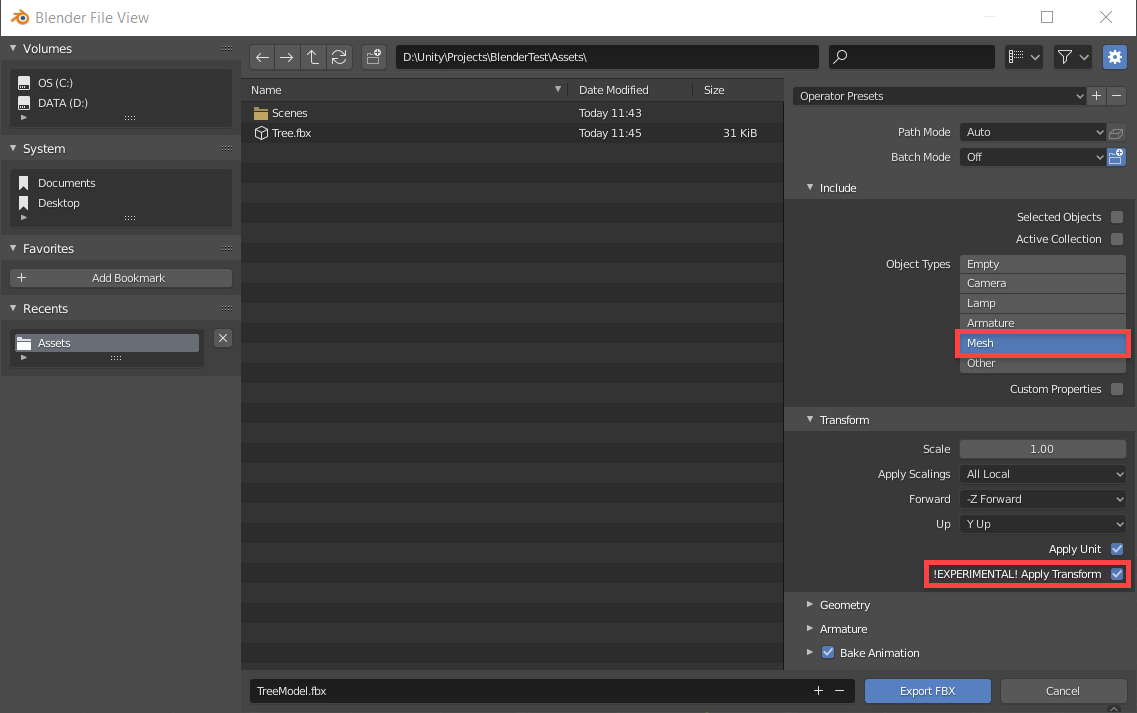
Note: if you are exporting the whole scene, clicking that button won’t make a difference, but if you are exporting only selected objects, not checking this option will cause them to be imported into Unity with a scale of 0.01, instead of 1.
To import the fbx file into Unity, simply place in the Assets folder and drag into your scene just like we’ve described for blend files.
The model will show just fine, but the Inspector panel will show a File Scale of 0.9999999 which is almost 1. We can deal with that.
If you drag the mesh into the scene and check the Inspector panel, you will notice that the scale is set to 1, that means we are on the right track.
Regarding the horizontal plane coordinates, if you want the X direction to match that of Blender, you have to apply a rotation of 180 degrees in Y in Unity, like like we did for blend files!
4. blend vs fbx? Which one wins?
There is simply no correct answer to that question, as both options have their pros and cons and that will depend also on your own workflow. The important thing is that by following this tutorial you can now import your Blender assets correctly no matter your choice.
Which approach should I take? Perhaps these guidelines can be of help:
- If you have multiple models in a single Blender file, you can easily export one by one as fbx files as described in the tutorial.
- If you have a single Blender file per model, it’s easy to just move these files into Unity, or even create them inside the Asssets folder to begin with!
- Important. After importing a blend file into Unity, if you modify and save that file in Blender, the objects in Unity that use this asset will be updated too. This can help you save time, as you don’t have to export again. However, it can also mean you have to be careful if you are making changes in Blender, as you can easily mess up your game objects by some unintentional transforms and location changes.
- On that sense, exporting fbx files makes this process manual, so even if you save changes in your Blender file, these won’t propagate into Unity unless you choose to.
- Importing blend files requires Blender to be installed. Since Blender is a free program this is not a big deal, but it’s good to know.
Ending Thoughts
Thanks for reading and I hope you found this tutorial helpful!
Some useful resources and discussions on this topic:
- http://answers.unity3d.com/questions/439807/blender-to-unity-which-export-format-is-best.html
- http://answers.unity3d.com/questions/36145/scaling-between-fbx-and-unity.html
- https://docs.unity3d.com/Manual/HOWTO-ImportObjectBlender.html
- https://www.reddit.com/r/Unity3D/comments/32lhok/unity_5s_scale_is_completely_messed_up/
You might also want to check out our developer job prospects article or our coding portfolio article to help make the most of your projects!
Lastly, if you’re looking to expand your skills with Unity or Blender, we recommend checking out the Unity Game Development Mini-Degree and Game Artwork Academy for fantastic online courses on those topics. Educators can also try out Zenva Schools which offers online courses for K12 classrooms in those topics as well (and comes with nifty features like classroom management tools, pre-made course plans, and reporting.
