Introduction
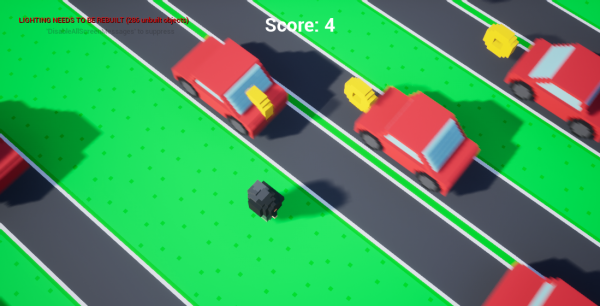
Complex games can be a lot of fun, but sometimes all players want to do is sit back and relive the retro days where simple mechanics and goals were the reigning champs. As a developer, not only might you want to create your own retro, arcade-style types of games (with some modern flair), but it can also be a great beginner’s project to start your game development skills!
As such, in this tutorial, we’ll be creating a road-crossing arcade game in the Unreal Engine. The game will feature a player controller, coins, cars, and an end goal – capturing the sorts of straight-forward mechanics you’d expect. Additionally, we’ll be working heavily with Unreal Engine’s unique Blueprinting system, so no coding from scratch is necessary!
If this is your first time using the Unreal Engine, we recommend you follow our intro to Unreal Engine tutorial first, as this one won’t be going over the basics of the engine itself.
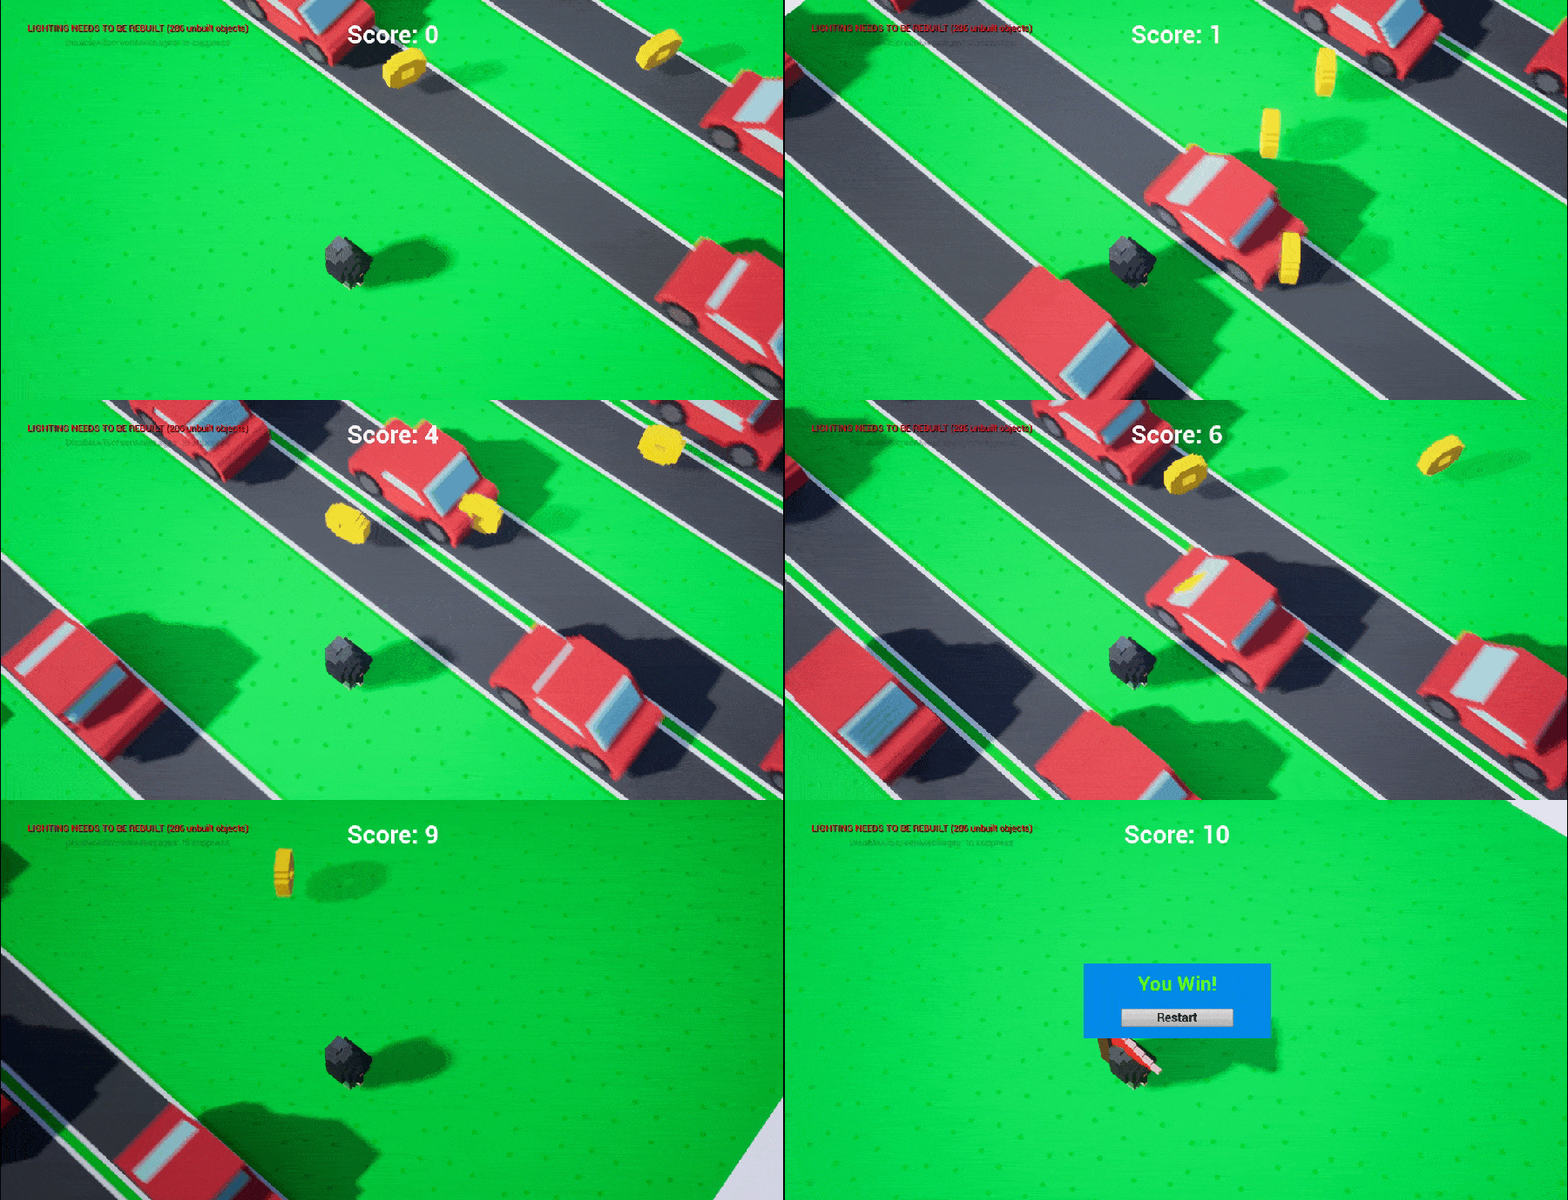
Project Files
For this project, we’ll be needing some 3D models made in MagicaVoxel.
You can also download the compete project with all the blueprints, levels, settings and models.
Creating the Project
To begin, create a new project (no starter content needed). Then we’re going to create three new folders in the Content Browser.
- Blueprints
- Levels
- Models
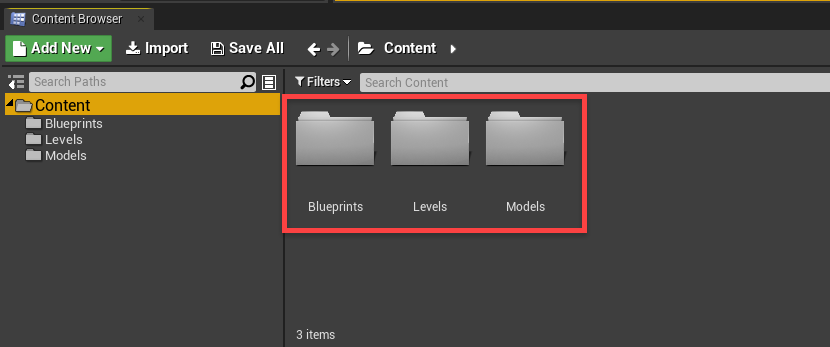
Next, save the open level to the Levels folder as MainLevel.
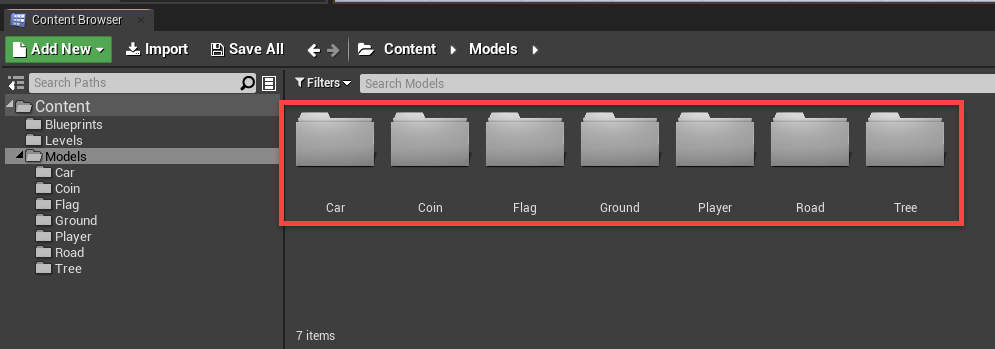
We’ll be using some pre-made 3D models from MagicaVoxel, so download the included assets (top of the tutorial) and drag the contents inside of the Models folder, into the Content Browser in our Models folder. Like so:
Creating the Player
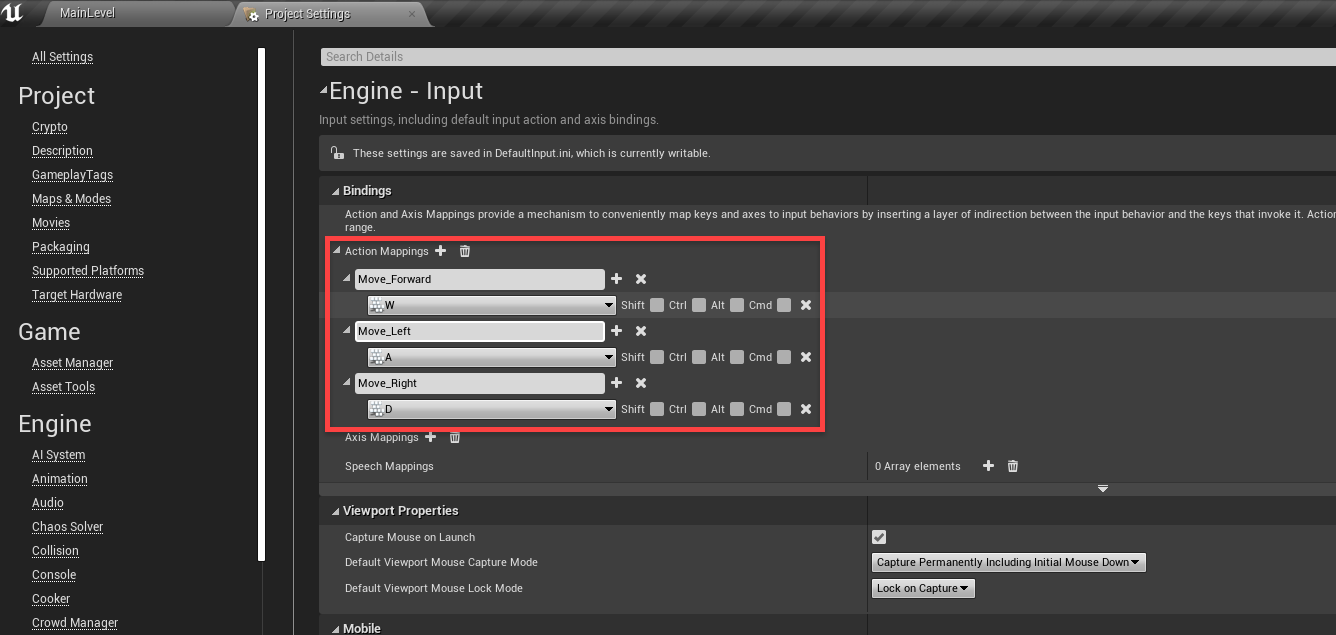
Now we can create our player. This player will be able to move forwards, left and right. To begin, we need to setup our key bindings. Go to the Project Settings window (Edit > Project Settings…) and navigate to the Input tab. We want to create three new action mappings.
- Move_Forward = W
- Move_Left = A
- Move_Right = D
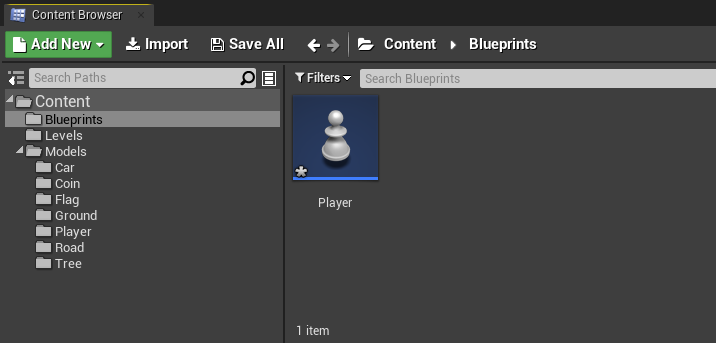
Back in the level editor, we can navigate to our Blueprints folder and create a new blueprint for our player. Make it’s parent class a Pawn and call it Player.
Open it up and we can begin.
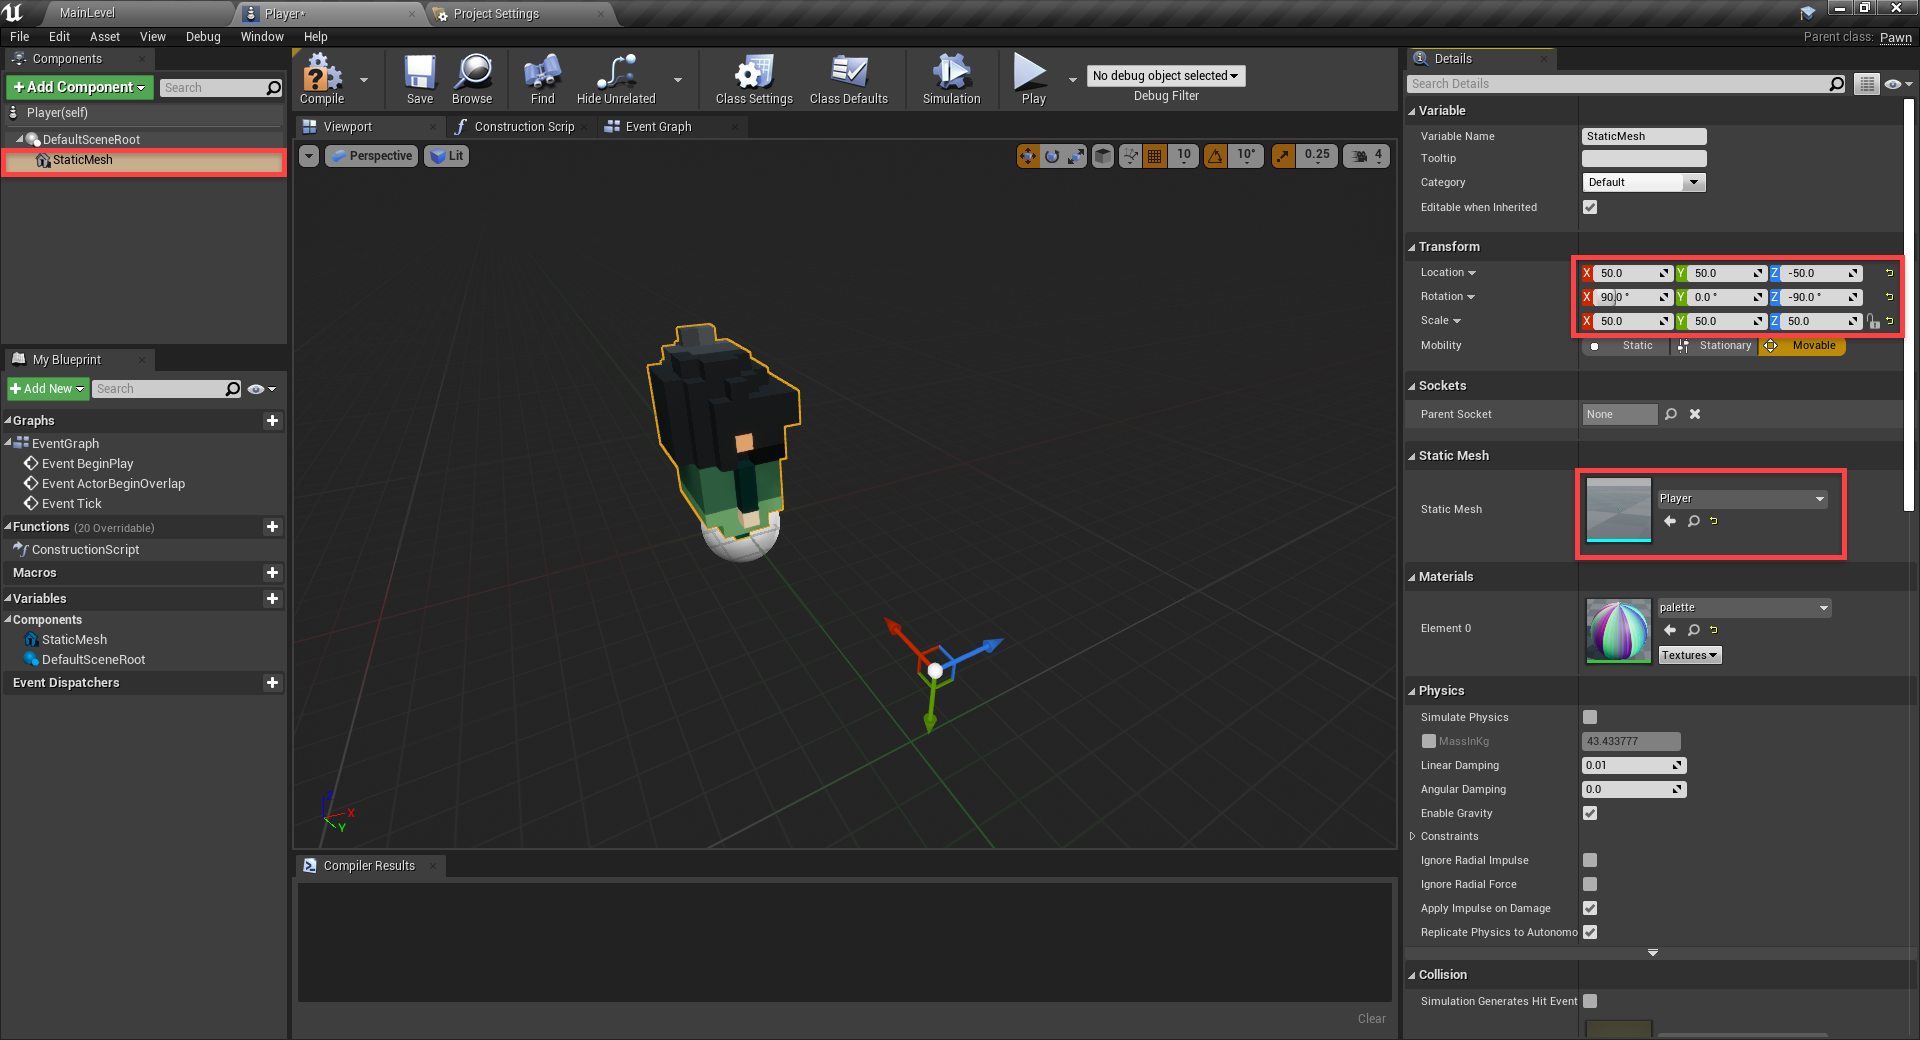
First, create a new Static Mesh component.
- Set the Static Mesh to Player
- Set the Location to 50, 50, -50
- Set the Rotation to 90, 0, -90
- Set the Scale to 50, 50, 50
- (not pictured) Disable Generate Overlap Events
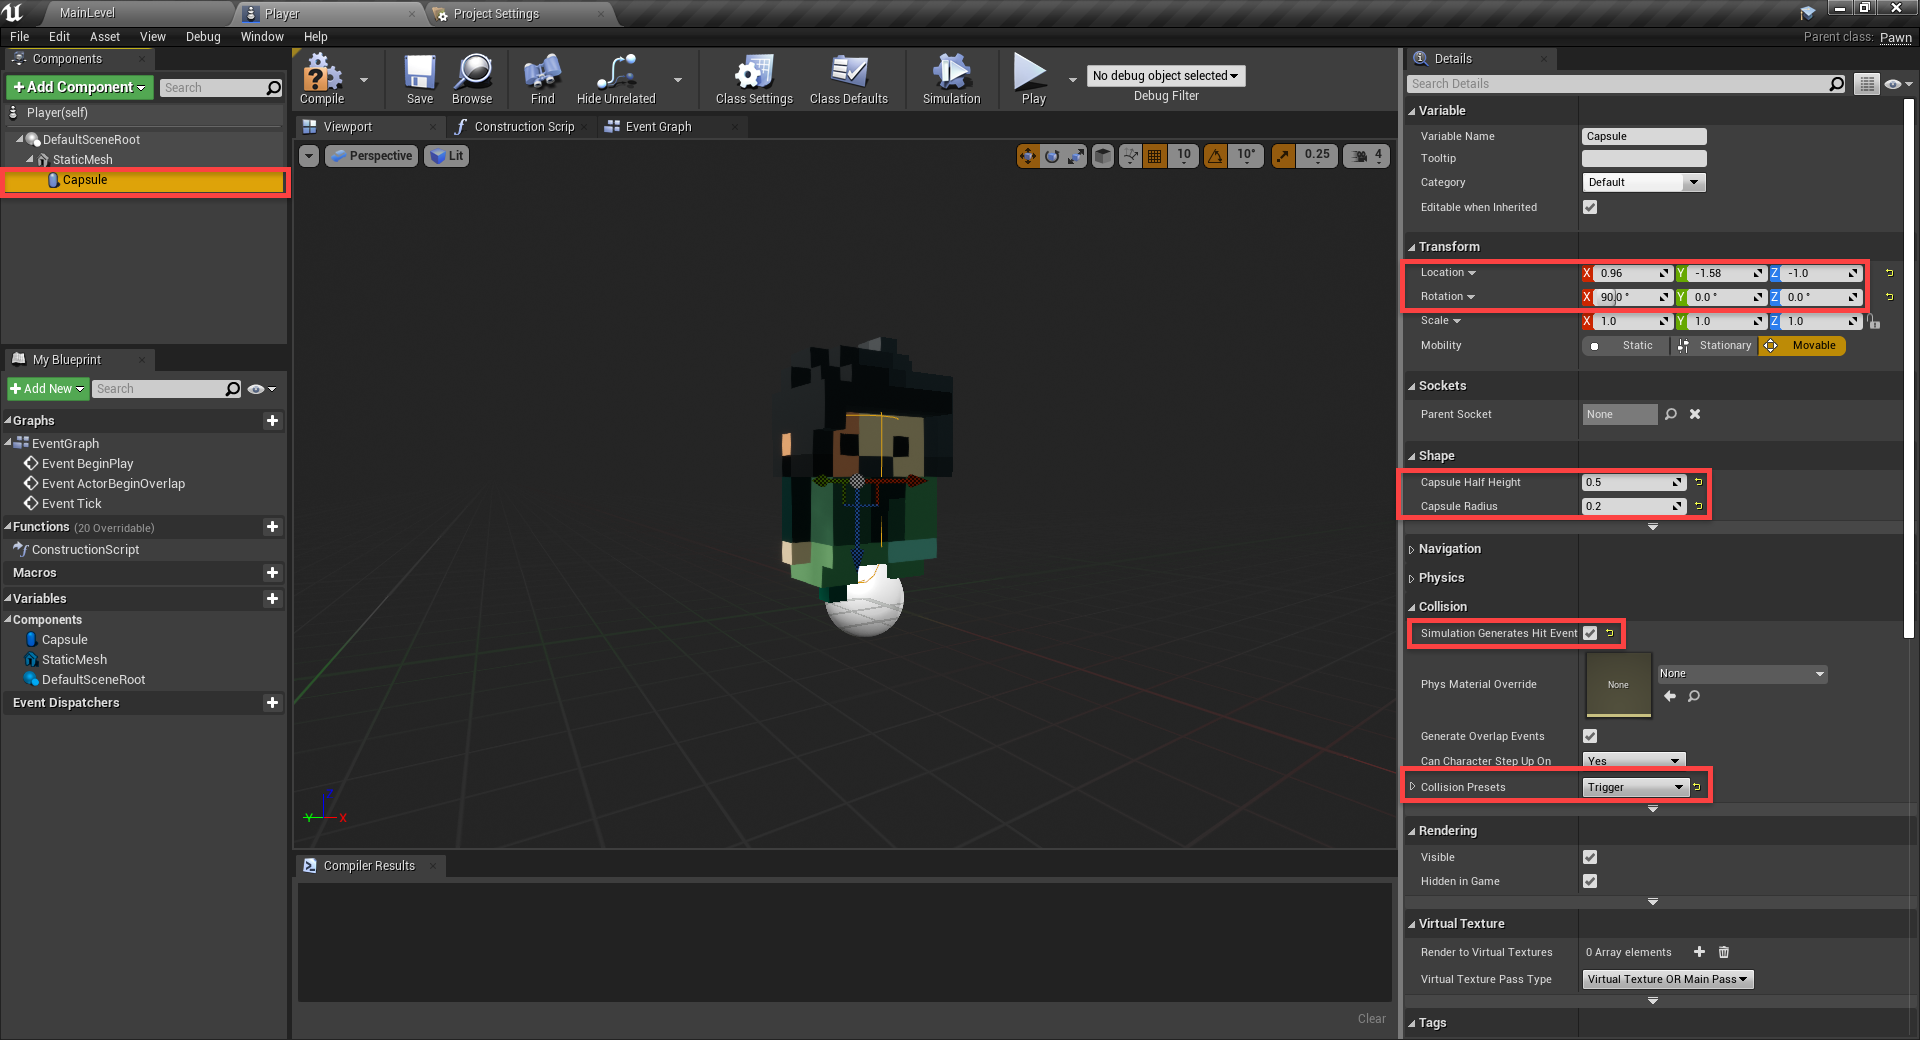
Next, create a Capsule Collider component as a child of the static mesh.
- Set the Location to 0.96, -1.58, -1.0
- Set the Rotation to 90, 0, 0
- Set the Capsule Half Height to 0.5
- Set the Capsule Radius to 0.2
- Enable Simulation Generates Hit Events
- Set the Collision Presets to Trigger
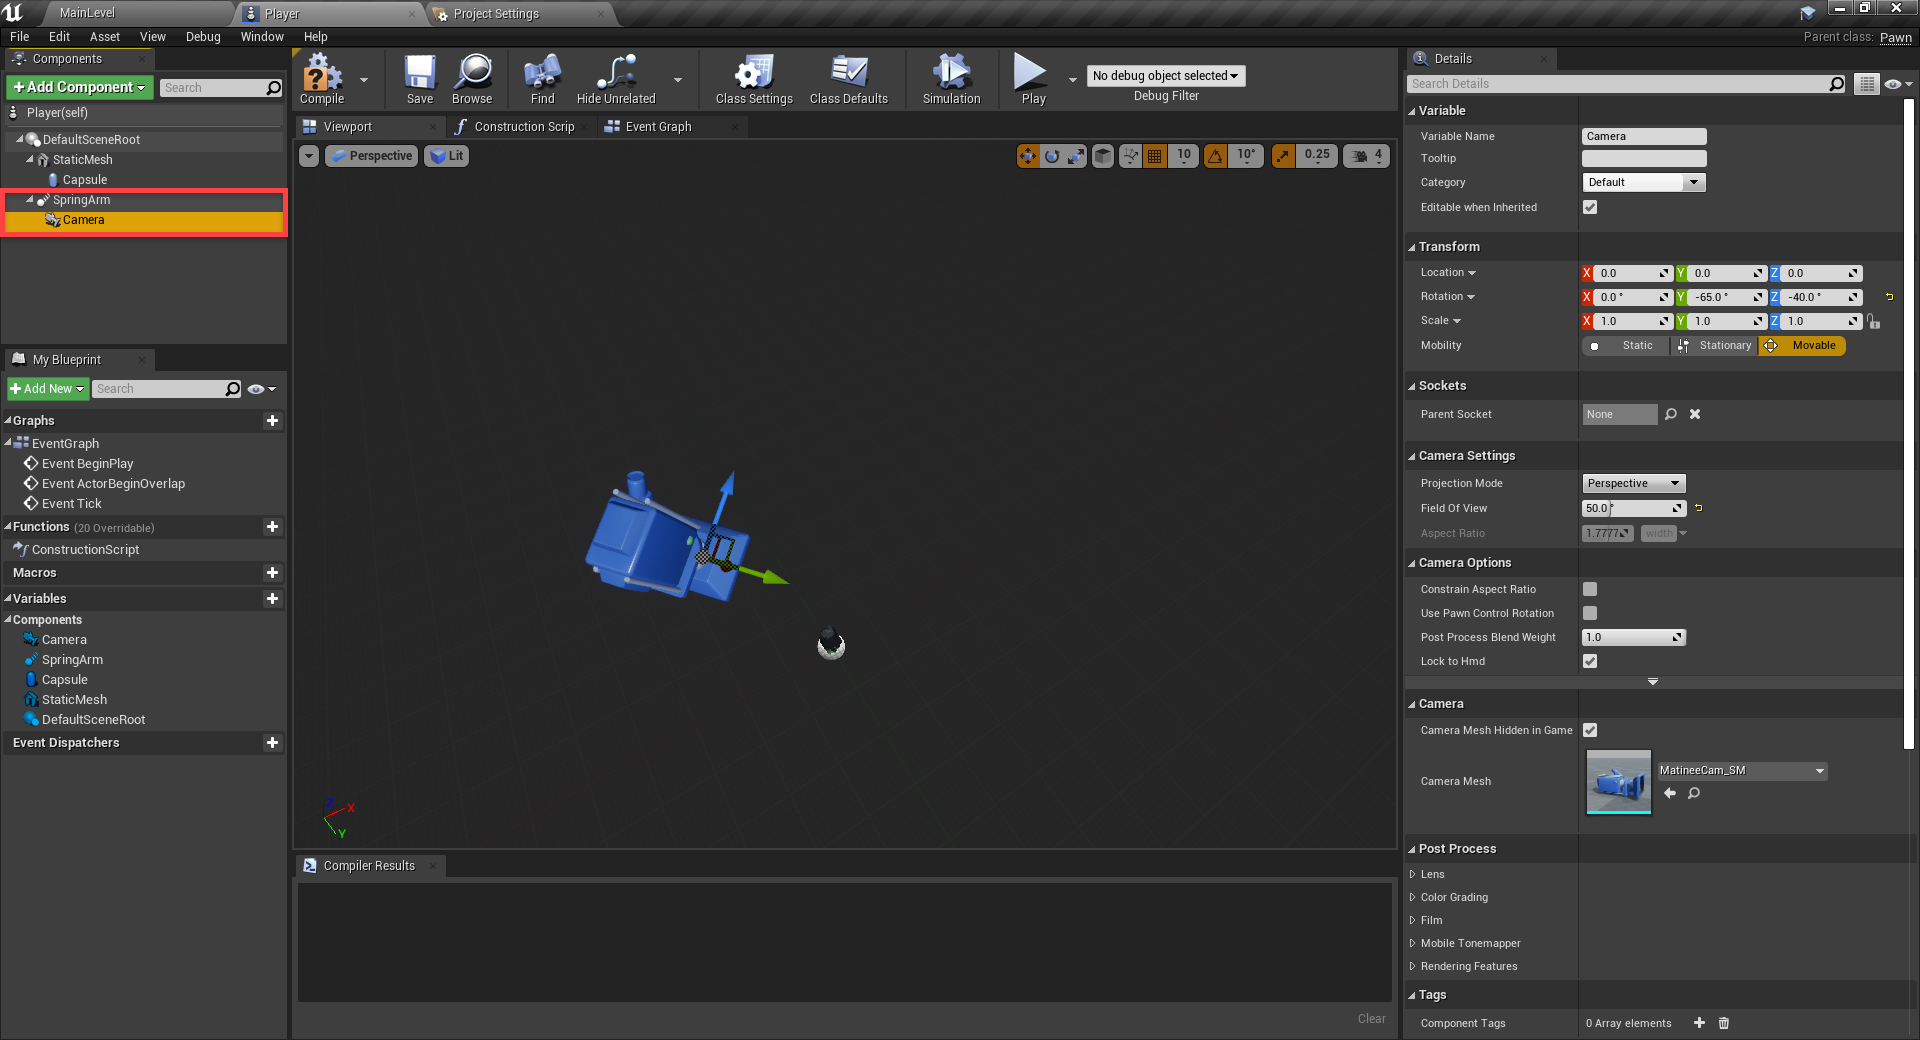
Finally, we have the camera setup. Create a new Spring Arm component as the child of static mesh. This component will hold our camera in place, even if we’re rotating.
- Set the Socket Offset to 100, 0, 0
- Set the Target Offset to 0, 227, 820
Then, create a Camera component as a child.
- Set the Rotation to 0, -65, -40
- Set the Field Of View to 50
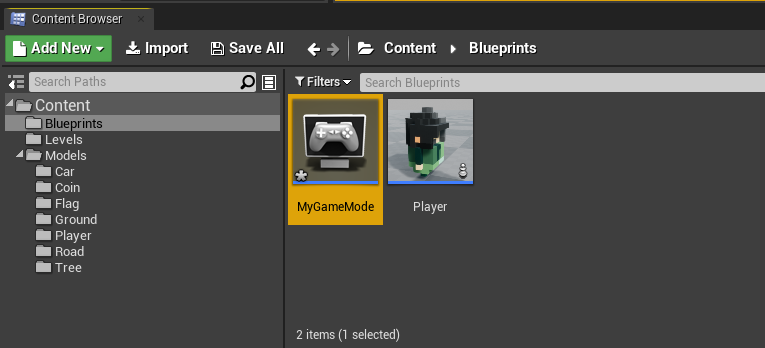
Let’s now go back to the level editor and in order to play as the player, we need to create a game mode blueprint.
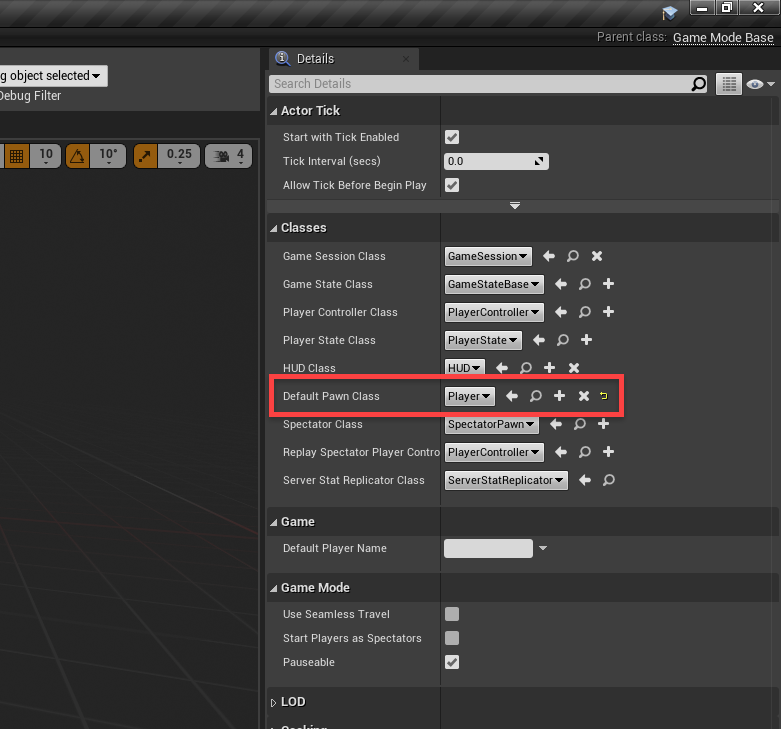
Open it up and all we need to do, is set the Default Pawn Class to our Player blueprint.
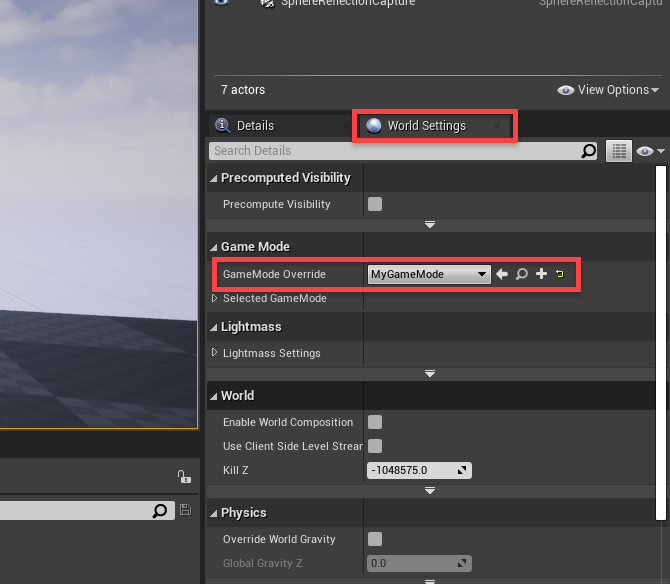
Save and compile it. Back in the level editor, go to the World Settings panel and set the GameMode Override to our new game mode.
Now if you press play, you’ll see the player appearing with the camera above them.
Moving the Player
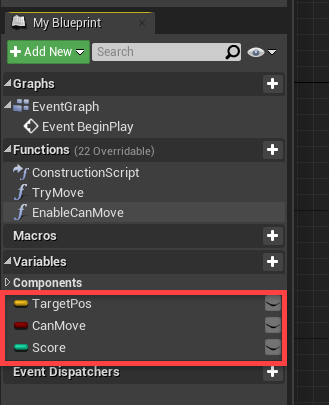
Back in the Player blueprint, we can begin to implement the movement. First, we’ll need to create the variables.
- TargetPos (Vector)
- CanMove (Boolean)
- Score (Integer)
Click Compile and set some default values.
- CanMove = true
In the Event Graph, we can begin by resetting the player position. The Target Pos variable is where the player is moving to, so we’ll set it to our position first.

Next, we’ll need to do pretty much the same thing for moving forward, left and right. To bypass just having three copies of the same code, we’re going to create a new function called TryMove. Create a new input for the function called Direction and make that of type Vector.
What we’re doing here, is checking if we can move. If so, add the direction to our TargetPos and then disable can move. But we want to be able to move eventually, so we’re going to call a function with a delay. The EnableCanMove function is what we’ll call after 0.3 seconds.

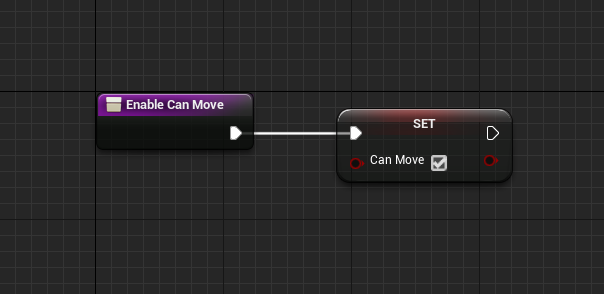
Let’s now create that EnableCanMove function. All we’re doing here is enabling the can move function.
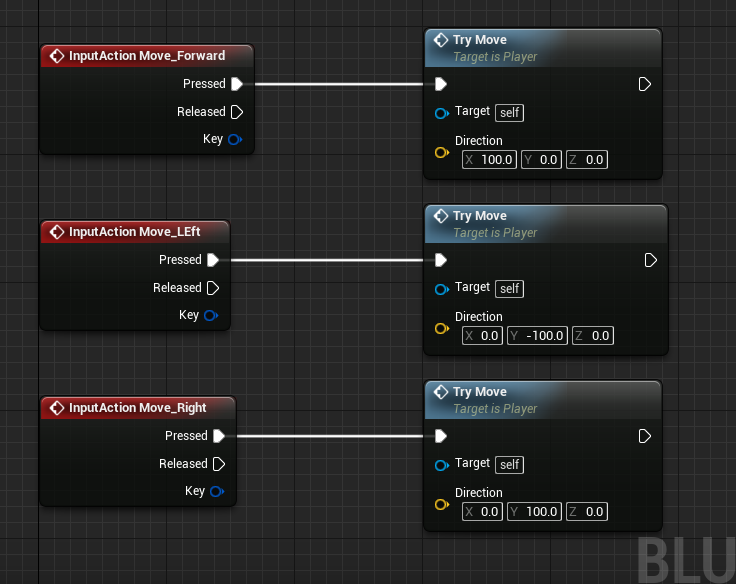
Back in the main event graph, let’s now setup our movement input to call the TryMove function. Make sure to fill in the respective Direction inputs.
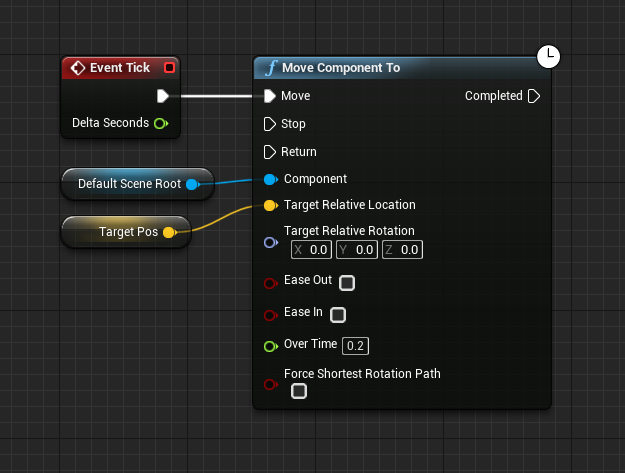
Next, we need to actually move the player. So every frame (event tick node), we’re going to trigger the Move Component To node which moves a component to the requested position.
You can now press play and test it out!
Level Layout
Before we continue with the rest of the game’s systems, let’s create our level. So in the level editor begin by deleting the floor object.
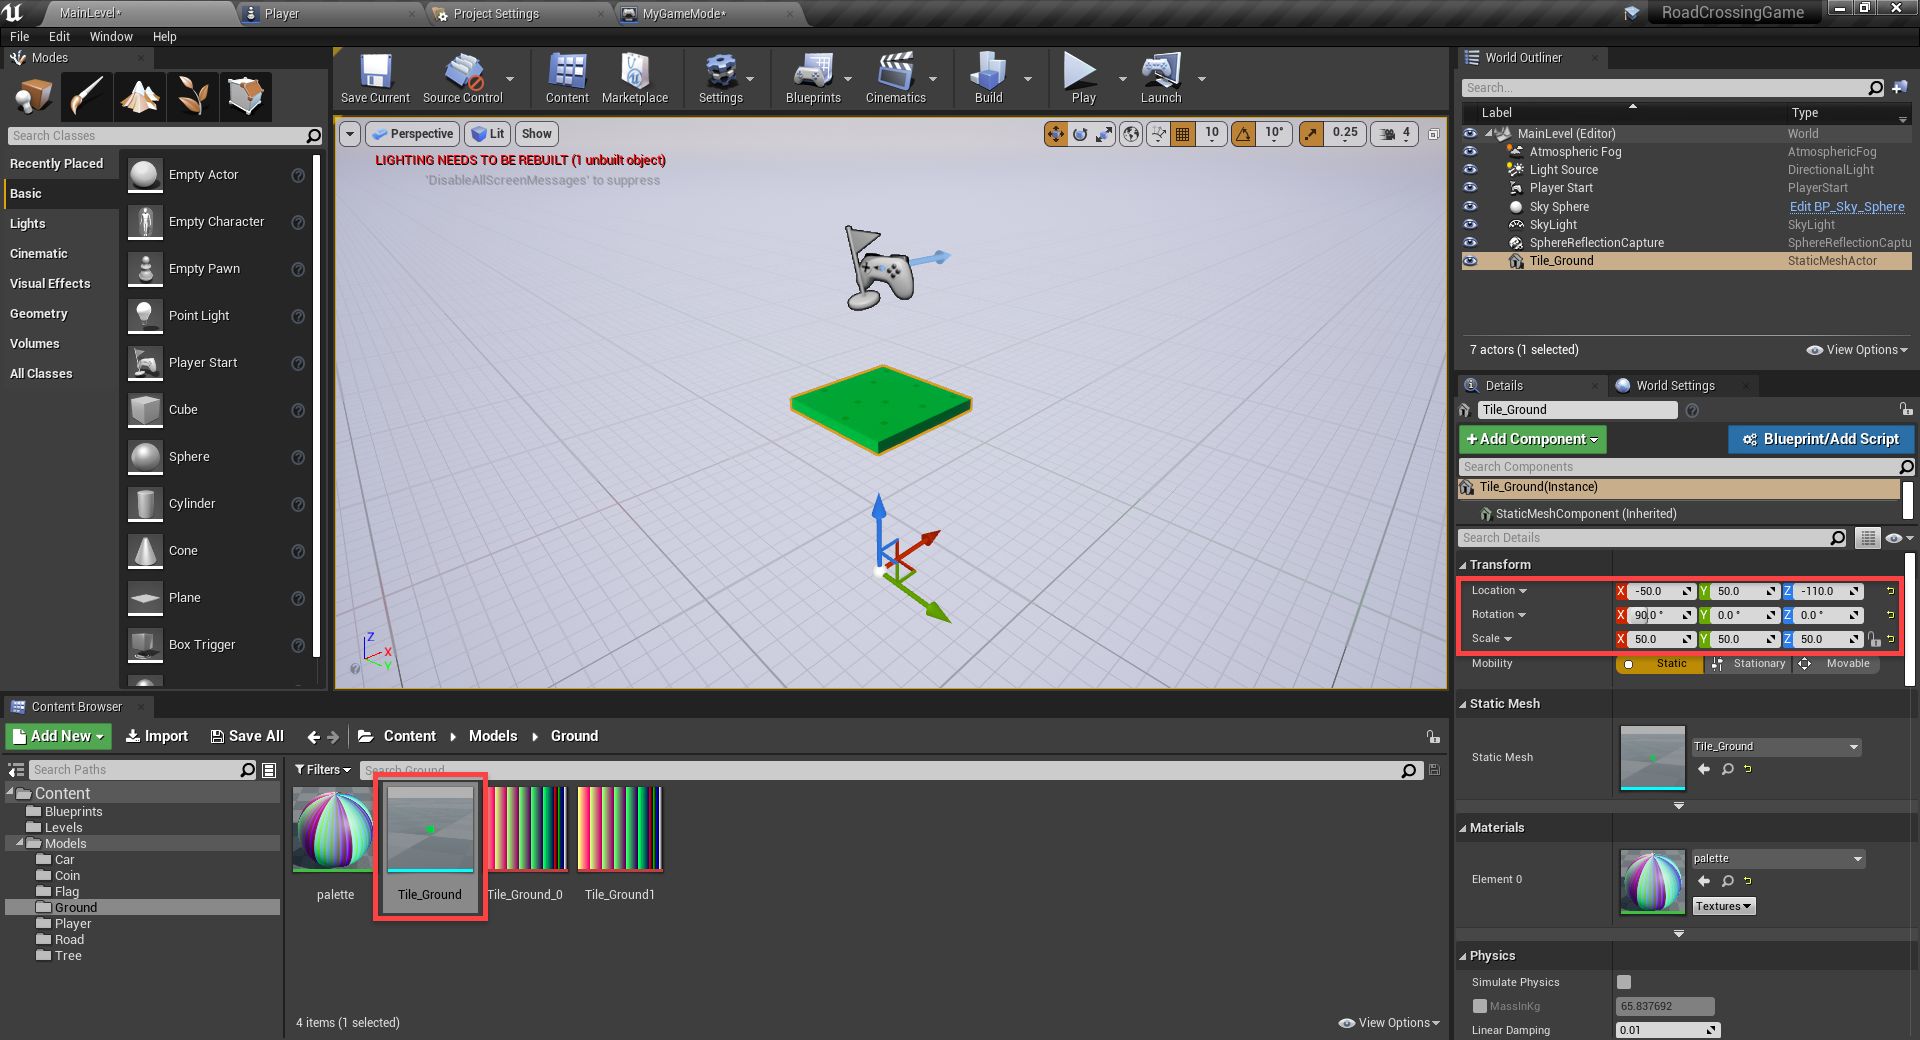
Then, in the Models/Ground folder, drag in the Tile_Ground model.
- Set the Location to -50, 50, -110
- Set the Rotation to 90, 0, 0
- Set the Scale to 50, 50, 50
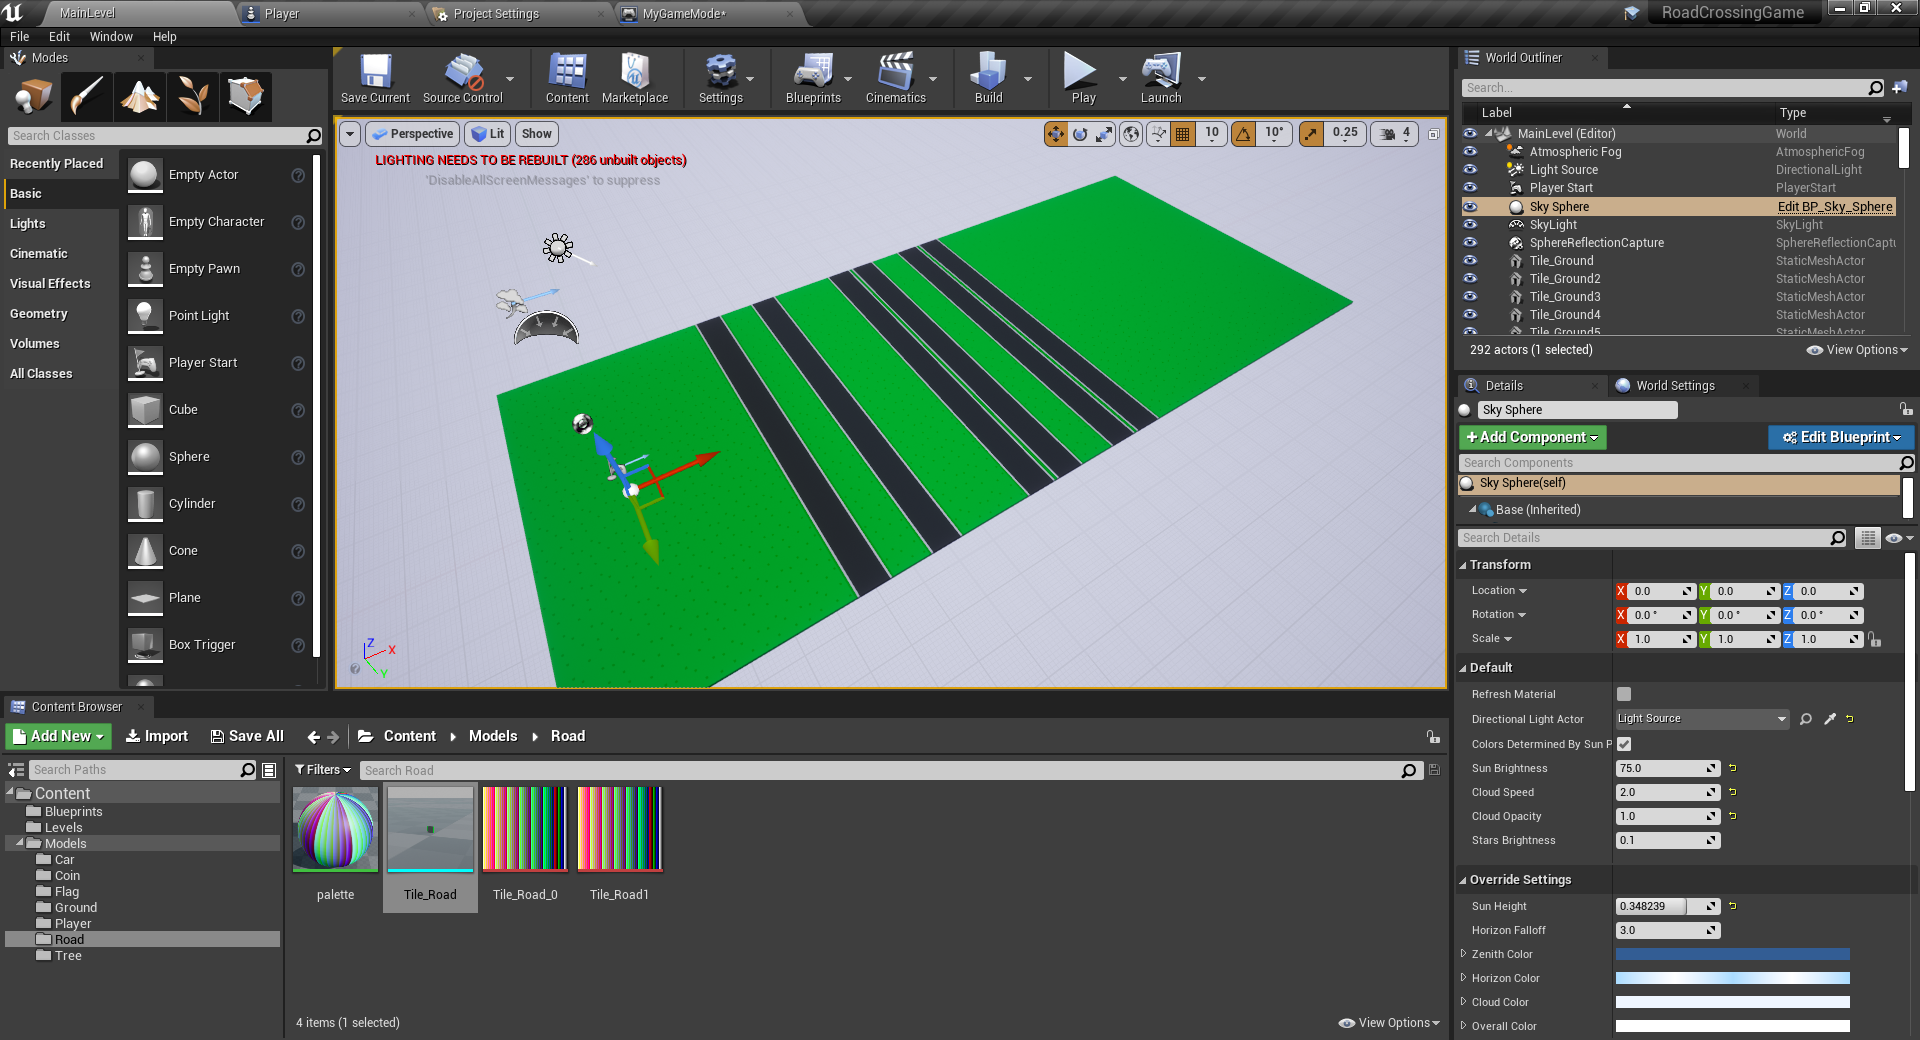
Combining the ground and road tiles, create a layout like the one below.
Collectable Coins
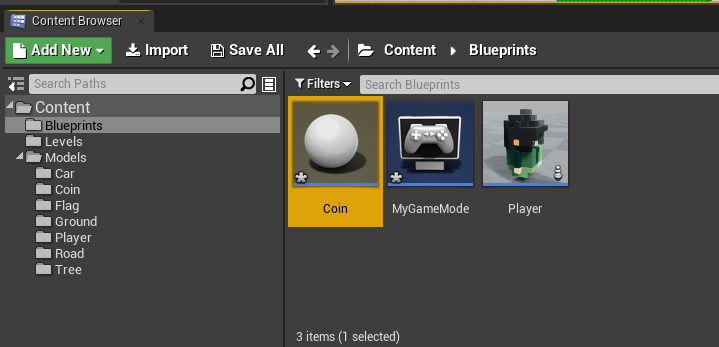
When playing the game, players can collect coins to increase their score. Create a new blueprint (parent class of Actor) and call it Coin.
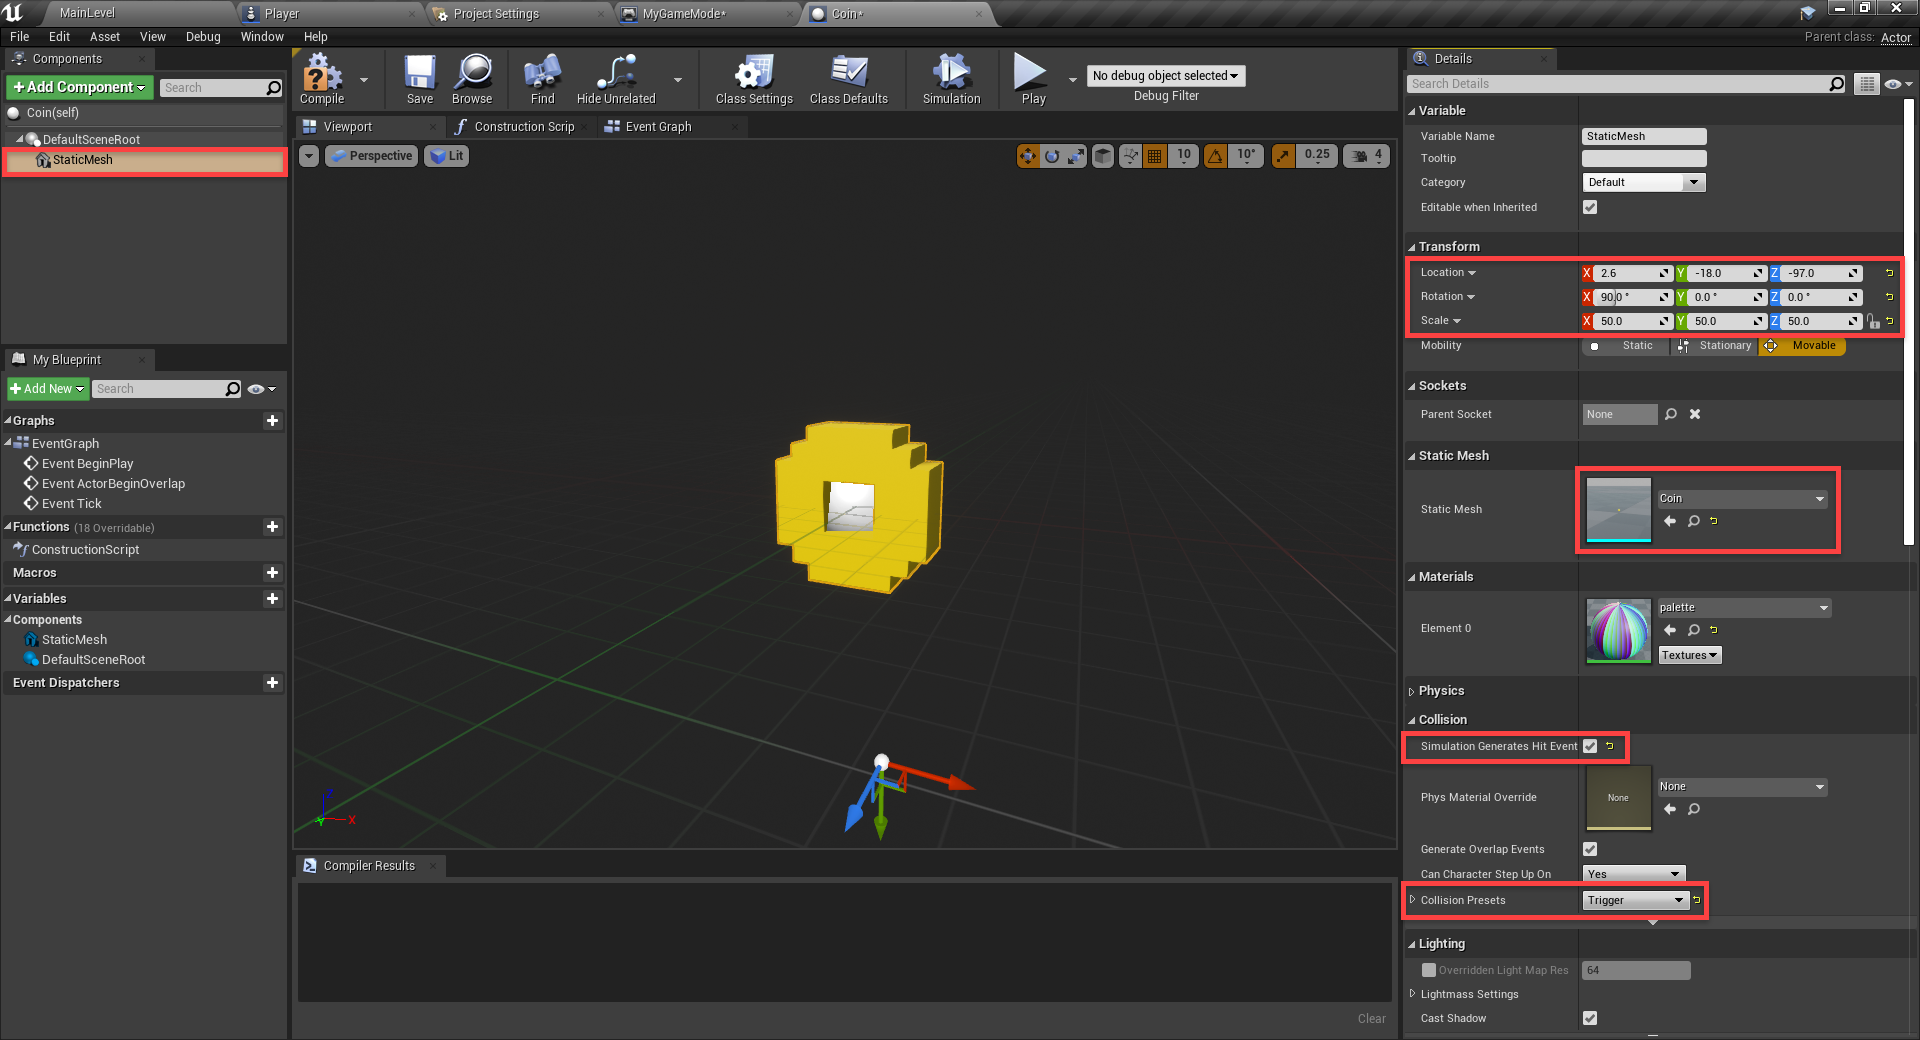
All we’re going to do component wise, is create a new Static Mesh component.
- Set the Static Mesh to Coin
- Set the Location to 2.6, -18.0, -97.0
- Set the Rotation to 90, 0, 0
- Set the Scale to 50, 50, 50
- Enable Simulation Generates Hit Events
- Set the Collision Presets to Trigger
Create a new variable of type Float and call it RotateSpeed. Compile and set the default value to 90.
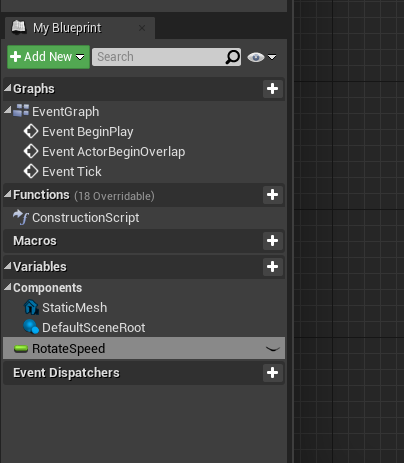
In the event graph, we’re first going to set it up so the coin rotates over time. We’re multiplying by the delta seconds so that the coin rotates in terms of degrees per second and not degrees per frame. This will make it the same across any frame rate.

Next, we need to add the score to the player when they collect the coin. First, go to the Player blueprint and create a new function called AddScore.
- Create an input for the function called ScoreToAdd of type Integer
This function will just add to the existing score.
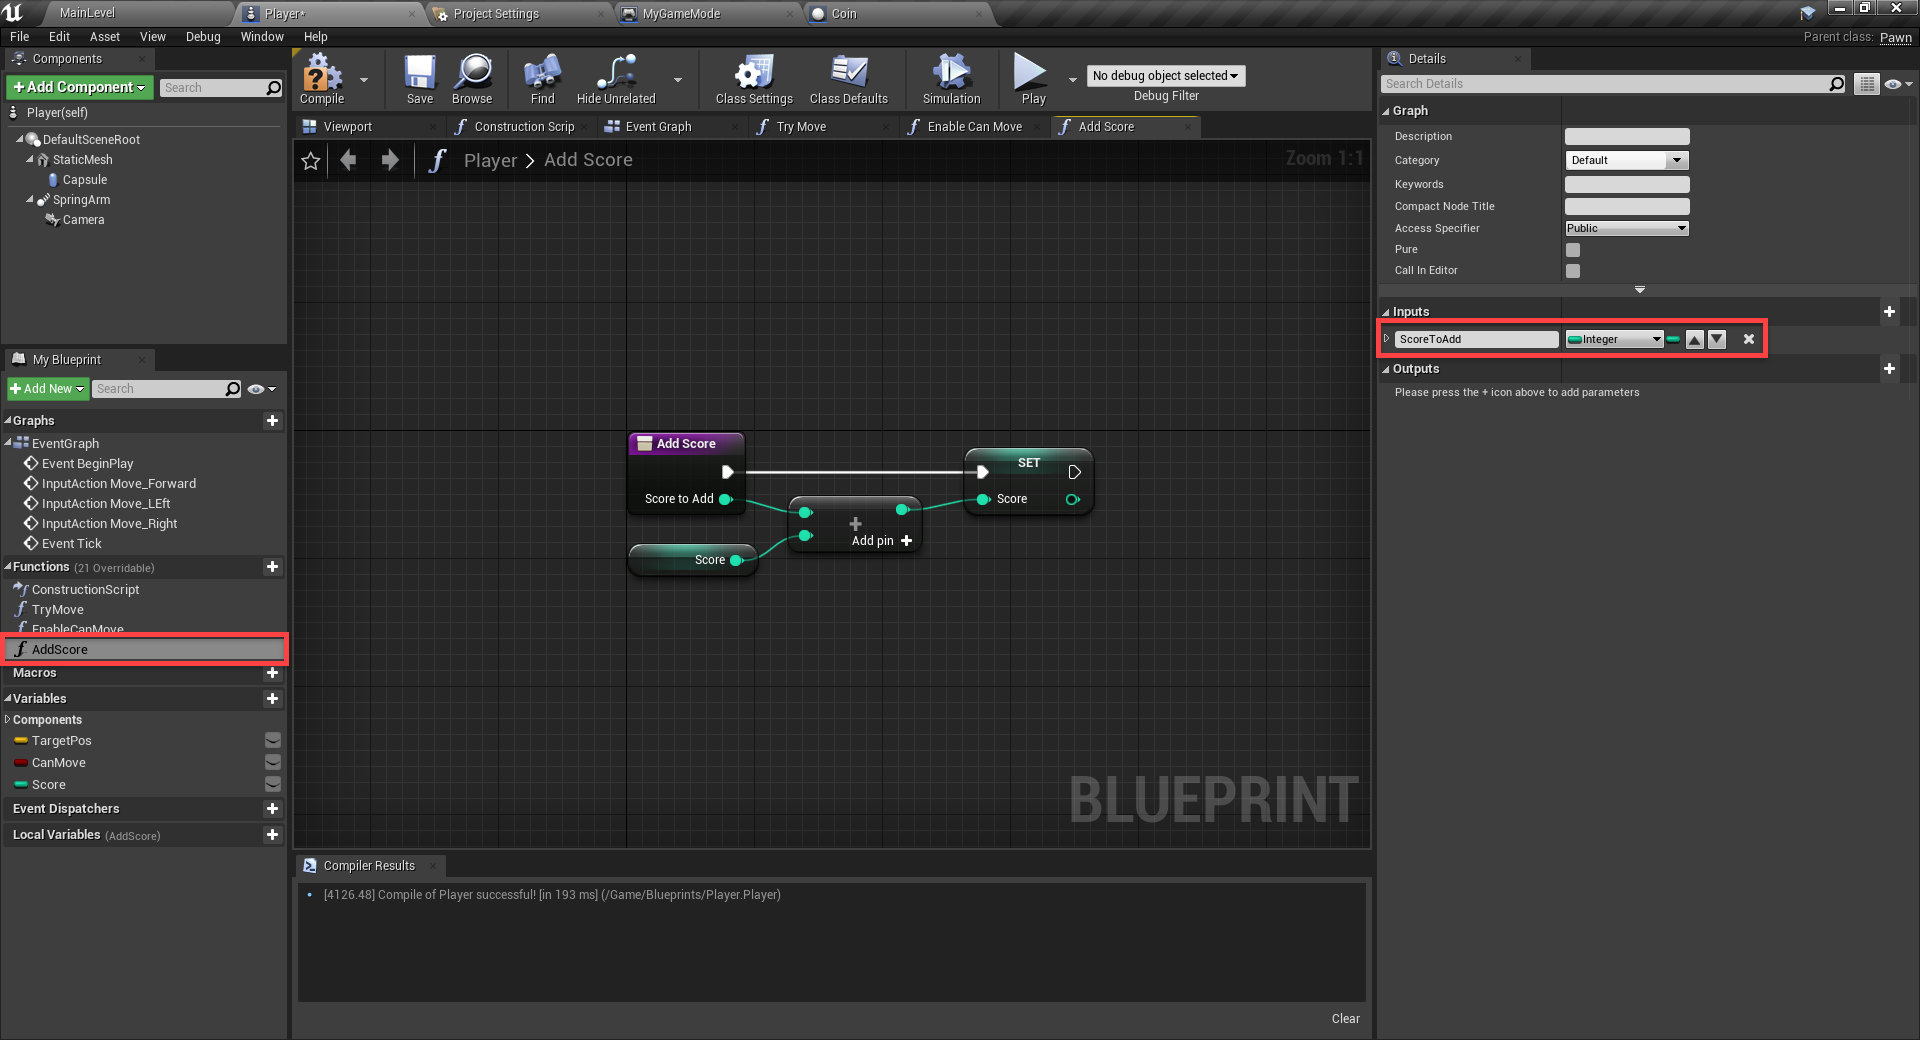
Back in the Coin blueprint, let’s create the logic so that when the player collides with the coin, we add to their score and get destroyed.

In the level editor now, we can drag in the coin blueprint and position it where we want. If you press play and collect the coin, you should see that it gets destroyed.
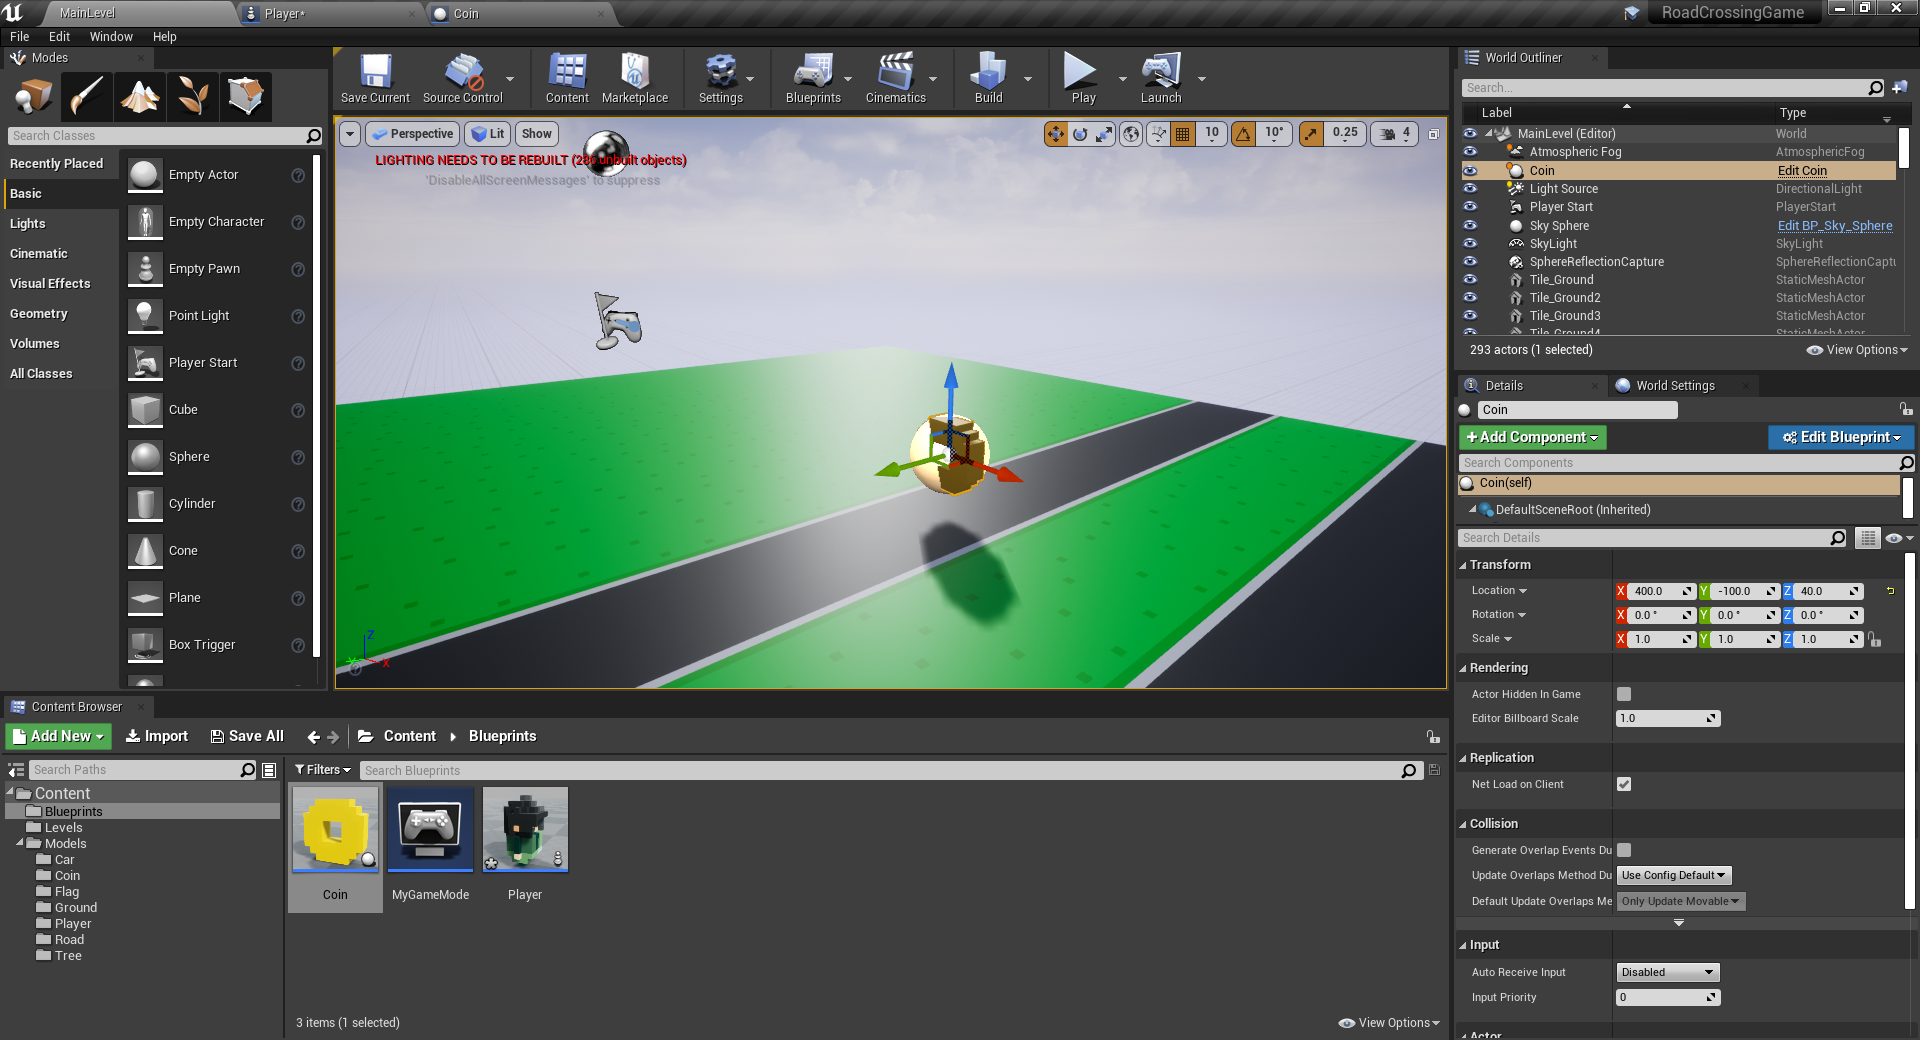
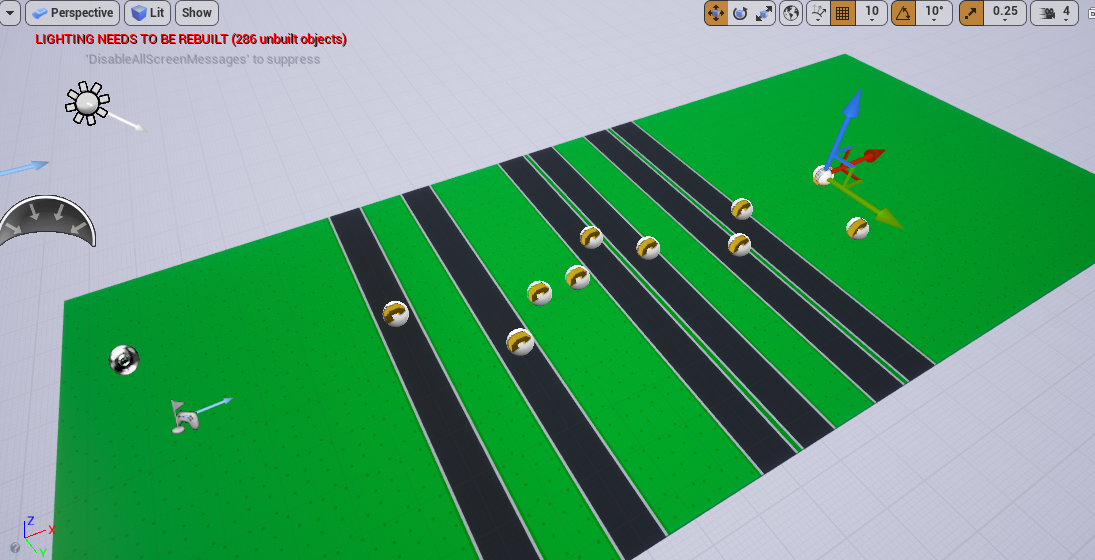
We can also then add in the rest of the coins.
Creating the Cars
The cars are going to be the player’s main obstacle. Hitting them will cause the game to restart.
Create a new blueprint (parent class of Actor) and call it Car. Open it up and we’ll start by creating a static mesh component.
- Set the Static Mesh to Car
- Set the Location to 75, -37, -100
- Set the Rotation to 90, 0, 180
- Set the Scale to 50, 50, 50
- Disable Generate Overlap Events
- Set the Collision Presets to Trigger
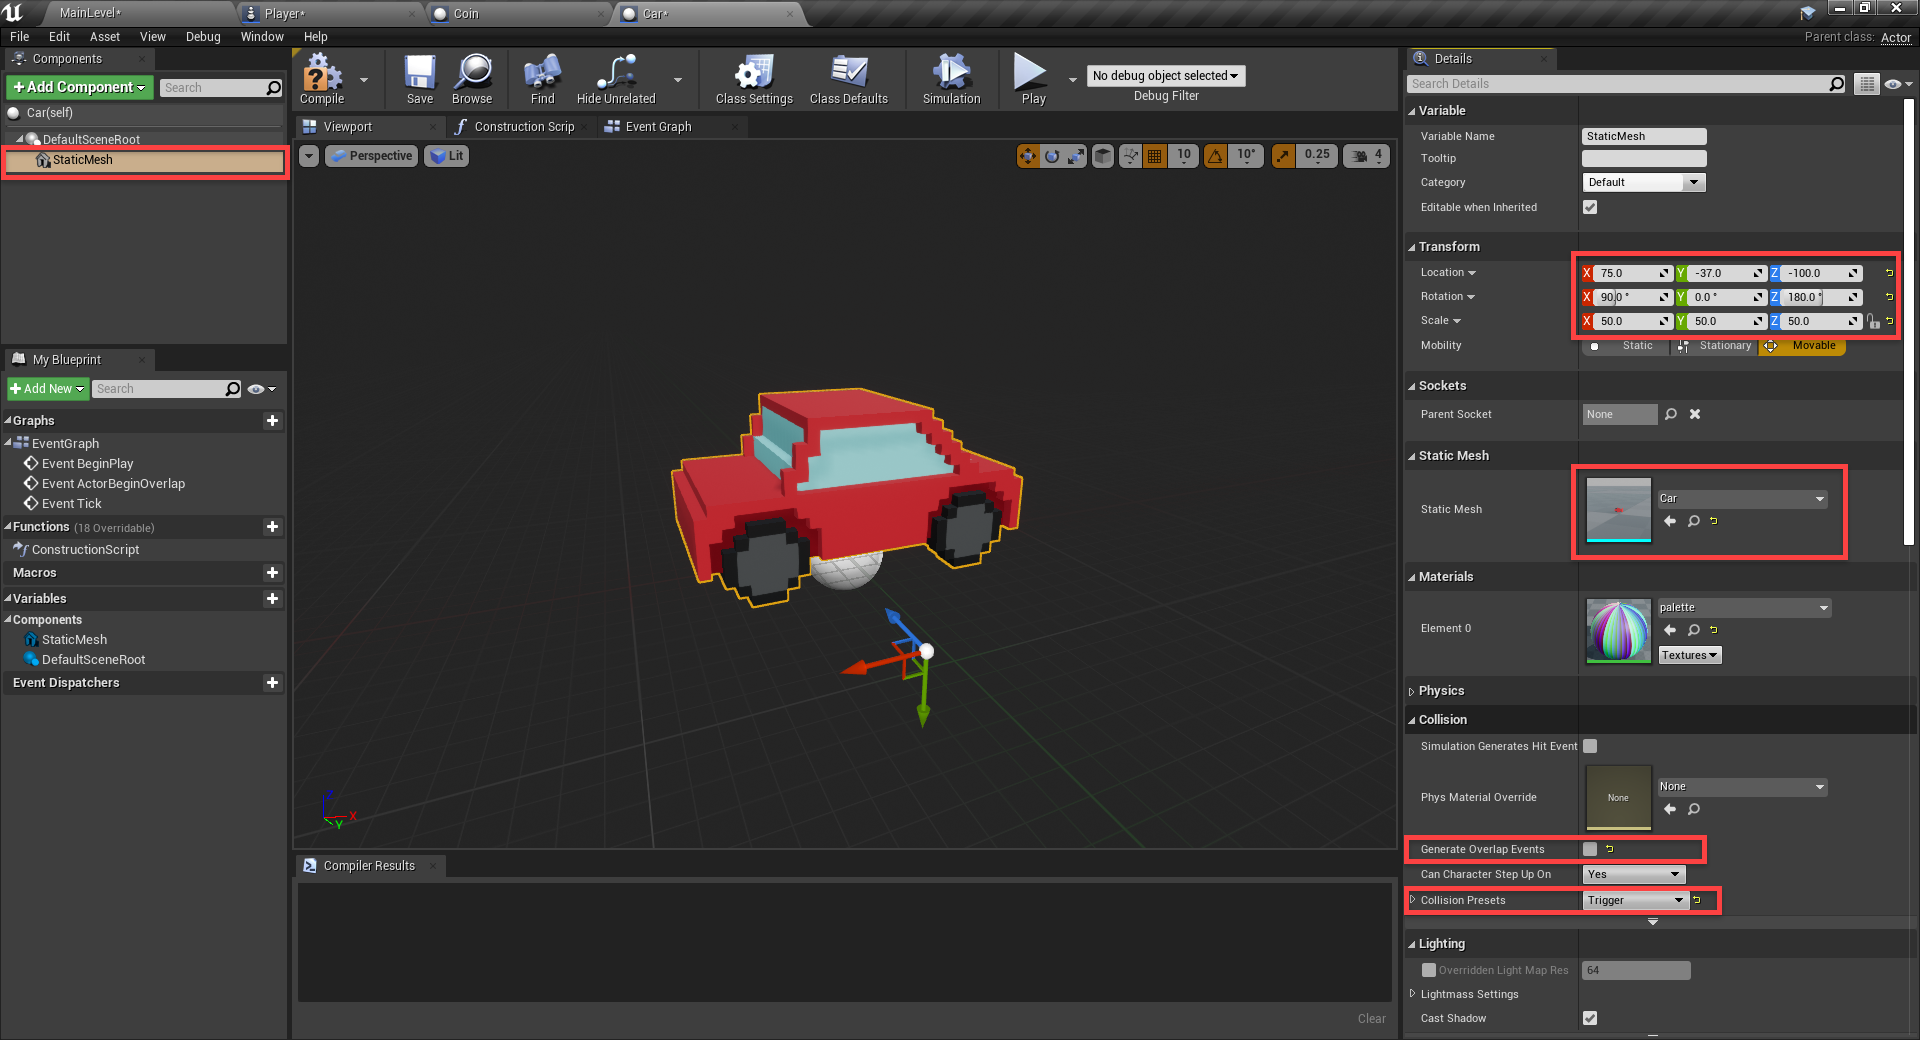
Next, create a Box Collider component.
- Set the Location to 1.5, -2.5, -0.75
- Set the Box Extents to 1.3, 0.45, 0.6
- Enable Simulation Generates Hit Events
- Set the Collision Presets to Trigger
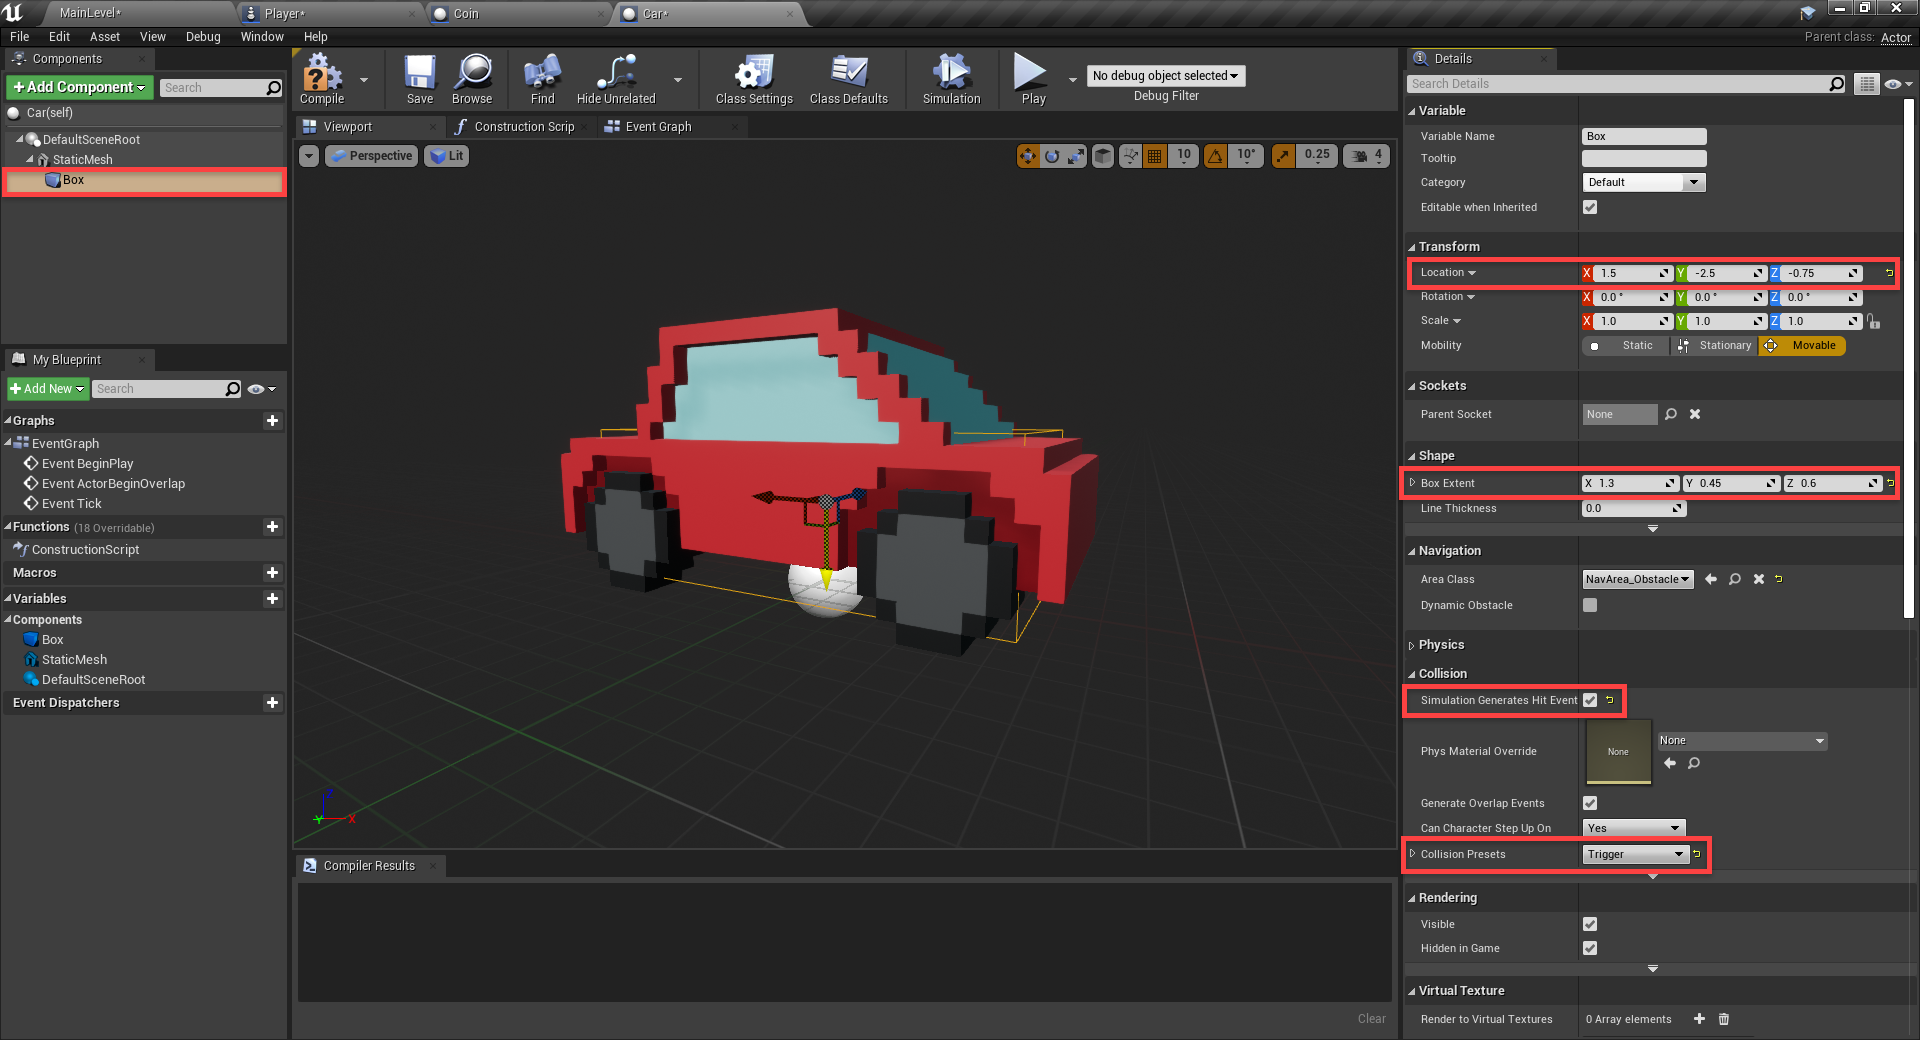
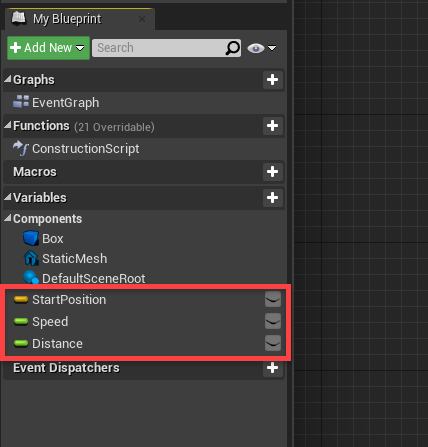
Let’s now head over to the Event Graph where we’ll begin by creating some variables.
- StartPosition (Vector)
- Speed (Float)
- Distance (Float)
Compile, then for each variable, enable Instance Editable so we can change the values in the level editor. But for the speed, let’s set that to a default value of 400.
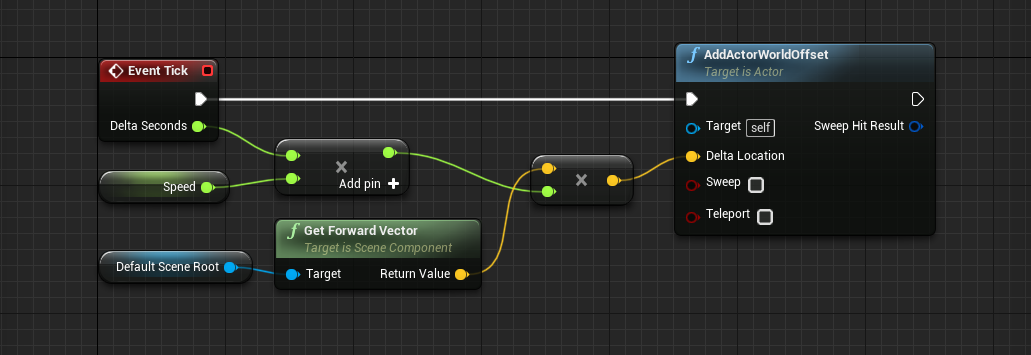
Now for the nodes. Each frame, we’re going to be moving in our forward direction.
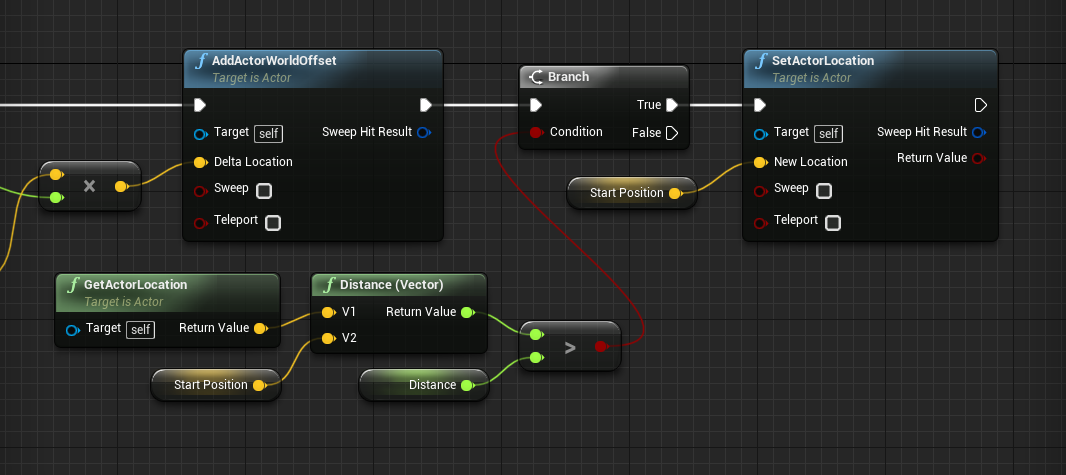
We’re also wanting to check each frame if we’ve driven as far as the distance variable. If so, then reset our position to the start position.
Finally, we’re going to check for an overlap of the player collider. If so, we’ll restart the scene.

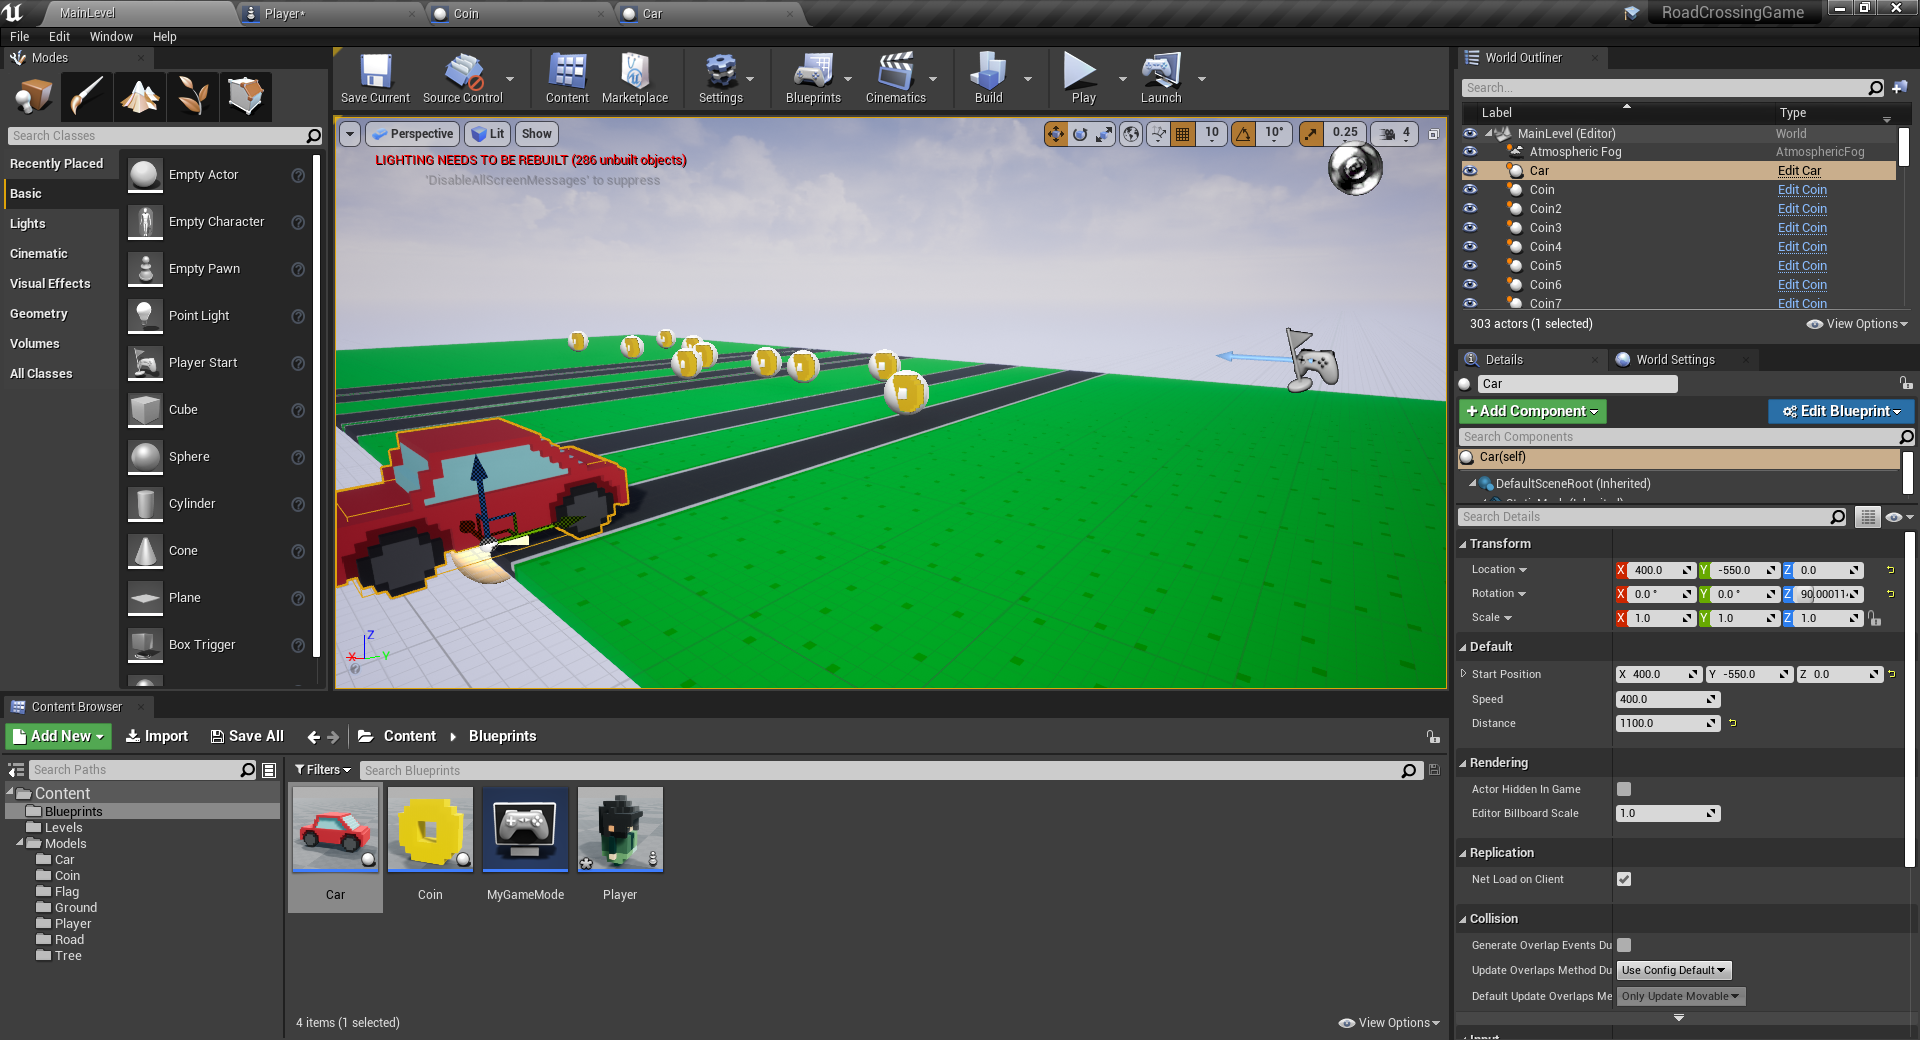
Back in the level editor, let’s place down our first car.
- Set the Location to 400, -550, 0
- Set the Rotation to 0, 0, 90
- Set the Start Position to 400, -550, 0
- Set the Distance to 1100
Now if you press play, you should see the car move down the road, then reset its position once it reaches the end.
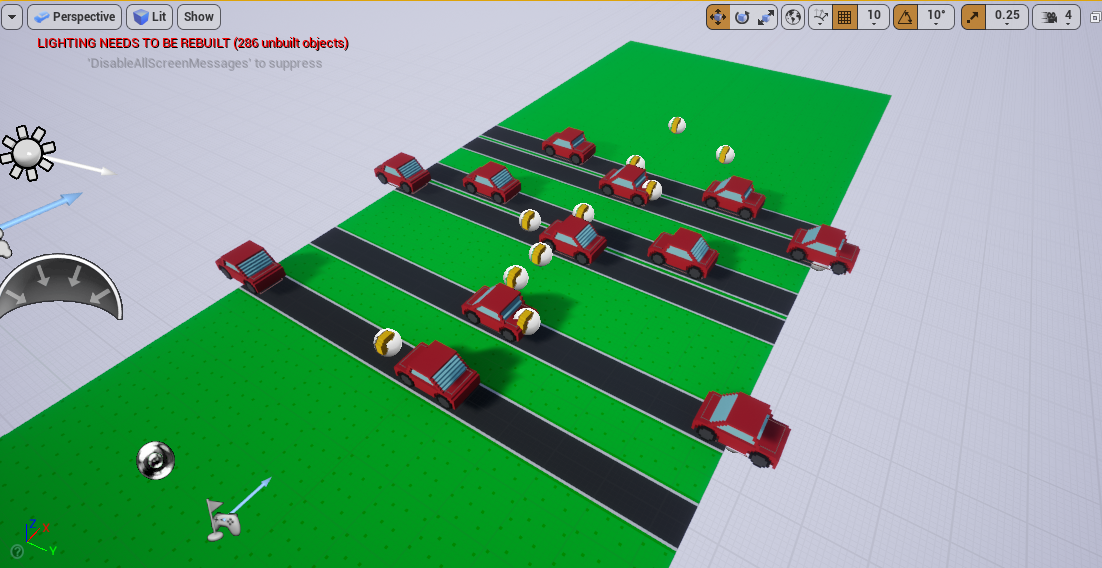
Go ahead and create many more cars to fill in the roads.
Game UI
Now we’re going to create some UI for the game. We’re going to have two elements. A win screen and a score text so the player can see their current score. In the Blueprints folder, right click and select User Interface > Widget Blueprint. Call it GameUI. Double-click to open the UI editor window.
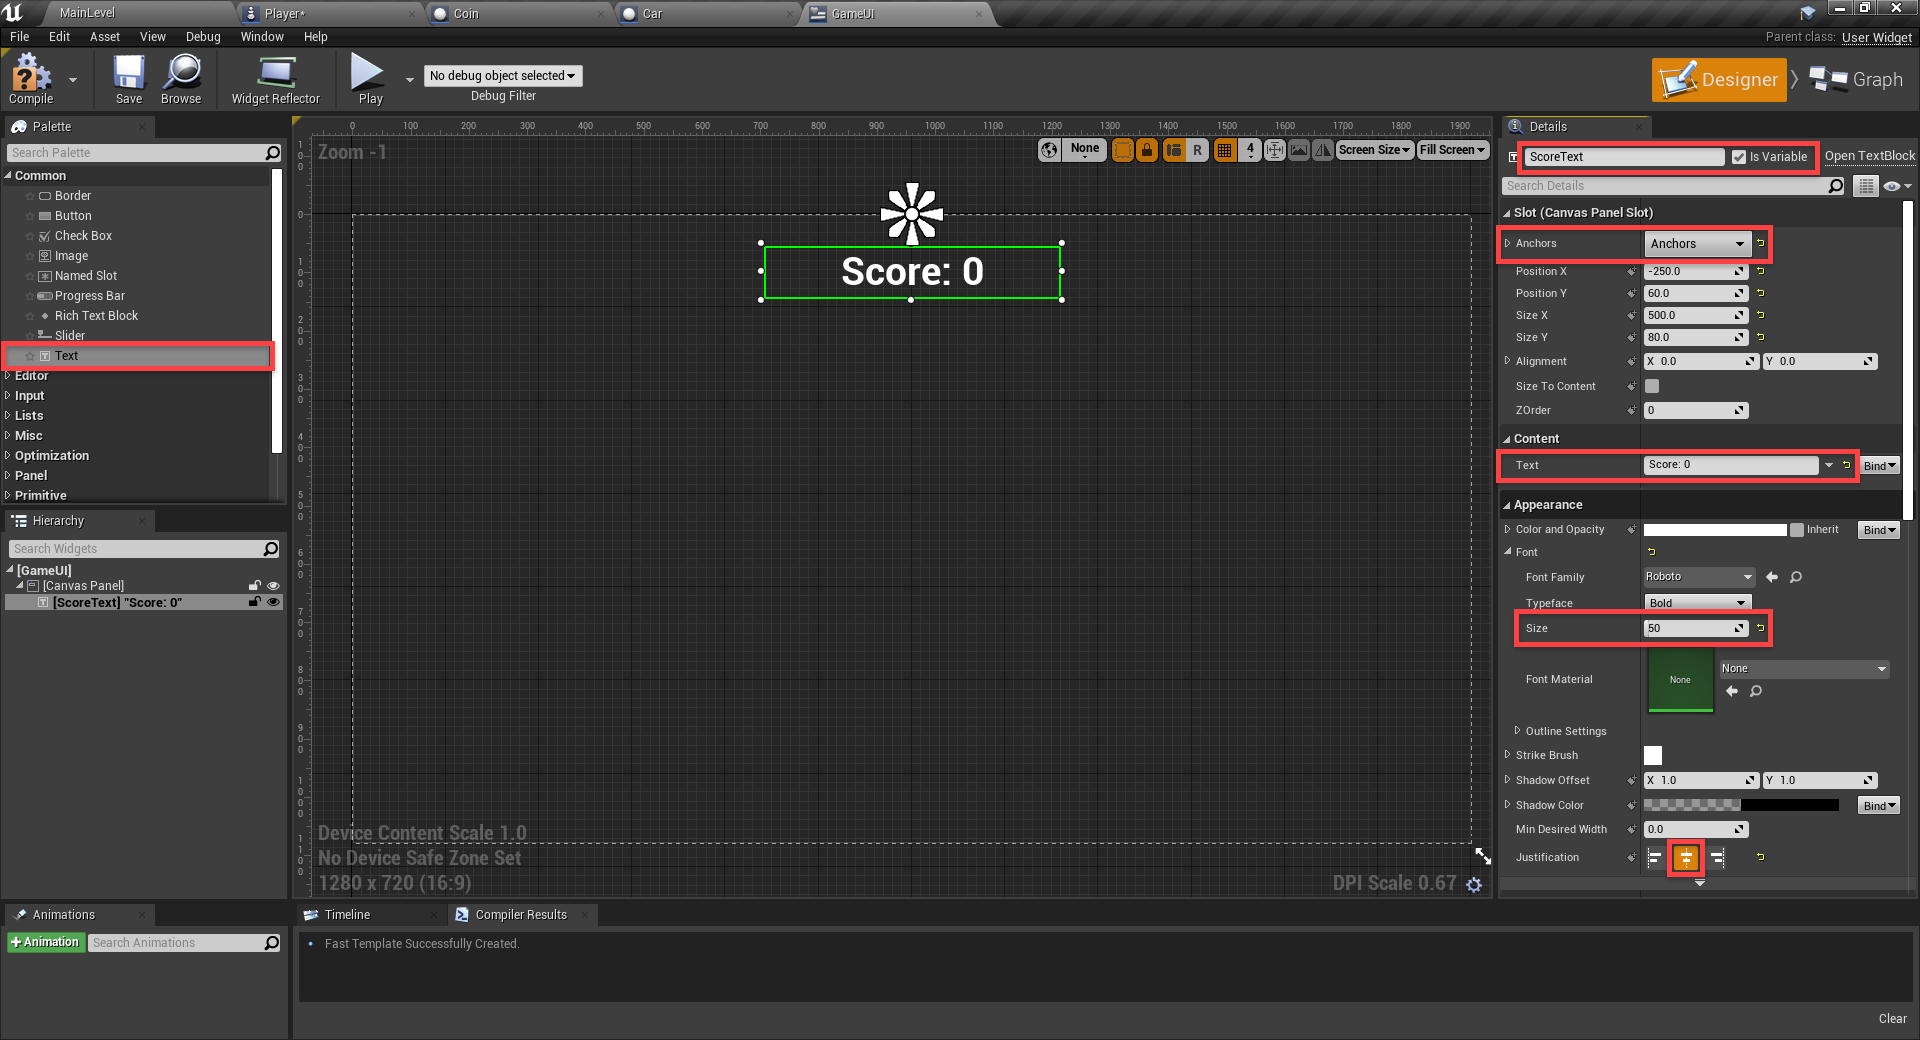
First, drag in a new Text component.
- Set the Name to ScoreText
- Enable Is Variable
- Set the Anchors to Top-Center
- Set the Position X to -250
- Set the Position Y to 60
- Set the Size X to 500
- Set the Size Y to 80
- Set the Text to Score: 0
- Set the Size to 50
- Set the Justification to Center
Next, we want to create the win screen. Drag in a canvas panel component. This will be the contents of the win screen. Populate it with a header text and button to restart the game. Make sure that the canvas panel has Is Variable enabled.
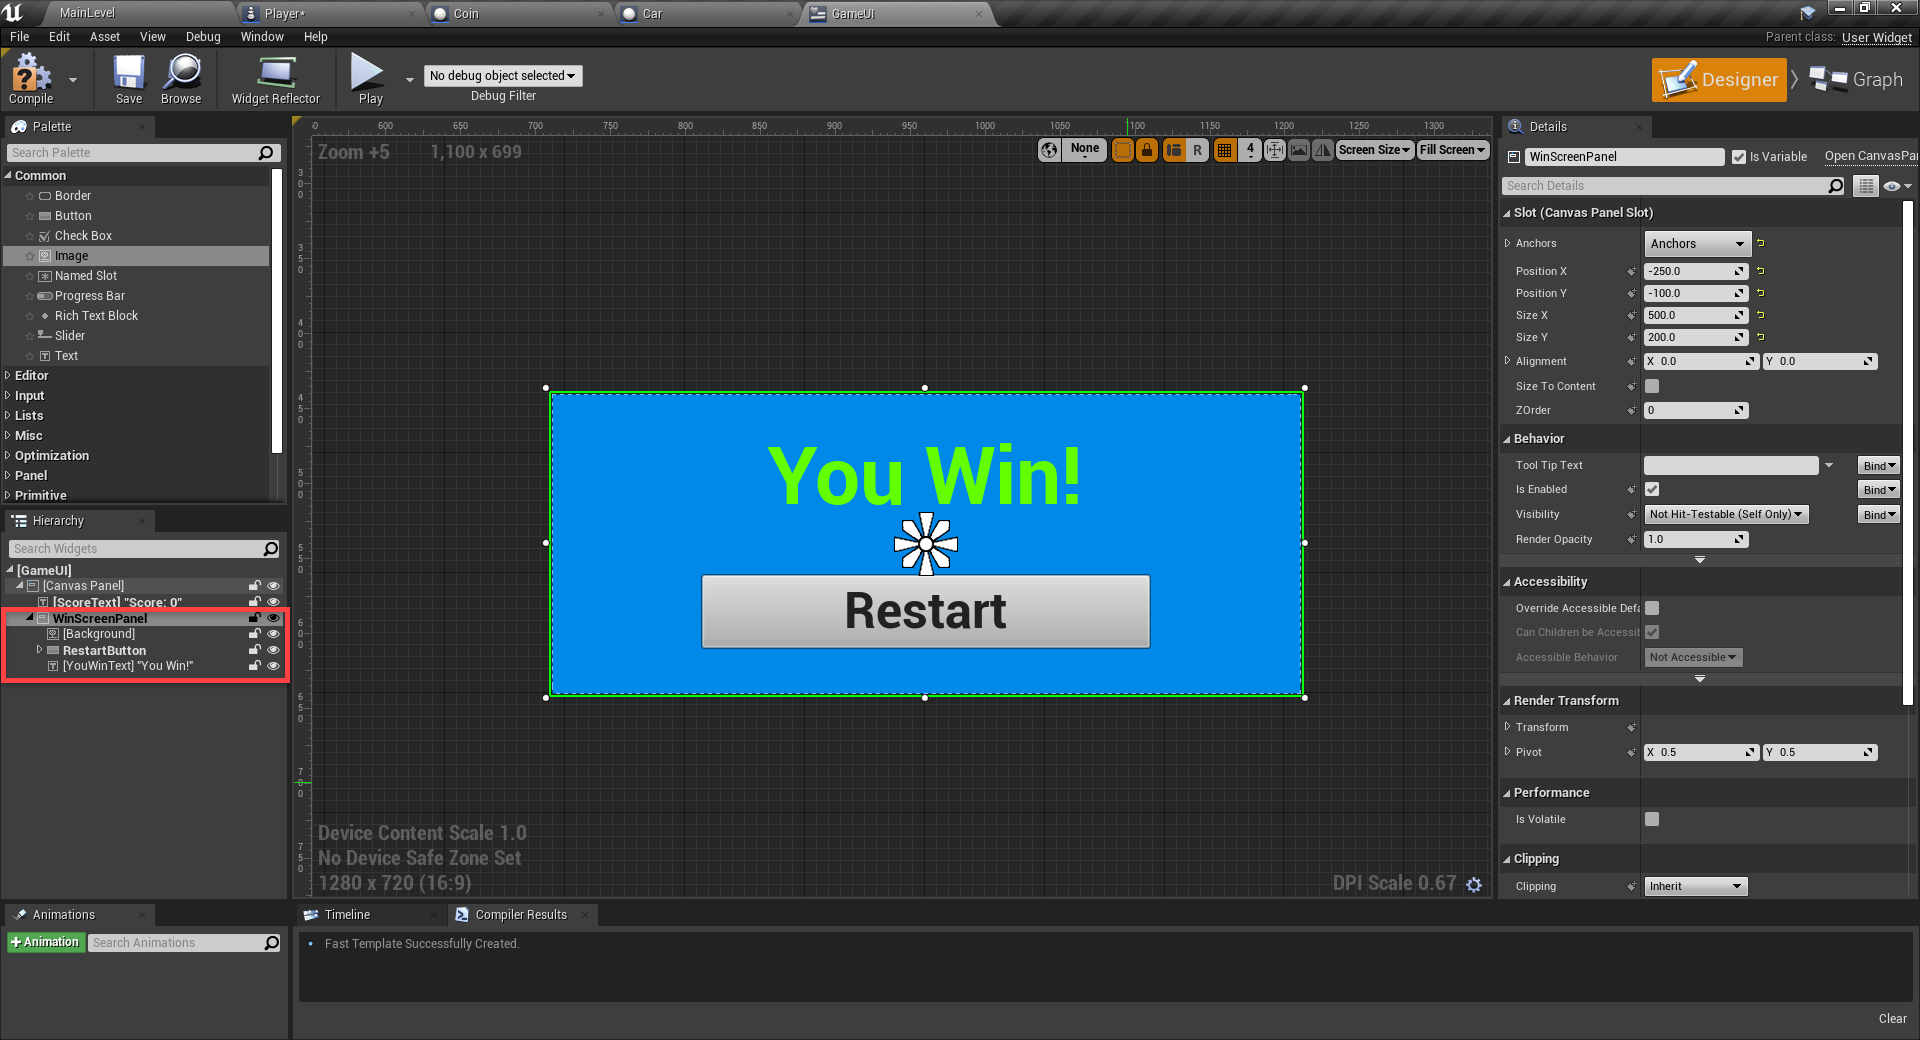
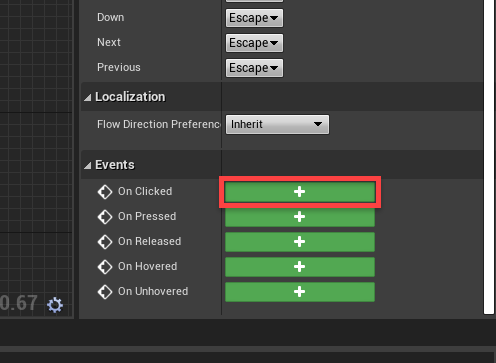
We then want to select our restart button, and in the Details panel create an On Clicked event.
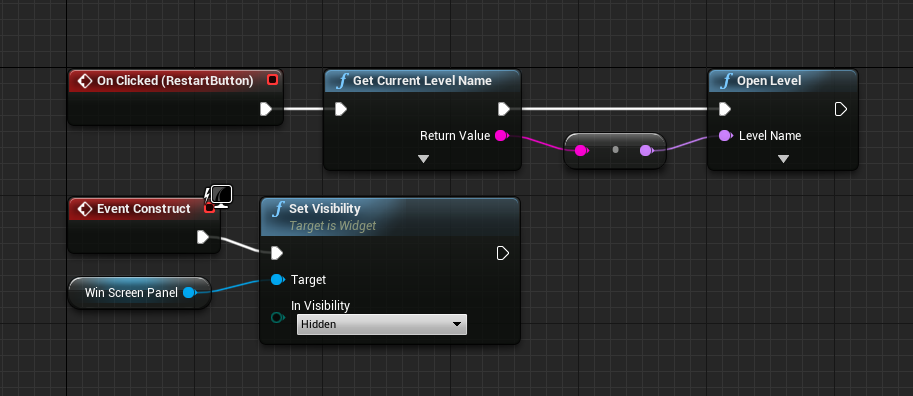
This will create an OnClicked node in the graph. All we want to do with this, is when triggered – restart the current level. Also, we’ll add the EventConstruct node which gets called when the UI is created. All we’re doing here, is disabling the win screen panel.
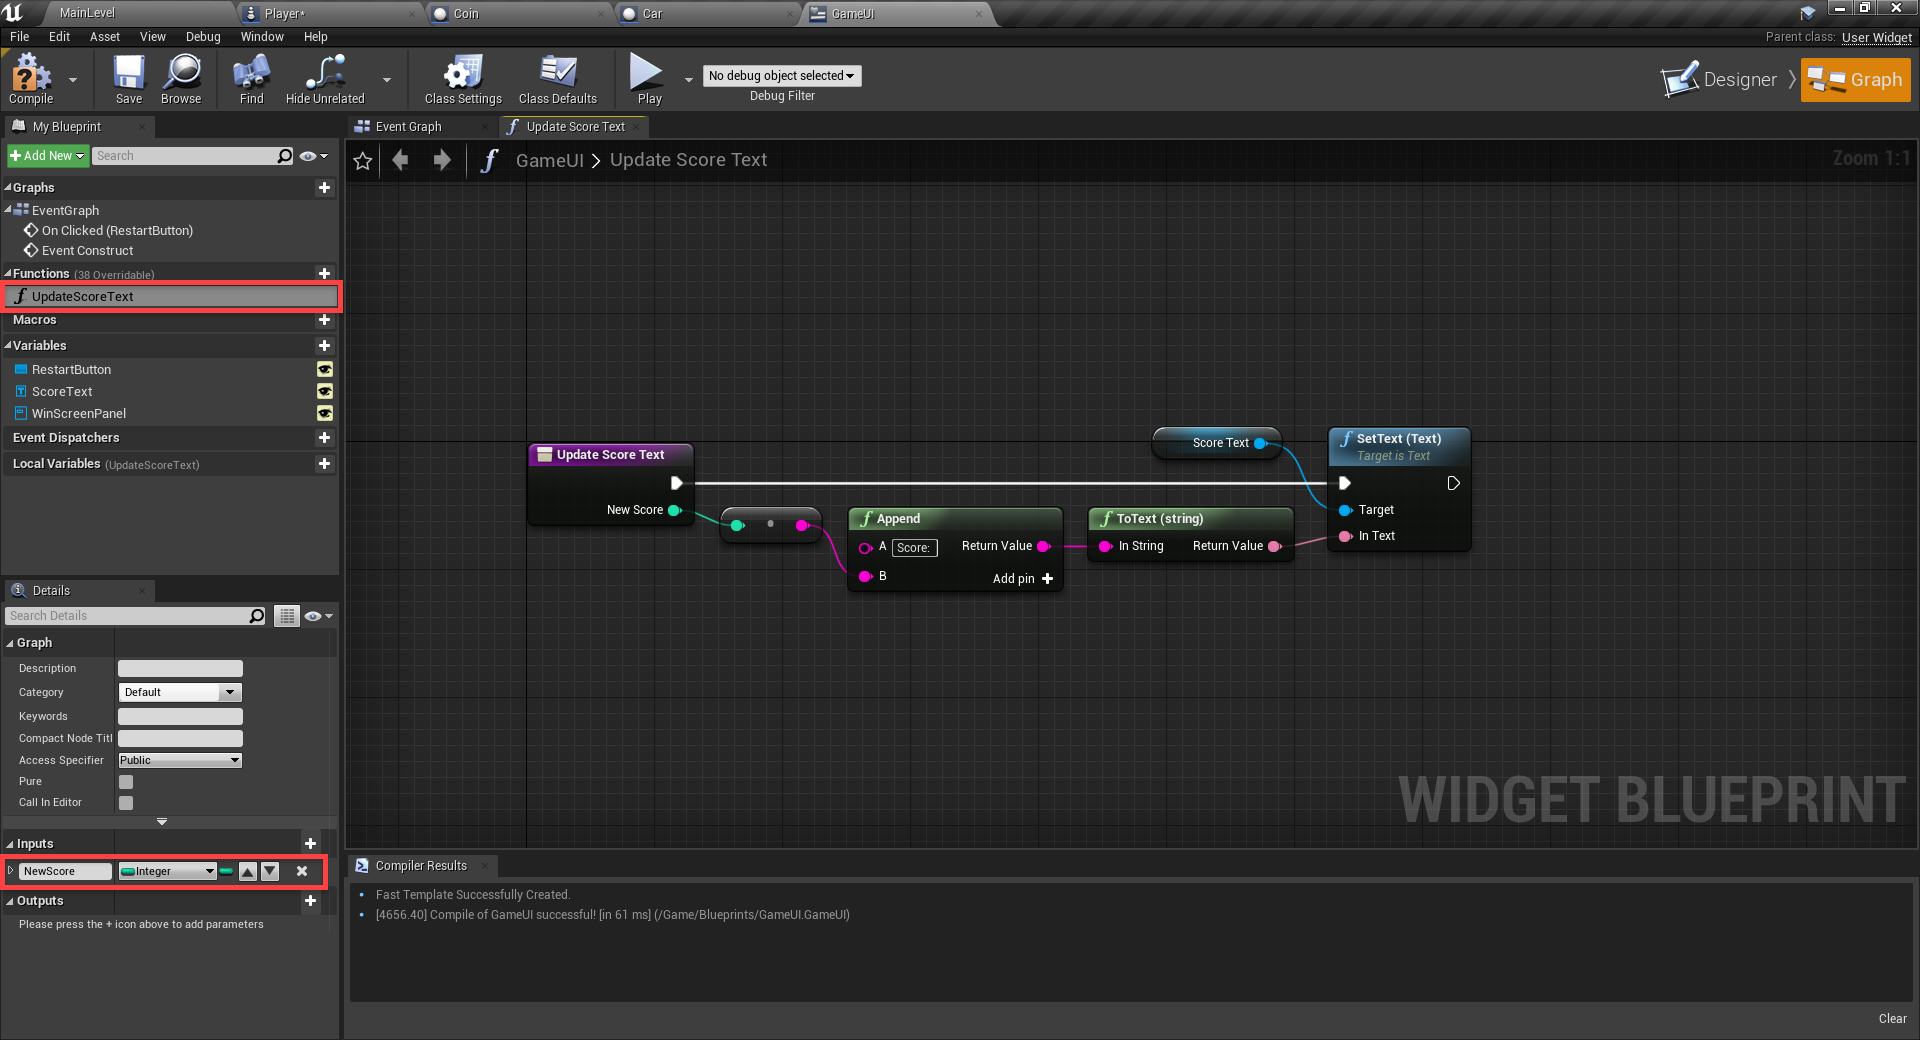
Next, we’ll create the UpdateScoreText function. This gets called when we collect a coin. Add an input of type Integer and call it NewScore.
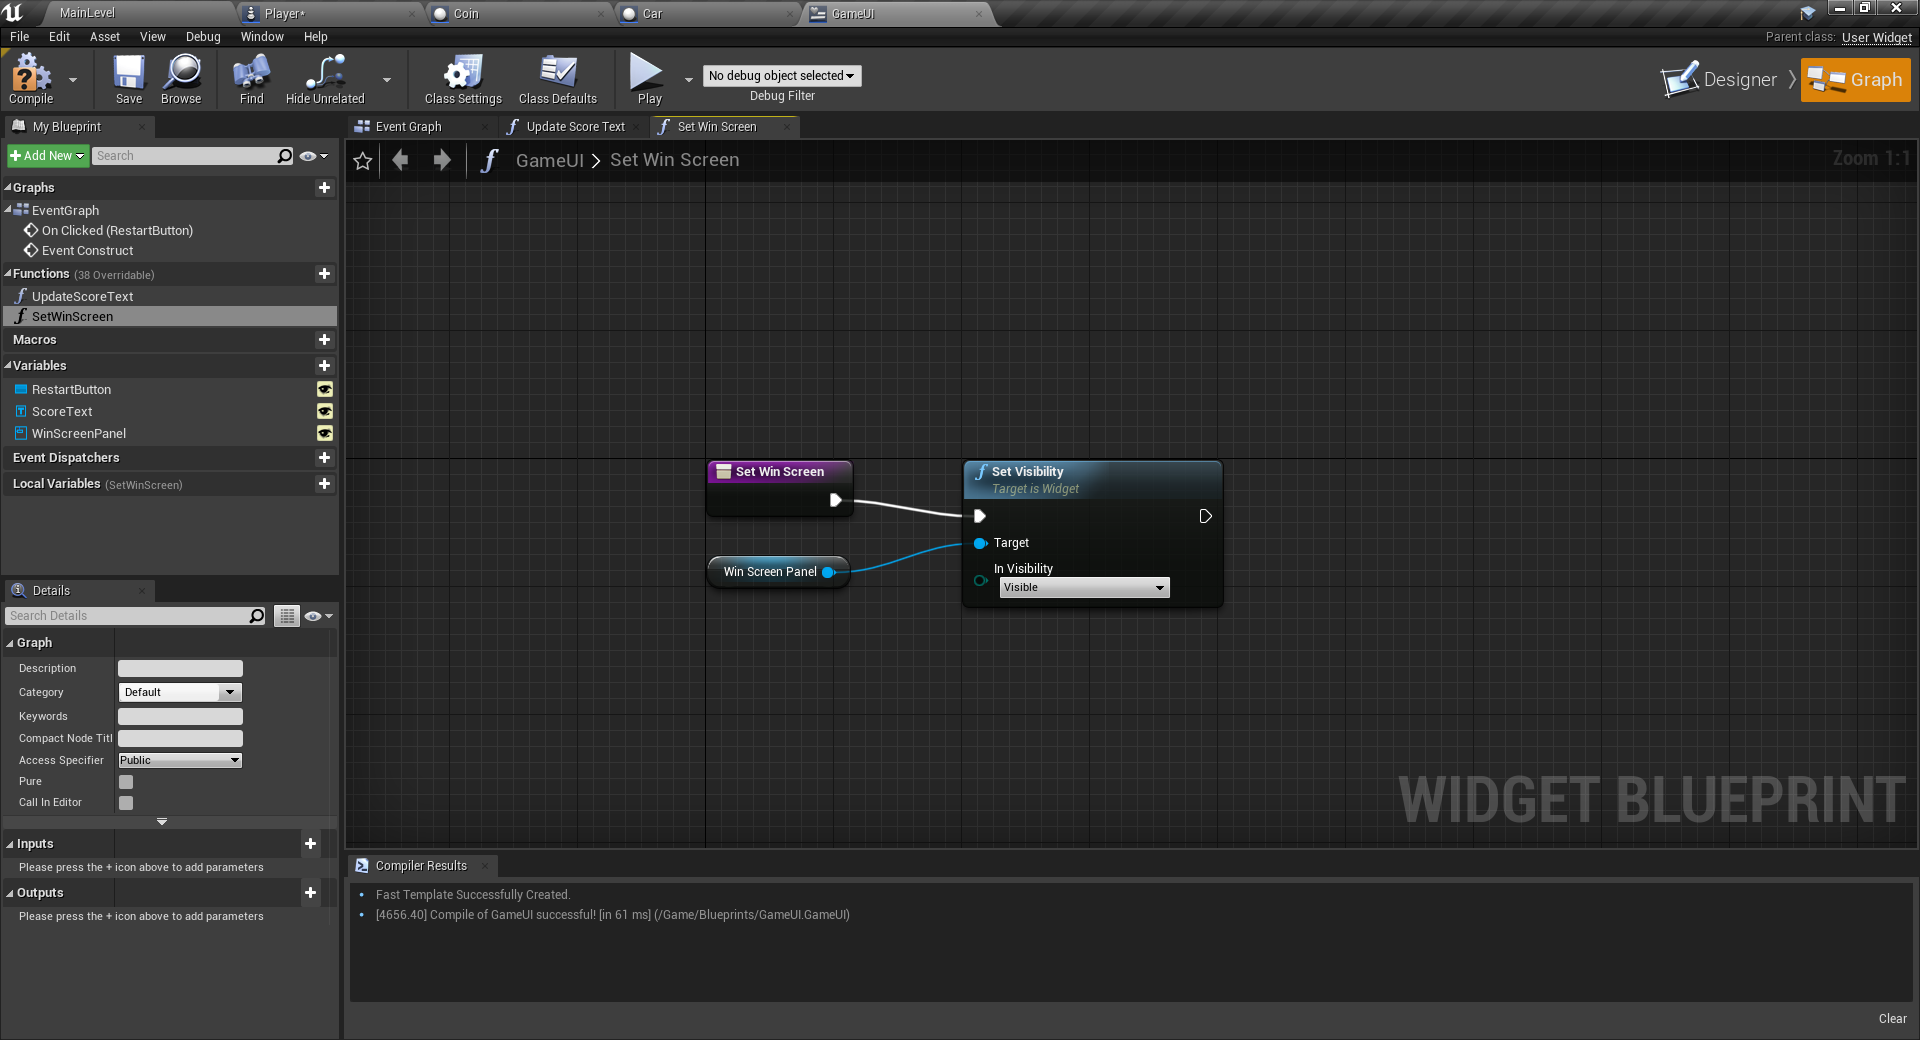
Then we have the SetWinScreen function which just sets the win screen panel to be visible.
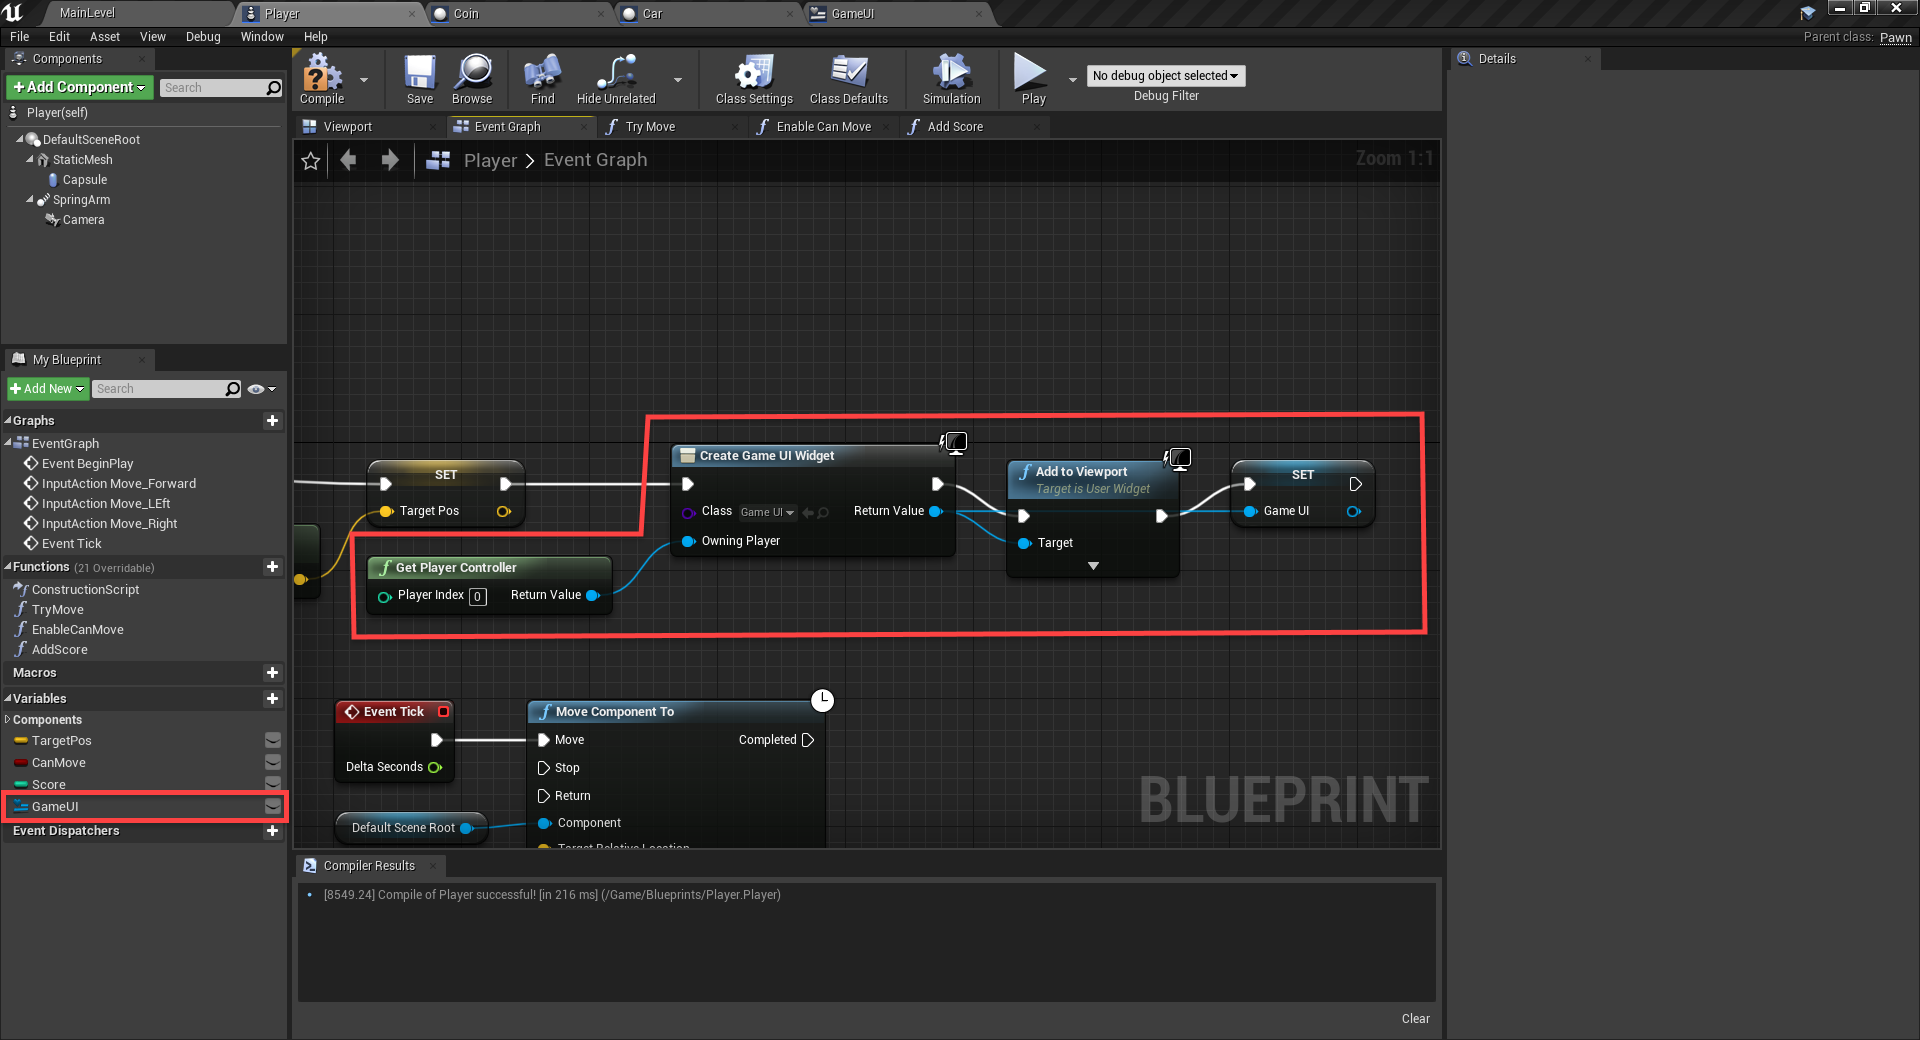
Back in the Player blueprint, we can initialize the UI. First, create a new variable of type GameUI called GameUI.
Then continuing on the EventBeginPlay flow, create and initialize the UI widget.
So inside of the AddScore function, we can update the UI.

If you press play, you’ll see it in action!
End Goal
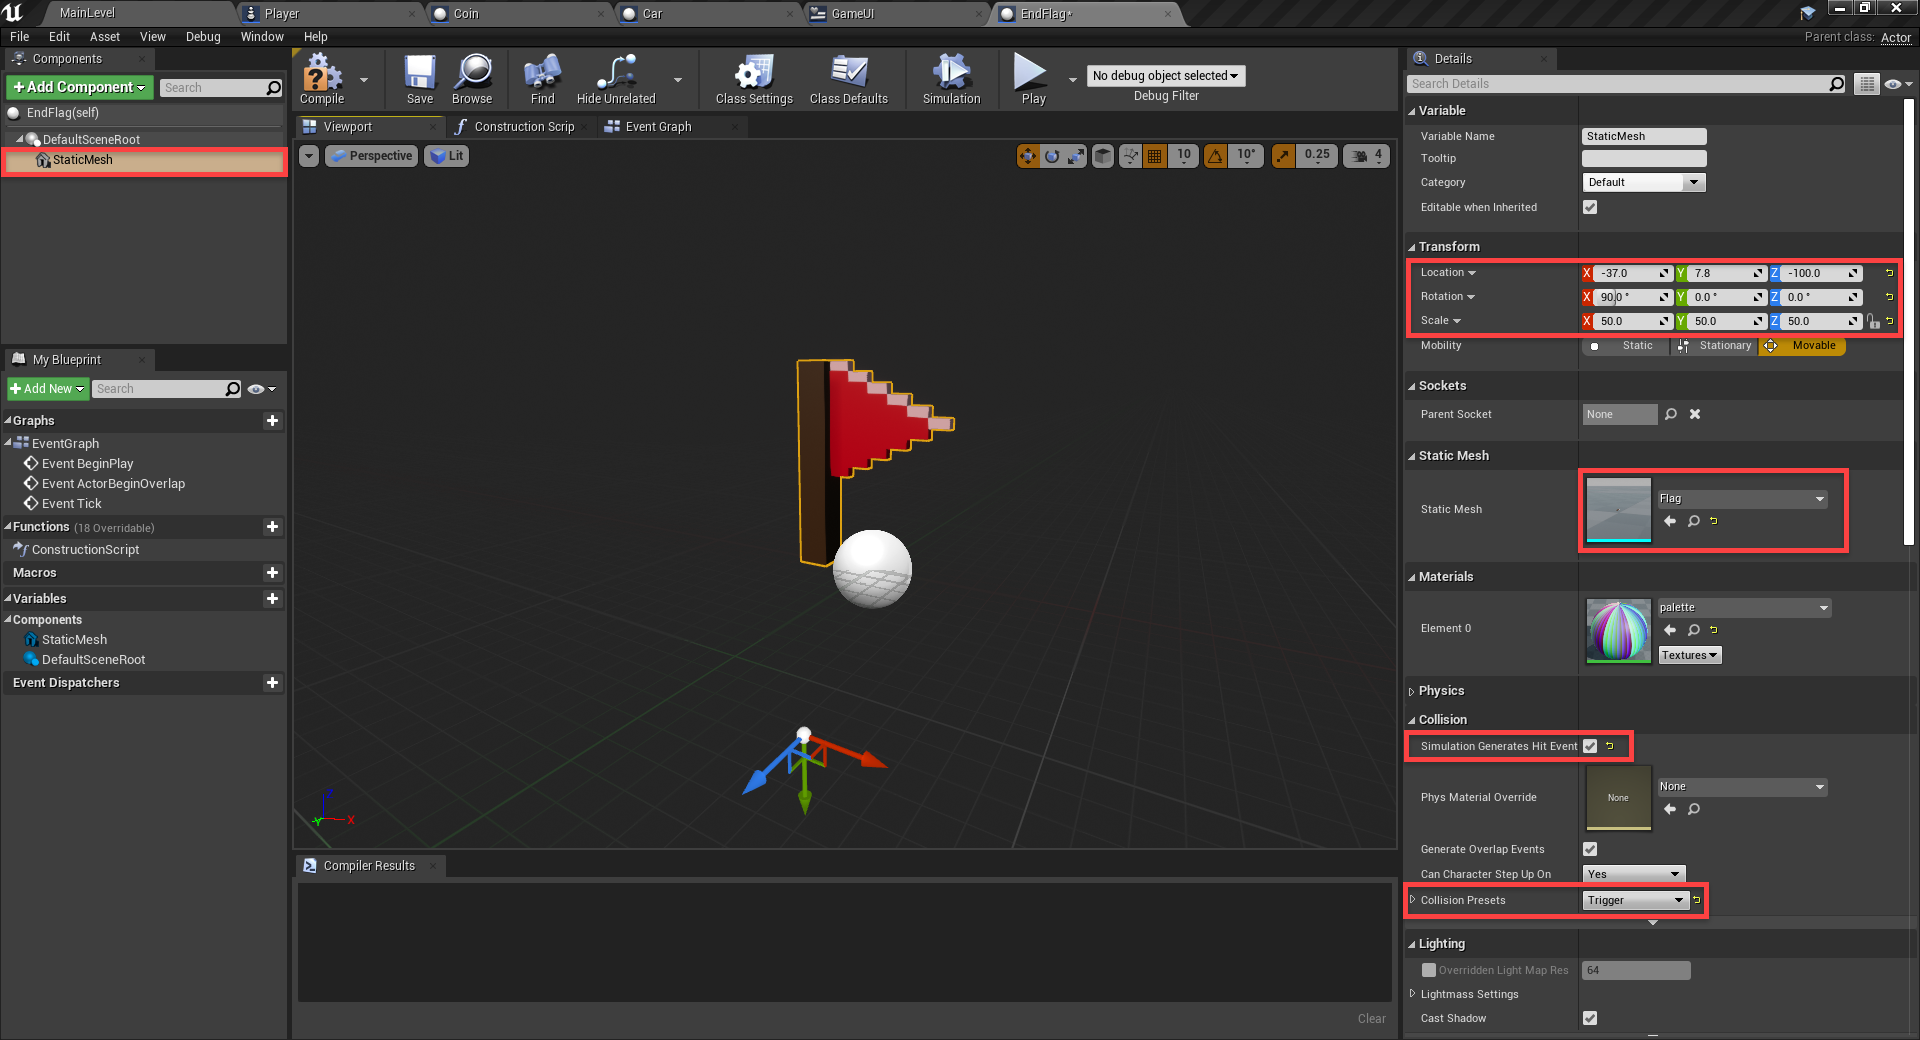
To finish the project off, we’re going to create a flag at the end of the level that the player needs to reach. This will enable the win screen, prompting them to restart the game. So in the Blueprints folder, create a new blueprint of type Actor called EndFlag.
All we’re going to do component wise is add in a static mesh.
- Set the Static Mesh to Flag
- Set the Location to -37.0, 7.8, -100.0
- Set the Rotation to 90, 0, 0
- Set the Scale to 50, 50, 50
- Enable Simulation Generates Hit Events
- Set the Collision Presets to Trigger
Over in the Event Graph, we just want to check when the flag has collided with something. If it’s the player, enable the win screen. Also enable the cursor.

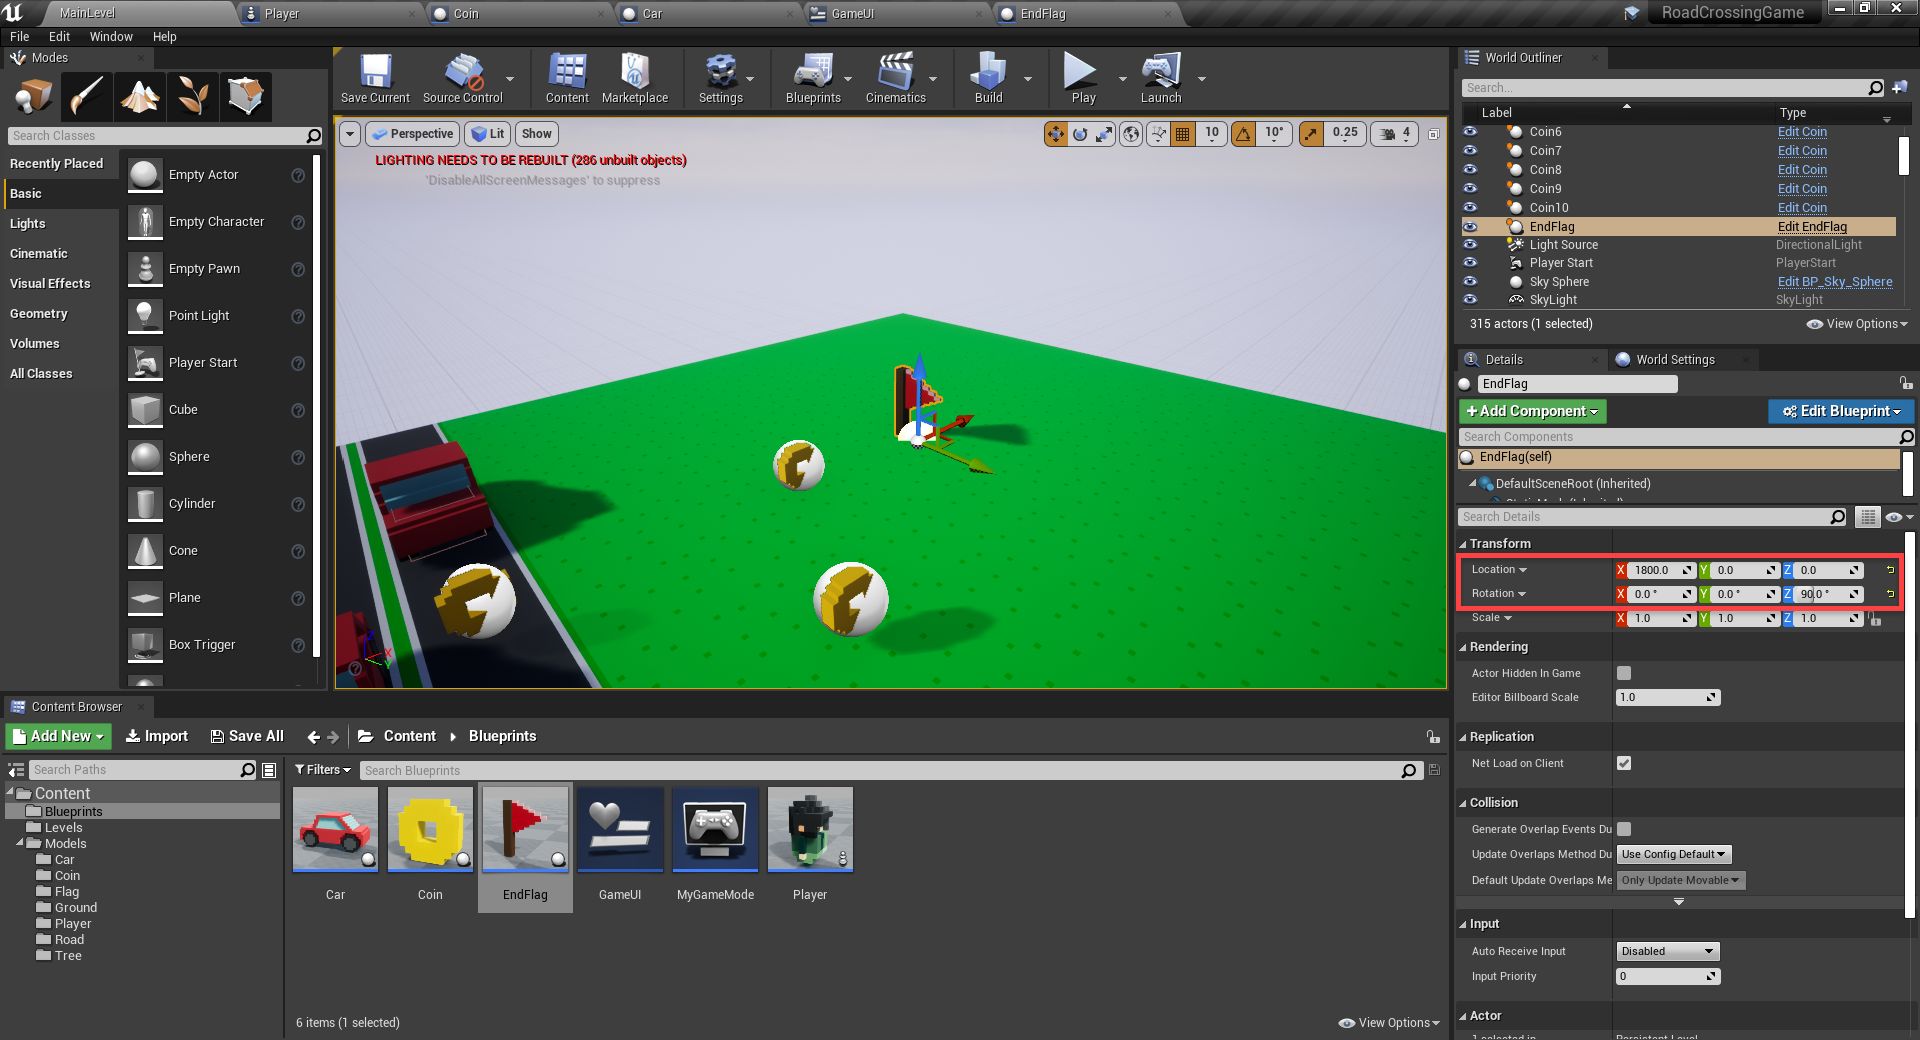
Back in the level editor, let’s drag in the flag and position it at the end of the level.
- Set the Location to 1800, 0, 0
- Set the Rotation to 0, 0, 90
Conclusion
There you have it! You now have a complete road-crossing, arcade game made with Unreal Engine! Over the course of this tutorial, we’ve learned to set up everything from coin collection to the constant flow of forward-moving cars to create obstacles for the player. All of this was accomplished with Unreal Engine’s Blueprinting system, which handles all our game logic – including win conditions!
From here, you could expand the game by adding in more obstacles, collectibles, or even more unique levels. You can also use these fundamentals to create an entirely new game with your new-found knowledge. Whatever you decide, good luck, and we hope you’ve learned a lot about building games with Unreal Engine!

