You can access the full course here: Publishing and Optimizing Mobile Games
Unity Device Simulator Tutorial
In this lesson, we’re going to be looking at the Device Simulator inside of Unity.
Device Simulator is a package you can install as an alternative to the default Game view. It allows us to get a preview of how an app will look at various different aspect ratios and resolutions.
Installing Device Simulator
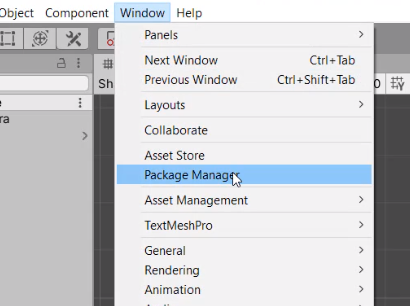
To install Device Simulator, we can go to Window > Package Manager:
And inside of the Package Manager, we can click on Packages: In Project and select ‘Unity Registry’.
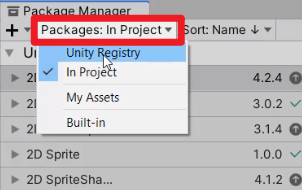
Then select Device Simulator and click on Install.
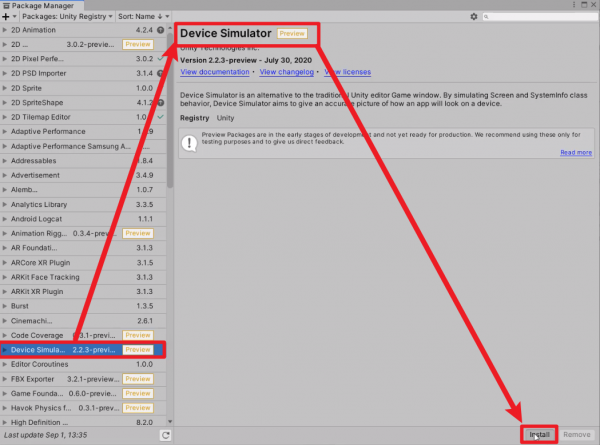
If the Device Manager doesn’t appear in the list, it may be hidden as a Preview Package.
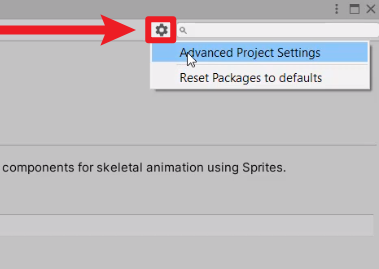
To enable viewing preview packages, click on the Gear icon at the top right, and select Advanced Project Settings.
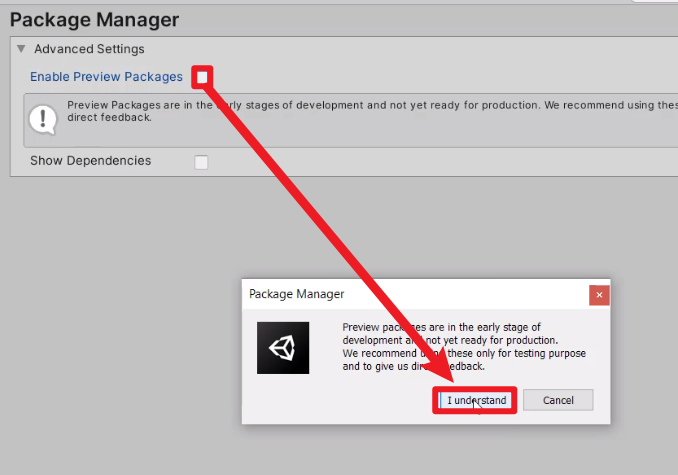
Click on Enable Preview Packages, and click on ‘I understand’.
Configuring Device Simulator
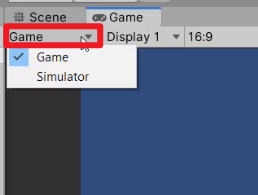
After installing, you will be able to click on the dropdown that says Game, and then select Simulator.
The screen will then switch over to the Simulator View, where we can change the device that we want to look through.
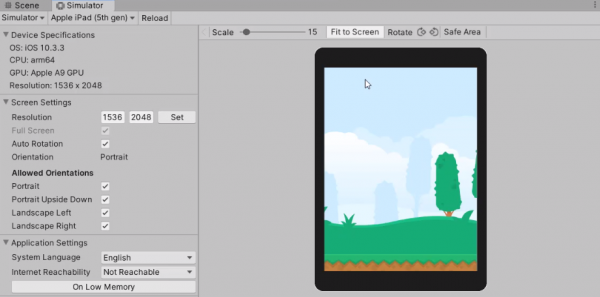
When you click on the default device– Apple iPad (5th Gen), you will see there’s a large list of various different mobile devices.
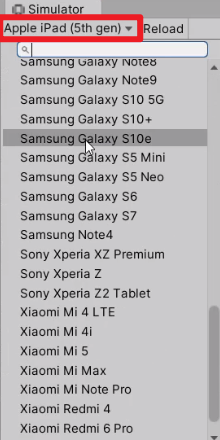
This is a great way of checking how our UIs will look on a mobile device, without having to actually build it and testing it out. Note that some UI elements may be cut off by any of the bevels or notches.
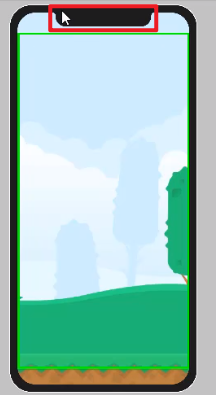
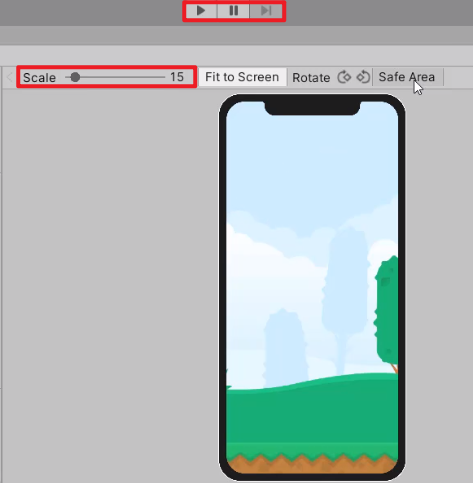
You can click the Safe Area to toggle the area that is recommended for your UI placement.
![]()
To test the app, just press the Play button and play it in the view, just like our normal game view. You can also zoom in/out using the Scale bar.
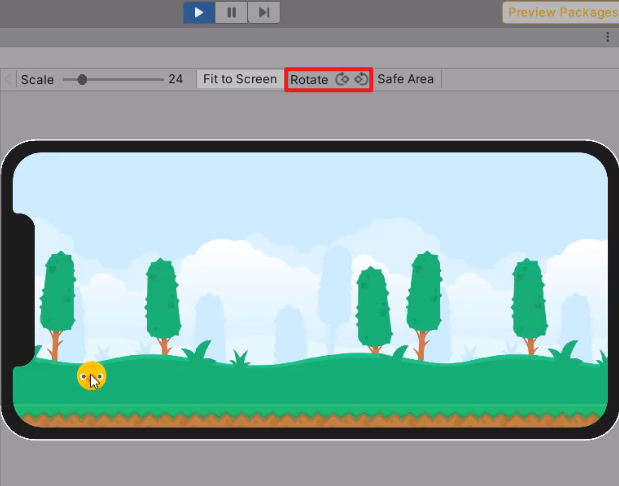
You can also rotate the screen by using these buttons.
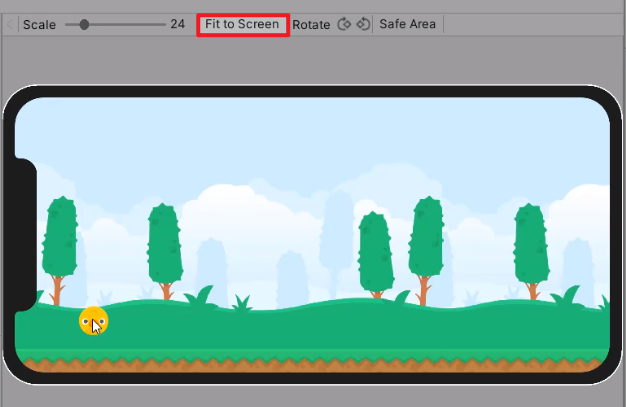
Fit to Screen resets the scale and as large as it can with the phone on the screen.
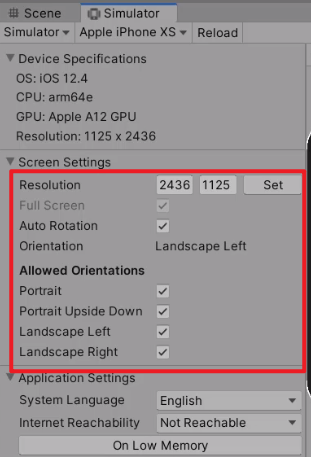
We can also change the Allowed Orientations, Resolution, and Auto-rotation.
Transcript
When developing new gaming Unity, generally a lot of the time you want to see how it looks on a specific device. If you have an iPhone and Android or any sort of mobile device that may have bezel, curved edges, or a weird aspect ratio you definitely wanna test it out to see if the UI fits.
If your game works, just to see generally how it is and inside Unity, by default in the game window, we actually do have the ability to modify both the aspect ratio and the resolution. Right now I’m rendering this game here that I’m working on at one 1920 by 1080, so 1080 resolution. And we can of course change it to five by four aspect ratio 16 by nine and various other things. You can click on the little plus icon down here to add in your own resolution or aspect ratio.
But when it comes down to mobile devices they are very different from computer screens. With mobile devices, they have their very own bezel, they have notches for the cameras and really it can be hard to develop around that. So what we can do inside of Unity here is use something known as the Device Simulator. And the Device Simulator allows us to basically simulate our game view if it was to be played on a specific mobile device.
So, here is how he can get the device simulator. First, we need to go up to the window here and go Package Manager. Now with device simulator is a package inside Unity which we can download. And as at the time of recording this, it is a preview package which means that we need to enable the ability to see and download preview packages.
So in the Package Manager, click at the top here and make sure you are at the Unity Registry, which basically just displays a list of all the various different packages from Unity which you can install and click on this gear icon here at the top right, go Advanced Project Settings and in here make sure that you have Enable Preview Packages ticked depending on the time that you are watching this course, the devices simulated could be out of preview and be a full official build but right now it is still preview.
So we’re gonna scroll down until we find the device simulator right here and we just wanna click on the install and this is going to begin installing this package into our Unity project. Okay, and when that is complete, we can close out of the package manager right here.
And if we go over to our game window, you’ll see that something has changed. At the top left, we now have a new drop down, which allows us to select Game or Simulator. Game is just the default game view that we have had Unity so far and simulator is gonna switch us out to the device simulator. So let’s click that and see what happens and straightaway you’ll see there is a lot of information on the left-hand side and the center panel changed to display our game on what seems to be an iPad.
So, pretty much here on the left hand side we have a specification about the device that we are testing it on. We can see the resolution, we can see some of the hardware details, we can see the specific resolution here that we can also then modify as well as enabling and disabling Auto Rotation, the Allowed Orientations. So you can really fine-tune how you want your game to be presented on these specific devices. Now on the right hand side, we can change the scale by zooming in and out if you do want to have a big view and you can use the scroll bars on the sides to actually navigate around.
We can click fit to screen to basically fit the device to our current simulated screen here, we can rotate left and right to get a different angle here and enabling safe area here shows us the bounds where it is safe to place UI.
Now, since this iPad here has pretty much a square or rectangular resolution aspect ratio with no bezel or with no notches, the safe area pretty much is the entire contents of the screen. But if we change the device, and to do that we can go up to the top left here, click on where it says Apple iPad and we’ll see there is a large list of various different mobile devices.
Now let’s pick a device that does have some bezel and notches, and for that we are going to pick the iPhone X S right here. And as you can see, it has the notch at the top here set up for us as well as the bezeled edges. Now, if we click Safe Area you’ll see that the safe area has now changed. We have the top bar, which is now below the notch and at the bottom, it’s basically making it so that this rectangle is not clipping into any notches or corner bezel, okay. And when developing your UI, try and fit it inside of these bounds right here.
So, what we can then do is rotate it sideways like so and just like inside Unity, we can press play and test out our game. As you can see here, I’ve got a little physics puzzle game set up that I’ve created. So we can play a game just as we were before in the normal game window but this time we are playing it on the specific device, we can see the correct resolution, aspect ratio and keeping in mind that bezel, notches, and any other occluding elements that a specific mobile device may have.
So yeah, that’s pretty much the device simulator. A very great if you wanting to test out on various different mobile devices as we are here and of course we can then change it to something such as, let’s just say the hasty, HTC 10, there we go. We’re testing on this new device now, we can change it on the fly. Let’s go to the galaxy S6, there we go. We can then change it to something such as the Sony Xperia Z, and here there you go, and of course as new devices are being released, they will be updated here, so do make sure that if you are using the device simulator that every now and then you check to see if there’s an update available and install that.
So that is the device simulator inside of Unity. Thank you for watching.
Interested in continuing? Check out the full Publishing and Optimizing Mobile Games course, which is part of our Mobile Game Development Mini-Degree.
