Introduction
Welcome back to this tutorial series where we’re building a 3D action RPG from scratch with Godot. In Part 1, we covered a lot of ground with how to make an action RPG with Godot, including:
- Creating the project
- Setting up the environment
- Implementing the third-person player controller
- Building collectible gold coins
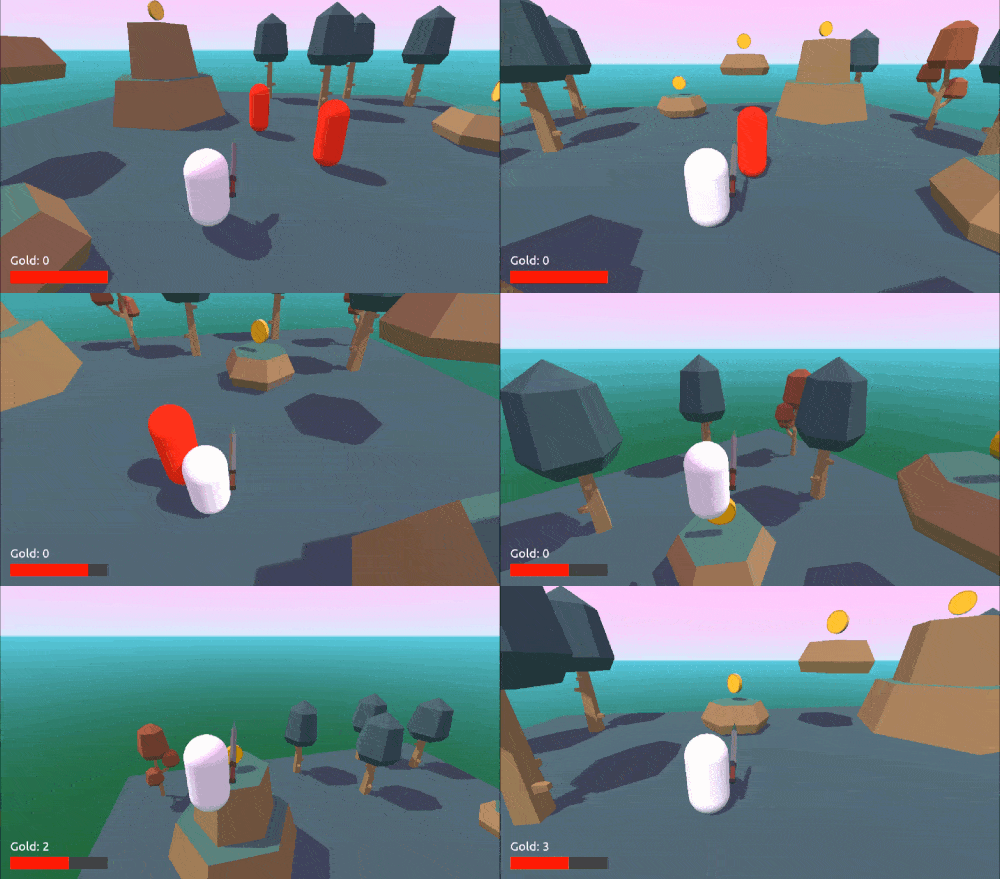
While these elements certainly create a great foundation for our game, we’ll want to add just a bit more to create that true, action RPG feel. Thus, in Part 2, we’ll be finishing our project by adding enemies and combat mechanics – including a nifty animation for our sword. To boot, we’ll also dive into the Godot UI so that you can set up a simple way to track the player’s health and gold.
We hope you’re ready to dive in and create this impressive piece for your portfolio!
Project Files
In this course, we’re going to be using a few models and a font to make the game look nice. You can, of course, choose to use your own, but we’re going to be designing the game with these specific ones in mind. The models are from kenney.nl, a good resource for public-domain game assets. Then we’re getting our font from Google Fonts.
Creating the Enemy
Let’s now create the enemy. They will chase after the player and damage them at a specified distance. To begin, let’s create a new scene with a root node of KinematicBody.
- Rename the node to Enemy
- Save the scene
- As a child, create a new MeshInstance node (rename it to Mesh)
- Set the Mesh to CapsuleShape
- Set the Radius to 0.5
- Set the Mid Height to 1.5
- Set the Transform > Translation to 0, 1.25, 0
- Set the Transform > Rotation Degrees to 90, 0, 0
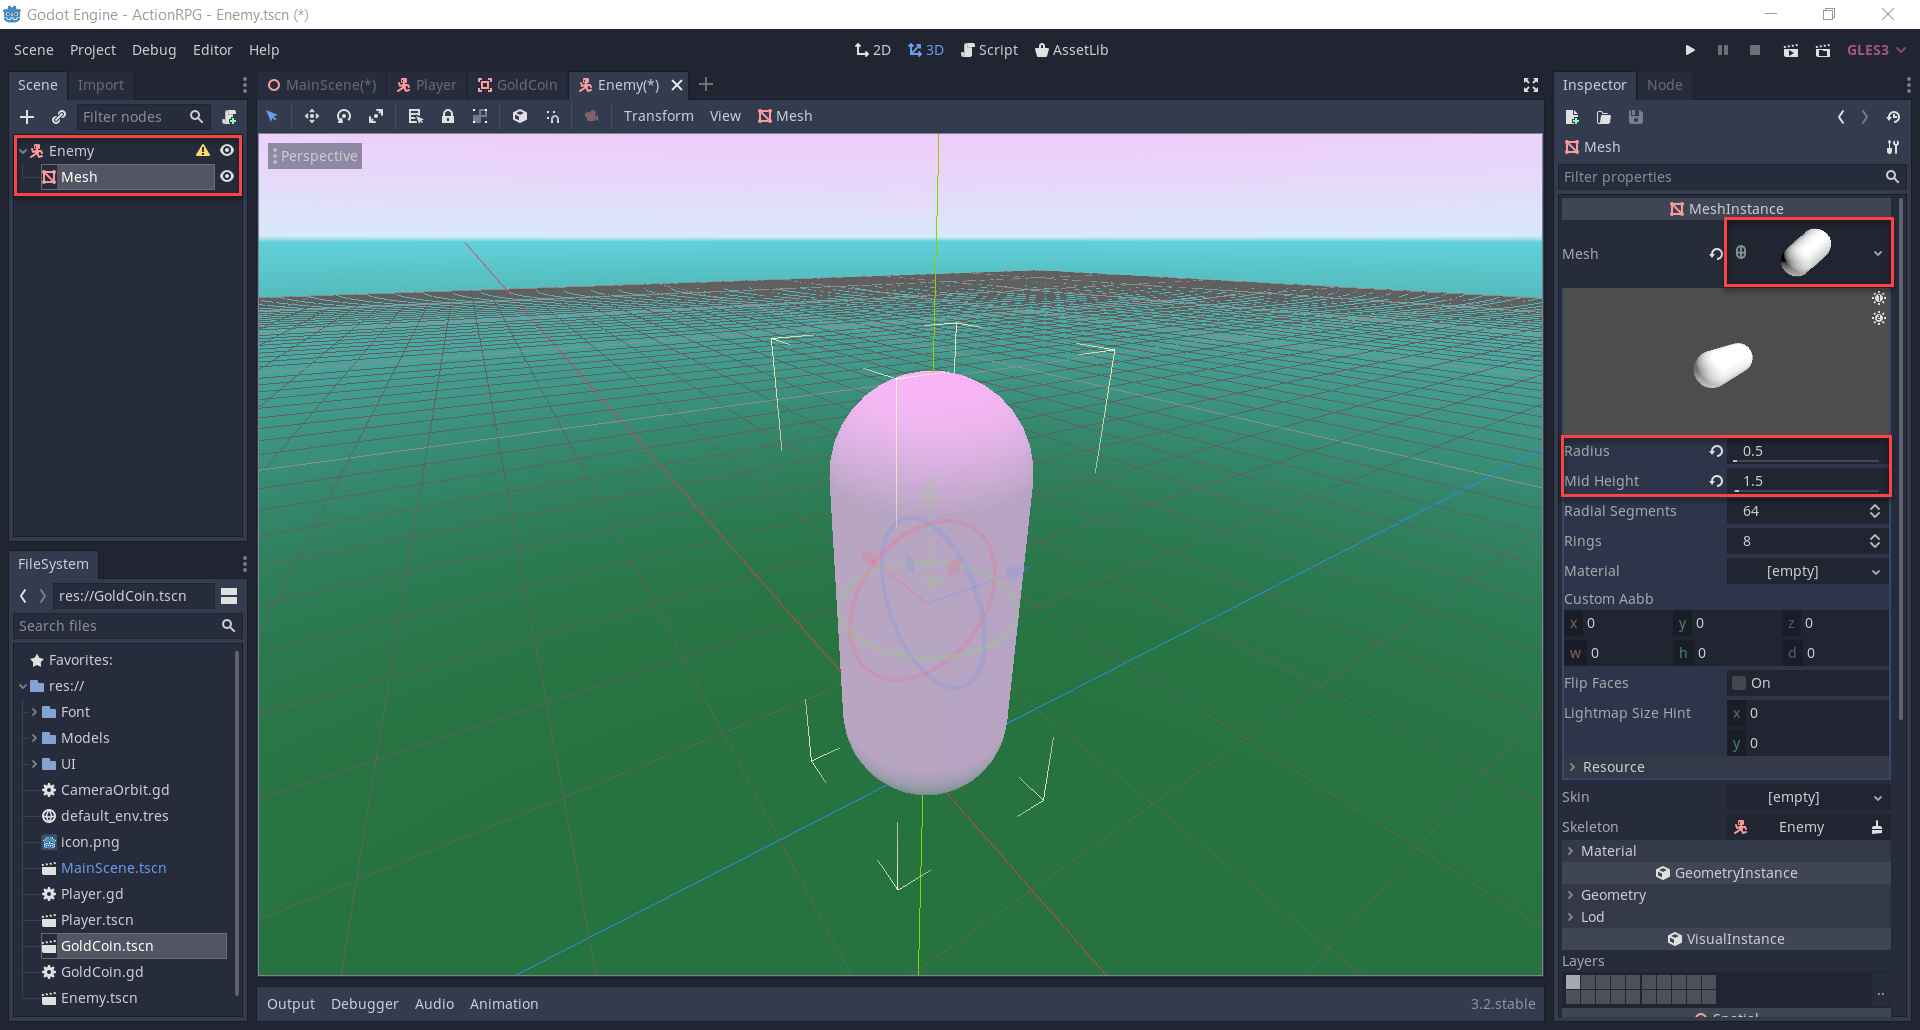
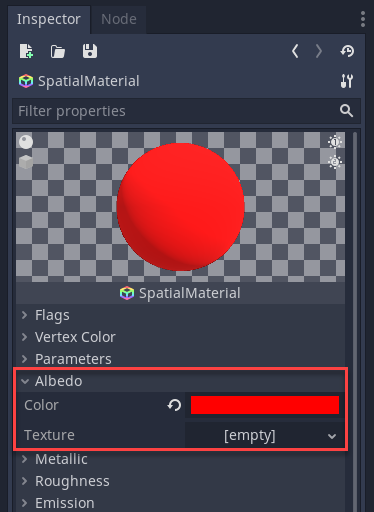
Let’s differ this capsule from our player. Just under where we set the radius. we can create a new SpatialMaterial. Click on that to open up the material properties.
- Set the Albedo > Color to red
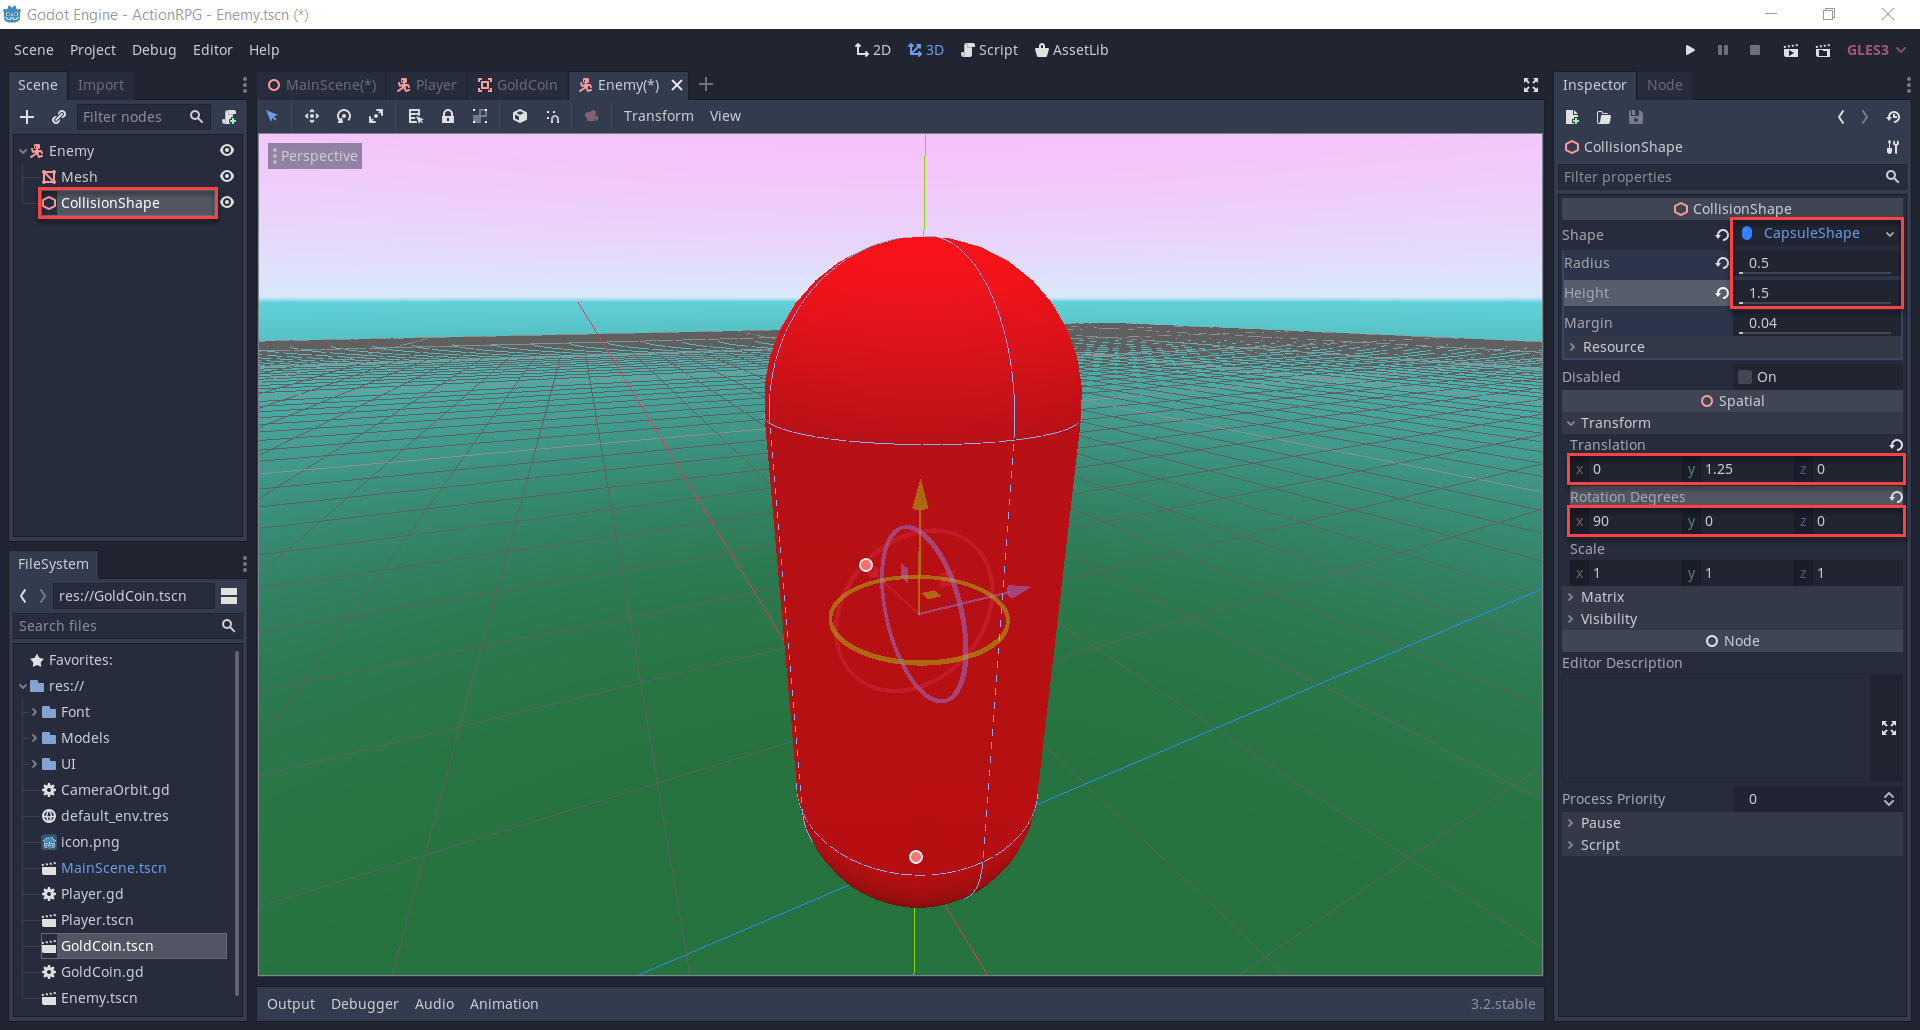
Next, we can create a CollisionShape node with the same properties as the mesh.
- Set the Shape to CapsuleShape
- Set the Radius to 0.5
- Set the Height to 1.5
- Set the Translation to 0, 1.25, 0
- Set the Rotation Degrees to 90, 0, 0
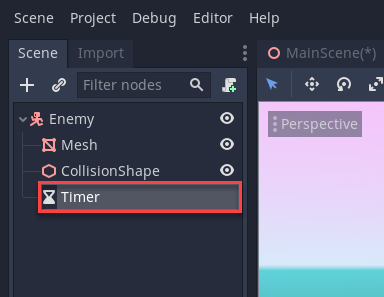
Finally, we’re going to create a Timer node which can send out a signal every certain amount of seconds. This will be setup in-script.
Scripting the Enemy
Now, we’re going to create the enemy script. Select the Enemy node and create a new script called Enemy. First, we want to enter in our variables.
# stats
var curHp : int = 3
var maxHp : int = 3

# attacking
var damage : int = 1
var attackDist : float = 1.5
var attackRate : float = 1.0

# physics
var moveSpeed : float = 2.5

# vectors
var vel : Vector3 = Vector3()

# components
onready var timer = get_node("Timer")
onready var player = get_node("/root/MainScene/Player")
First, we’re going to create the _ready function which gets called once the node is initialized. Inside of here, we’re going to set the timer wait time and start it.
func _ready ():

    # set the timer wait time
    timer.wait_time = attackRate
    timer.start()
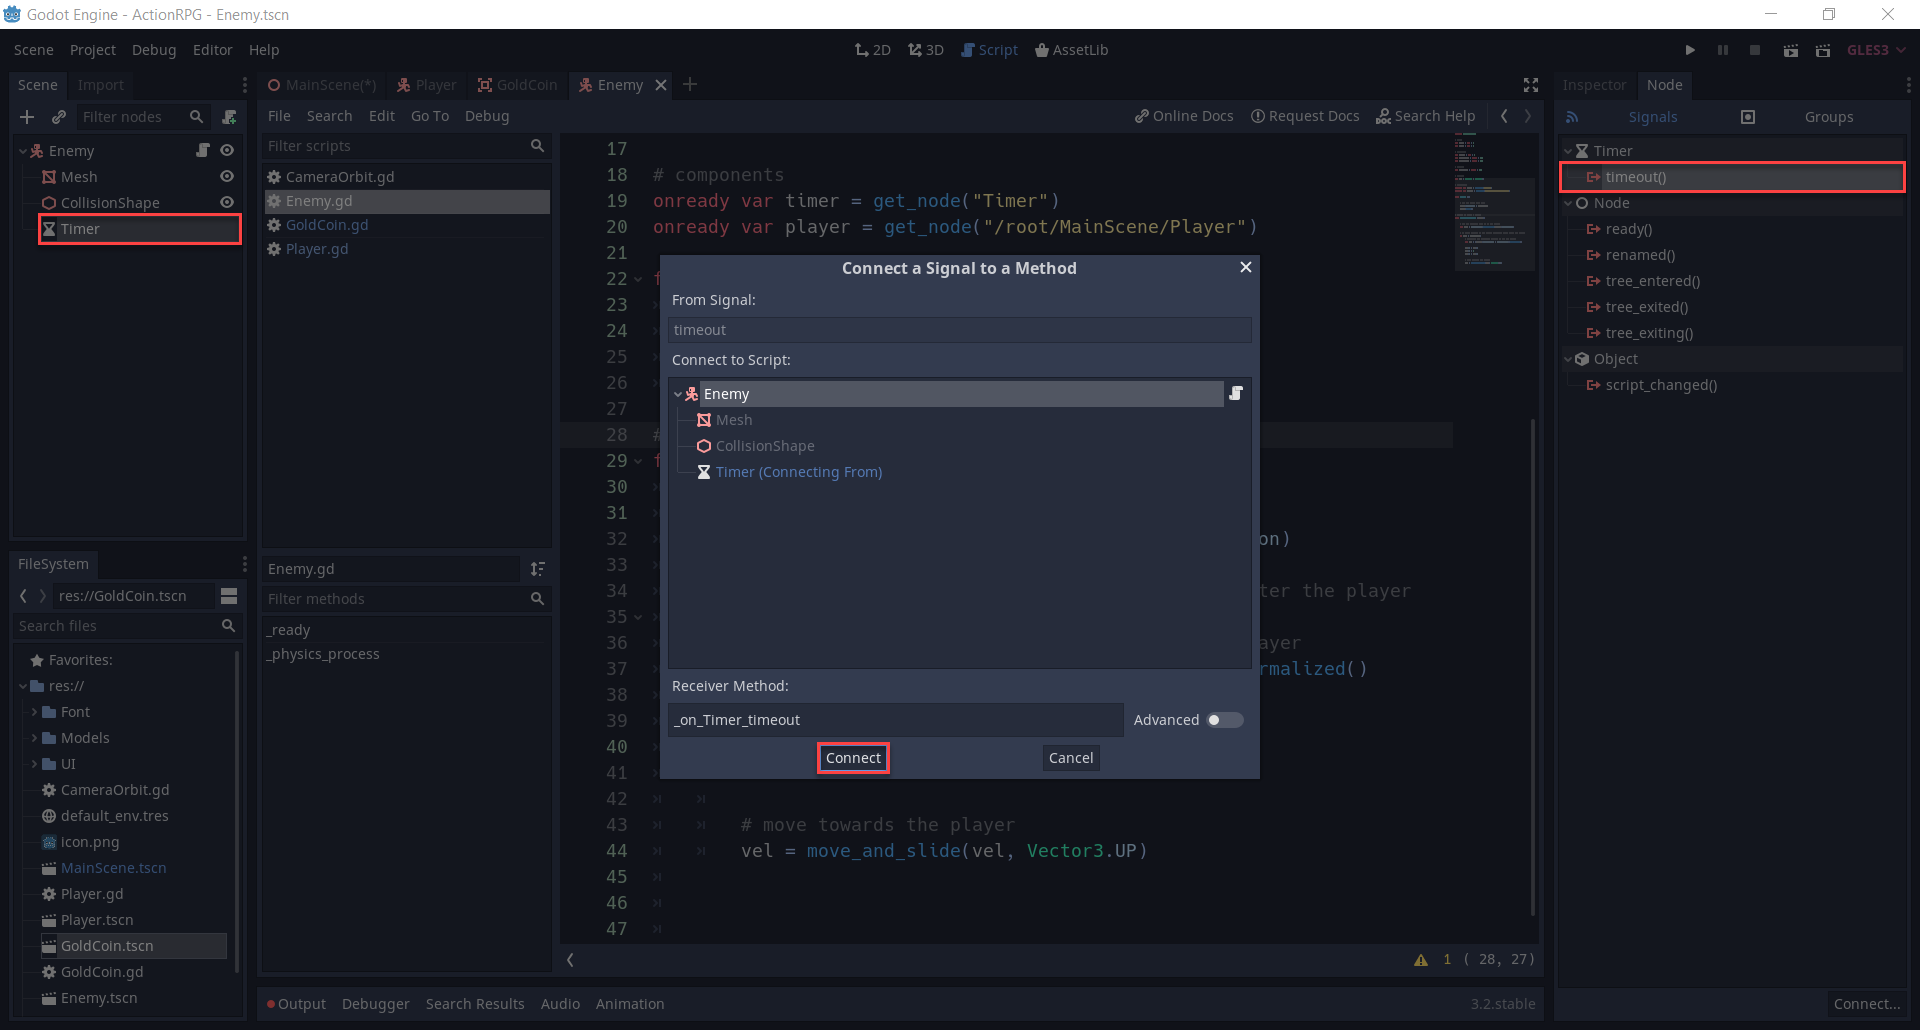
But nothing will happen right now because the timer isn’t connected to anything. So select the node and in the Node tab, we want to connect the timeout() signal to the script.
- Double click the timeout signal
- Click Connect
- Now you should see that there’s a new function in the enemy script
With the new function, let’s check our distance to the player and damage them. We’ll create the take_damage function on the player soon.
# called every "attackRate" seconds
func _on_Timer_timeout ():

    # if we're within the attack distance - attack the player
    if translation.distance_to(player.translation) <= attackDist:
        player.take_damage(damage)
Next, let’s implement the ability for the enemy to chase after the player when further than the attack distance.
# called 60 times a second
func _physics_process (delta):

    # get the distance from us to the player
    var dist = translation.distance_to(player.translation)

    # if we're outside of the attack distance, chase after the player
    if dist > attackDist:
        # calculate the direction between us and the player
        var dir = (player.translation - translation).normalized()

        vel.x = dir.x
        vel.y = 0
        vel.z = dir.z

        # move towards the player
        vel = move_and_slide(vel, Vector3.UP)
Let’s finish of the enemy script with the take_damage and die functions. The take damage function will be called when the enemy is attacked by the player.
# called when the player deals damage to us
func take_damage (damageToTake):

    curHp -= damageToTake

    # if our health reaches 0 - die
    if curHp <= 0:
        die()

# called when our health reaches 0
func die ():

    # destroy the node
    queue_free()
Our enemy is now finished. We’ve got all the functions setup, so let’s now go over to the Player script and create the functions which get called by an attacking enemy.
# called when an enemy deals damage to us
func take_damage (damageToTake):

    curHp -= damageToTake

    # if our health is 0, die
    if curHp <= 0:
        die()

# called when our health reaches 0
func die ():

    # reload the scene
    get_tree().reload_current_scene()
We can now go to the MainScene and drag the enemy scene in to create a new instance. Press play and the enemy should chase after you.
Sword Animation
Now its time to implement the ability to attack enemies. Before we jump into scripting, let’s create an animation for the player’s sword. In the Player scene, right click on the WeaponHolder and create a new child node of type AnimationPlayer. Rename it to SwordAnimator.
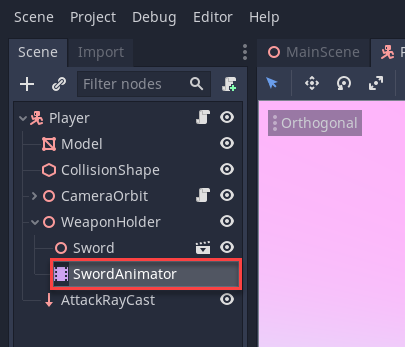
Selecting the node should toggle the Animation panel at the bottom of the screen. Here, we want to click on the Animation button and create a new animation called attack.

With the animator, we can choose which properties we want to animate. Select the WeaponHolder, and in the inspector select the key icon next to Rotation Degrees. Create that new track.
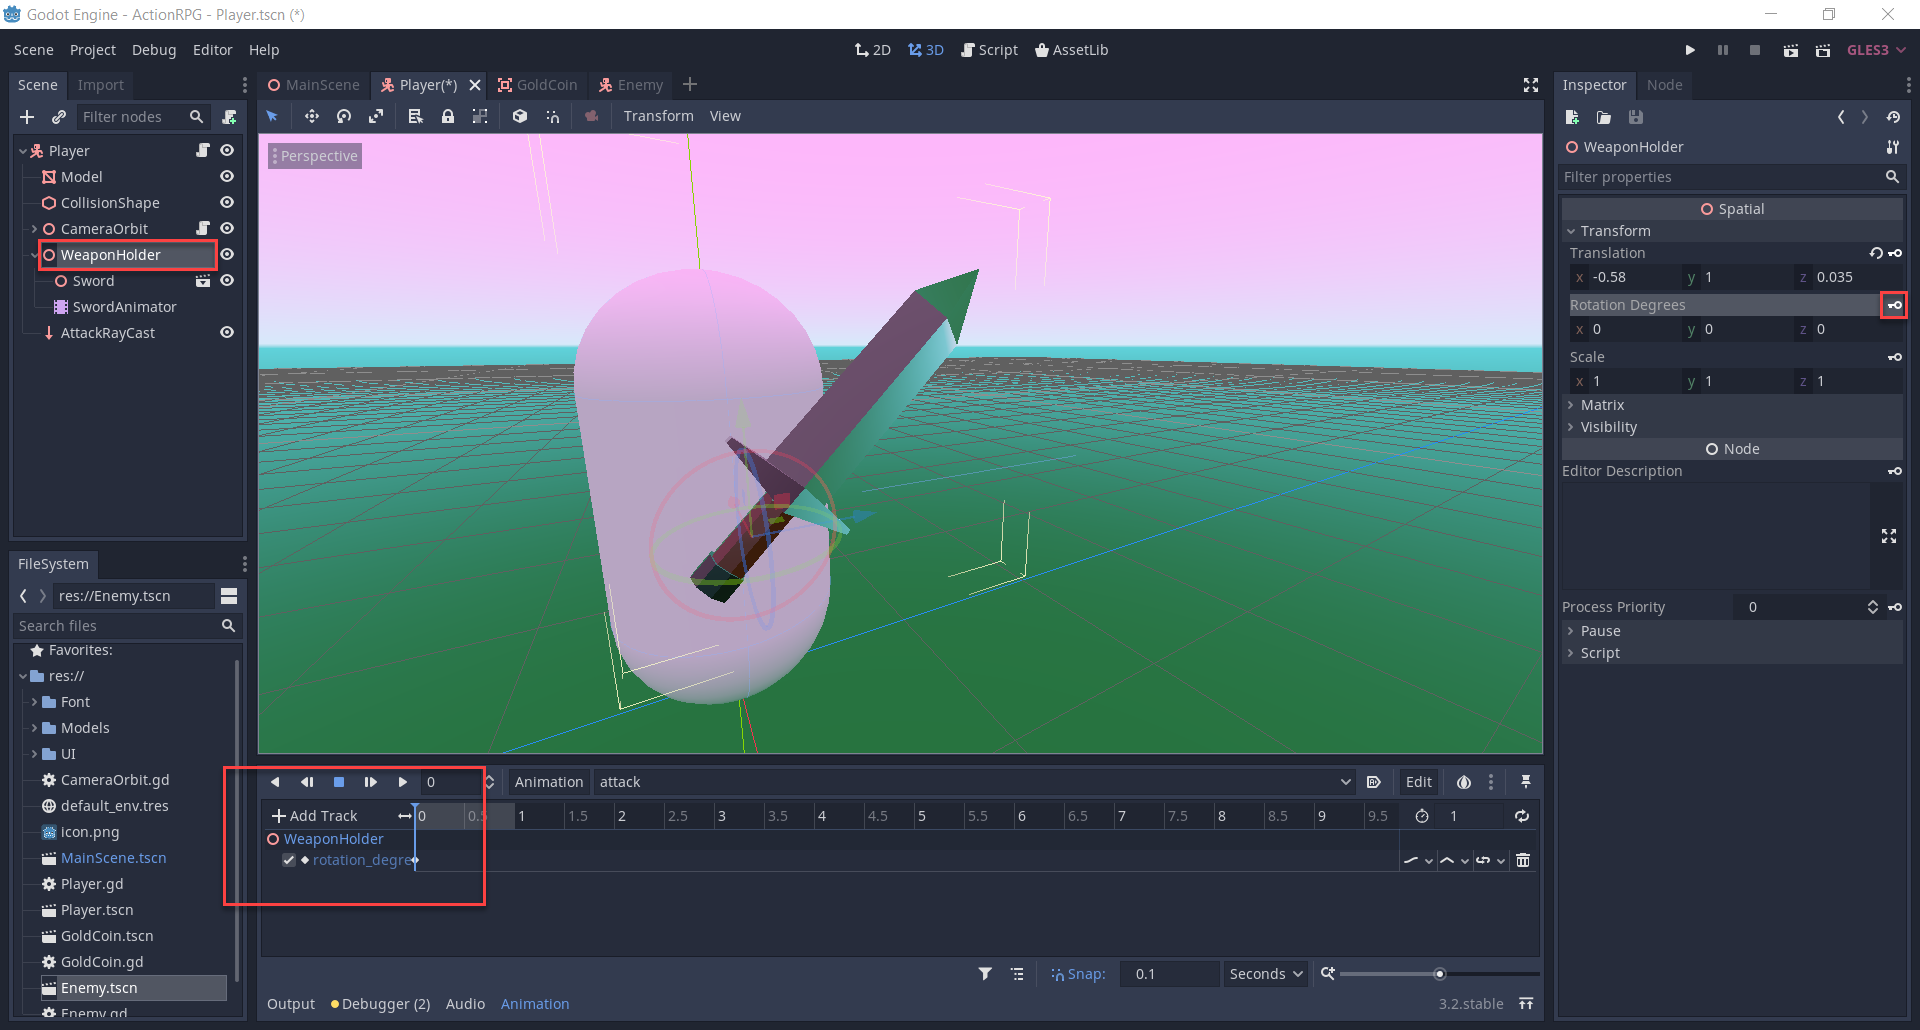
By default the FPS of the animation is quite low, so select the Time drop-down and change that to FPS. Set the FPS to 30.

Now we can right-click on the tack and insert a new key. Selecting the key, we can change the rotation with the Value property.
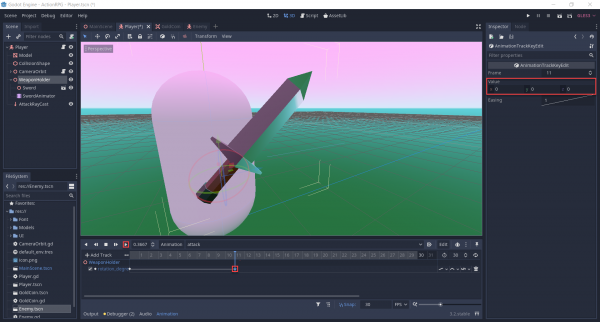
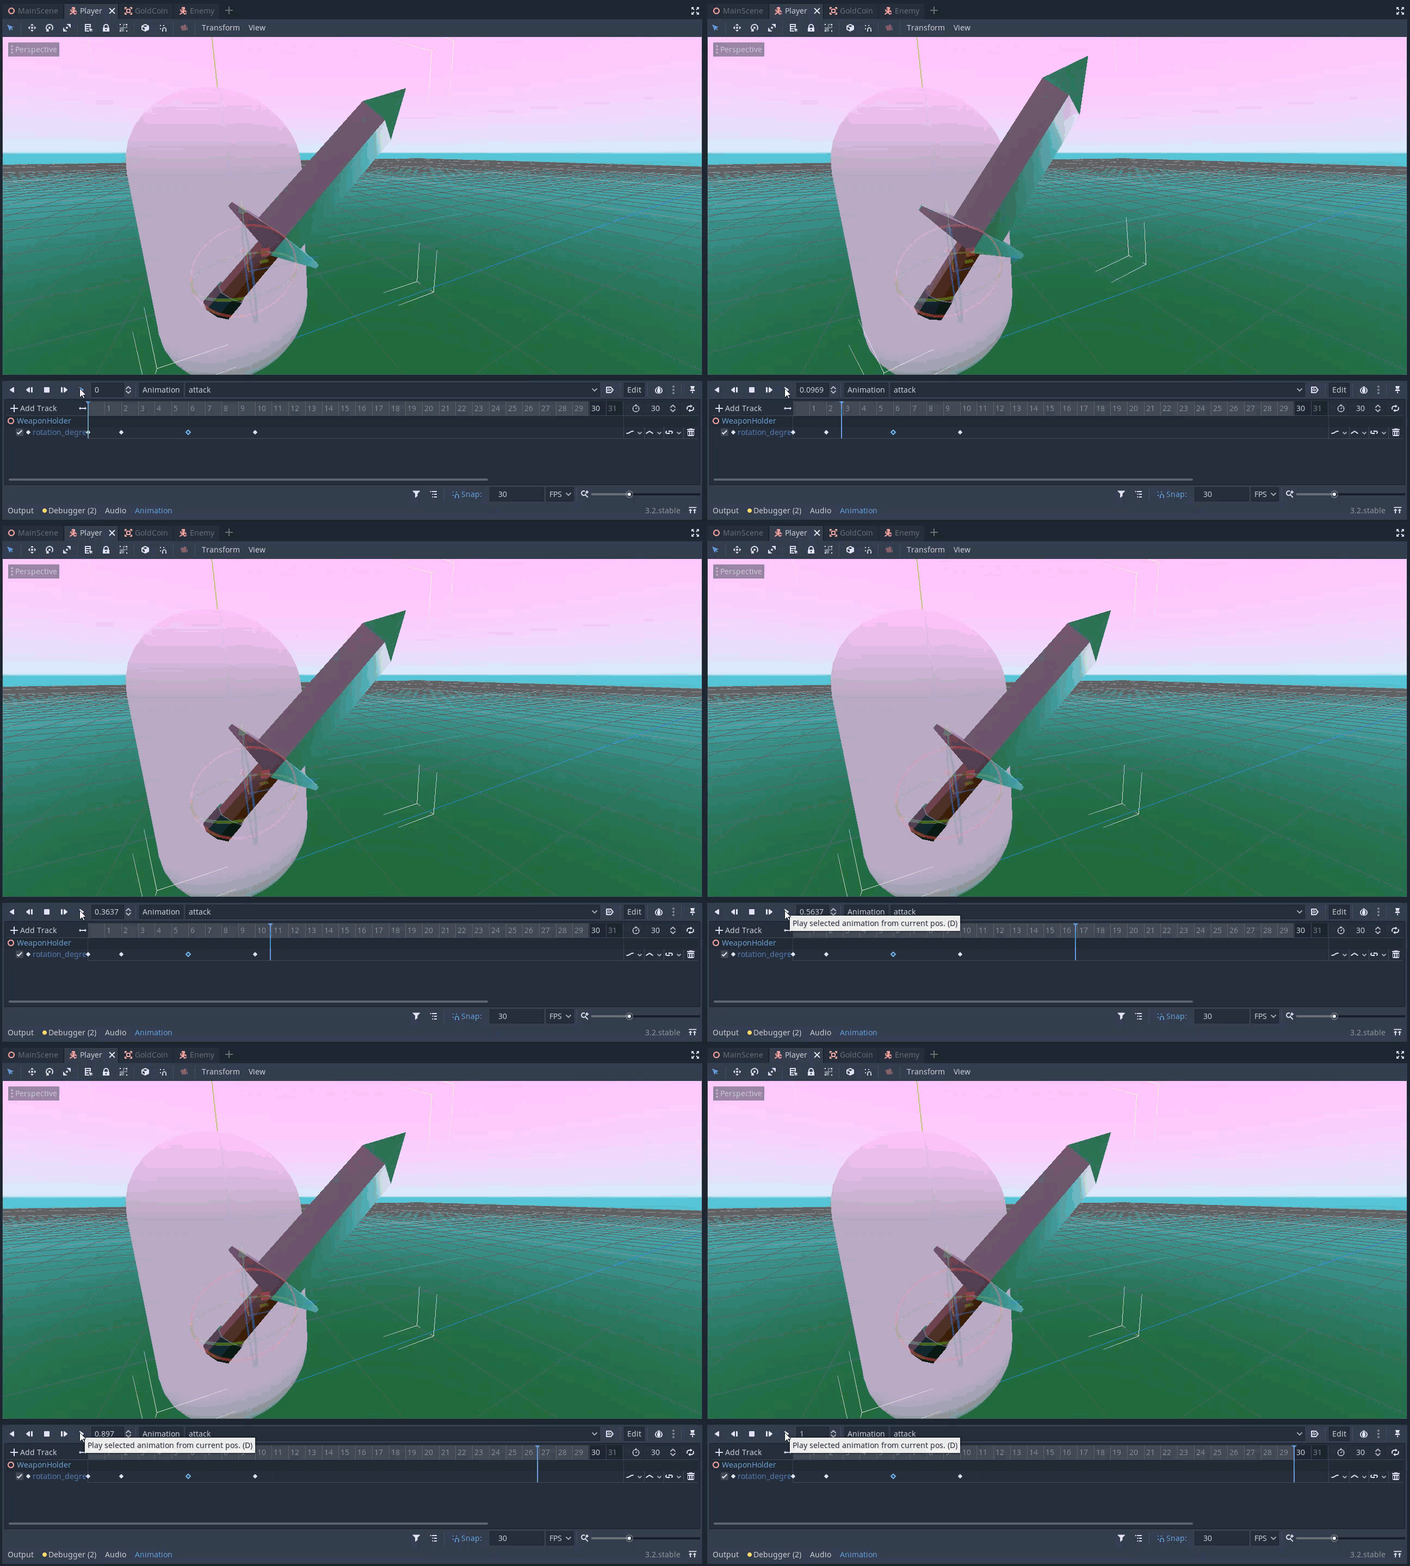
Here’s the attack animation I made.
Attacking the Enemy
Now that we have the attack animation, let’s go ahead and start scripting it. In the Player script, let’s create the _process function which gets called every frame.
func _process (delta):

    # attack input
    if Input.is_action_just_pressed("attack"):
        try_attack()
The try_attack function will check to see if we can attack and if so, damage the enemy.
# called when we press the attack button
func try_attack ():
First, we want to see if we can attack based on the attack rate. We’re getting the current time elapsed in milliseconds. That’s why we’re multiplying attackRate by 1000.
# if we're not ready to attack, return
if OS.get_ticks_msec() - lastAttackTime < attackRate * 1000:
    return
Then we want to set the last attack time and play the animation.
# set the last attack time to now
lastAttackTime = OS.get_ticks_msec()

# play the animation
swordAnim.stop()
swordAnim.play("attack")
To actually attack the enemy, we need to check to see if the raycast is detecting an enemy.
# is the ray cast colliding with an enemy?
if attackCast.is_colliding():
    if attackCast.get_collider().has_method("take_damage"):
        attackCast.get_collider().take_damage(damage)
We can now press play and test it out. Try attacking the enemy and eventually they should disappear, showing that our system works.
Creating the UI
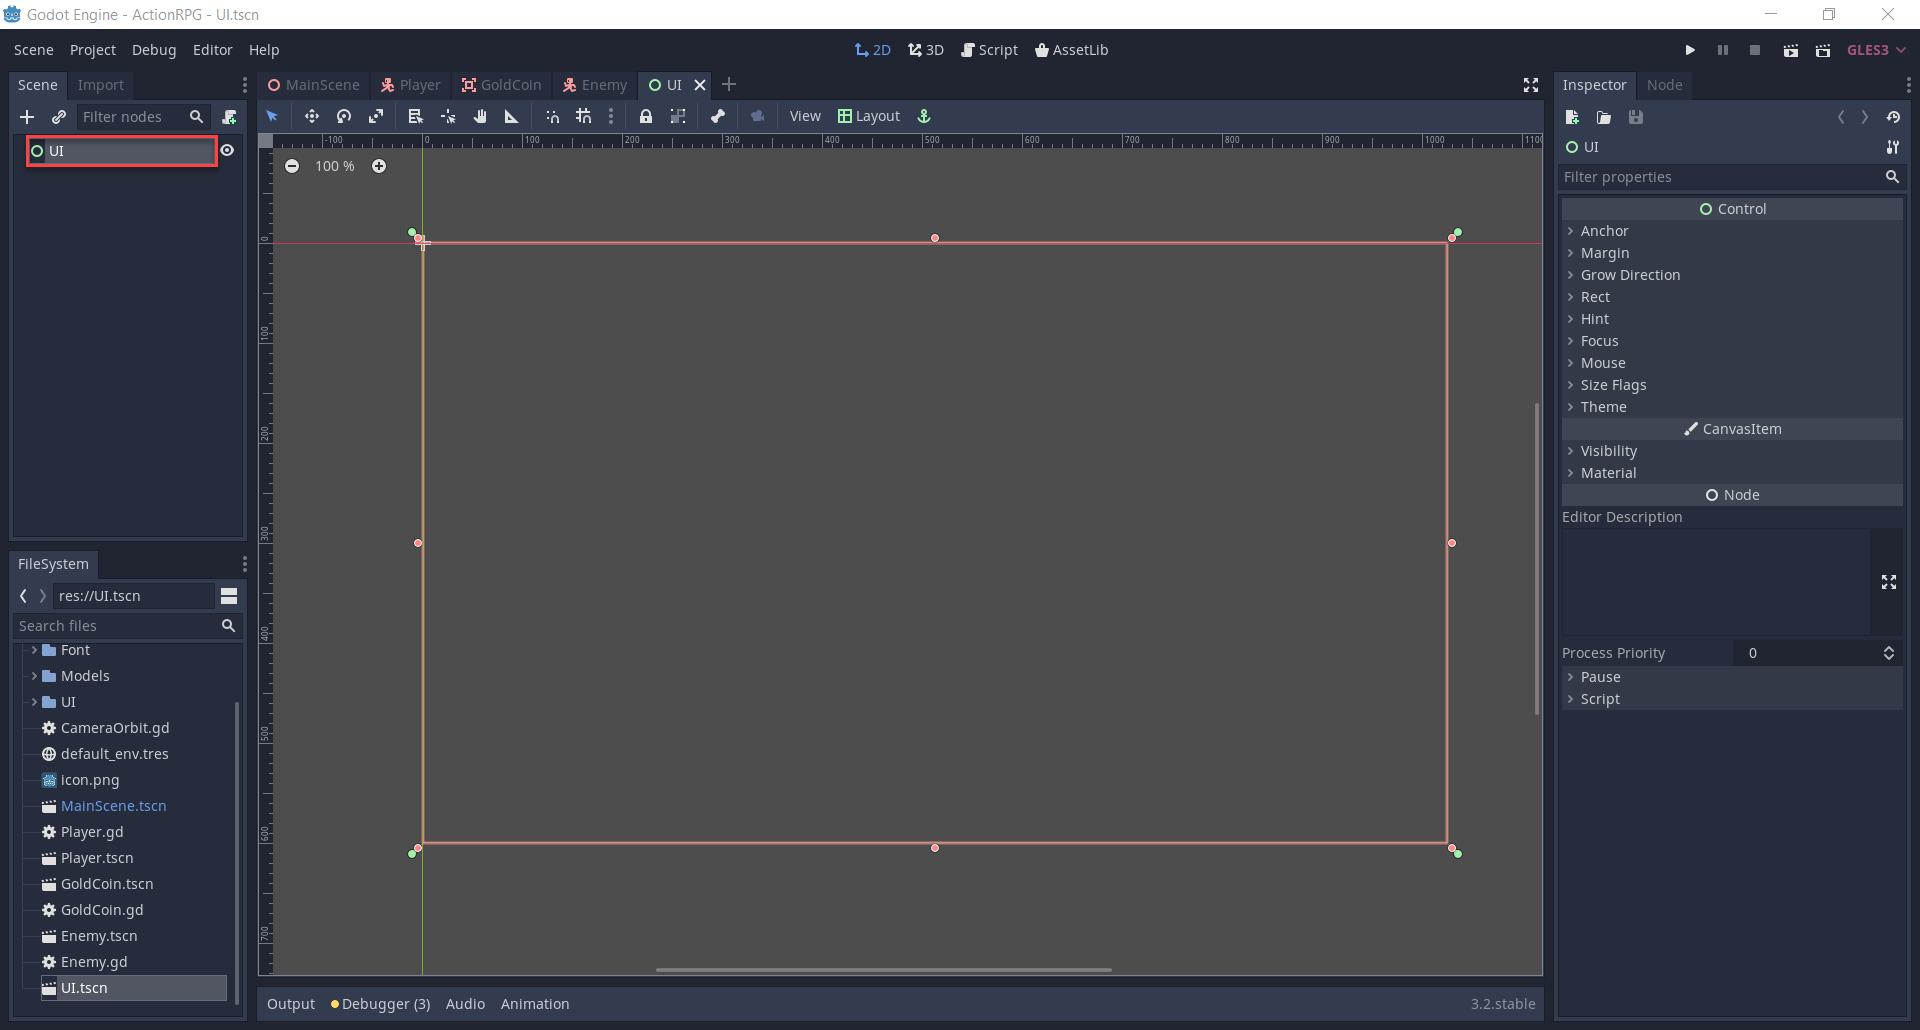
Now that we have all of the systems in place, the final thing to do is implement the user interface. This will include a health bar and gold text. So to begin, let’s create a new scene of type user interface (Control node). Rename it to UI and save the scene.
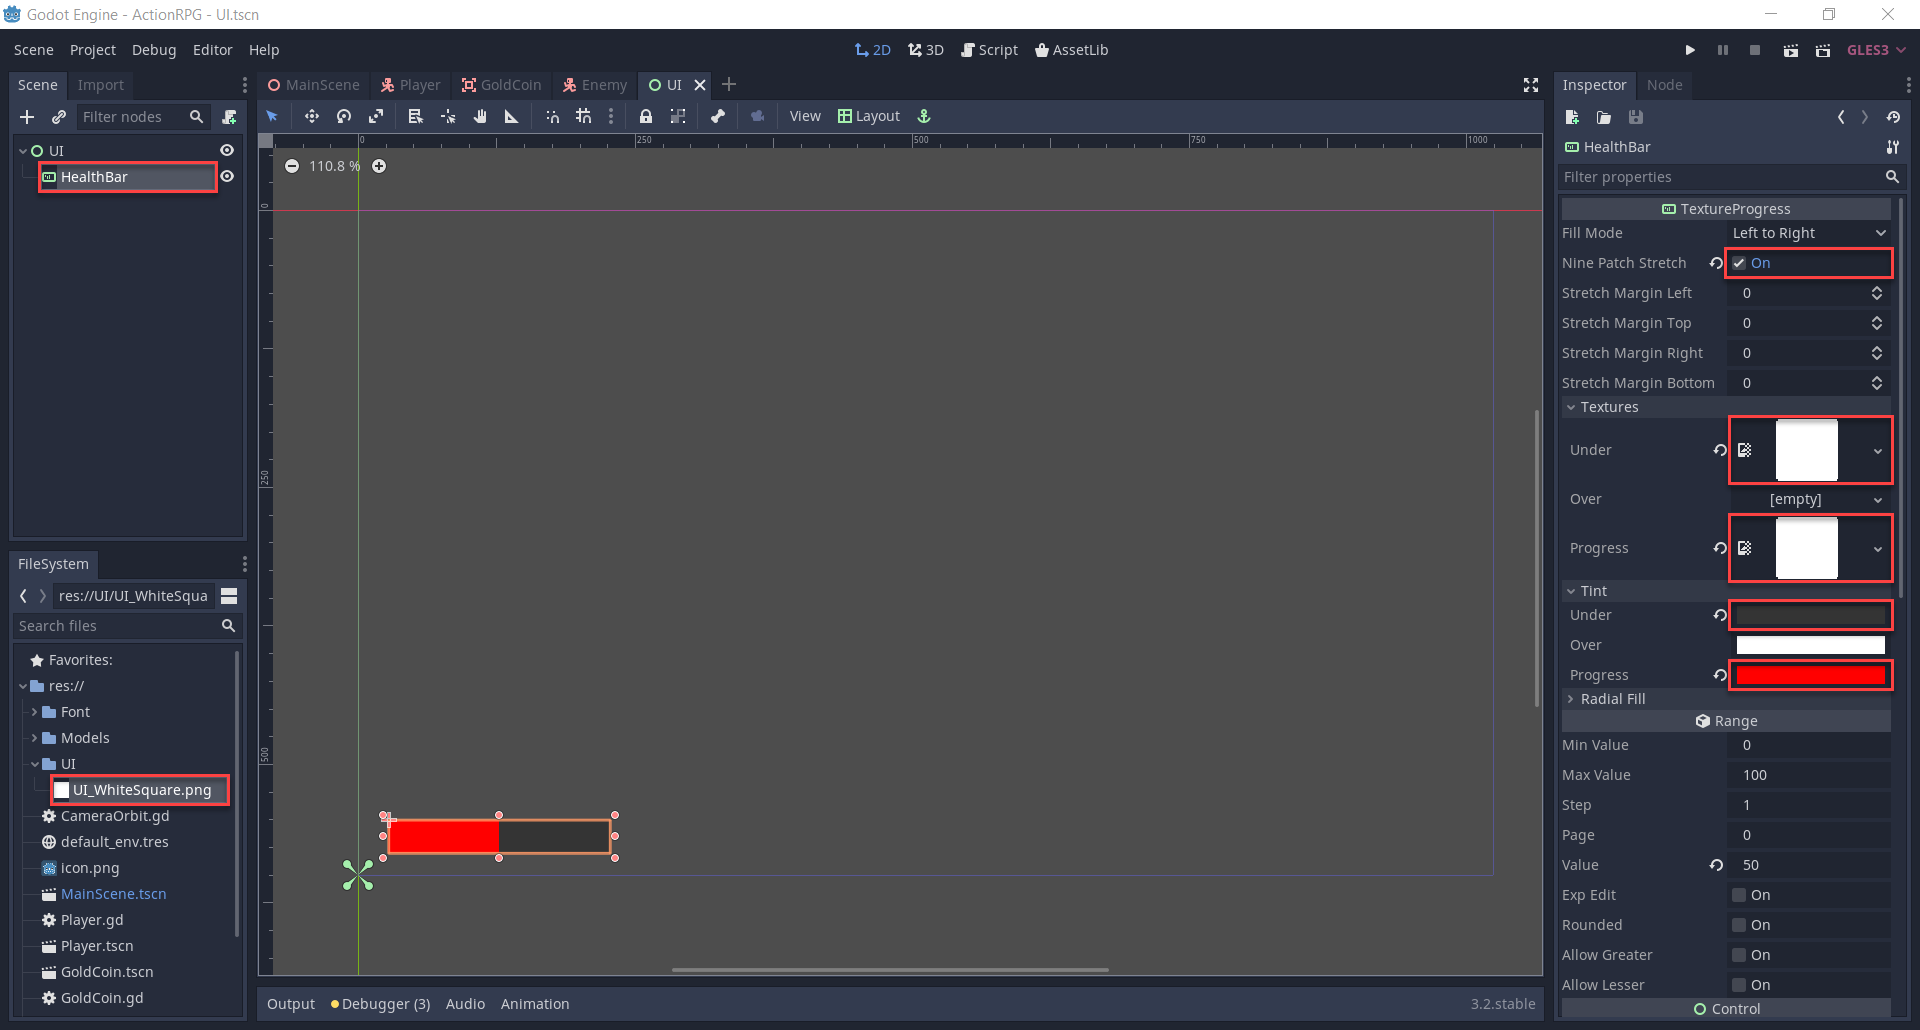
As a child, create a new TextureProgress node. This is a texture which can resize like a progress bar.
- Rename the node to HealthBar
- Enable Nine Patch Stretch
- Set the Under and Progress textures to UI_WhiteSquare.png
- Set the Under tint to dark grey
- Set the Progress tint to red
- Bring the anchor points (4 green pins) down to the bottom left of the screen
- Drag the health bar down to the bottom left and resize it (drag on the circles to resize)
For our gold text, we’re going to need a font as the default one isn’t that versitile.
- Right click on the .ttf file in the file system and select New Resource…
- Search for and select DyanamicFont
- This will create a new dynamic font resource
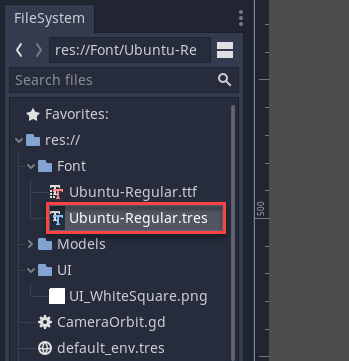
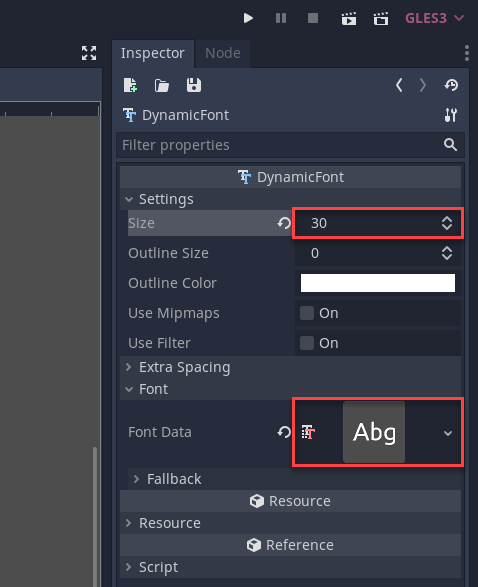
Double click the dynamic font, and in the inspector…
- Set the Size to 30
- Drag the .ttf file into the Font Data property
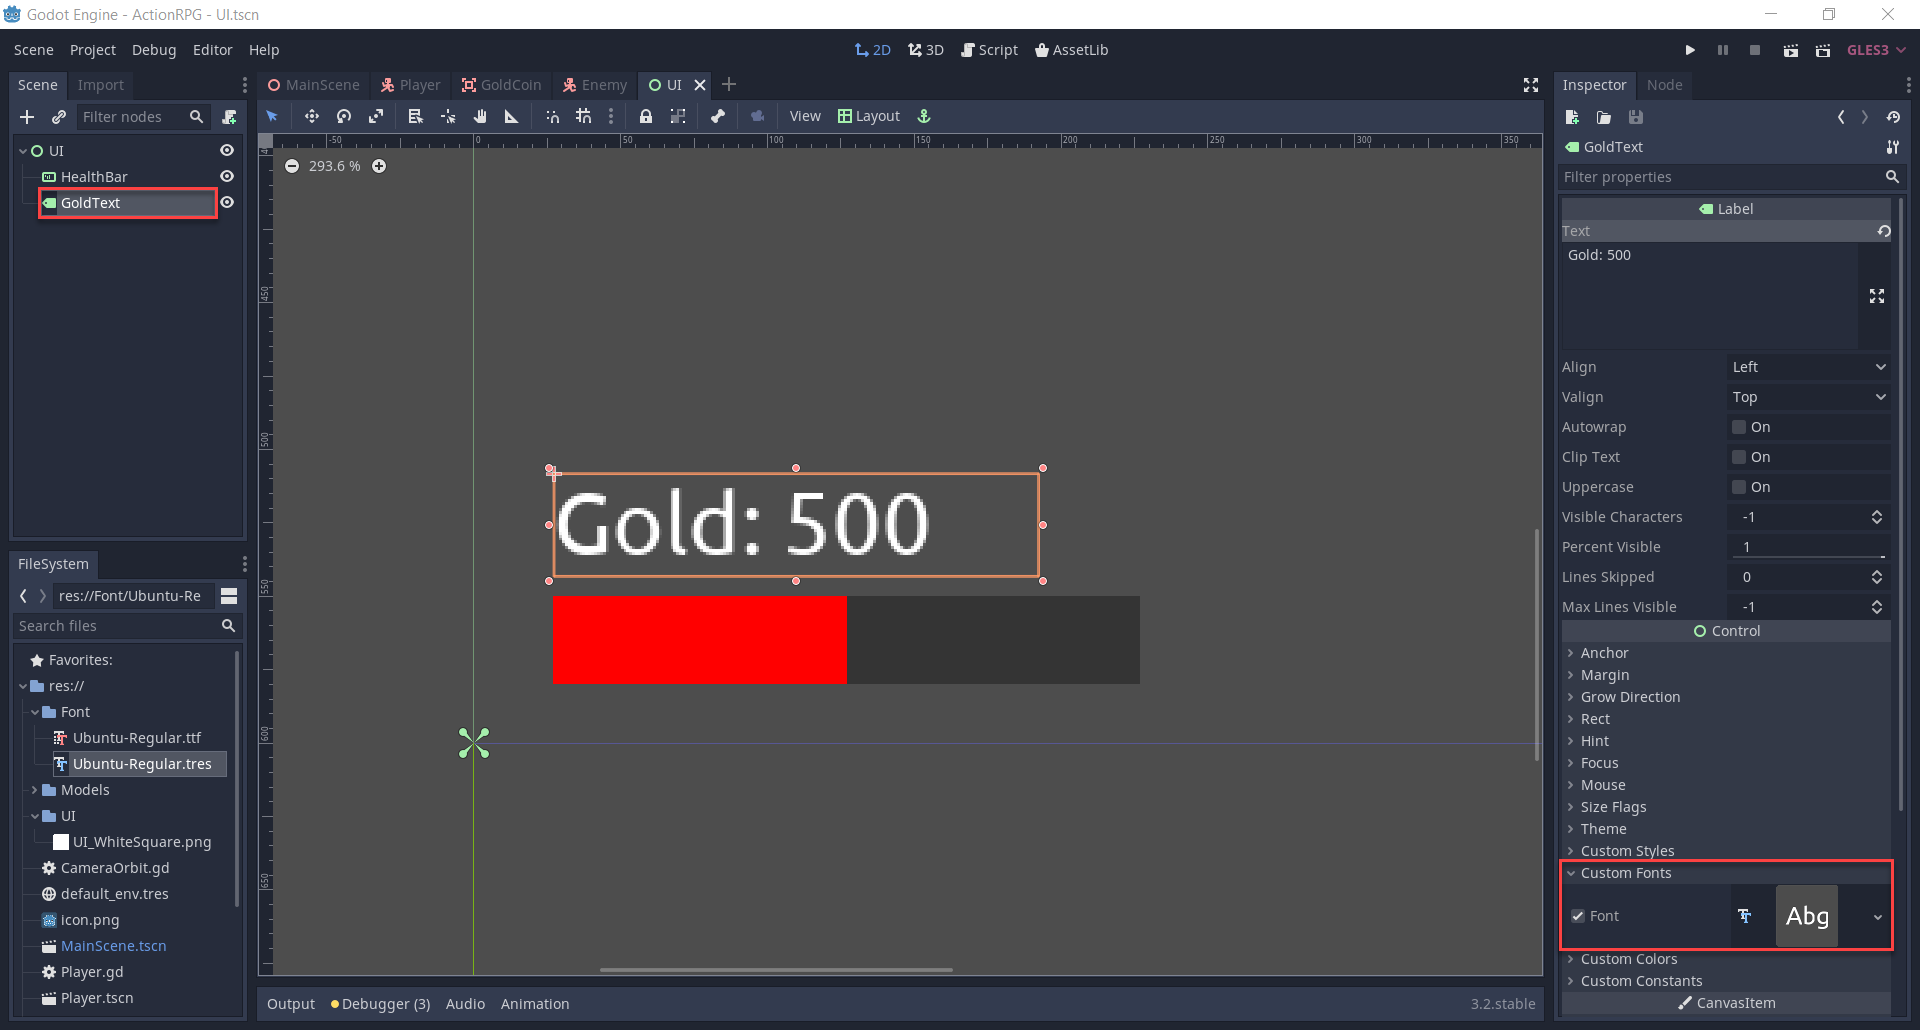
Now we can create a Label node and rename it to GoldText. This node will display text on-screen.
- Drag it down above the health bar
- Set the anchor points to be bottom-left of the screen
- Drag the dynamic font asset into the Custom Font property on the label
Now that we have our UI, let’s go to the Player scene and create a child node called CanvasLayer. This is a node which renders the control node children to the screen. So as a child of the canvas layer, drag in the UI scene.
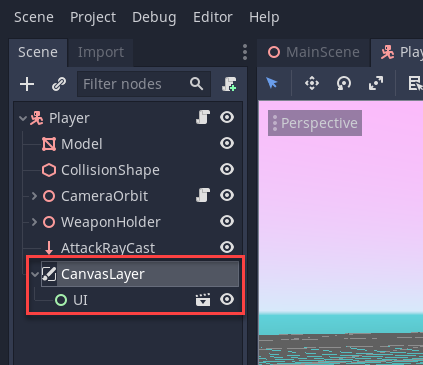
If we press play, you’ll see that the UI is rendering on the screen.
Scripting the UI
We’ve got our UI displaying on-screen, but it doesn’t do anything just yet. In the UI scene, create a new script attached to the UI node called UI. We can start with the variables.
onready var healthBar = get_node("HealthBar")
onready var goldText = get_node("GoldText")
Then we can create the update_health_bar function. This will set the value of the texture progress.
# called when we take damage
func update_health_bar (curHp, maxHp):

    healthBar.value = (100 / maxHp) * curHp
Finally, the update_gold_text function will update the text of the gold text label.
# called when our gold changes
func update_gold_text (gold):

    goldText.text = "Gold: " + str(gold)
Now that we’ve got the UI script created, let’s go to the Player script and hook these functions up.
Let’s create a variable to reference the UI node.
onready var ui = get_node("CanvasLayer/UI")Then inside of the _ready function (called when the node is initialized), we want to initialize the UI.
# called when the node is initialized
func _ready ():

    # initialize the UI
    ui.update_health_bar(curHp, maxHp)
    ui.update_gold_text(gold)
Inside of the give_gold function, we can update the gold text.
# update the UI
ui.update_gold_text(gold)
Inside of the take_damage function, we can update the health bar.
# update the UI
ui.update_health_bar(curHp, maxHp)
And there we go. You can press play now and see that the UI will update when we take damage and collect coins.
Conclusion
Congratulations on completing the tutorial! If you’ve been following along, you should now have a 3D action RPG playable within your Godot editor! Over the course of both Part 1 and Part 2, we learned how to create:
- A third-person player controller
- Enemies who chase and attack the player
- Player combat
- Collectible coins
- User interface
With that, you now have a fantastic project that you can share with your friends, add to your portfolio, or use as a base for your own projects. As you can imagine, these systems can be expanded in numerous ways, such as adding more collectibles, adding different enemies, and beyond. We encourage you to explore what Godot is capable of – but for now, we hope you enjoy this action RPG you’ve created with your own two hands!
