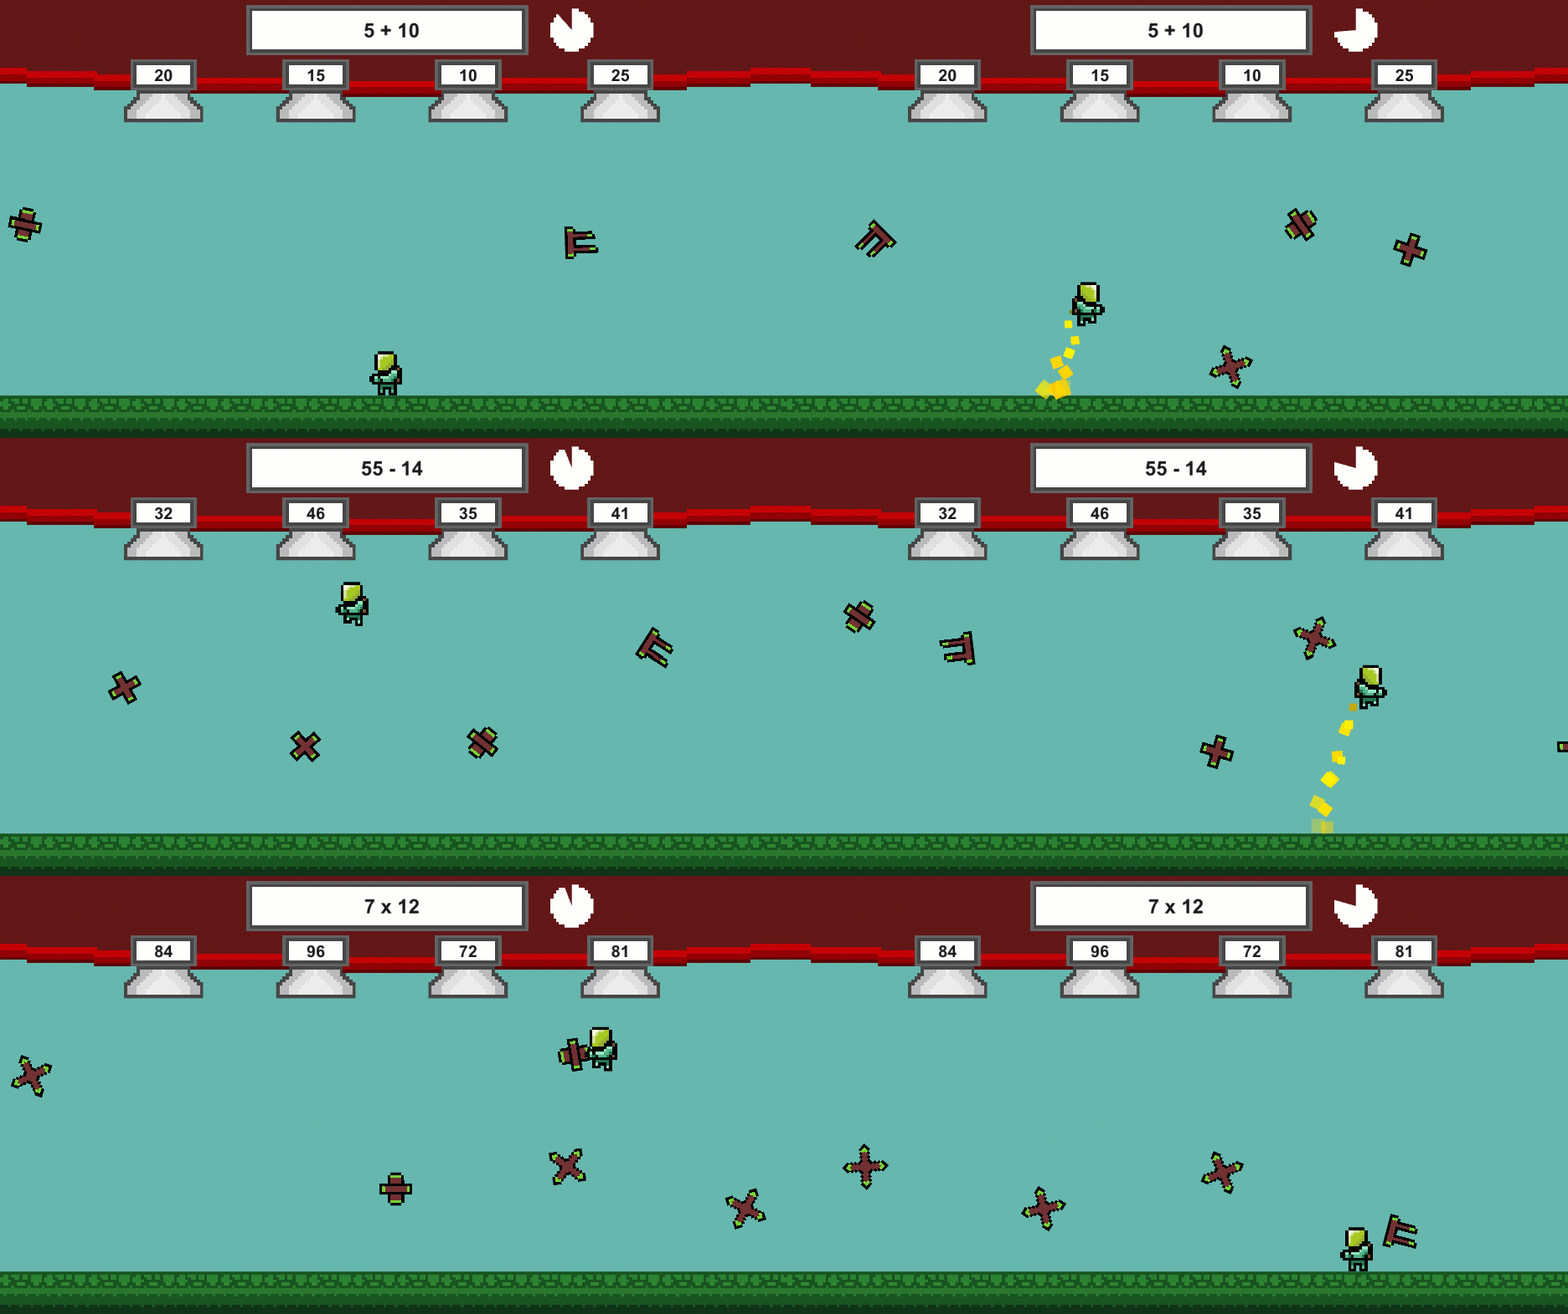
In this tutorial, we’re going to be creating a 2D math game, in a similar vein to Math Blaster. This project is going to feature a player character that can move and fly. Above them will be a math problem and 4 tubes with different answers on them. The goal of the game is to fly into the correct tubes and finish all of the problems. To add in some challenge, there will be a ticking timer for each question and obstacles that the player needs to avoid.
Check out the other parts to this series:
This is a game that’s meant to stimulate the player’s mind, having them solve math problems while constantly needing to focus on multiple things at once.
The project is very expandable and contains elements that you can use in future educational games.
Project Files
This project will feature various sprites, animations and a particle effect. You can download the project files here.
Project Setup
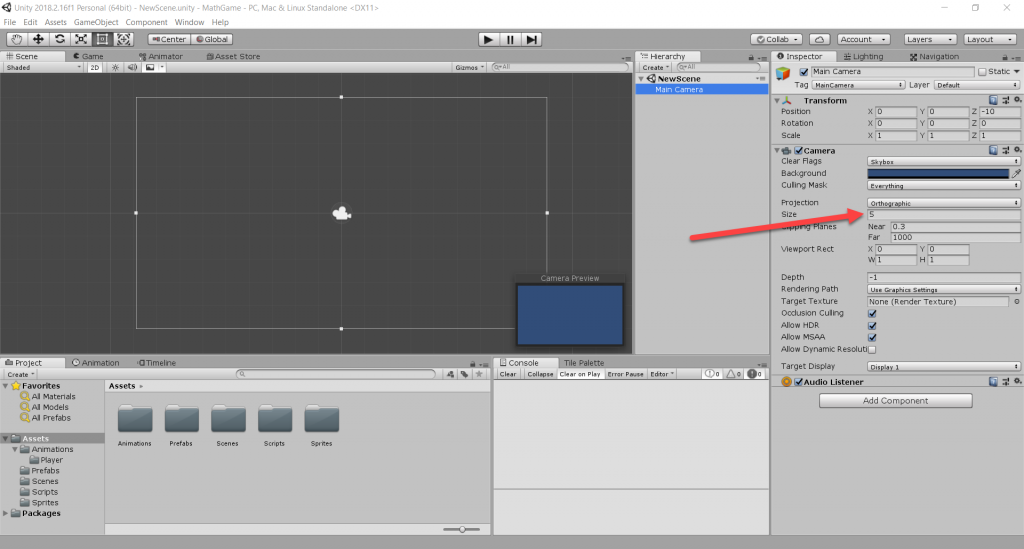
First of all, create a new 2D Unity project. Then we need to make sure that our “Main Camera” has an orthographic size of 5. This is due to the scale we’re working with.
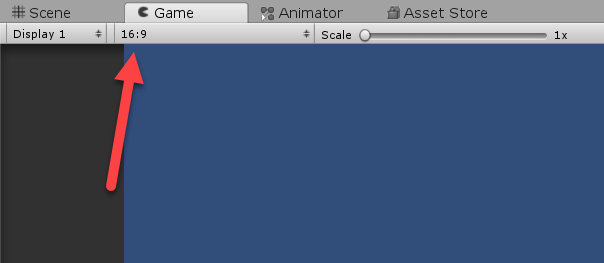
Since we’re working in 2D and the fact that we’re utilizing the whole height and width of the screen, it’s important that it’s consistent across most platforms. Go to the Game window and set the aspect ratio to 16:9.
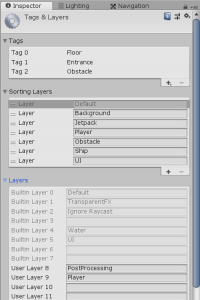
For this project we’re going to need to add in some tags, sorting layers and one layer. If you’ve downloaded the project files and are using that, then you can skip this step.
Tags: Floor, Entrance, Obstacle
Sorting Layers: Background, Jetpack, Player, Obstacle, Ship, UI
Make sure that the sorting layers are in that specific order, as this determines what sprites render in-front of others.
Layers: Player
Scene Setup
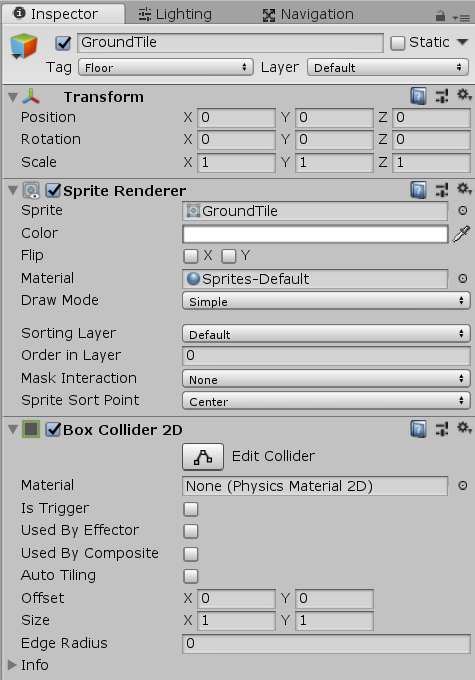
Now, create an empty GameObject (right click Hierarchy > Create Empty), and call it “Ground”. This is going to be where we store all of our ground tiles. Then, drag in the “GroundTile” sprite as a child of the object.
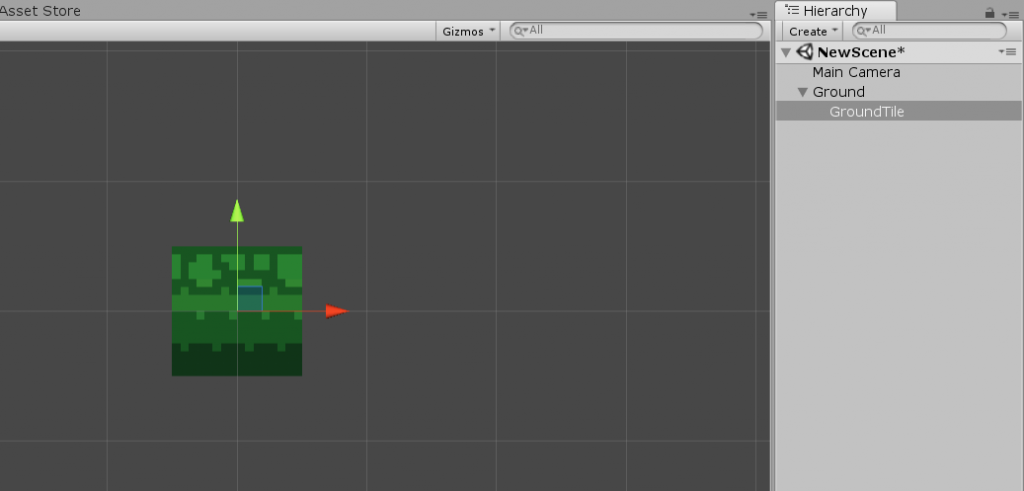
To make the floor usable, we need to add a BoxCollider2D component to the tile, and set its tag to “Floor”. If you don’t have a “Floor” tag, just add one.
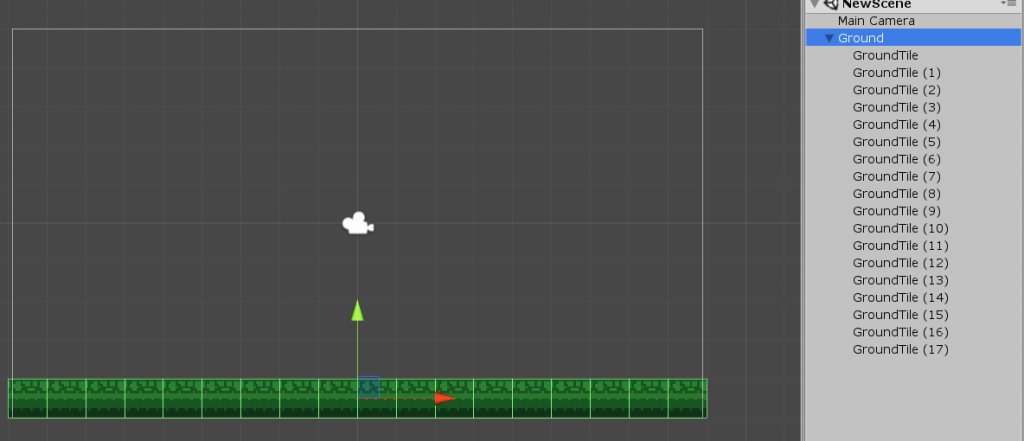
Now duplicate that tile and lay them out horizontally along the bottom border of the camera frame.
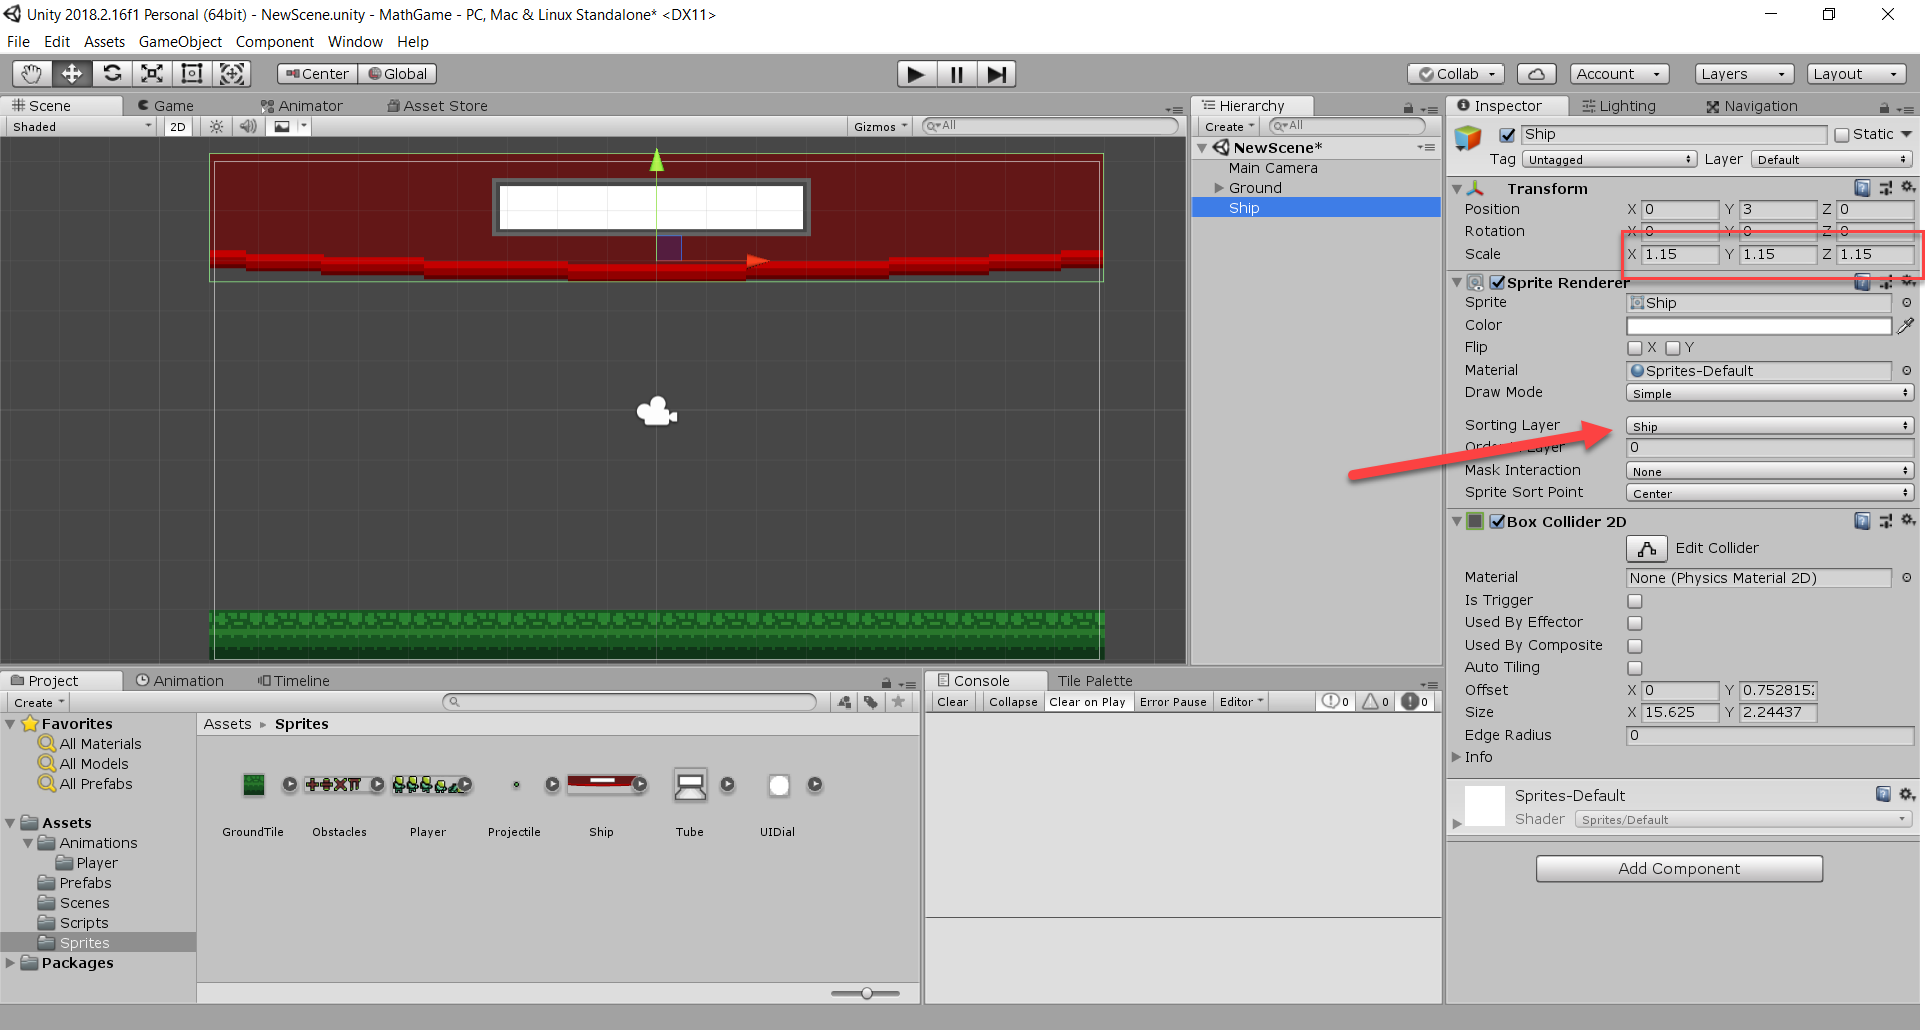
Next, drag in the “Ship” sprite to the top of the frame. You may see that it’s a bit too small, so just increase the scale to 1.15. Then, set the sorting layer to “Ship” and add a BoxCollider2D component, resizing it so it fits the ship.
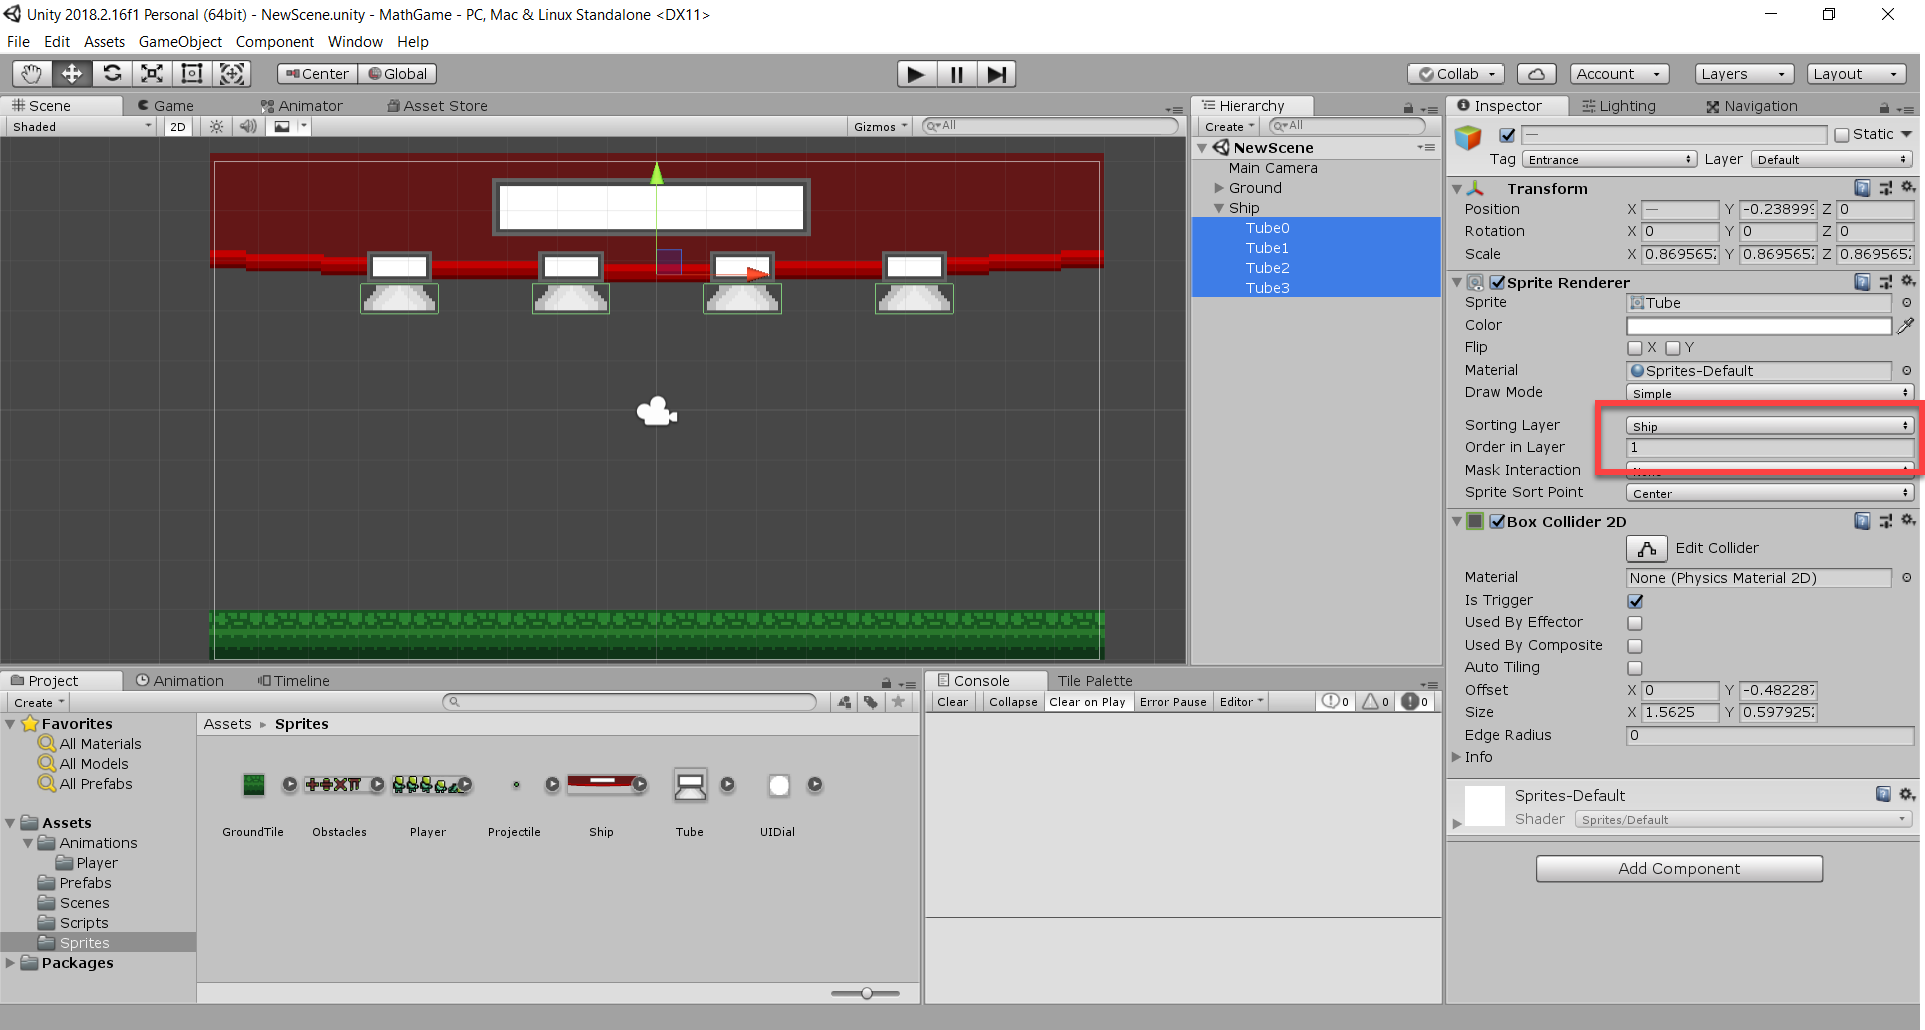
For our tubes, we’re going to drag in the “Tube” sprite, add a BoxCollider2D, set the tag to “Entrance” and sorting layer to “Ship” with an order in layer to 1. This basically means that it’s on the same layer as the ship but it will render in-front.
Then duplicate them. In our case we’re having 4 possible answers, but you can have as many as you want.
Now at the moment, our background is just the default blue. So what we’re going to do is change the color to something a bit more ‘alien’. Click on the camera and change the “Clear Flags” property to Solid Color. Then you can set the background color. For me I used a blue/green color (hexadecimal: 4BC1AC).

Setting up the Player
Now it’s time to move onto our player. Before jumping into scripting it, we need to set up a few things first.
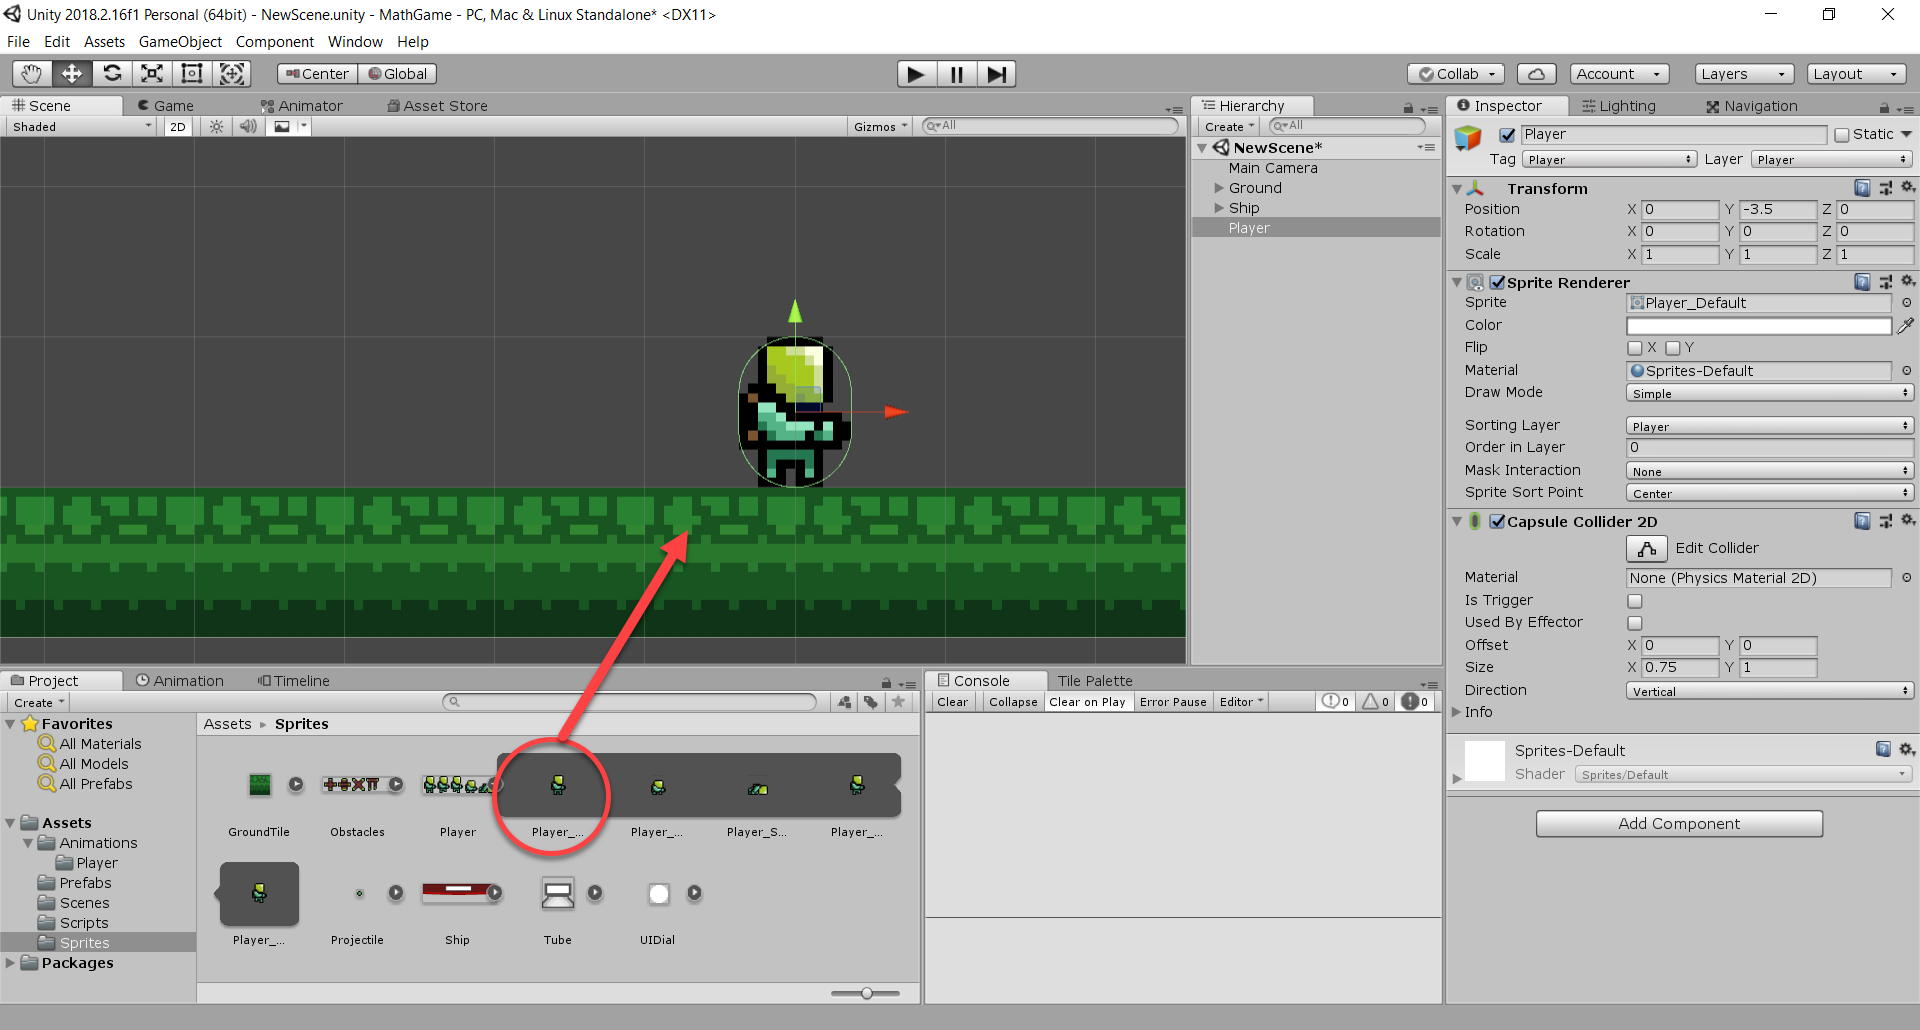
Drag the “Player_Default” sprite into the scene (part of the Player sprite sheet). Then set the tag, layer and sorting layer to “Player”. Finally, add a CapsuleCollider2D. We’re not using a box collider because they can get stuck if moving along a surface with multiple other colliders. Capsule collider allow us to glide much smoother.
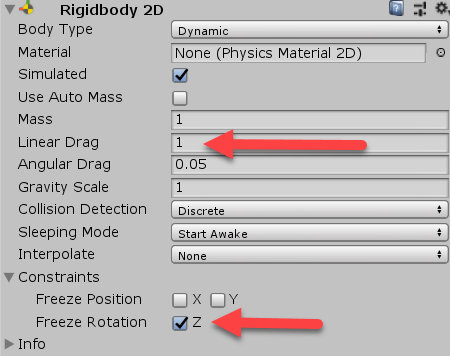
We also need to add a Rigidbody2D component. Set the “Linear Drag” to 1 and enable “Freeze Rotation”. This will prevent the player from falling over.
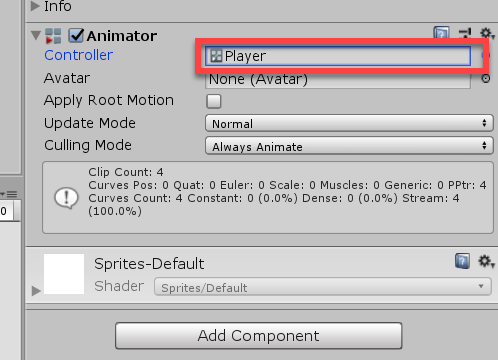
For the player, if you downloaded the project files you will have some animations. They’ve all been connected and setup inside of the “Player” animation controller. So to add it, just add an Animator component and set the controller to be the “Player” controller.
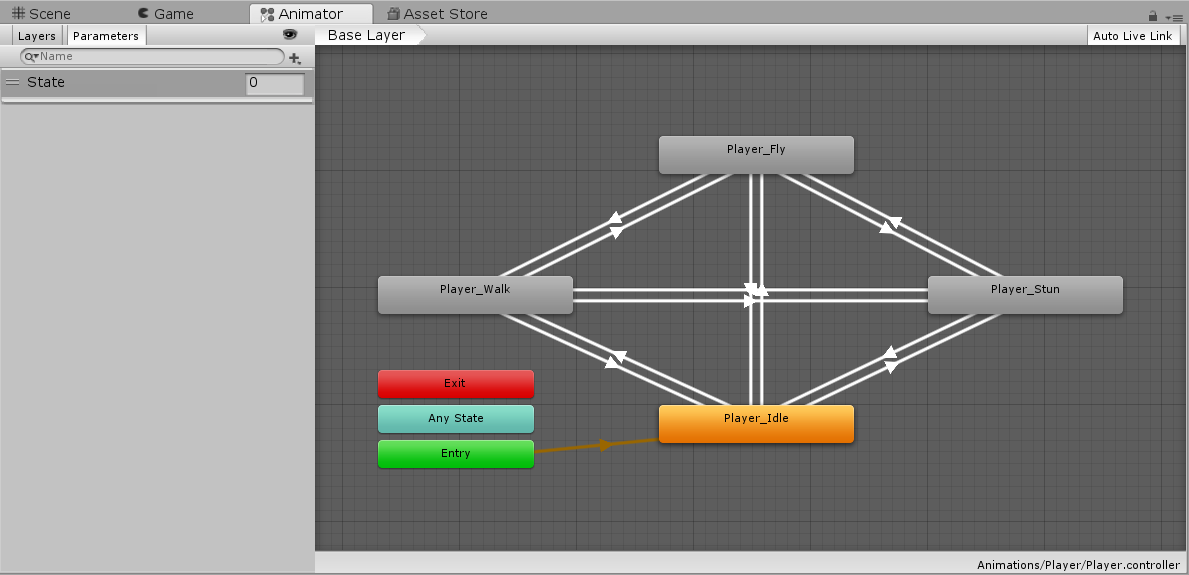
If you double click on the player controller, you will see in the Animator window what it’s made up of. Our various animations play determined based on the “State”. This is a number we’ll talk about more when we script the player.
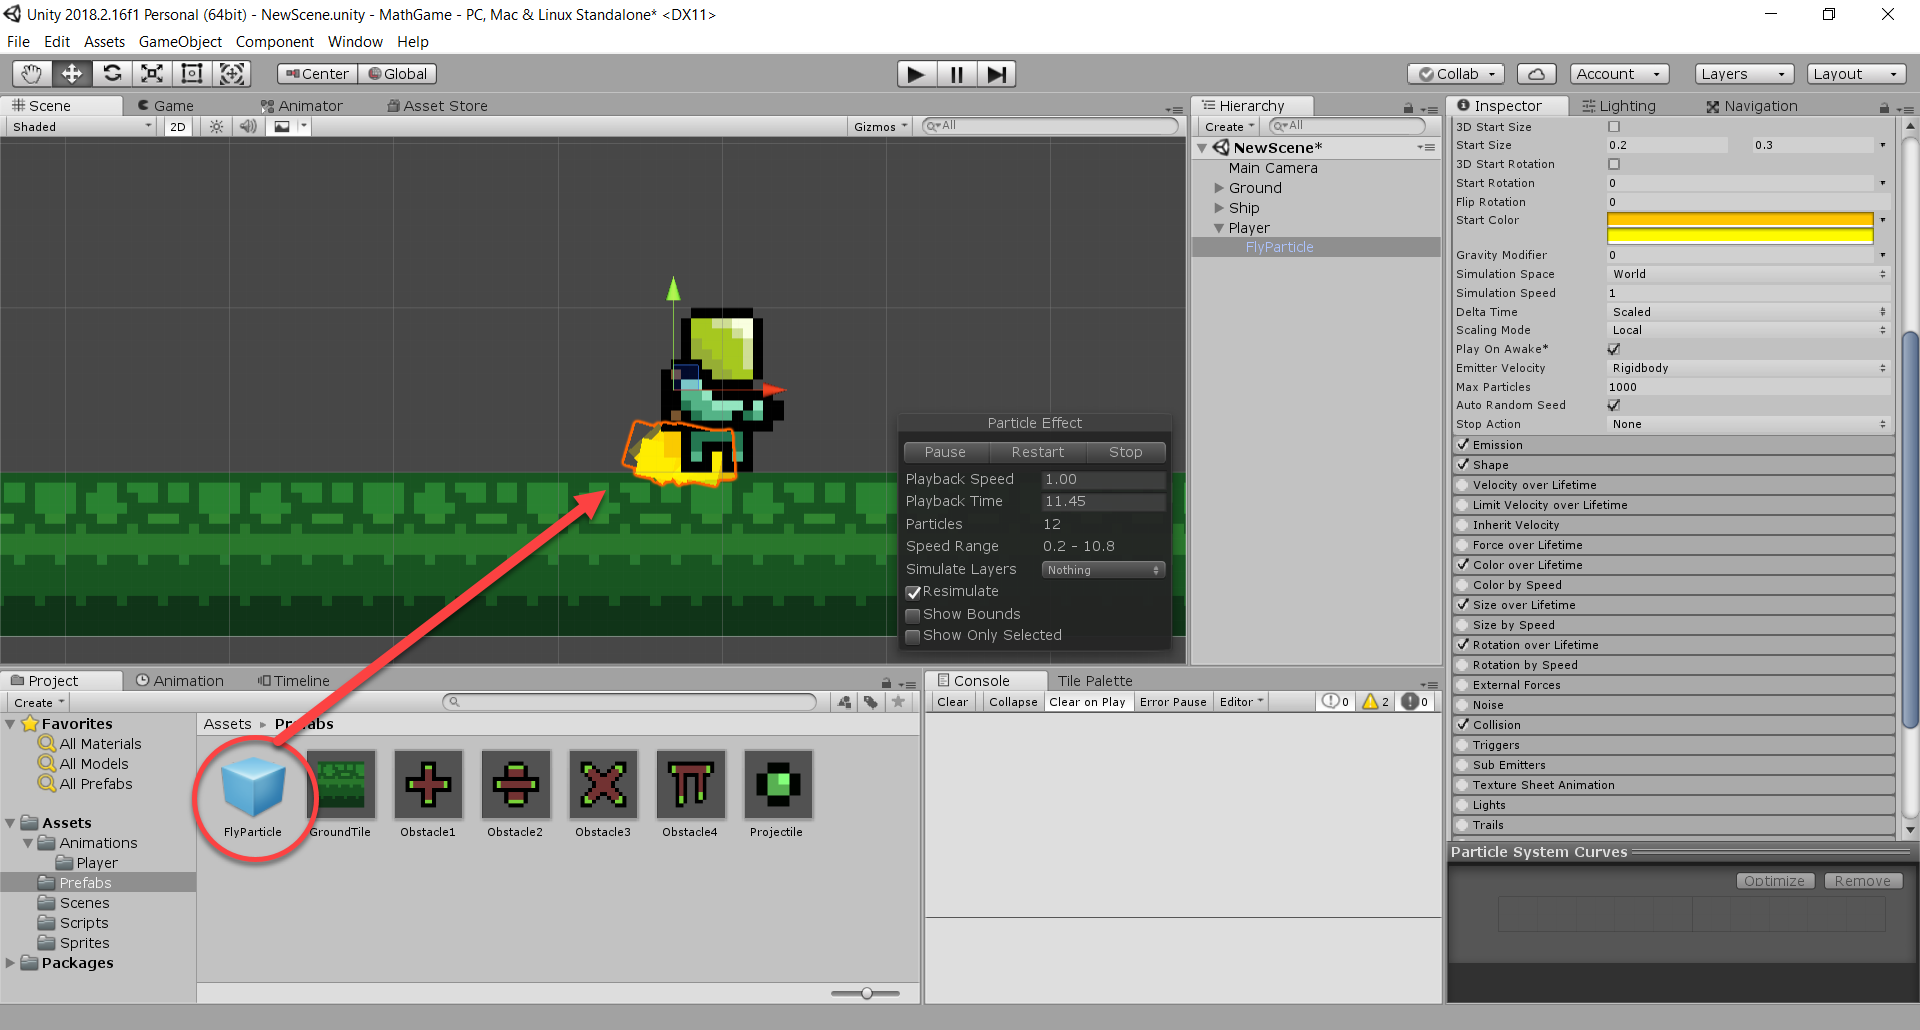
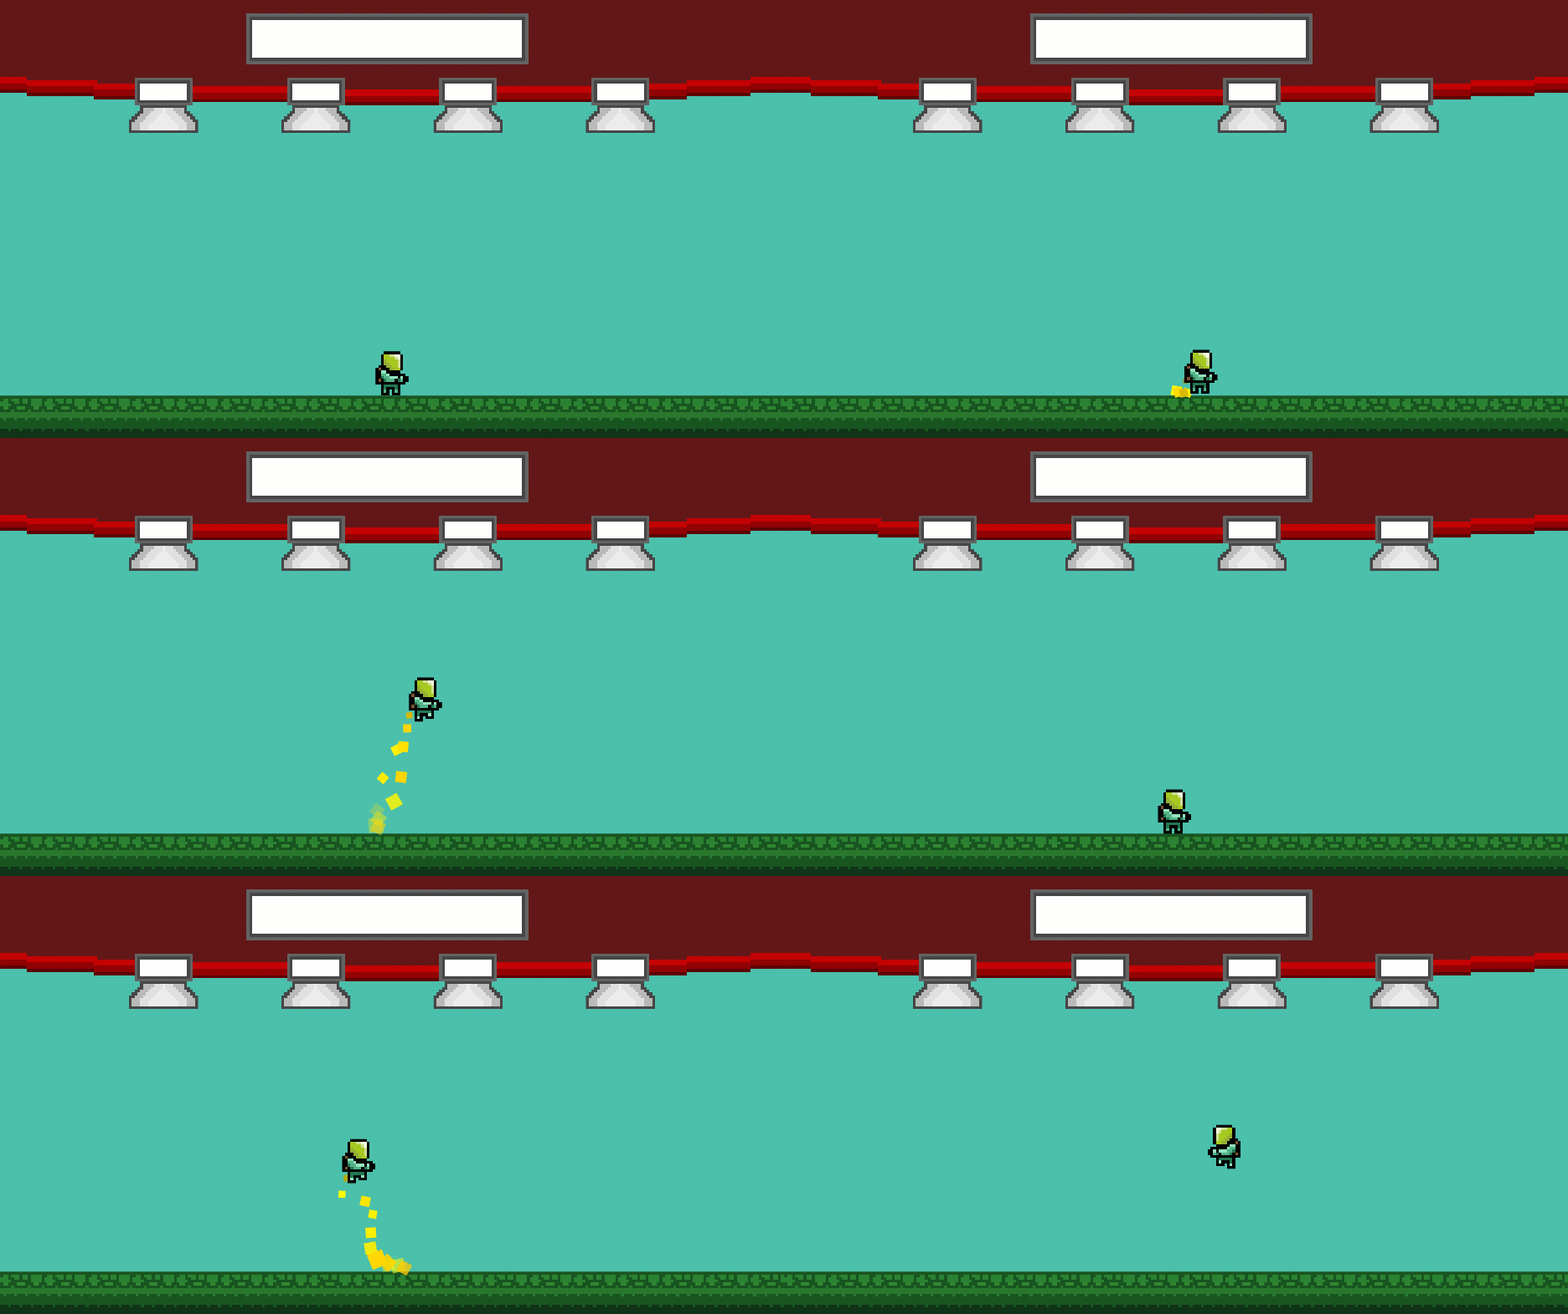
To add some interesting visual elements, we’ve got a jetpack particle which will blast particles when the player flies.
Drag in the “FlyParticle” prefab into the scene as a child of the player. Position it in a way so it comes out from the player’s jetpack.
Scripting the Player Controller
To begin, let’s create a new C# script called “PlayerController” and attach it to the player object we just made.
Opening it up, we can start by adding a new enumerator called “PlayerState” at the top of our class. This enum will contain the player’s current state. If you look back at the player animation controller, you will see that the “State” float value correlates to the id of each enum value.
public enum PlayerState
{
    Idle,       // 0
    Walking,    // 1
    Flying,     // 2
    Stunned     // 3
}
Now back in our class, let’s add the variables we’re going to be using. First, we have our state, some values for speeds and durations and finally a list of components that we can access.
public PlayerState curState;            // current player state

// values
public float moveSpeed;                 // force applied horizontally when moving
public float flyingSpeed;               // force applied upwards when flying
public bool grounded;                   // is the player currently standing on the ground?
public float stunDuration;              // duration of a stun
private float stunStartTime;            // time that the player was stunned

// components
public Rigidbody2D rig;                 // Rigidbody2D component
public Animator anim;                   // Animator component
public ParticleSystem jetpackParticle;  // ParticleSystem of jetpack
To begin with our functionality, let’s add a “Move” function. This is going to be called every frame. It gets the horizontal axis (-1 to 1) which maps to the left/right arrows and A/D keys. Then we check if the player is moving left or right and flip the X scale depending on that. This will make the player flip their facing direction. Finally, we set our horizontal velocity to be the direction with the move speed applied.
// moves the player horizontally
void Move ()
{
    // get horizontal axis (A & D, Left Arrow & Right Arrow)
    float dir = Input.GetAxis("Horizontal");

    // flip player to face the direction they're moving
    if (dir > 0)
        transform.localScale = new Vector3(1, 1, 1);
    else if (dir < 0)
        transform.localScale = new Vector3(-1, 1, 1);

    // set rigidbody horizontal velocity
    rig.velocity = new Vector2(dir * moveSpeed, rig.velocity.y);
}
Another function is “Fly”. This gets called whenever the player holds the up arrow key and adds force upwards to the player’s rigidbody. We also play the jetpack particle.
// adds force upwards to player
void Fly ()
{
    // add force upwards
    rig.AddForce(Vector2.up * flyingSpeed, ForceMode2D.Impulse);

    // play jetpack particle effect
    if (!jetpackParticle.isPlaying)
        jetpackParticle.Play();
}
Something we need to know for changing states is whether or not the player is standing on the ground. For this we have the “IsGrounded” function which returns a bool value of true or false.
We shoot a short raycast downwards and check if it hit the floor. If so, return true, otherwise return false.
// returns true if player is on ground, false otherwise
bool IsGrounded ()
{
    // shoot a raycast down underneath the player
    RaycastHit2D hit = Physics2D.Raycast(new Vector2(transform.position.x, transform.position.y - 0.85f), Vector2.down, 0.3f);

    // did we hit anything?
    if(hit.collider != null)
    {
        // was it the floor?
        if(hit.collider.CompareTag("Floor"))
        {
            return true;
        }
    }

    return false;
}
Speaking of states, we need a way to change it. So let’s make a function called “SetState” which will be called every frame. First up, we check if we’re not stunned, because if we are the state can’t change.
The Idle state is determined if the player’s velocity is 0 and they’re grounded. Walking is if the player’s horizontal velocity isn’t 0 and they’re grounded, and Flying is if the player’s velocity isn’t 0 and they’re not grounded. Fairly simple.
Then we tell the Animator we’ve set our state, which will change the currently playing animation.
// sets the player's state
void SetState ()
{
    // don't worry about changing states if the player's stunned
    if (curState != PlayerState.Stunned)
    {
        // idle
        if (rig.velocity.magnitude == 0 && grounded)
            curState = PlayerState.Idle;
        // walking
        if (rig.velocity.x != 0 && grounded)
            curState = PlayerState.Walking;
        // flying
        if (rig.velocity.magnitude != 0 && !grounded)
            curState = PlayerState.Flying;
    }

    // tell the animator we've changed states
    anim.SetInteger("State", (int)curState);
}
“Stun” is a function that will be called when the player gets stunned. We set the state and make their velocity shoot them downwards so they hit the ground. Also setting the stun time and stopping any jetpack particles.
// called when the player gets stunned
public void Stun ()
{
    curState = PlayerState.Stunned;
    rig.velocity = Vector2.down * 3;
    stunStartTime = Time.time;
    jetpackParticle.Stop();
}
So how does the player actually call these functions? With the “CheckInputs” script. This calls the “Move” function which has its own inputs. For flying we check for up arrow inputs and at the end we set the state as it may have changed.
// checks for user input to control player
void CheckInputs ()
{
    if (curState != PlayerState.Stunned)
    {
        // movement
        Move();

        // flying
        if (Input.GetKey(KeyCode.UpArrow))
            Fly();
        else
            jetpackParticle.Stop();
    }

    // update our current state
    SetState();
}
What calls “CheckInput” is the “FixedUpdate” function. This is a function that is similar to the “Update” function. The difference is that unlike being called every frame, this is called at a consistent rate (0.02 seconds). Why? Well because we are altering the physics of the rigidbody. This needs to be a consistent rate otherwise things can mess up.
In this function, we also update the “grounded” bool to be if the player is grounded or not. We also check if the player is stunned and if so, has the stun time ran out? If so, make them idle.
void FixedUpdate ()
{
    grounded = IsGrounded();
    CheckInputs();

    // is the player stunned?
    if(curState == PlayerState.Stunned)
    {
        // has the player been stunned for the duration?
        if(Time.time - stunStartTime >= stunDuration)
        {
            curState = PlayerState.Idle;
        }
    }
}
One last function is an OnTriggerEnter2D check. We’re checking if we’re entering an “Obstacle” object. If so, we get stunned.
// called when the player enters another object's collider
void OnTriggerEnter2D (Collider2D col)
{
    // if the player isn't already stunned, stun them if the object was an obstacle
    if(curState != PlayerState.Stunned)
    {
        if(col.GetComponent<Obstacle>())
        {
            Stun();
        }
    }
}
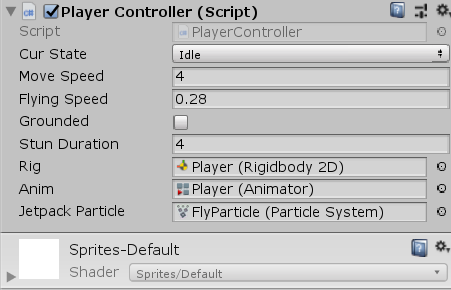
Going back to the editor now, we can enter in the values for our player and test it out. The best values that I found for the game are:
- Move speed = 4
- Flying speed = 0.28
- Stun duration = 4
Make sure you also add in the components and press play!
Creating an Obstacle
Now, we’re going to begin to create the obstacles for the player to avoid.
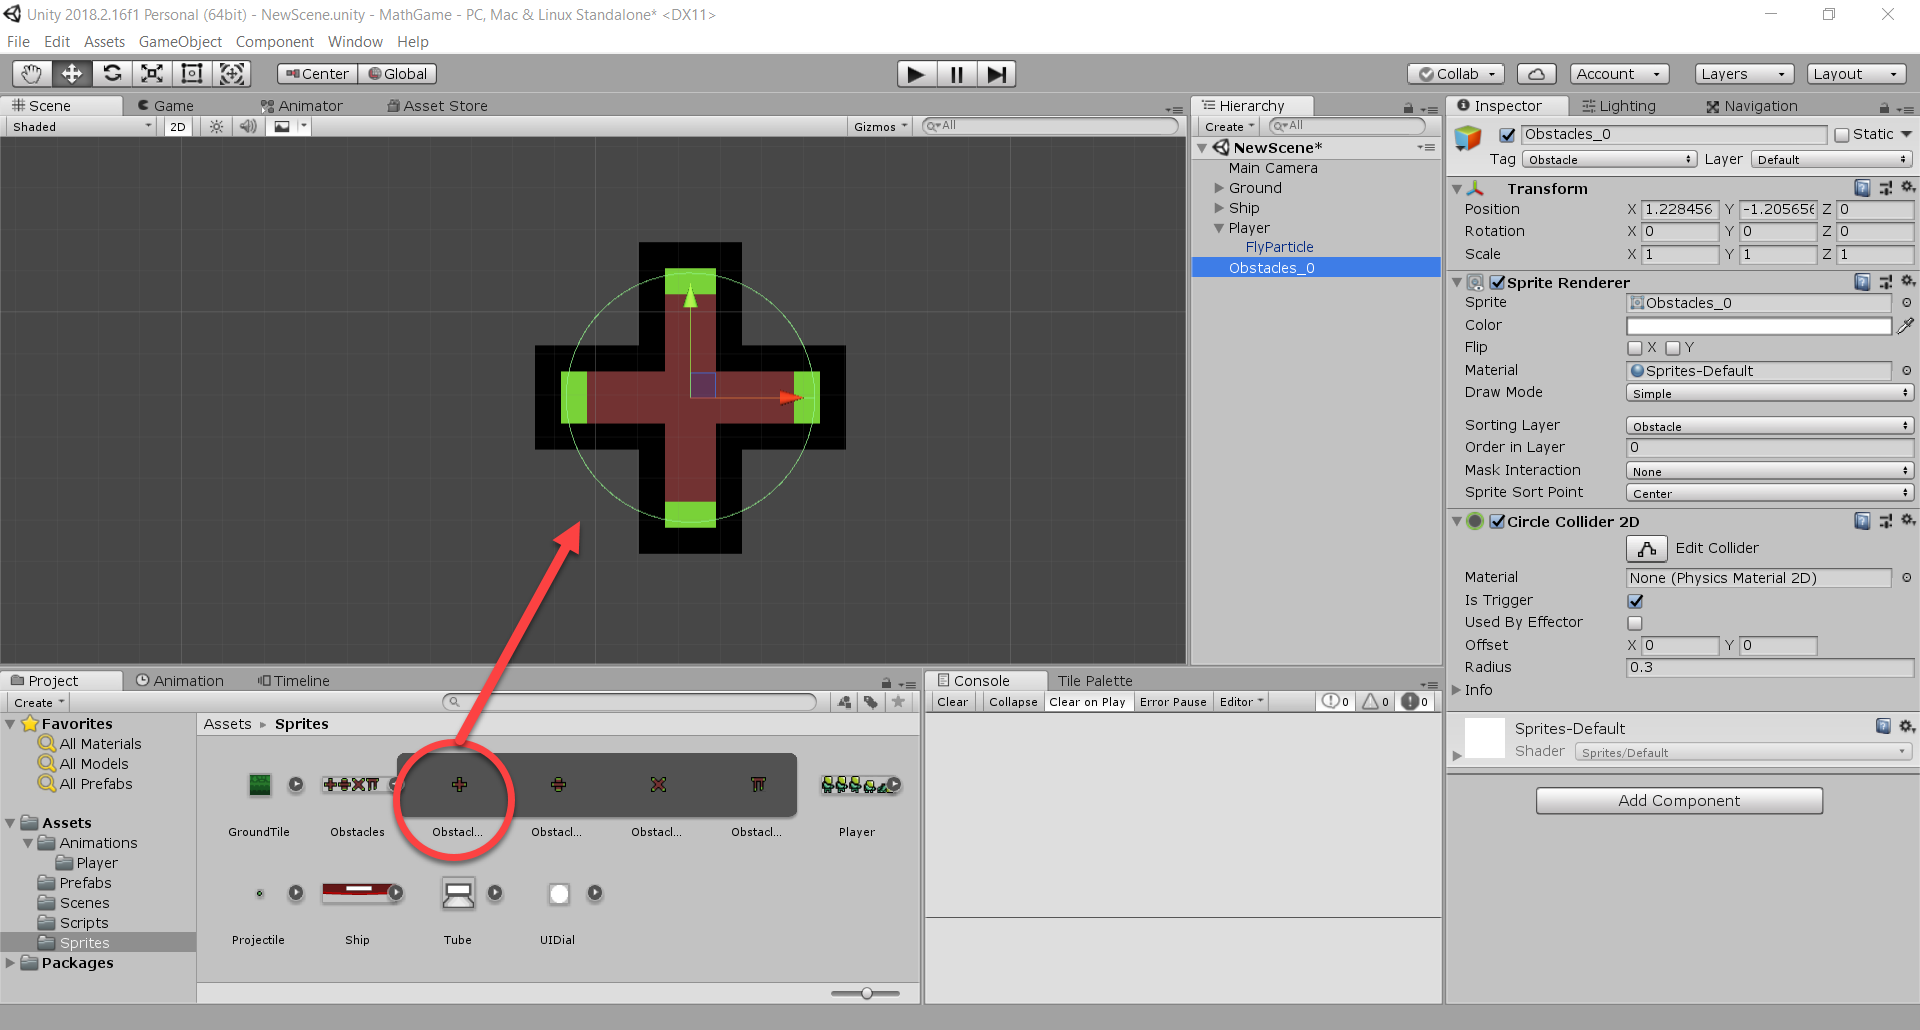
Drag in the “Obstacles_0” sprite (a part of the Obstacles sprite sheet) into the scene. Set the tag and sorting layer to “Obstacle” and add a CircleCollider2D. a good thing would be to make the collider a bit smaller than the actual sprite. This will make it so when the player get’s stunned, they don’t think “I didn’t even touch that!”. It allows for more near misses.
Now create a new C# script called “Obstacle”, attach it to the obstacle object and open it up.
Our variables are fairly simple. We have the direction that it’s going to move in which is determined by the spawner when it’s created. The move speed is how fast it moves and aliveTime is how long until it will be destroyed.
public Vector3 moveDir;         // direction to move in
public float moveSpeed;         // speed to move at along moveDir

private float aliveTime = 8.0f; // time before object is destroyed
In the “Start” function, we want to call the Destroy function. Now this won’t instantly destroy it, but we can set a time delay. This means the object will be destroyed after “aliveTime” seconds.
void Start ()
{
    Destroy(gameObject, aliveTime);
}
In the “Update” function, we want to move the object in the direction specified. As well, we want to rotate it over time in the direction that it’s moving. This just makes the movement look better and as if something ‘threw’ it.
void Update ()
{
    // move obstacle in certain direction over time
    transform.position += moveDir * moveSpeed * Time.deltaTime;

    // rotate obstacle
    transform.Rotate(Vector3.back * moveDir.x * (moveSpeed * 20) * Time.deltaTime);
}
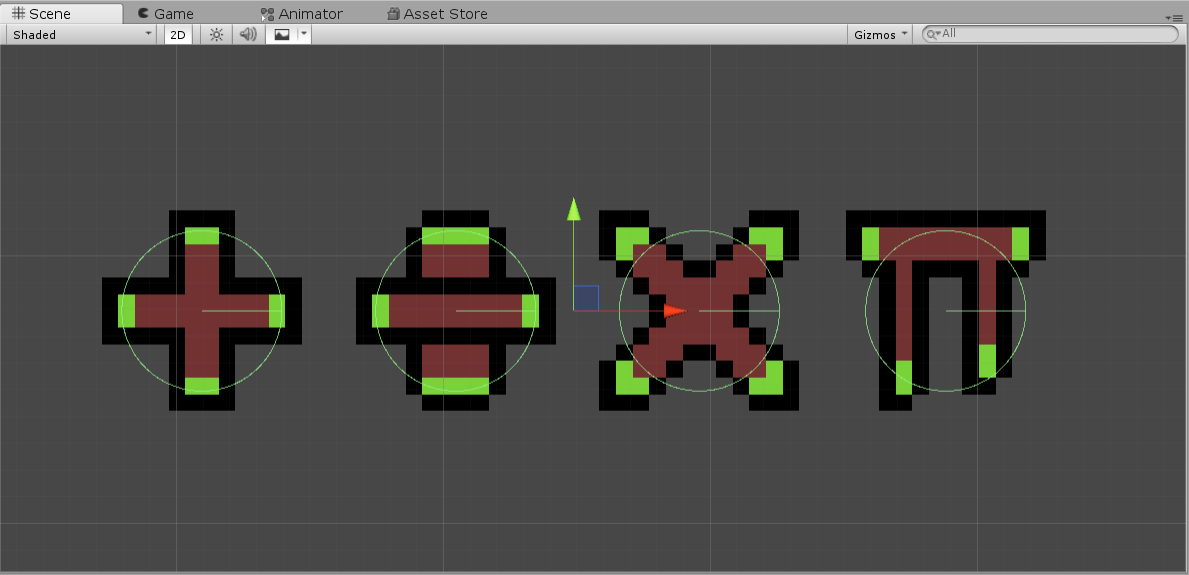
Now back in the editor, we can duplicate the obstacle for each of the 4 sprites. You can create your own, or use the ones included (math related symbols). Then save them as prefabs and you’re done!
Continued in Part 2
We now have a character and some obstacles to face, but there’s quite a bit to go in the math department.
In Part 2, we’ll be creating a system to spawn the obstacles we just made. Also, we’ll learn how to set up a game loop of displaying problems, solving them, and receiving a new problem – with UI elements to help out.


