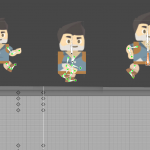
While static sprites work fine, animating your 2D characters in a game can create a whole new experience – so knowing how to do so can be a great boost to your projects.
In this tutorial, we’re going to go over how to use Unity’s Animator Component to properly render your 2D sprite animations based on the character’s in-game actions (also known as a State Machine).
If you’re ready to breathe more life into your Unity 2D games, let’s dive in.
Introduction
What is it that an animator does? What summary can we give that would accurately describe the operations an animator performs? Is an animator an artist illusionist? Is he a virtual puppet master? What about video game animators? Are they much different from a pen-and-pencil animator?
I would say that when it comes to video games, animators are both an illusionist and a puppet master. An illusionist that crafts a realistic movement, and a puppet master that orchestrates this movement. In this tutorial, we will take an animated character and be its puppet master. We will take the animated motions of this character and dictate to it when it will run, jump, or walk. We will create a system of machines that will intelligently transition between actions and take keyboard input from the user. At the end of this tutorial, we will have a complete 2D character that will behave in such a way you would almost expect it to declare, “There are no strings on me!”
BUILD GAMES FINAL DAYS: Unlock 250+ coding courses, guided learning paths, help from expert mentors, and more.
Requirements
This tutorial uses a 2D sprite that was rigged in this tutorial (Rig a 2D Character in Unity) and animated in this tutorial (Animate a 2D Character in Unity). If you are interested in sprite rigging or 2D animation, have a look at those two tutorials. Both are an in-depth view of rigging and animating a character. Or, if you like, you could download the project files from the animation tutorial and jump right into this one.
Here is a link to the project files that will get you started in this tutorial: Project Files.
This project also requires the “2D Animation,” “2D Sprite Skinning,” and “2D Inverse Kinematics” packages so make sure you have those downloaded and imported into your project before continuing (for instructions on downloading and importing the packages, refer to the first part of this tutorial: Rig a 2D Character in Unity). Also, some familiarity with C# would be quite helpful. If, however, you aren’t confident in your C# coding skills, follow along with this tutorial anyway. You will still be able to complete this project even if you have limited knowledge of C#.
The Animator Component
Let’s start by examining the Animator component. Click on the Adventurer character and have a look at the Animator component.
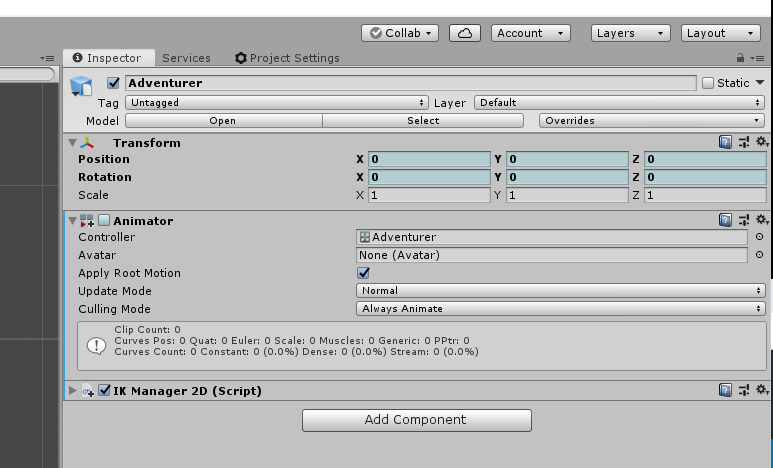
The “Controller” field is where we assign an animator controller.
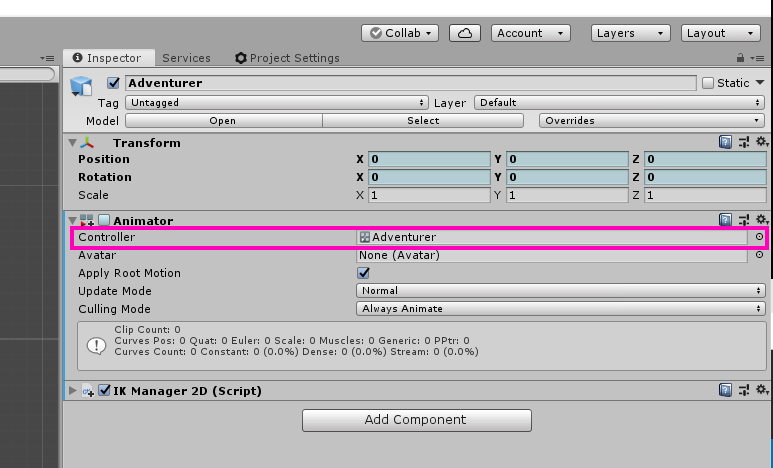
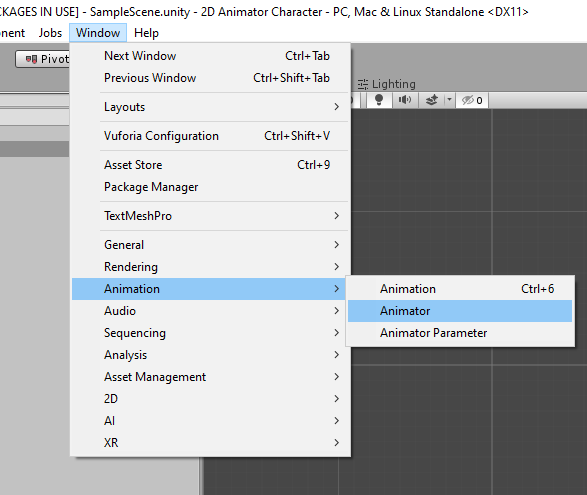
An “Animator Controller” allows us to create interactions between animations. It is where all the running, jumping, and walking actions come together into one unified site. We already have one assigned to this field and you can go to Window -> Animation -> Animator to see what an Animator Controller looks like.
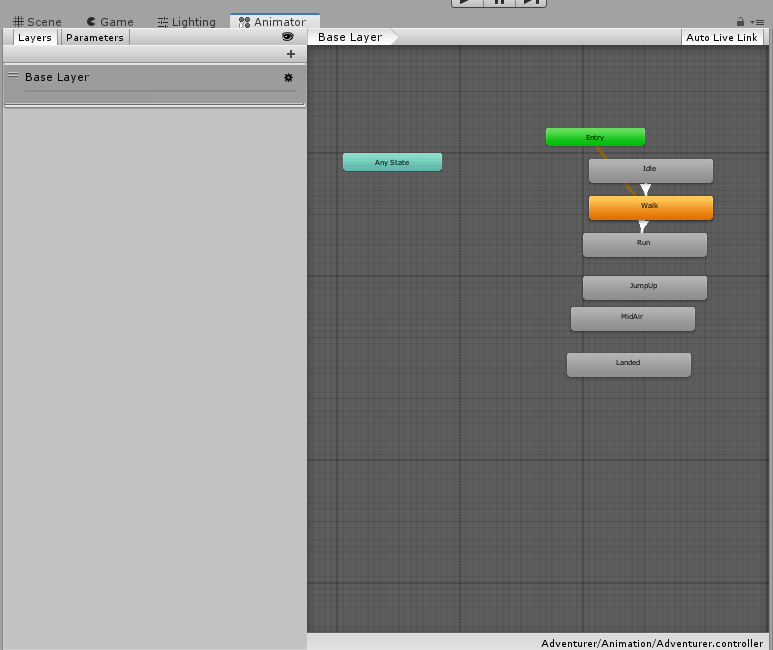
As you can see, all of our animations are stored here ready for us to do structure interactions between them. For now, however, let’s go back to the Animator component and continue examining it.

The “Avatar” field is fairly self-explanatory. This is where we would assign the Avatar property. You’ll notice this field is empty. This is because an Avatar is primarily for 3D humanoids as opposed to 2D. Since we’re operating in 2D, we have no need for an Avatar.
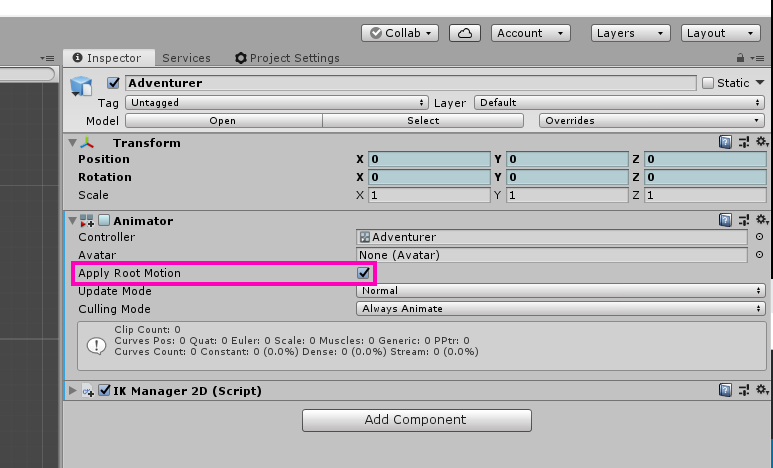
“Apply Root Motion” will determine whether or not our character will move in an additive way. With this enabled, our animation will be what drives the locomotion of our object not the scripting of the game object. This obviously contributes to a more realistic character animation but it requires the animator to actually animate the character moving forward. All of our walk and run animations have the forward motion animated into the clip so we want this enabled.
With Root Motion enabled:
Without Root Motion:
“Update Mode” determines what frame rate the Animator should use.
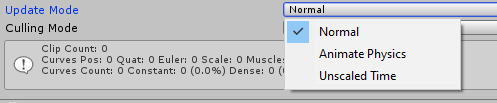
“Normal” simply uses the frame rate that the Update() method uses. This is the one we’re going to be using as it is will match the current frame rate of the game. “Animate Physics” uses the frame rate that the FixedUpdate() uses. It is best for animations with a lot of physics interactions as this operates on a completely different frame rate than “Normal”. And “Unscaled Time” simply runs all animations at 100% speed. This is best for UI animations that aren’t trying to be realistic and have no physics interactions.

“Culling Mode” determines how the animations will behave when they are outside of the view of the camera. “Always Animate” will keep the animation running. This is obviously the most memory intensive option but for a 2D game, it will not make much difference. “Cull Update Transform” will pause the animation but will continue to update the transform. And “Cull Completely” will disable everything. For the sake of this tutorial, I’m going to set it to Always Animate.
Now that we have some fair knowledge of the Animator Component, let’s start working in the Animator Controller!
Creating the Running Mechanic
If you haven’t already, go to Window -> Animator and dock the animator tab somewhere in your workspace. I chose to put it directly underneath the scene view. You’ll notice that all of our animations show up here as grey rectangles.
These are called “states” in Unity. You’ll notice that one of them is orange. This is known as the “Default State” and it is this is what will run as soon as we play the game.
The first action we need to make for our character is the ability to run and walk. So let’s think about how we’re going to do this. We have two animations, run and walk. We need a way to have both of these played consecutively. When the player presses the left and right arrow keys, the character needs to go from an idle state to a running state without it being a jerky transition from standing to running. We can prevent a jerky transition by having the character blend between the idle, walking, and running animations.
The way we would do this in Unity is by creating what is known as a “Blend Tree.” A Blend Tree will take a series of animations and blend between them based on input from a parameter. This explanation can be a little confusing so let’s see what it looks like in practice.
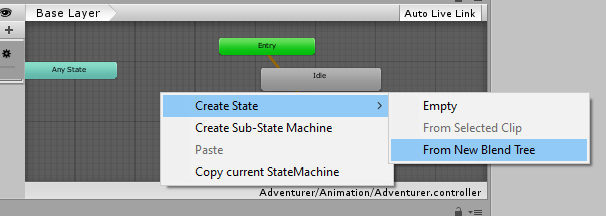
Right-click in empty space on your Animator and select “Create State -> From New Blend Tree.”
Name it “Locomotion.” Right-click on the blend tree and select “Set as Default Layer State.”
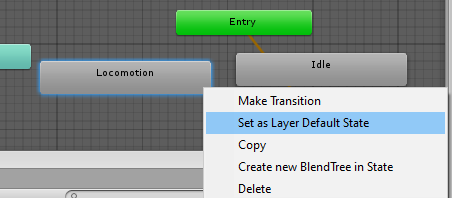
This means that as soon as we hit play, the blend tree will immediately start playing. Now double click on the blend tree to open it.
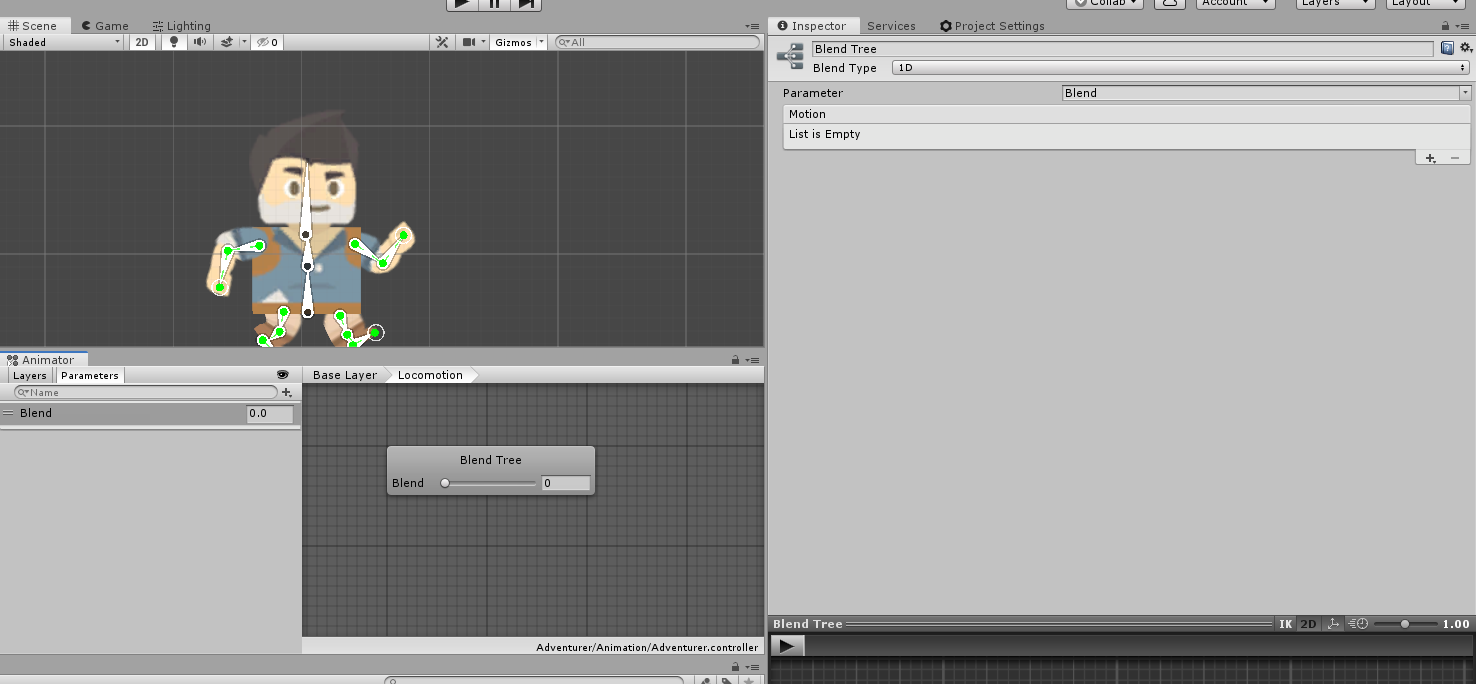
A couple of things we should note. First, the “Blend Type” is set to 1D.
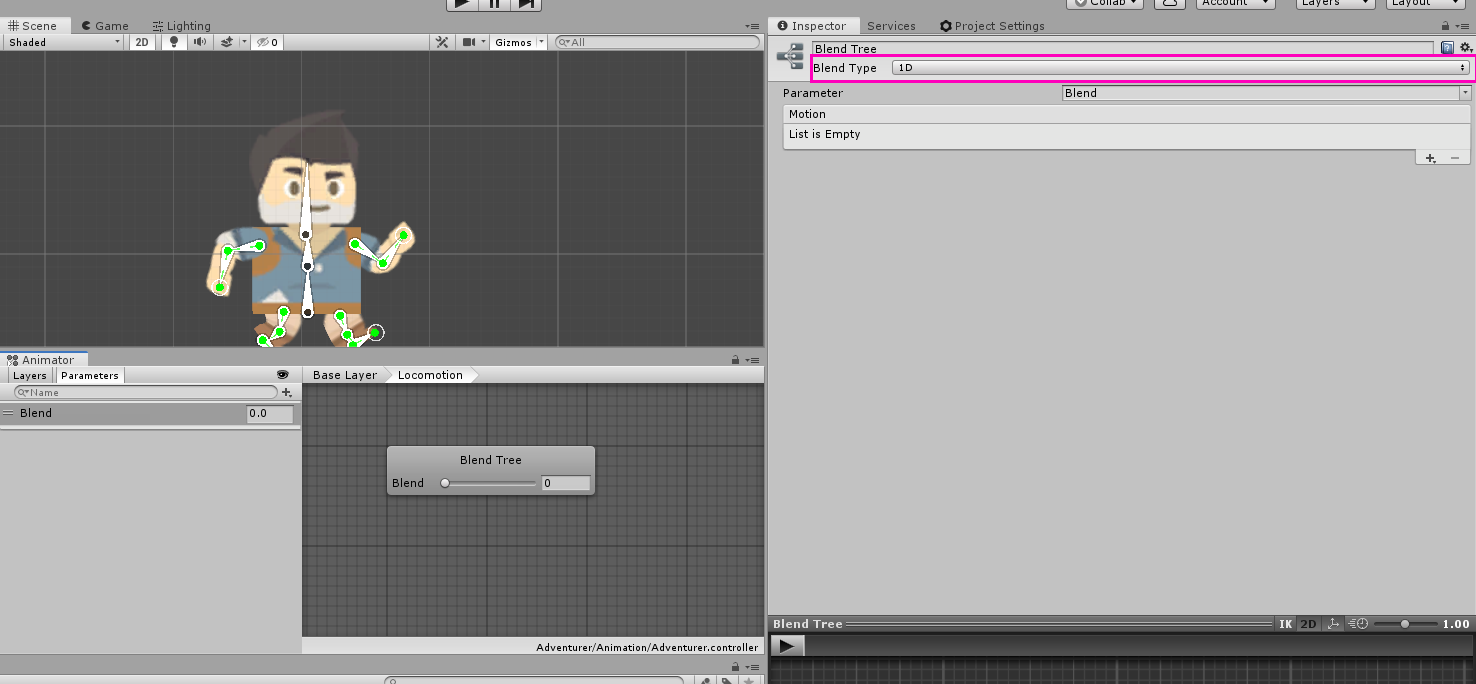
This means the blend tree will only take input from one parameter. The other types (“2D Simple Directional”, “2D Freeform Directional”, “2D Freeform Cartesian”, and “Direct”) use more than one. In this tutorial, we’re only going to be using 1D but have a look at this Game Dev Academy tutorial (Unity Animator – Comprehensive Guide) if you’d like a more in-depth look at this portion of the blend tree.
Second, if you click over to the “Parameters” panel, you’ll see it’s created a new parameter called “Blend.”
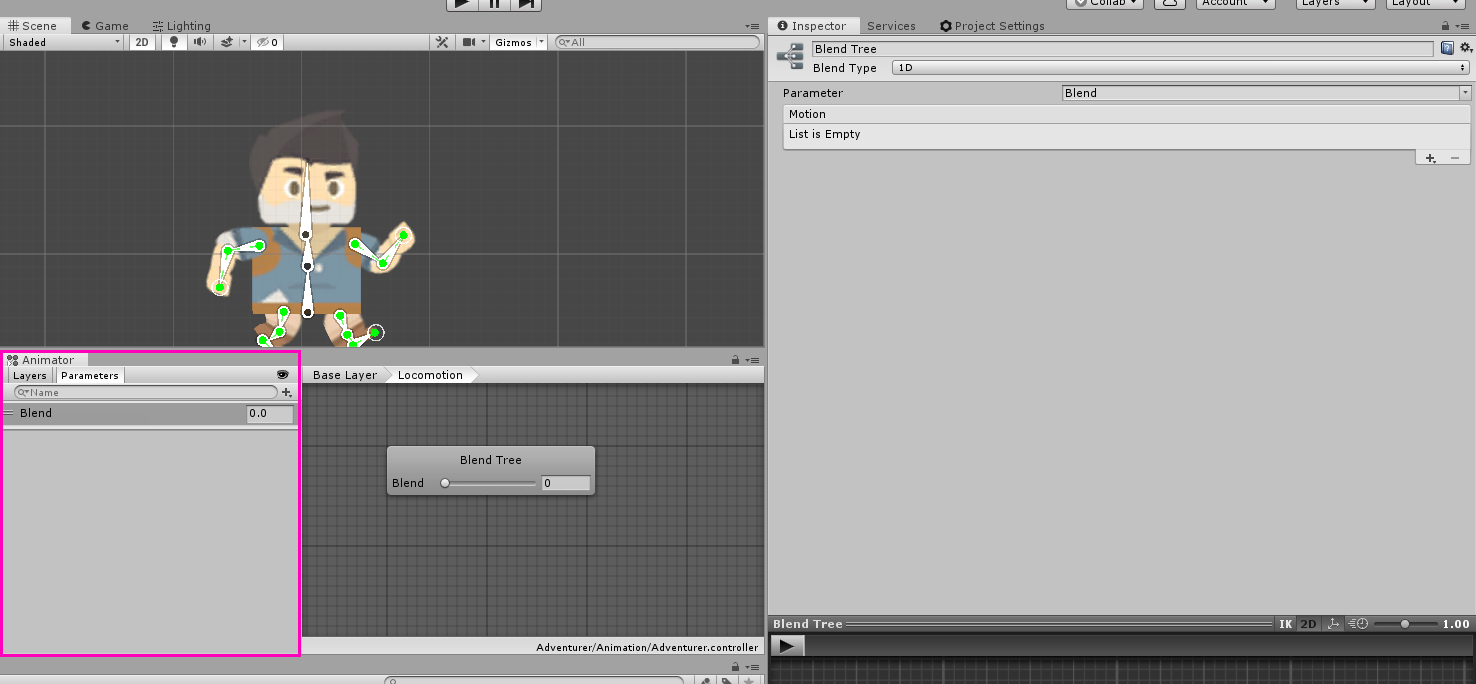
There are different types of parameters (“float”, “int”, “bool”, and “trigger”) and they all behave sort of like variables in the Unity animator. They also can be accessed through scripts which we will be doing a little bit later. A blend tree requires that we have a parameter so it has automatically created one for us. This is what will determine when a certain animation will play. Let’s name it “Speed” since speed is what will determine whether our character is running or walking.
Now, let’s construct the body of this blend tree. Hit the plus icon in the inspector and add three new motion fields.
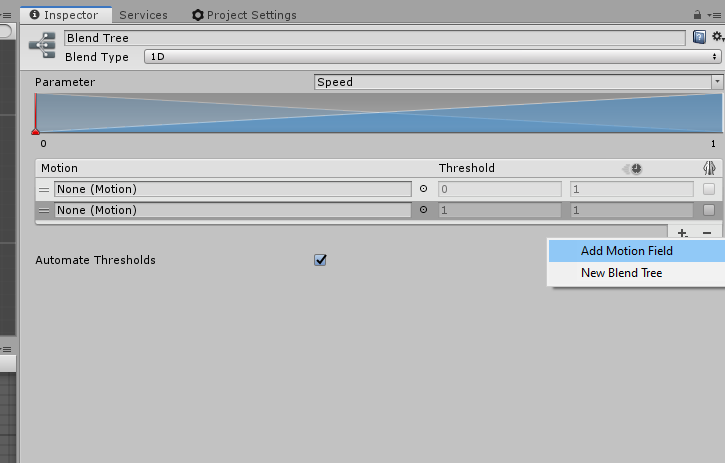
Drag our Idle, Walk, and Run motions into these fields.
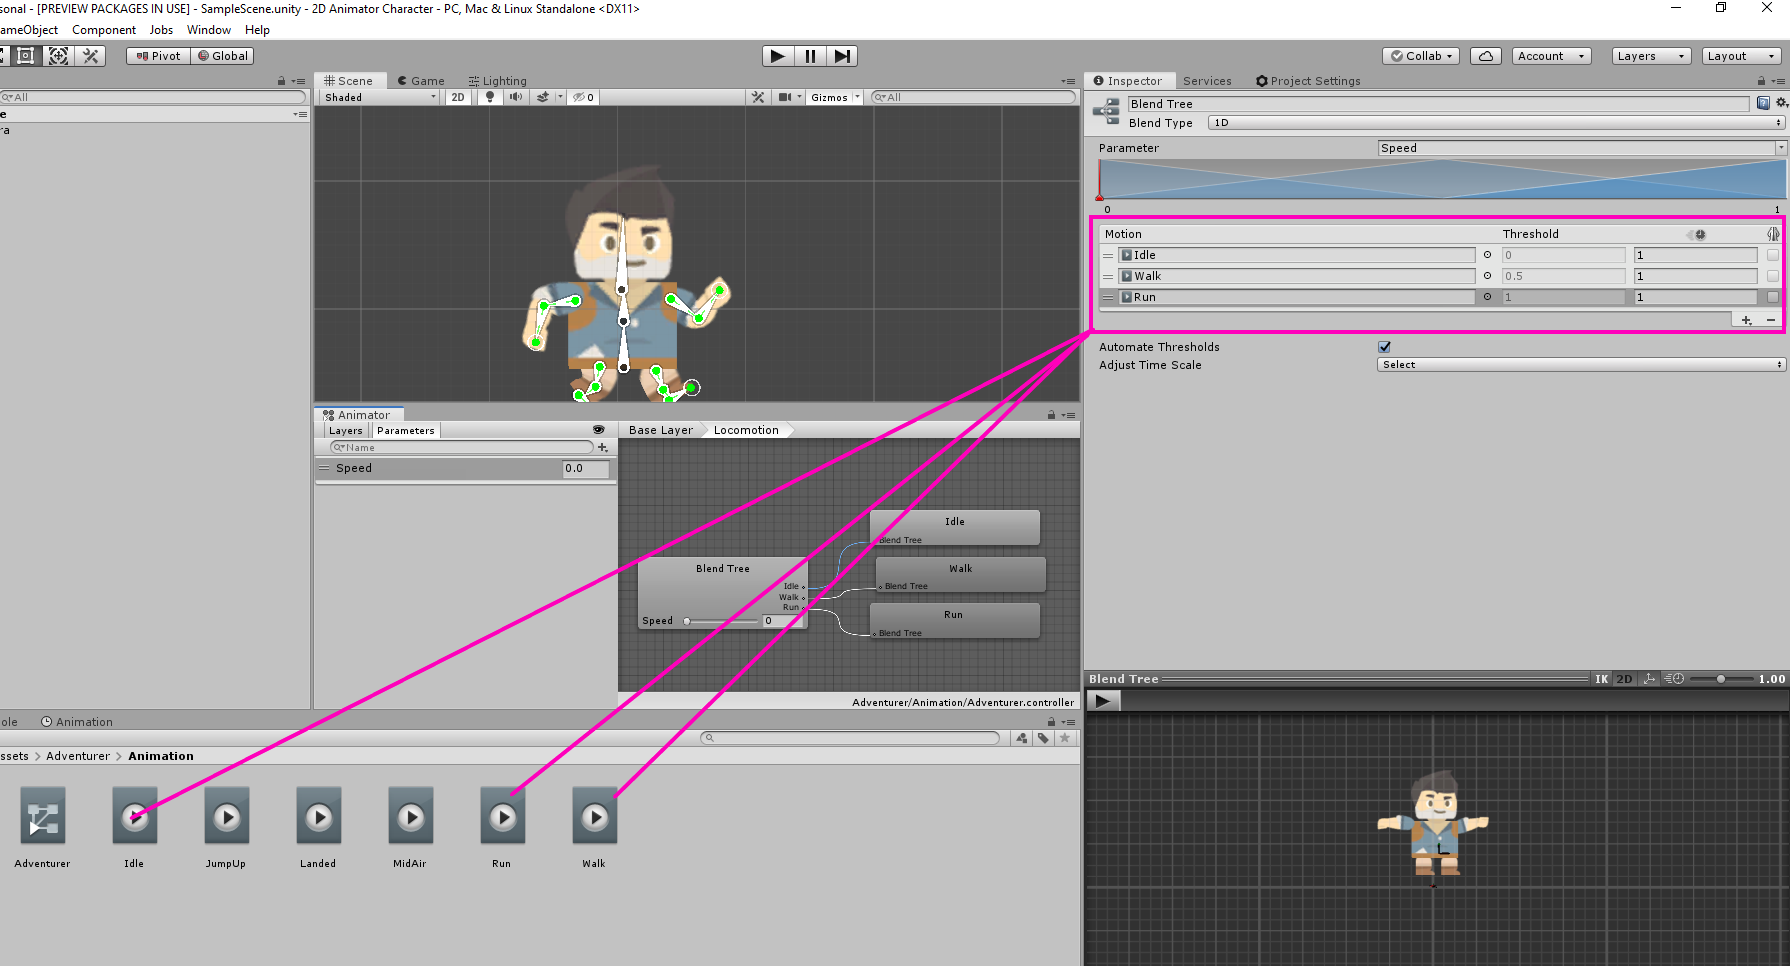
Because “Automate Thresholds” is checked, we can use the slide on the lower part of the blend tree square to see when exactly our character will be running. Hit play and drag the slider around.
As you can see, our character will run or walk based on the value of the Speed parameter. You can customize the thresholds by unchecking “automate thresholds” and changing the values. We usually leave one as the maximum speed value so don’t go past that. I like the current thresholds (idle at 0, walking at 0.5, and running at 1) so I’m just going to leave “automate thresholds” checked.
Creating the Jump mechanic
The final mechanic for our character! This has a bit of a different structure than the locomotion blend tree because, if you will remember, we made three poses for our jump mechanic rather than three animations. So this mechanic is going to make use of something called “Transitions.” The name is fairly self-explanatory, however, we’re going to look at the various ways we can tweak transitions to give us that jumping look.
First, create a new trigger parameter called “Jump” and a boolean parameter called “Grounded.”
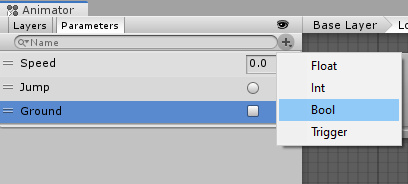
[should be “Grounded” instead of “Ground”]
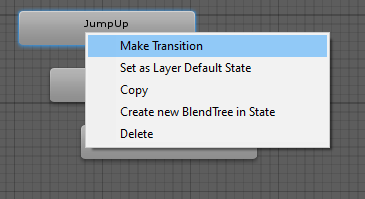
Jump is what we will use to determine if the player has pressed the jump button and Grounded is what we will use to determine if the player is on the ground. Next, locate your three jumping poses (“JumpUp,” “MidAir,” and “Landed”) and place them near each other. Now, right-click on “JumpUp” and select “Make a Transition.”
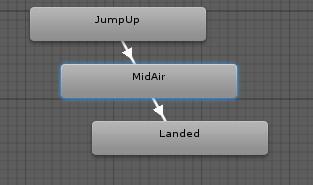
You’ll notice a white arrow has come from the JumpUp state and is now tracking to your cursor.

Left-click on the “MidAir” state (I use the term “state,” “pose,” and “animation” interchangeably in this section). You have now created a transition! Create another transition from MidAir to Landed and that will complete the majority of our mechanic.
Now, we just need to customize each transition.
Transitions
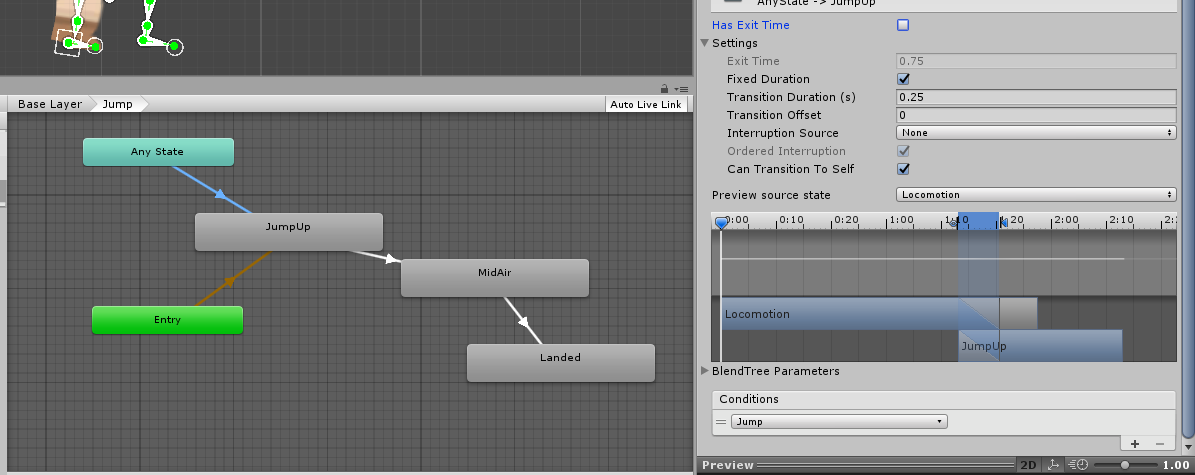
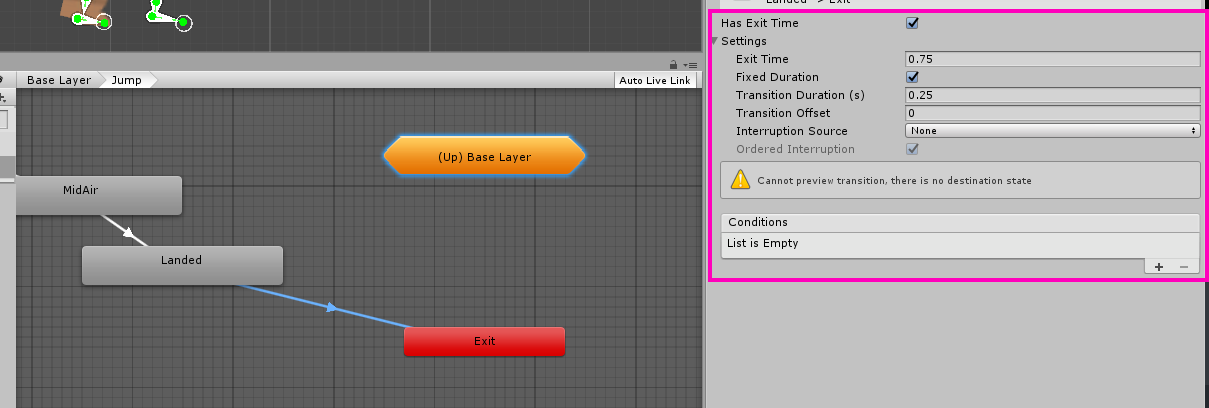
Select the JumpUp to MidAir transition.
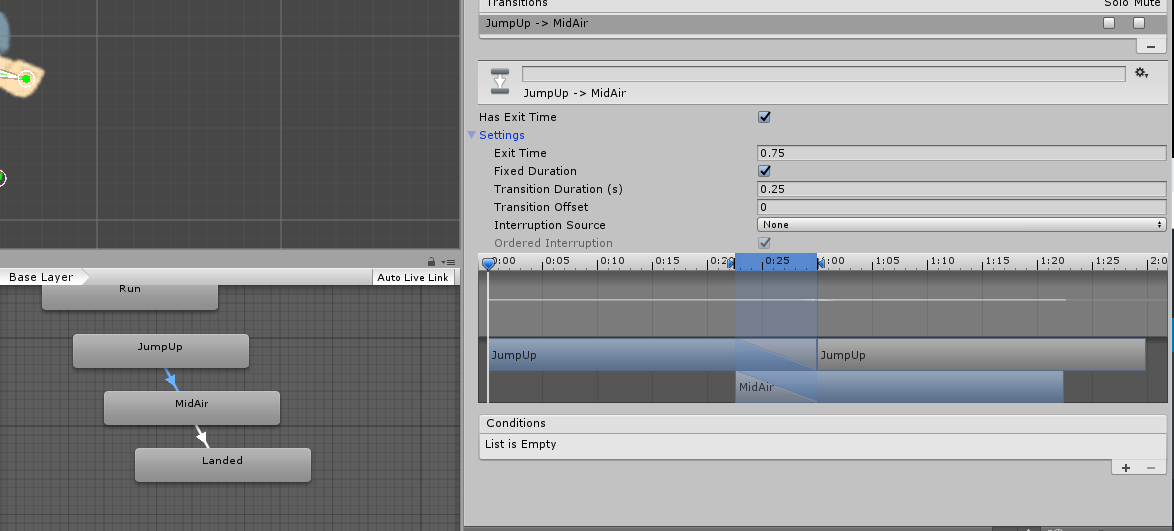
Notice all the settings that appear in the inspector.
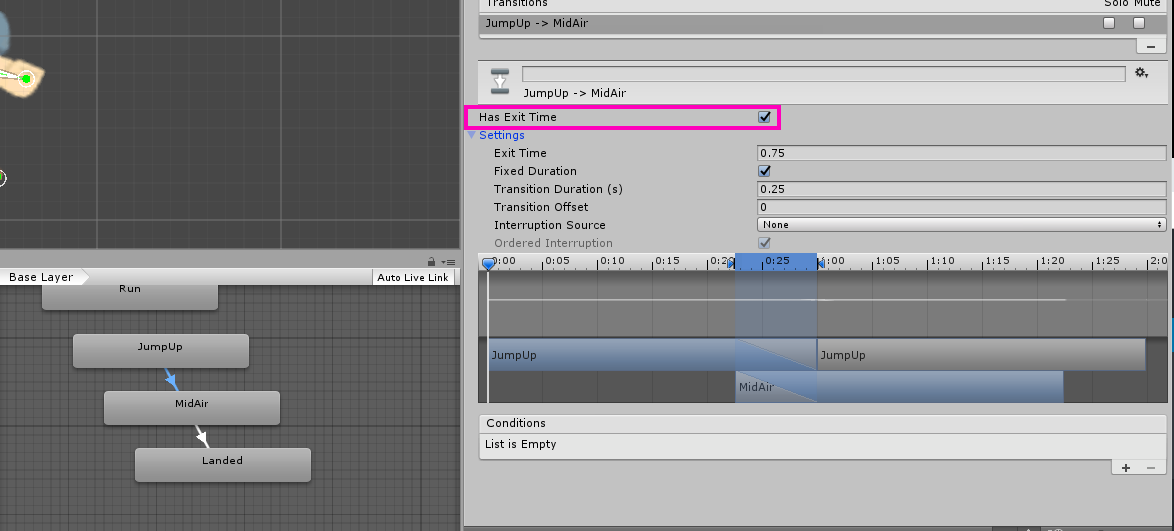
“Has Exit Time” will determine if the animation will play to the end or transition immediately. The other settings under the “settings” drop-down are all fairly self-explanatory and can be configured in the timeline we see in this window.
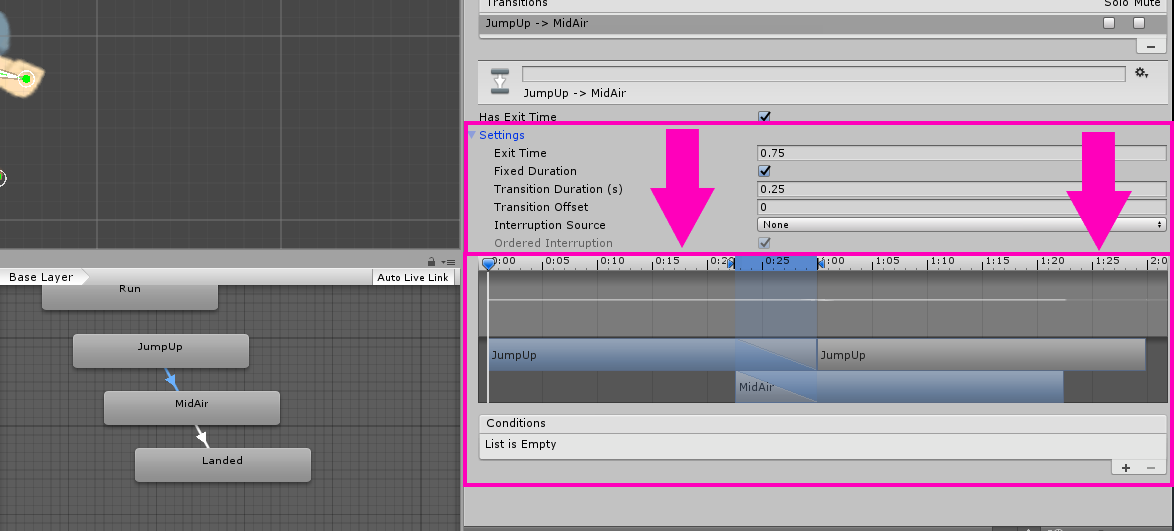
This timeline will determine how long the transition will be and where in the clip it will transition. The only setting here that cannot be customized through the timeline is the “Interruption Source.”
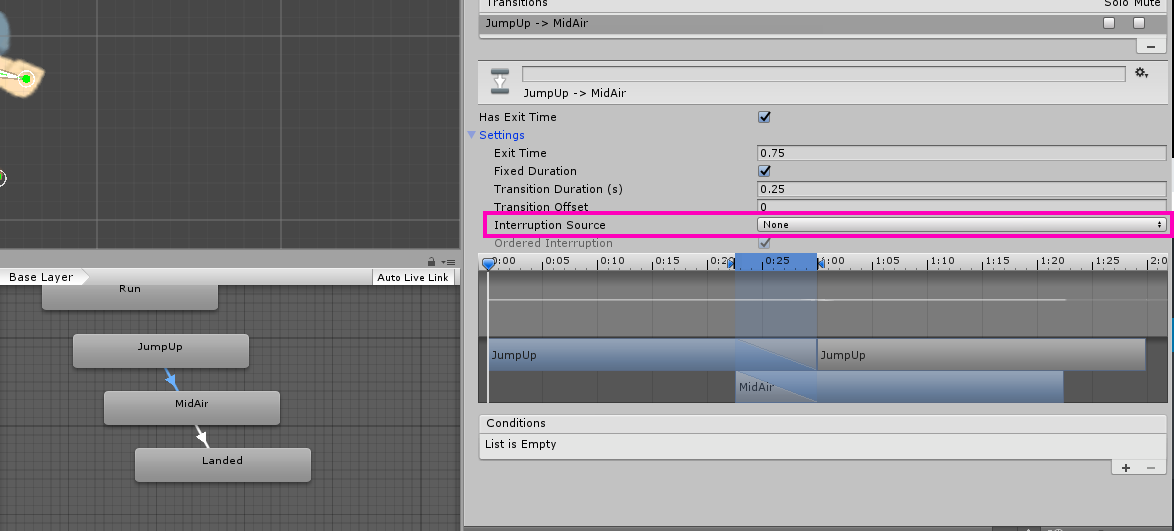
Right now it is set to “None” which means the transition essentially cannot be interrupted (there are exceptions to this which we will look at later). This is the setting we want for the Jump Mechanic but it’s worth having a look at the other options in case you will have need of this in your other projects. Click on this setting and notice all the other options.
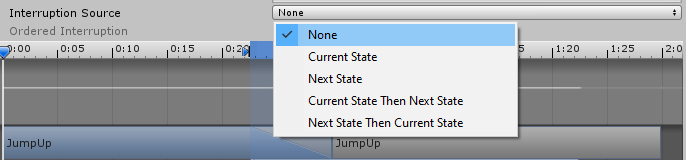
This determines what transitions will play if an interruption to the current transition is detected. All of the options seem kind of ambiguous but if you stare at them for a little while, they start to explain themselves. For example, if it is set to “Current State Then Next State,” when the transition is interrupted, it will play the transitions that are on the current state and then play the transitions on the next state. The converse is true for “Next State Then Current State.” If this transition is interrupted, it will immediately play the transitions on the next state and then play the transitions on the current state. This seems really complicated but I hope you can see how useful this could be. Imagine you had a die sequence. If the character is hit by a fatal bullet, you would want the normal hit animation to play and then you would want the die animation to play (likely in that order). And you would want all of this to interrupt whatever transition was currently playing. Interruption Source seems complicated but I hope you see how useful it could be.
The final setting we need to look at is the “Conditions” box.
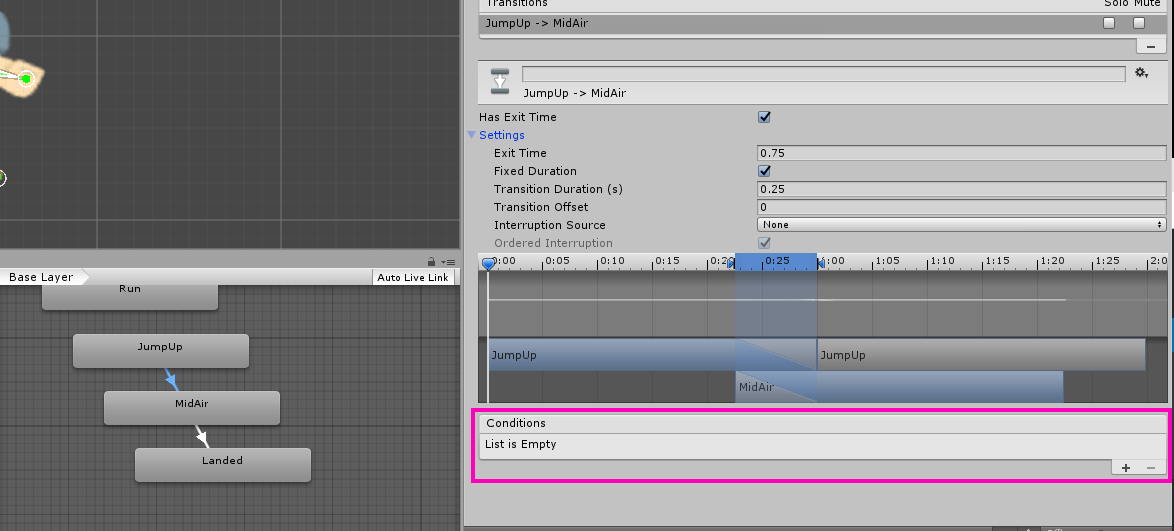
Here we can tell the animator to check certain parameters in a “true-false” scenario. If all the conditions are met, then the transition will play. If this is empty, it will simply play the transition after the Exit Time has elapsed. We will be using the conditions box to determine if the “Jump” trigger has been activated and whether the player has landed. At the moment, however, there is some important clean up we must do in order to complete our Jump Mechanic.
Sub-State Machines
Zoom out and have a complete look at your Animator Controller.
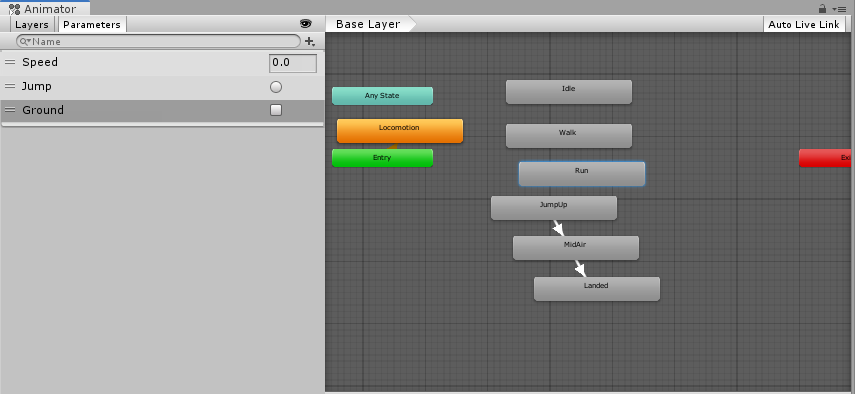
It looks very cluttered. There are half a dozen animation states, transitions going all over the place, and just a general lack of order. This leads to a very inefficient workflow because we have to implement a few more transitions into this to complete the Jump Mechanic. This is where we need to introduce a tool called a “Sub State Machine.” A Sub State Machine is essentially an instance of the Animator Controller that exists within the larger Animator Controller. This means we can put all our Jump poses in the Sub State Machine and have them behave in the exact same way they are now. This will tidy our workspace and increase our Controller’s efficiency.
Right-click in empty space and select “Create Sub State Machine.”
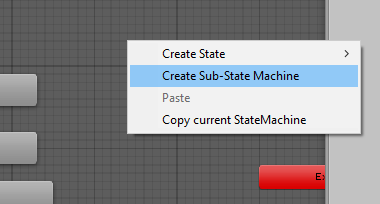
Name this “Jump.” Delete the Idle, Walk, and Run animations if they’re still in the animator.
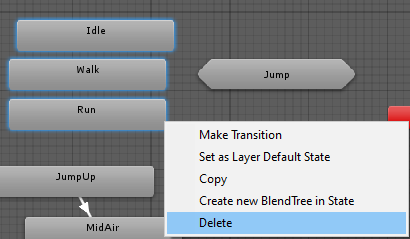
Now, select all three of our jump poses and drag them on top of the sub-state machine to place them inside of it.
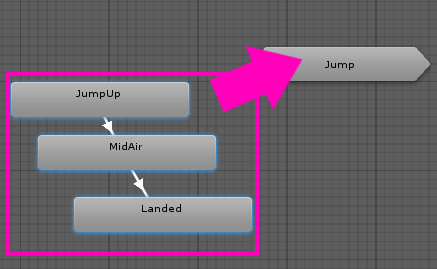
Double click on the sub-state machine to open it up.
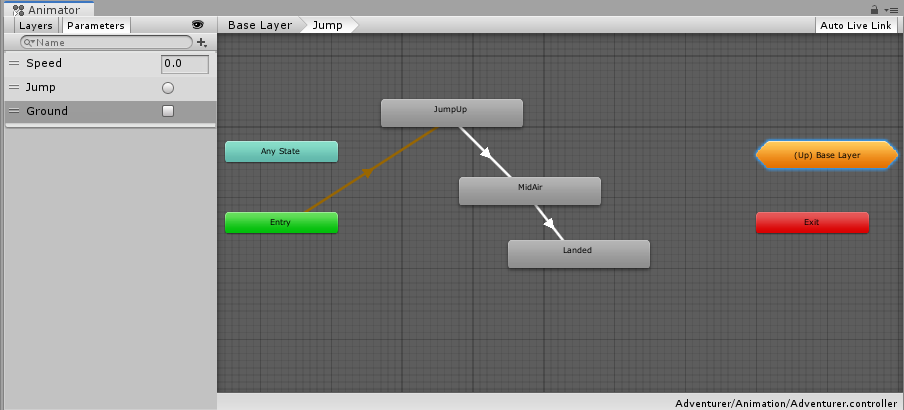
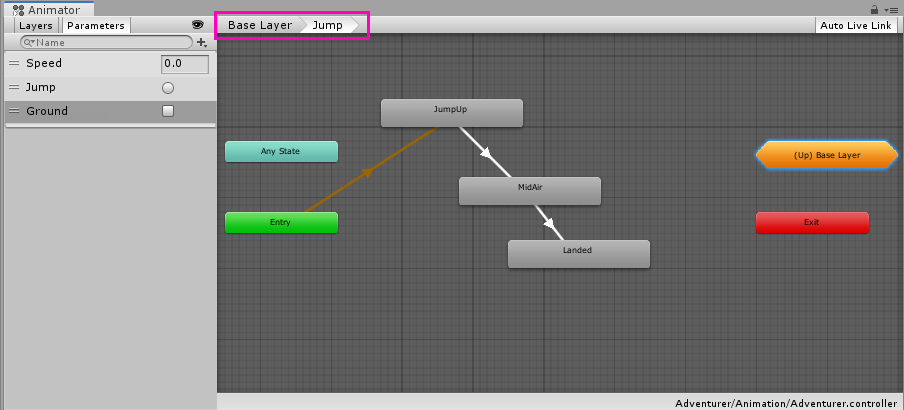
You can go back to the Base Layer by using the bread-crumb in the top left corner.
You’ll notice the presence of four states. “Any State,” “Entry,” “Exit,” and “(Up) Base Layer.”
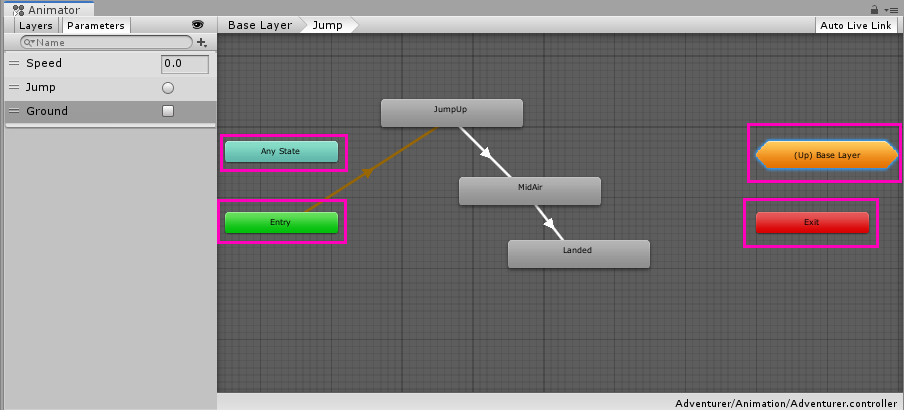
“Any State”, “Entry”, and “Exit” exist in the base layer; Up Base Layer is the only new state we get inside of this sub-state machine. Any State means if the condition of the transition coming from it is true, then it will transition no matter what animation is currently playing. This is the only state that will interrupt Interruption Source when it is set to “None.” Entry is simply whenever the sub-state machine has been transitioned into. In the Base Layer, this is what is called right as soon as you hit play in the editor. If you were to transition into this sub-state machine, it would go through this state. “Up Base Layer” and “Exit” function in similar ways, however, in Up Base Layer you can specify which state you’d like to transition into while the Exit state simply goes to the Entry state on the base layer.
Configuring the Jump Sub-State Machine
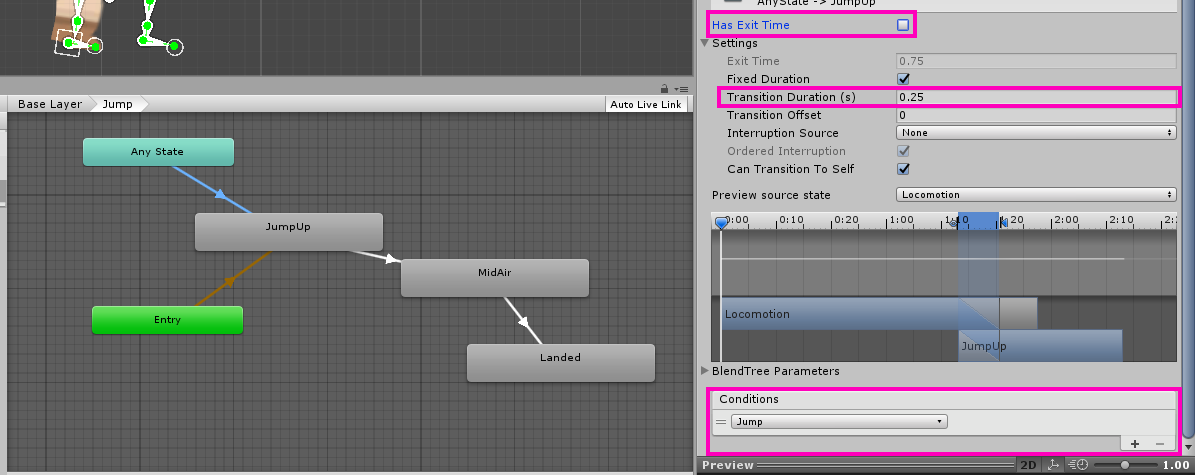
On paper, the functions of these states may be confusing but if you take them at face value, they make intuitive sense. For our Jump Mechanic, we want to transition from the “Any State” to our JumpUp pose. Right-click on the Any State state and make a transition. This transition needs to have a condition. This condition needs to be the “Jump” trigger parameter.
Just like that. Now, whenever this trigger is switched, the character will jump no matter what action is currently running.
The settings for this transition are simple. We need to disable “Has Exit Time” since we do not want the previous animation to run to completion and we want the character to jump right away. Next, we need to specify a duration. It should be something very short since, as I’ve stated before, we want there to be no delay with this jump. I’ve found a value of “0.25” to work well.
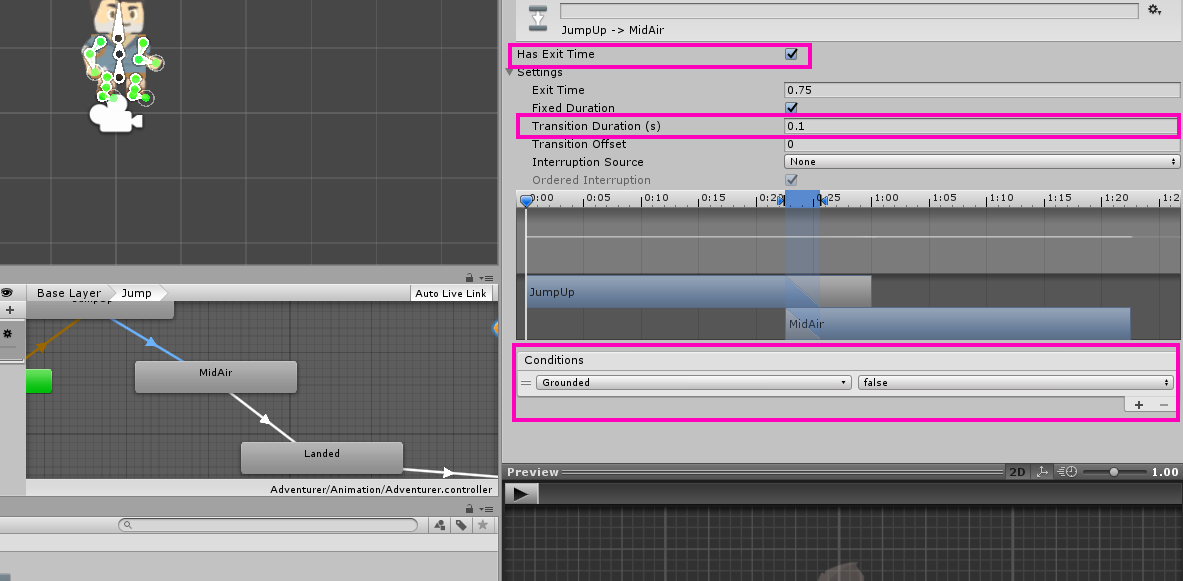
For this next transition (the Jump to Mid Air transition) we make use of the “Grounded” boolean parameter. Since this parameter is what we will use to determine whether the character is touching the ground or not, we want the “Mid Air” pose to play while the character is in the air. Create a condition for the Grounded parameter when it is set to “false.” This is the only condition we need so let’s set the other settings. It doesn’t matter much if there is an exit time on these animations since they are so short. Simply leave it to whatever it is by default. Now we need to set a duration. We want the transition to be very quick as we transition from Jump to Mid Air. Set it to “0.1” as this gives us just enough transition while not slowing down the mechanic.
We are done with this transition! We just have to configure two more.
The Mid Air to Landed transition is similar to the previous transition in that it needs to be extremely quick. This is the moment where the character impacts the ground and it would look awkward if there was a delayed reaction. Set the duration to be almost nothing at “0.01”. For this transition, it might be a good idea to disable exit time in case leaving this checked would contribute to a few moments of delay. And finally, we need to have a condition. Just like the previous transition was when the character was in the air, this one will be when the character impacts the ground. Therefore, we need a condition for the Grounded parameter when it is set to “true.”
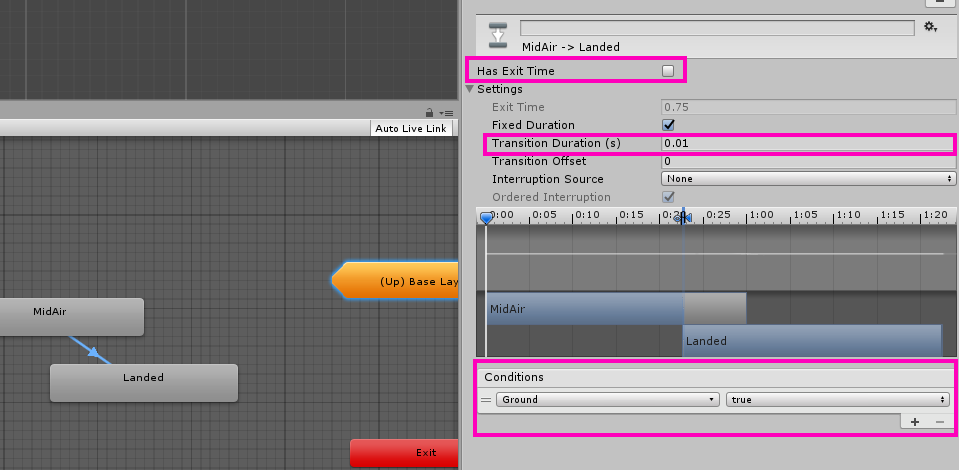
And with that, our transition configured! Now on to the final one.
This final transition is when the character “picks himself up” after impacting the ground. This transition should have no conditions and we can leave exit time enabled since we’re not worrying about delayed reactions here. As for the duration length, I set mine to 0.25 but I encourage you to tweak this value. A larger value will get a “slow getup” look while a shorter value will have a “quick pick up.”
The final aspect we need to configure with this transition is where it will transition to. We have two options, we could transition into the Up Base Layer state or the Exit state. We could get the same result for each option but one has some apparent benefits that the other doesn’t possess. The best choice here is to transition into the Exit state for two reasons; the first being that it increases the scalability of the Animator Controller. If we used Up Base Layer, we would have to specify which state to transition to. This isn’t a problem for us now since we only have one other state (the Locomotion state) but what if we had more than one? We would have to prioritize which state to transition into after we are finished jumping which is something that shouldn’t be done when it comes to creating an efficient Animator Controller. The second reason is that it makes our animator controller look very tidy. Have a look at the Base Layer and notice how clean it looks having only one transition on the Locomotion state. Ultimately, transitioning to the Exit state is the best choice for tidiness and scalability.
Alright! That is all for our Jumping Mechanic! It is now complete
Scripting our Character
If you were to hit play, you could control the character by fiddling with the values in the parameters panel but that makes for a very lousy game. Instead, we need to be able to modify these values through some form of input such as the keyboard.
Create a new folder called “Scripts” and create a new C# script called “PlayerController.”
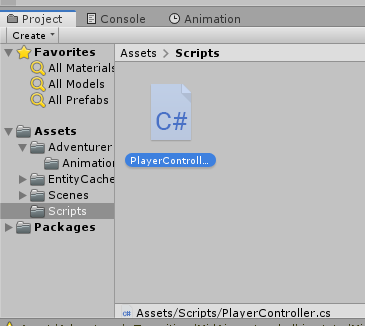
Here is the code that will go into it:
using System.Collections;
using System.Collections.Generic;
using UnityEngine;
public class PlayerController : MonoBehaviour
{
private Animator thisAnim;
private Rigidbody2D rigid;
public float groundDistance = 0.3f;
public float JumpForce = 500;
public LayerMask whatIsGround;
// Use this for initialization
void Start()
{
thisAnim = GetComponent<Animator>();
rigid = GetComponent<Rigidbody2D>();
}
// Update is called once per frame
void Update()
{
var h = Input.GetAxis("Horizontal");
thisAnim.SetFloat("Speed", Mathf.Abs(h));
if (h < 0.0)
{
transform.localScale = new Vector3(-1, 1, 1);
}
else if (h > 0.0)
{
transform.localScale = new Vector3(1, 1, 1);
}
if (Input.GetButtonDown("Jump"))
{
rigid.AddForce(Vector3.up * JumpForce);
thisAnim.SetTrigger("Jump");
}
if (Physics2D.Raycast(transform.position + (Vector3.up * 0.1f), Vector3.down, groundDistance, whatIsGround))
{
thisAnim.SetBool("Grounded", true);
thisAnim.applyRootMotion = true;
}
else
{
thisAnim.SetBool("Grounded", false);
}
}
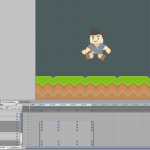
}This script requires the character to have a 2D Rigidbody component and a collider of some sort. I set up my scene to look like this so I could test out my character:
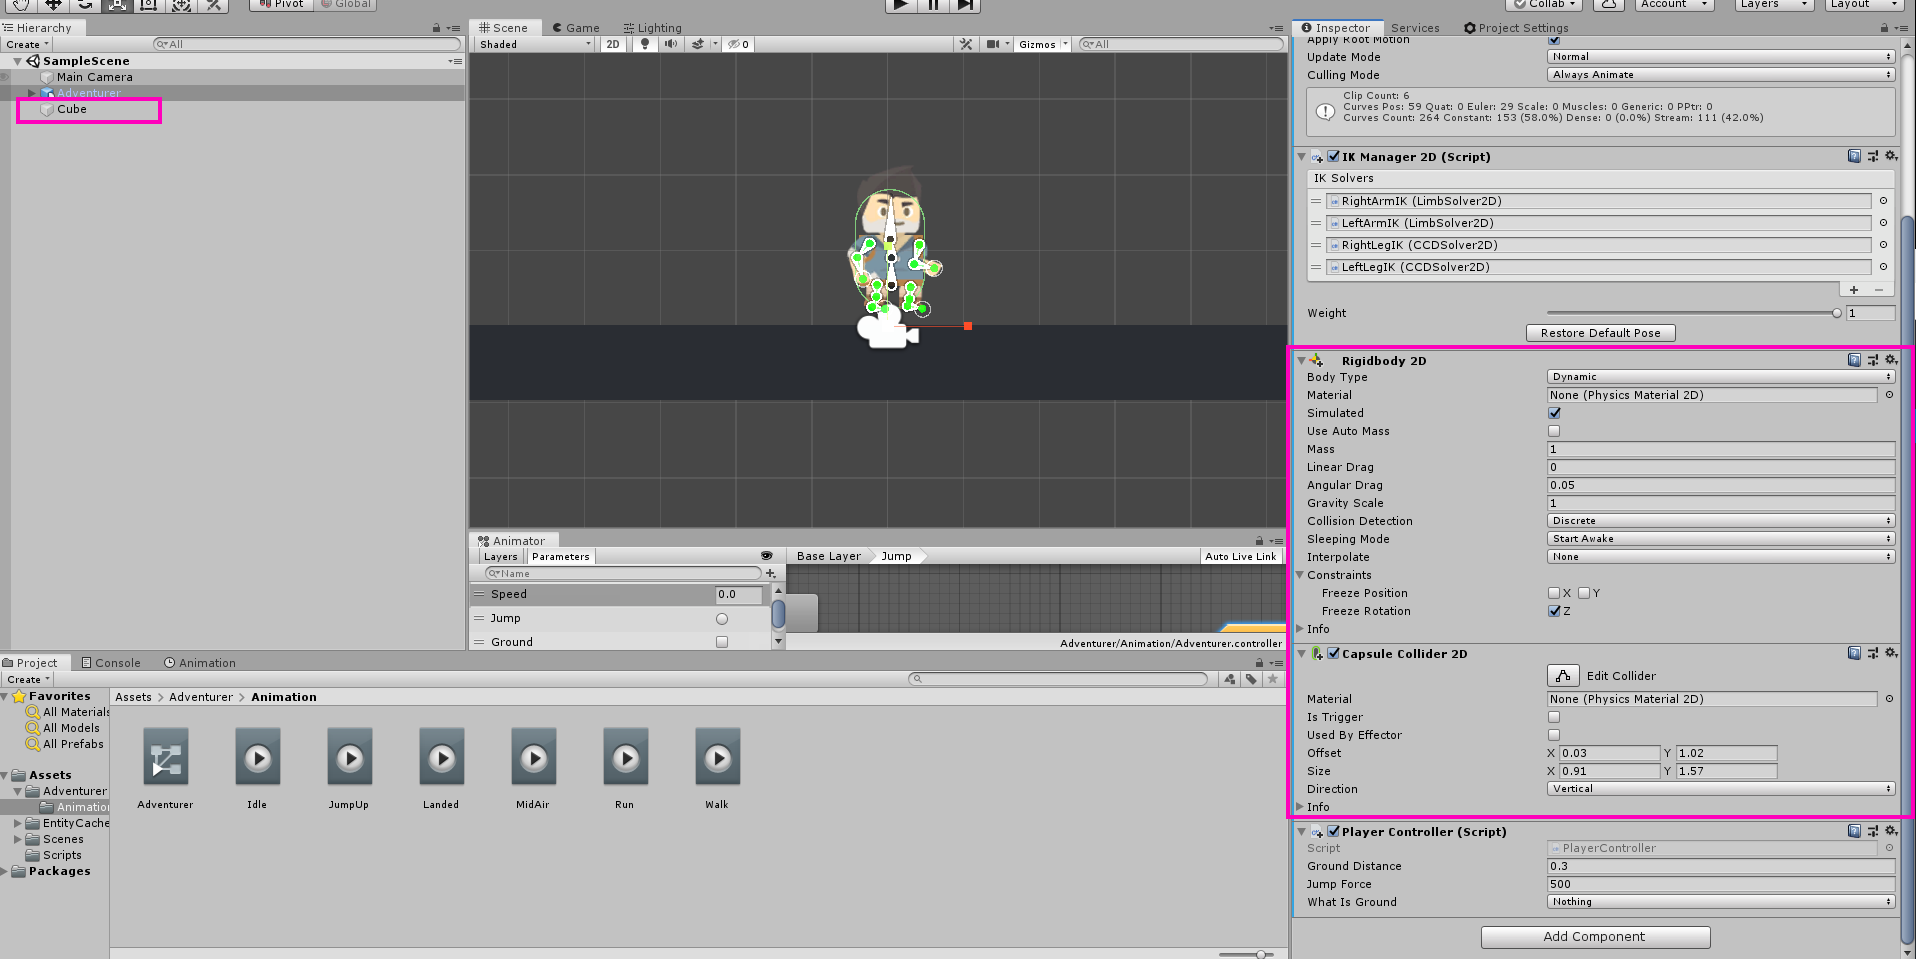
With this script, it is important to note how we access the parameters from the animator controller. We use a variable of type “Animator” and access a parameter by saying “.SetBool(*Name of Parameter*, *value*).” Two other important features are how we take input and how we assign the value of the “Grounded” boolean. Assigning this boolean was the most mystifying for me when I was learning how to work the Unity Animator. What we’re doing is sending a raycast (a raycast is simply a ray shot in a specified direction that can collect data about what it hits) in the downwards direction and thereby determining if the character is touching the ground or not.
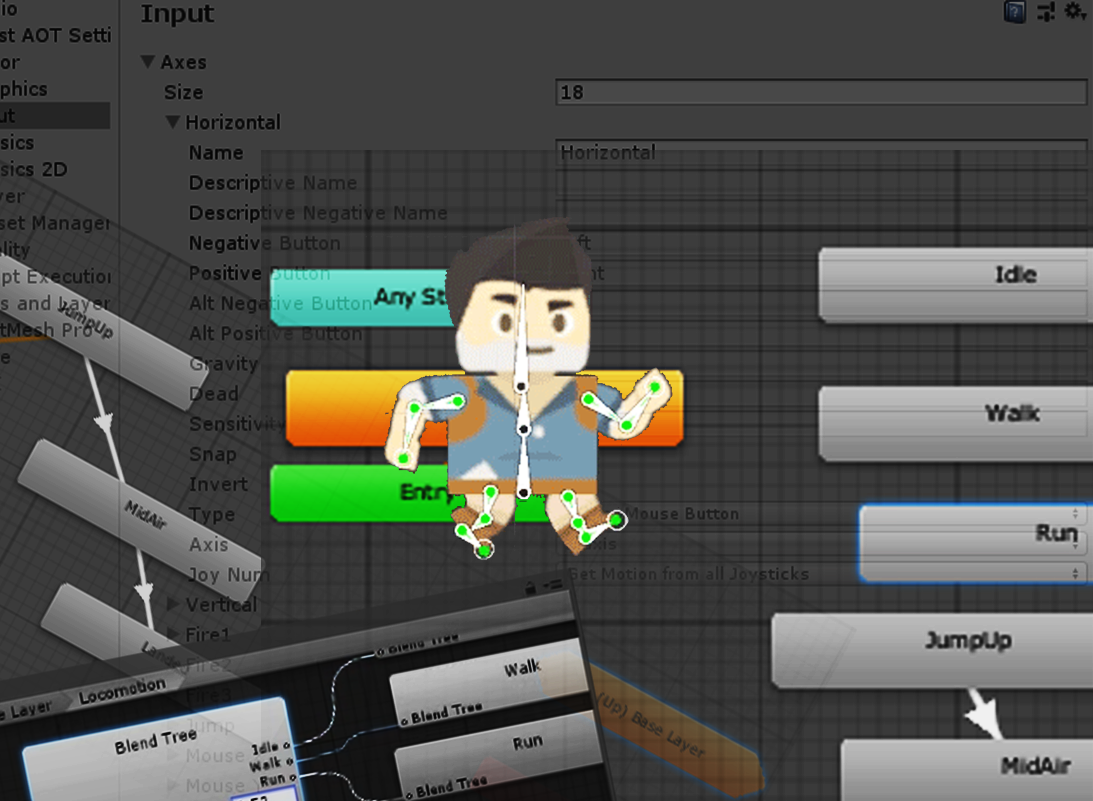
The way we are taking input is by saying “Input.GetAxis(“*specify name of the axis*).” This is a good way to take input since it is cross-platform, meaning, we wouldn’t have to change this value if you were to export it as a console game or as a PC game. Go to Edit -> Project Settings -> Input to see exactly what is going on in with this method.
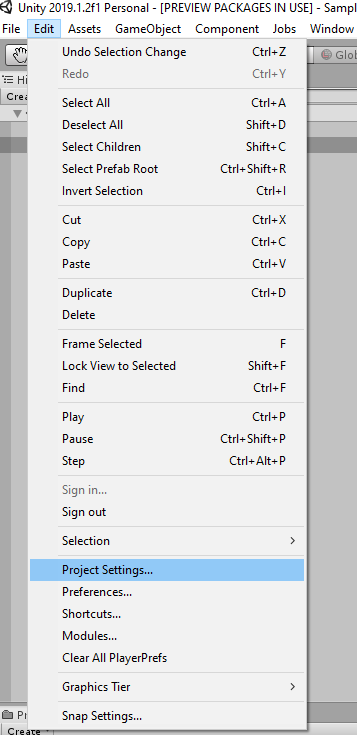
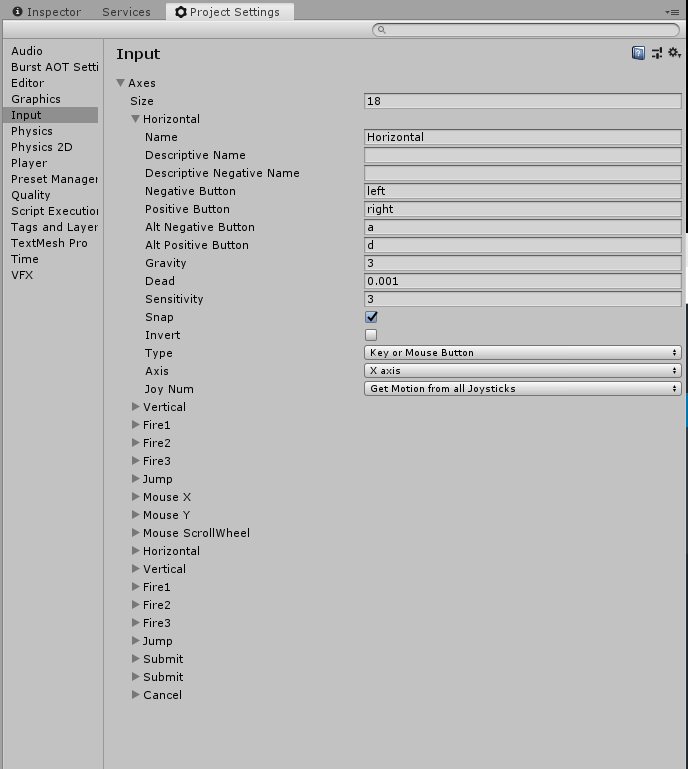
For a desktop game, the “Horizontal” input is the left and right arrow keys. Therefore, if you hit play, you can now operate our character through the keyboard. Pretty cool, isn’t it?
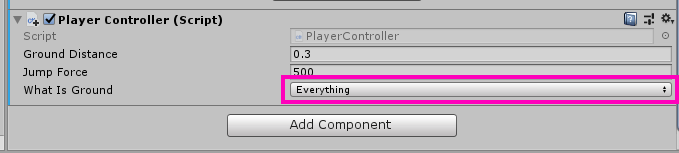
If you attempt to jump in your game and notice that the character always seems to be stuck in a jump pose, check the “What is Ground” variable on your PlayerController script. It needs to be set to “Everything” in order for it to work.
Conclusion
This character was rigged, animated, and scripted all from scratch. If you were able to complete all three of our animation tutorials, I, with the power vested in me as a game developer, do declare you an official video game “Puppet Master.” It is no small achievement to have completed all of that. I am sure you will find these skills used over and over again in your own video game projects. That’s it for me.
Keep making great games!