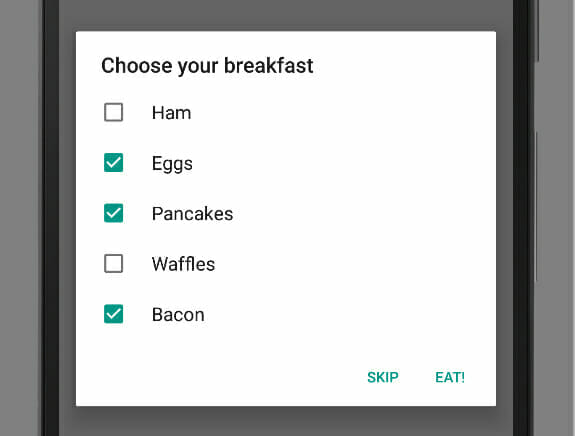
In this post, we’re going to learn how to build and post dialogs to the user. Our app will create two dialogs. One of them will be a plain dialog with two actions, and another will be a more complicated dialog to ask what you want to order for breakfast using a list of checkboxes. We’ll learn how to create those, as well as how to implement a listener so we can get callbacks to our main Activity.
Let’s get started! Create a new Android Studio project called DialogDemo and use Android 6.0 Marshmallow. We can create an empty Activity with the default settings. Regarding the view, let’s keep it simple and have two buttons that will display our different dialogs. These buttons will be centered on the screen, right under each other.
<?xml version="1.0" encoding="utf-8"?>
<RelativeLayout xmlns:android="http://schemas.android.com/apk/res/android"
    xmlns:tools="http://schemas.android.com/tools"
    android:layout_width="match_parent"
    android:layout_height="match_parent"
    android:paddingBottom="@dimen/activity_vertical_margin"
    android:paddingLeft="@dimen/activity_horizontal_margin"
    android:paddingRight="@dimen/activity_horizontal_margin"
    android:paddingTop="@dimen/activity_vertical_margin"
    tools:context="com.deshpande.dialogdemo.MainActivity">

    <Button
        android:id="@+id/button_redButtonDialog"
        android:layout_width="wrap_content"
        android:layout_height="wrap_content"
        android:layout_centerInParent="true"
        android:text="RedButtonDialog"
        android:onClick="showRedButtonDialog"/>

    <Button
        android:layout_width="wrap_content"
        android:layout_height="wrap_content"
        android:layout_below="@+id/button_redButtonDialog"
        android:layout_centerHorizontal="true"
        android:text="BreakfastDialog"
        android:onClick="showBreakfastDialog"/>

</RelativeLayout>
We’ll also need to create just some small method stubs for the onClick placeholders.
public void showRedButtonDialog(View view) {
    // TODO
}

public void showBreakfastDialog(View view) {
    // TODO
}
Now we need to create a separate class for our dialogs. We’ll create the RedButtonDialog first. Right-click on the main Java package and create a new class called RedButtonDialog. After it’s created, it needs to extend AppCompatDialogFragment. In Android 6.0, all dialogs are treated as fragments. In order to set up our dialog, we need to override the onCreateDialog(…) method. Inside, we can create an Alert dialog using the Builder pattern and set the message and the buttons using anonymous inner classes. Note that for the negative dialog button, we can just dismiss the dialog. Finally, we can return the new dialog by calling builder.create() .
@NonNull
@Override
public Dialog onCreateDialog(Bundle savedInstanceState) {
    AlertDialog.Builder builder = new AlertDialog.Builder(getActivity());
    builder.setMessage("Push the red button?")
            .setPositiveButton("Push", new DialogInterface.OnClickListener() {
                @Override
                public void onClick(DialogInterface dialogInterface, int i) {
                    // TODO
                }
            })
            .setNegativeButton("Cancel", new DialogInterface.OnClickListener() {
                @Override
                public void onClick(DialogInterface dialogInterface, int i) {
                    dialogInterface.dismiss();
                }
            });

    return builder.create();
}
We need to populate the event listener for when the red button is pushed, but our issue is that the dialog might not have the necessary information to do anything when the positive button is pressed. This is in line with Java’s principle of encapsulation. We want to compartmentalize components as much as possible. In our case, we don’t want the dialog to know the inner workings of our app; the dialog just needs to know how to be a dialog. To remedy this, we can create a callback to the Activity that created the dialog using interfaces as types. First, let’s define an interface and a listener variable at the class level.
public interface OnRedButtonPushListener {
    void onButtonPush();
}

private OnRedButtonPushListener listener;
Now, in our positive button event listener, we can just call listener.onButtonPush(). Now we need to make the Activity implement the listener and set up the listener. We can do this through a setter, or, since we’re using fragments, we can do this when the Dialog is attached to the Activity in onAttach(). We need to make sure that the Activity we’re attaching to implements the listener interface. We can do this by attempting to cast the Activity to the interface.
@Override
public void onAttach(Activity activity) {
    super.onAttach(activity);
    try {
        listener = (OnRedButtonPushListener) activity;
    } catch (ClassCastException e) {
        throw new ClassCastException(activity.toString() +
                " needs to implement onButtonPushListener");
    }
}
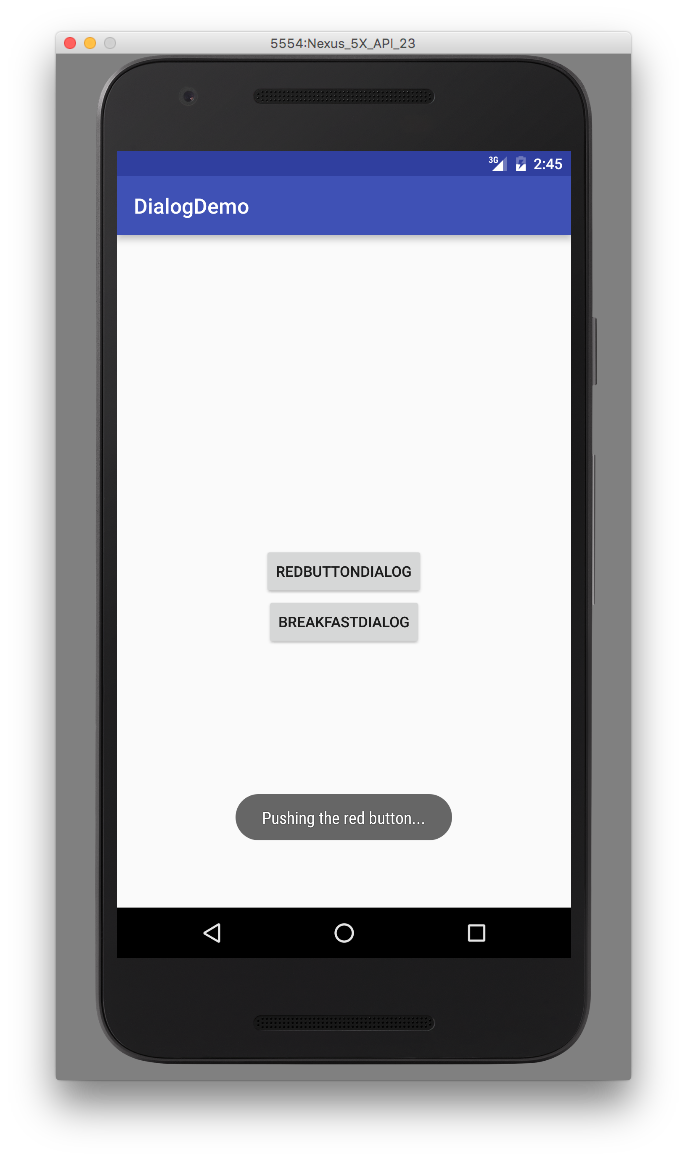
This will force the Activity creating the dialog to implement the callback listener interface. Let’s go back to our MainActivity and have it implement RedButtonDialog.OnRedButtonPushListener. In the method, we can just have the app tell the user that the button has been pushed. We can also implement our method that shows the dialog. To show a dialog, we need to create a new object and call show(…) on it. We pass in the SupportFragmentManager and a unique String tag to identify the dialog to the system.
public void showRedButtonDialog(View view) {
    RedButtonDialog redButtonDialog = new RedButtonDialog();
    redButtonDialog.show(getSupportFragmentManager(), "RedButtonDialog");
}
...
@Override
public void onButtonPush() {
    Toast.makeText(this, "Pushing the red button...", Toast.LENGTH_SHORT).show();
}
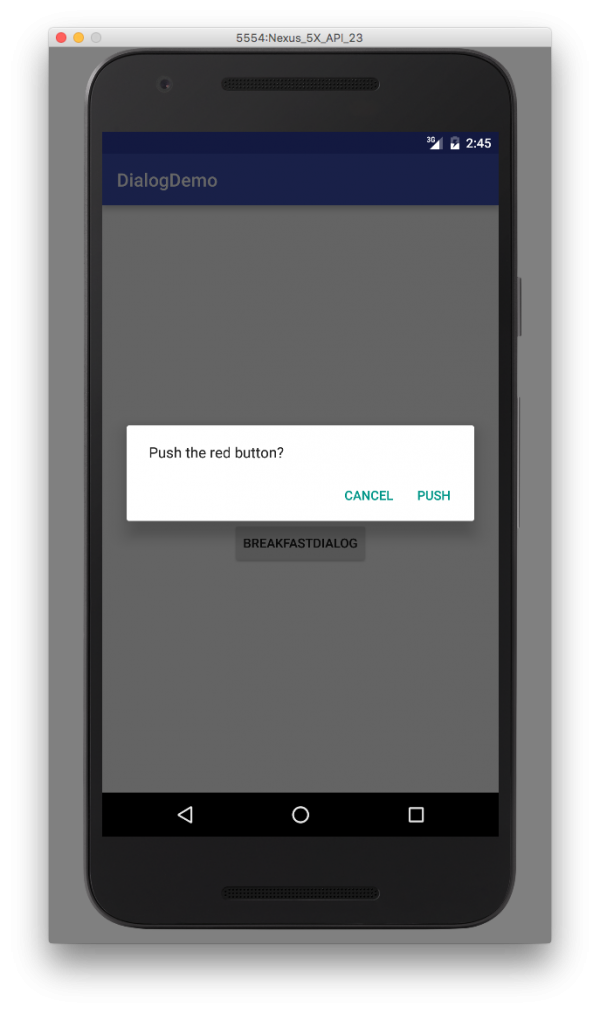
Now we can run the app and see the results of pressing the button!
Now that we’re done with the first dialog, we can create a new class for the second, more complicated dialog. It also needs to implement DialogFragment and override the onCreateDialog(…) method. We can also create a listener for it in the same fashion as the first dialog. We first need to define an interface and a listener instance variable.
public interface OnBreakfastSubmitListener {
    void submitBreakfast(ArrayList<String> food);
}

private OnBreakfastSubmitListener listener;
Notice that our callback method provides MainActivity with an ArrayList of the selected food. In addition to this, we also need to override the onAttach(…) method exactly like the previous dialog.
@Override
public void onAttach(Activity activity) {
    super.onAttach(activity);
    try {
        listener = (OnBreakfastSubmitListener) activity;
    } catch (ClassCastException e) {
        throw new ClassCastException(activity.toString() +
                " needs to implement OnBreakfastSubmitListener");
    }
}
This forces any Activity that wants to create this dialog to also implement the callback method. For our list of checkboxes, we just need to supply the list items; we won’t actually have to create the checkboxes ourselves! We’ll need two more instance variables: one for the possible breakfast options and another to hold the options that the user chose.
private static String[] OPTIONS = { "Ham", "Eggs", "Pancakes", "Waffles", "Bacon" };
private ArrayList<String> breakfast;
Now we can get to the meat of the dialog: onCreateDialog(…). First, we need to create a new ArrayList and Builder for our dialog. Since our content is going to be populated with the list of checkboxes, we’ll need to provide our user with a title to our dialog so he or she knows what this dialog is for. To give our dialog checkboxes, we need to call setMultiChoiceItems(…) and pass the options and a listener for when an item is clicked. If an item is checked, then we can add it to the ArrayList, and, if it’s been clicked and it’s already in our ArrayList, we can remove it. For our positive button listener, we call the callback, passing our ArrayList as a parameter. For our negative button listener, we simply dismiss the dialog. Finally, we can return builder.create() to create our dialog.
@NonNull
@Override
public Dialog onCreateDialog(Bundle savedInstanceState) {
    breakfast = new ArrayList<>();
    AlertDialog.Builder builder = new AlertDialog.Builder(getActivity());

    builder.setTitle("Choose your breakfast")
            .setMultiChoiceItems(OPTIONS, null, new DialogInterface.OnMultiChoiceClickListener() {
                @Override
                public void onClick(DialogInterface dialogInterface, int which, boolean isChecked) {
                    if (isChecked) {
                        breakfast.add(OPTIONS[which]);
                    } else if (breakfast.contains(OPTIONS[which])) {
                        breakfast.remove(OPTIONS[which]);
                    }
                }
            })
            .setPositiveButton("Eat!", new DialogInterface.OnClickListener() {
                @Override
                public void onClick(DialogInterface dialogInterface, int i) {
                    listener.submitBreakfast(breakfast);
                }
            })
            .setNegativeButton("Skip", new DialogInterface.OnClickListener() {
                @Override
                public void onClick(DialogInterface dialogInterface, int i) {
                    dialogInterface.dismiss();
                }
            });

    return builder.create();
Now that this dialog is also implemented, we can go back to our MainActivity and make it implement BreakfastDialog.OnBreakfastSubmitListener and the callback method. For our callback method, we’ll just have the app display the user’s order. To make the output look a bit better, we’re going to style it by remove the surrounding brackets. Finally, we need to implement the Button’s onClick method to display the BreakfastDialog in the exact same fashion as the previous dialog.
public void showBreakfastDialog(View view) {
    BreakfastDialog breakfastDialog = new BreakfastDialog();
    breakfastDialog.show(getSupportFragmentManager(), "BreakfastDialog");
}
...
@Override
public void submitBreakfast(ArrayList<String> food) {
    Toast.makeText(this, "Ordered" + food.toString().replace('[', ' ').replace(']', ' '), Toast.LENGTH_SHORT).show();
}
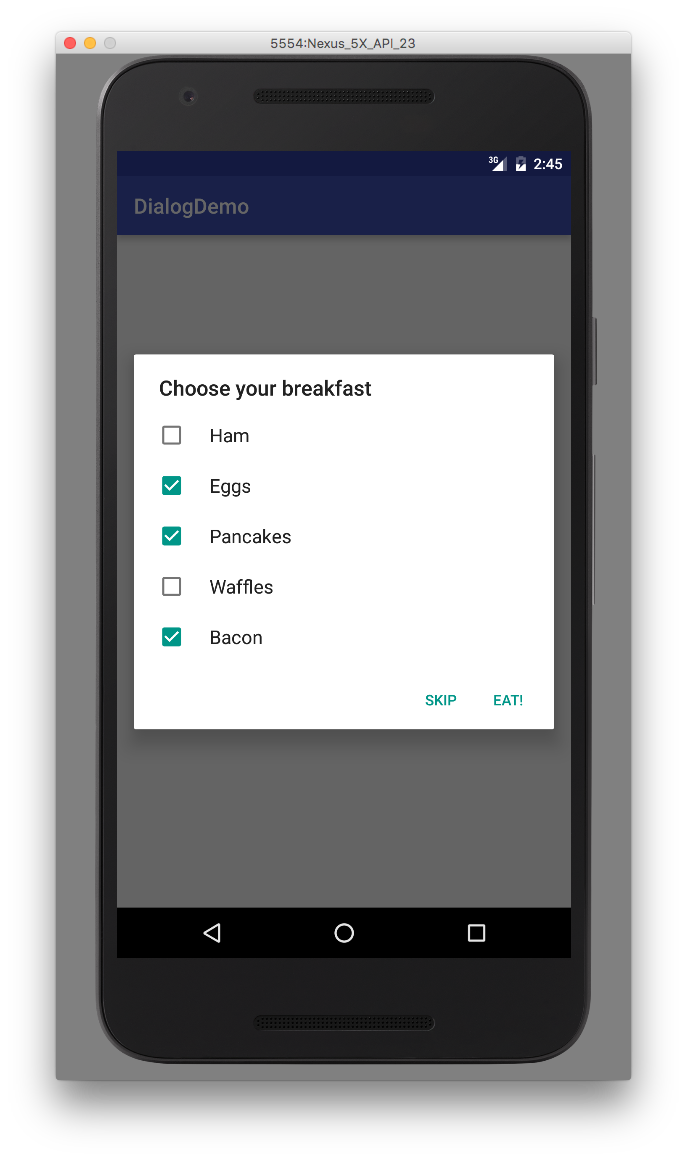
Now we can click the second button! When we do, we can see the checkboxes dialog and select items. When we click ok, those data are transferred to MainActivity, which then displays the Toast message.
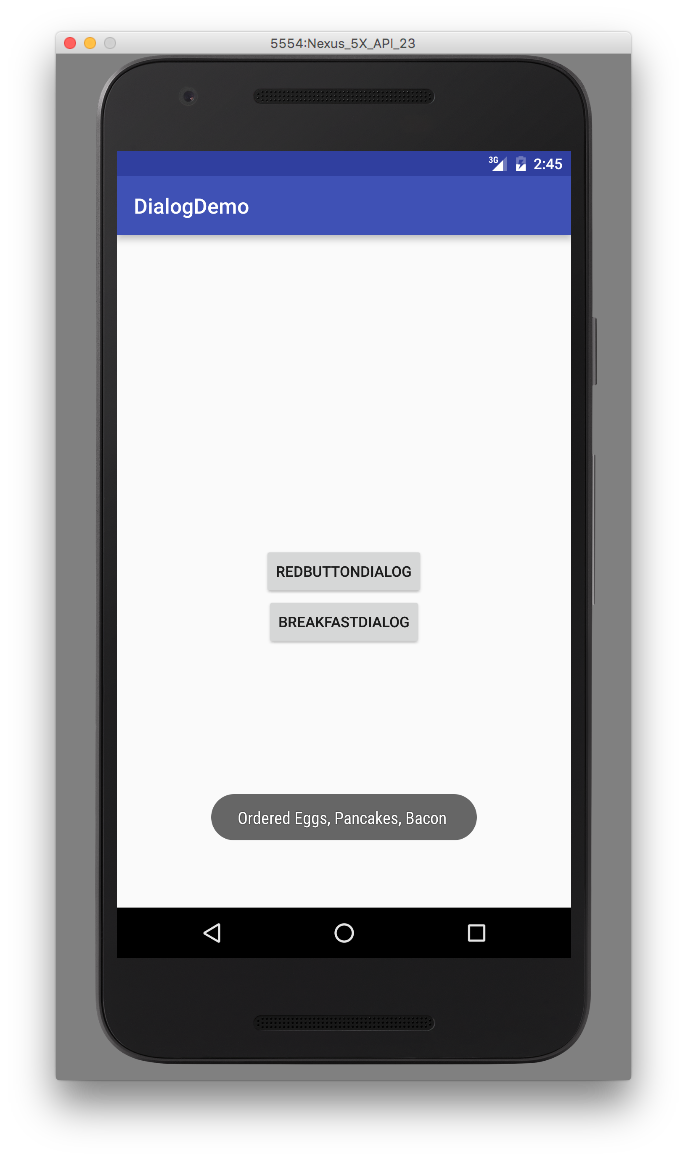
In this post, we learned how to create dialogs and display them to our user. We covered how to use AlertDialogs in dialogs. We learned how to use buttons and checkboxes to provide some interactivity with these dialogs. Finally, we learned how we can create callbacks to the Activity that created the Dialogs. Keep in mind that dialogs are a very disruptive operation, so use them sparingly! Now, go create some new apps with your newfound skills!
