Introduction
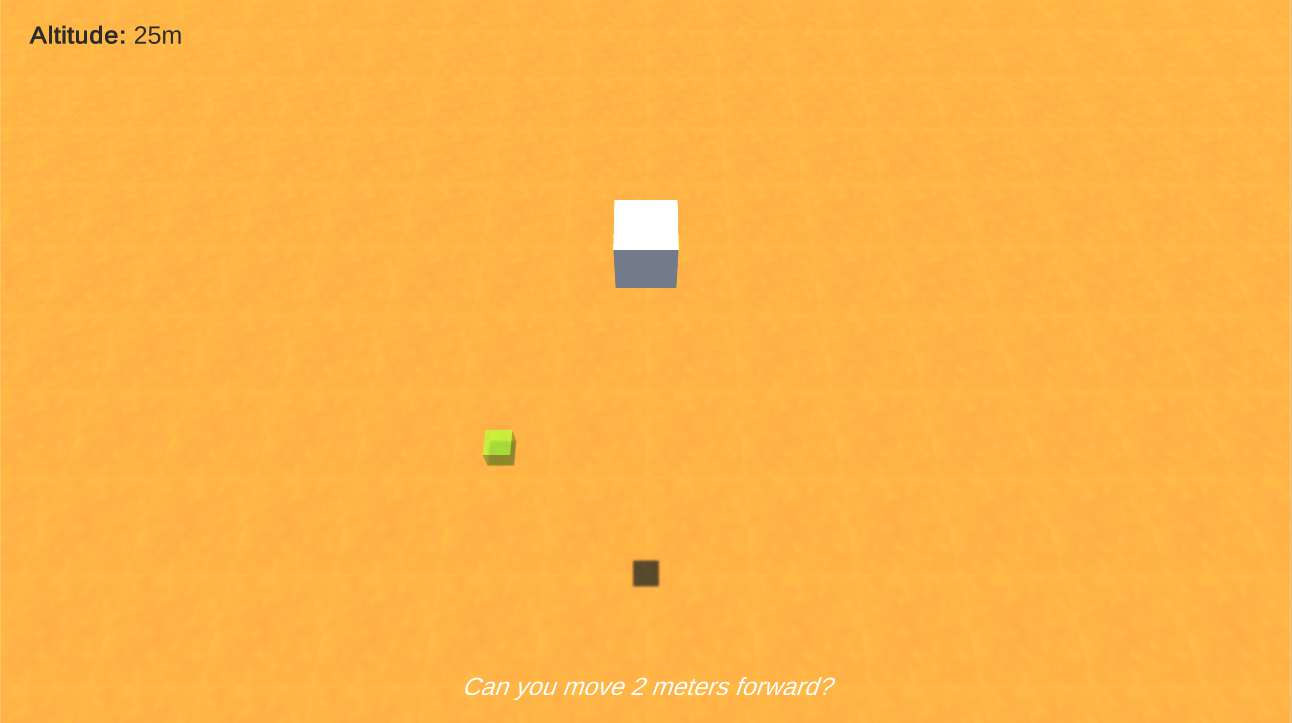
In this tutorial, we’re going create a voice controlled game where you move a landing mars rover. We’ll be using 2 different services from Microsoft’s Azure Cognitive Services: LUIS and Speech to Text.
You can download the project files here.
Setting up LUIS
LUIS is a Microsoft, machine learning service that can convert phrases and sentences into intents and entities. This allows us to easily talk to a computer and have it understand what we want. In our case, we’re going to be moving an object on the screen.
To setup LUIS, go to www.luis.ai and sign up.
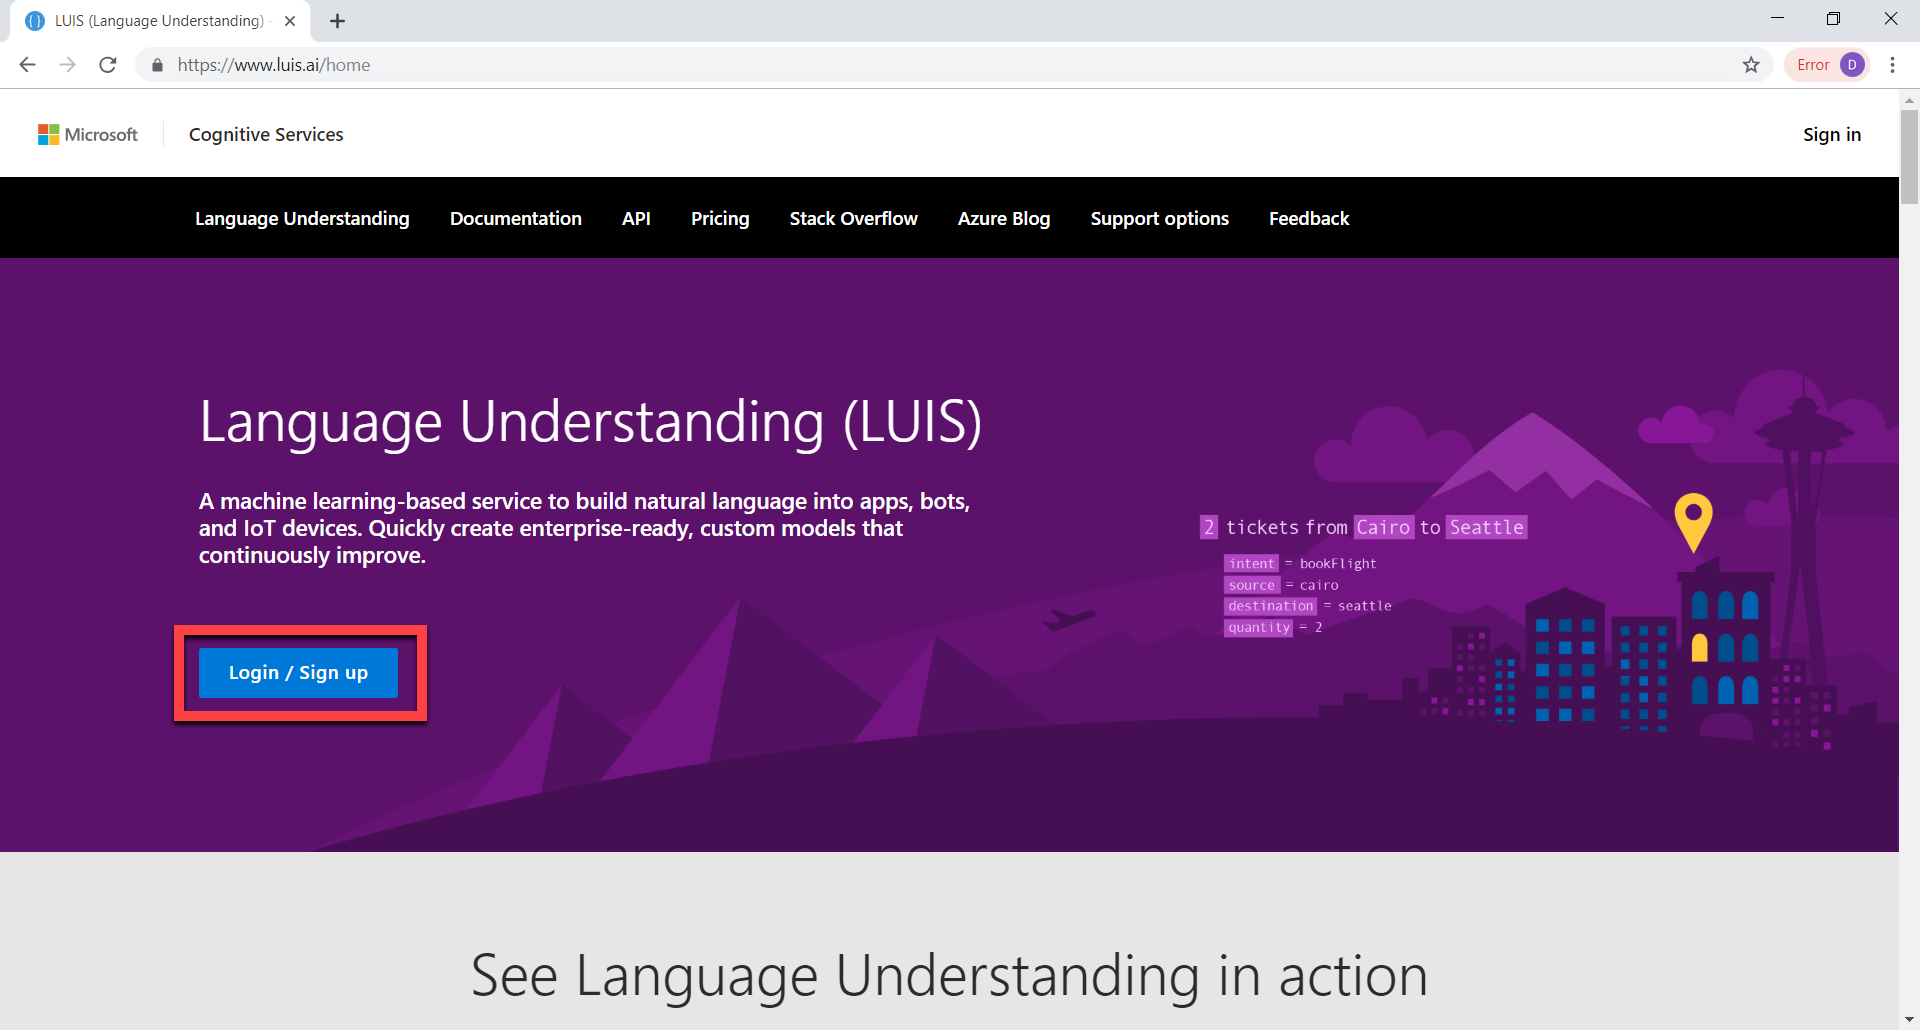
Once you sign up, it should take you to the My Apps page. Here, we want to create a new app.

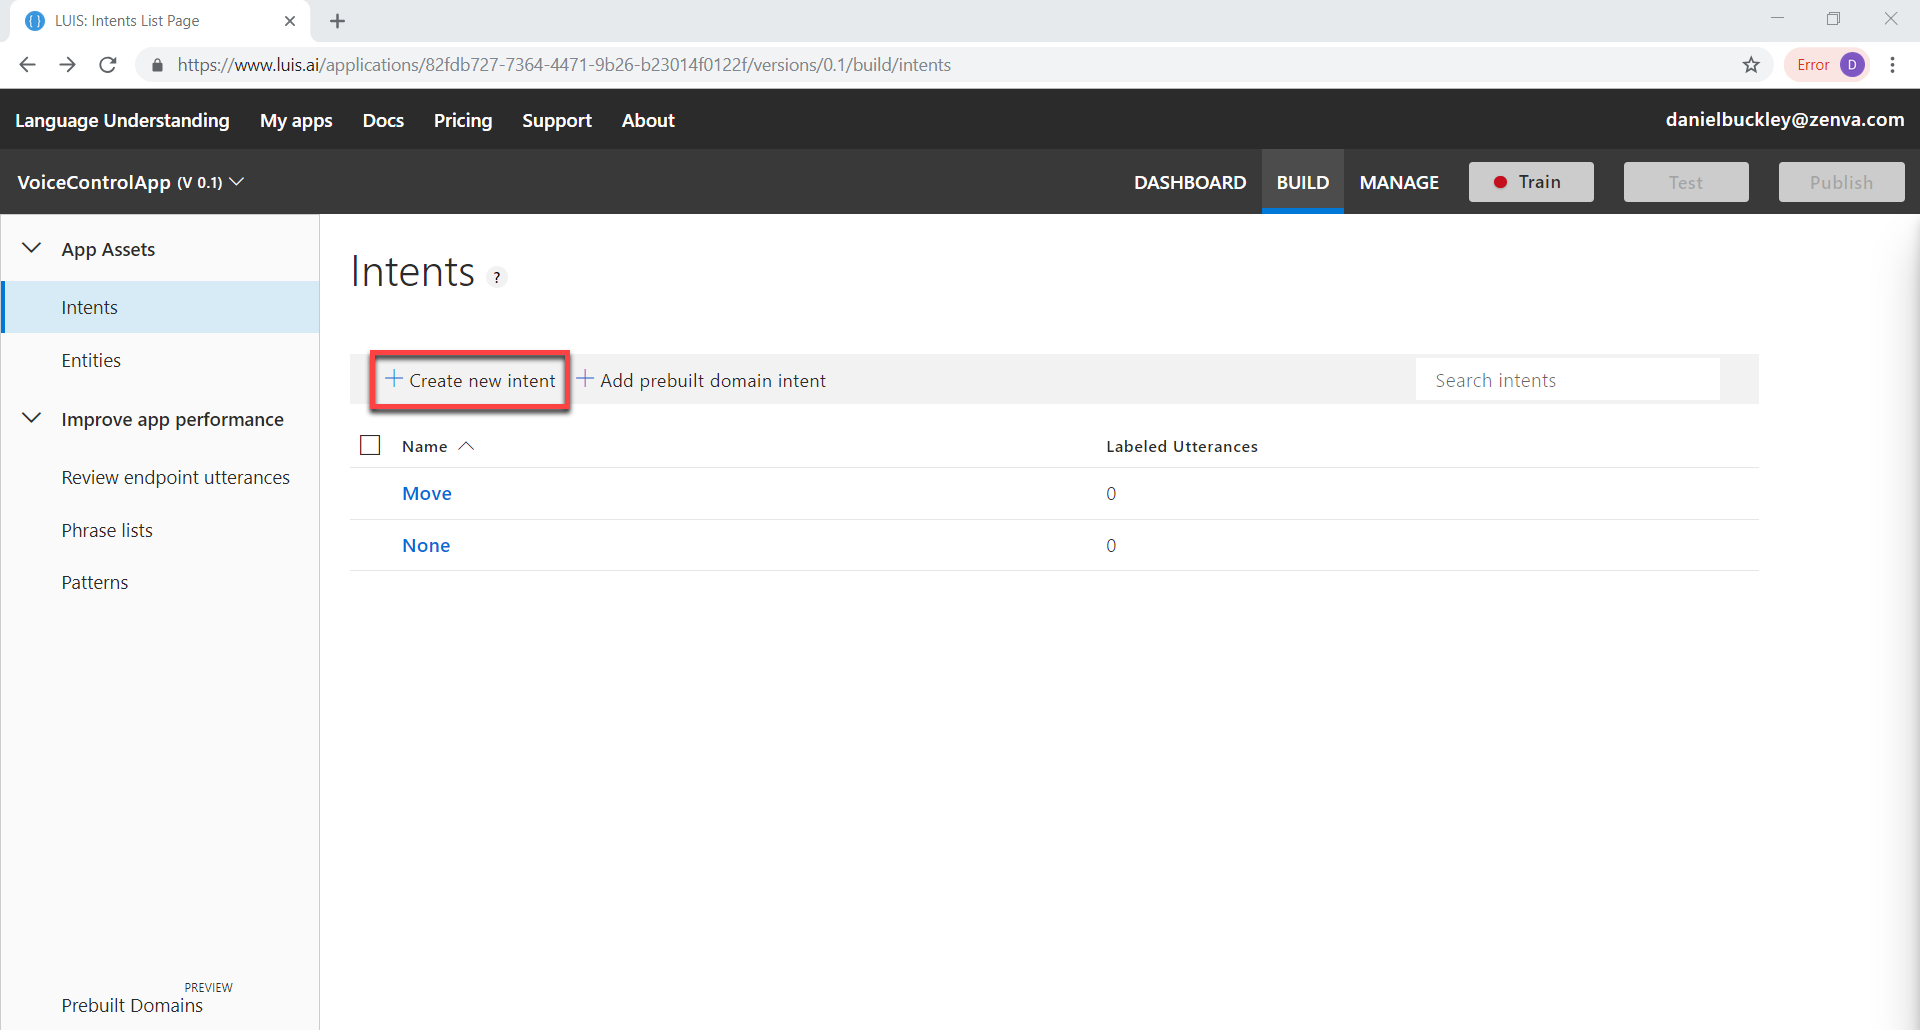
When your app is created you will be taken to the Intents screen. Here, we want to create a new intent called Move. An intent is basically the context of a phrase. Here, we’re creating an intent to move the object.
Then go to the Entities screen and create two new entities. MoveDirection and MoveDistance (both Simple entity types). In a phrase, LUIS will look for these entities.
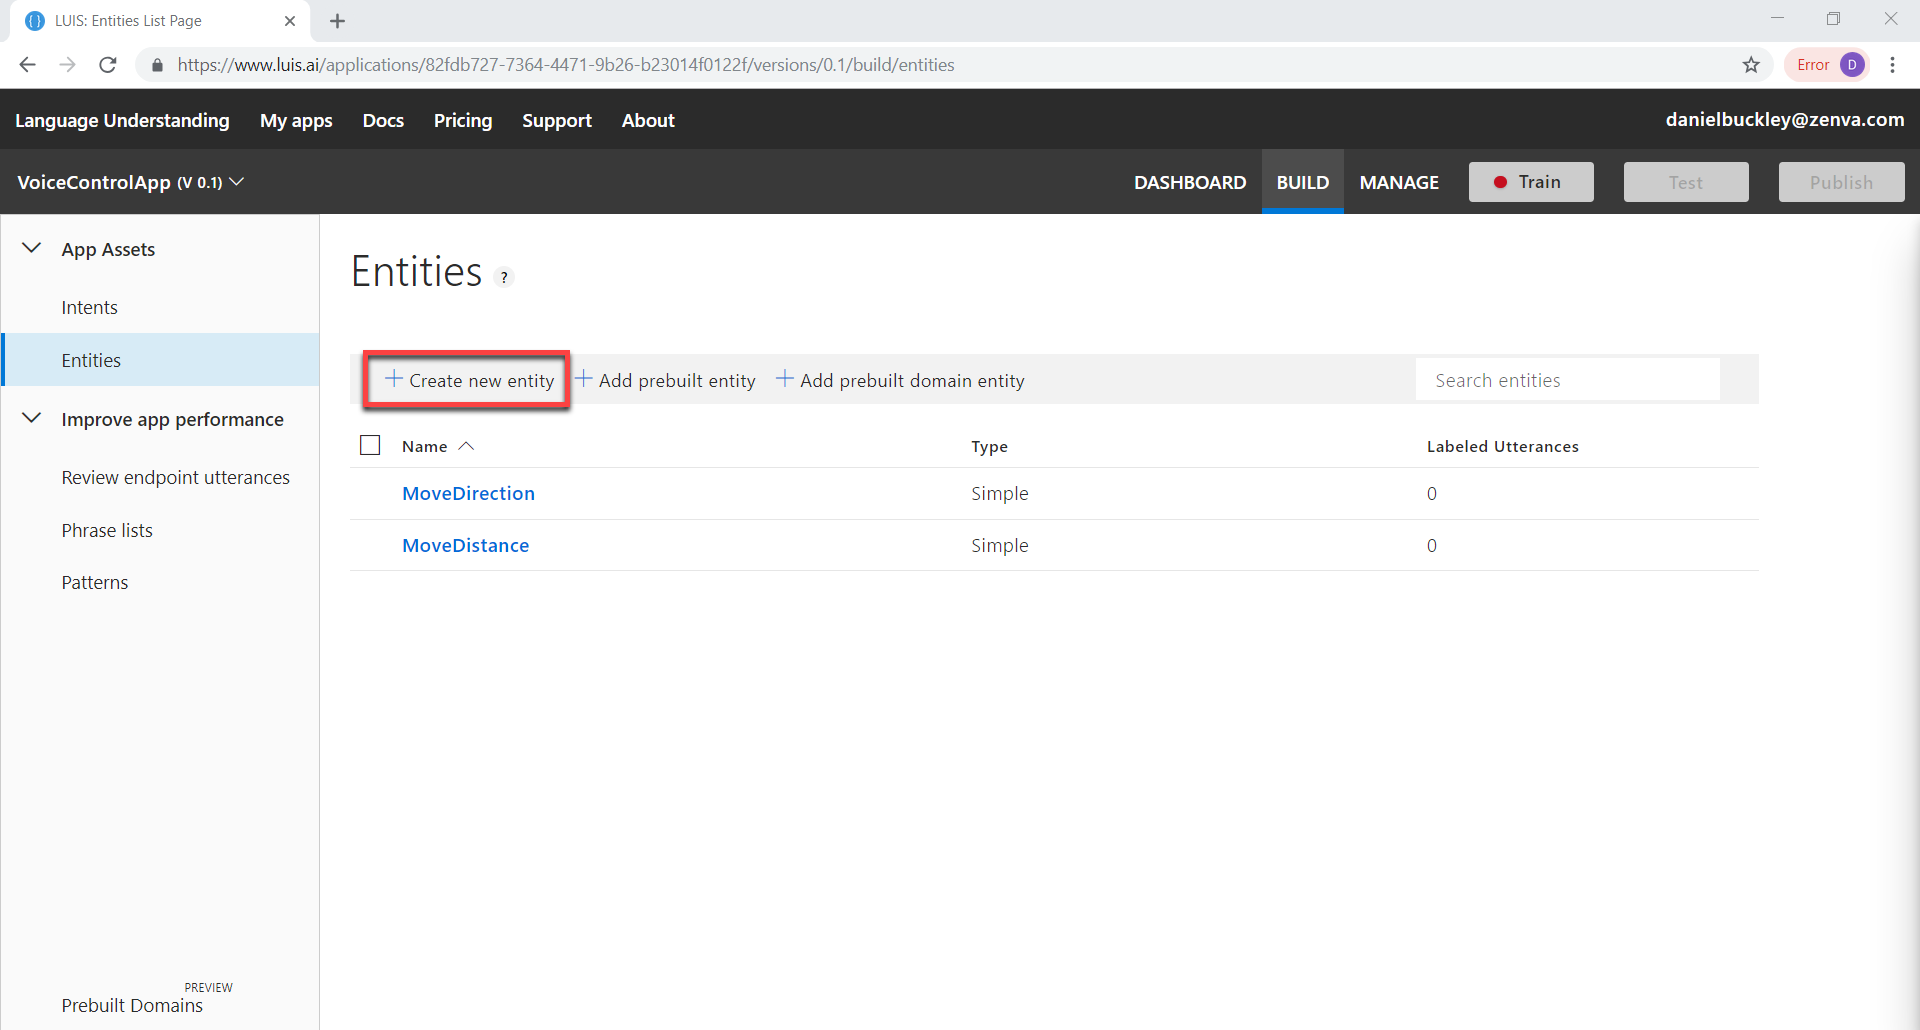
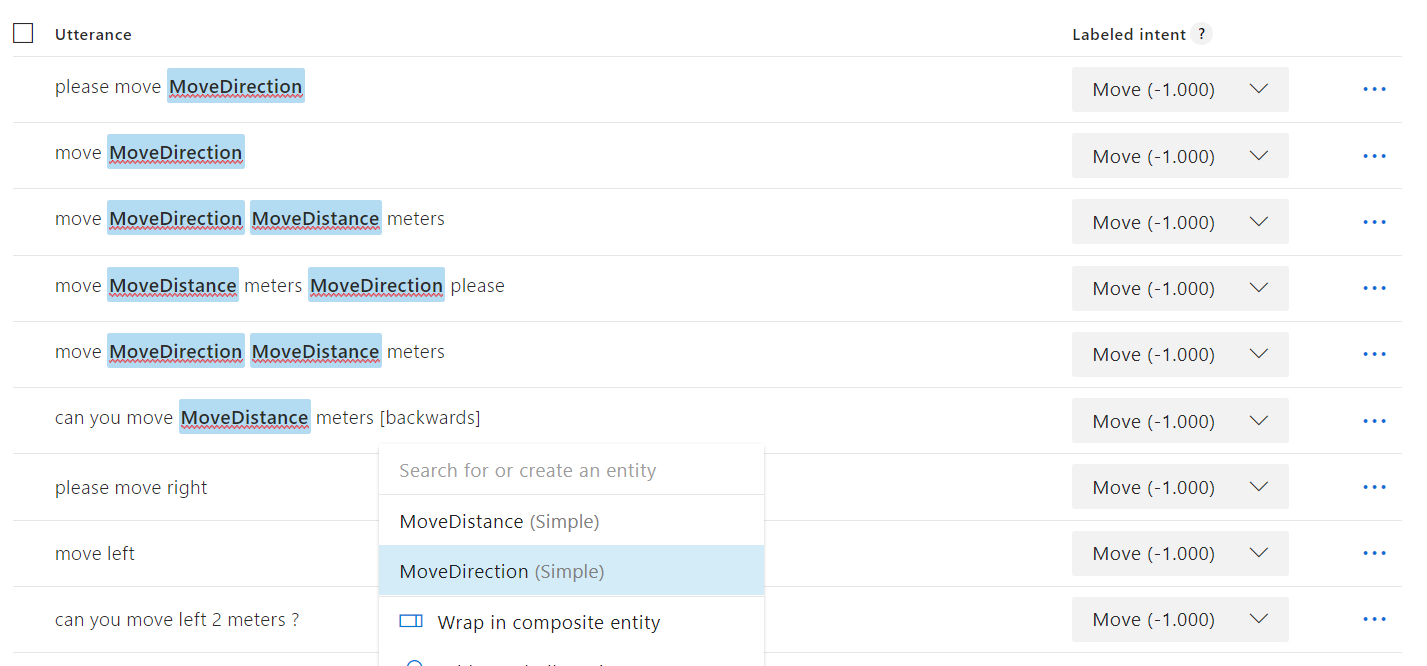
Now let’s go back to the Intents screen and select our Move intent. This will bring us to a screen where we can enter in example phrases. We need to enter in examples so that LUIS can learn about our intent and entities. The more the better.
Make sure that you reference all the types of move directions at least once:
- forwards
- backwards
- back
- left
- right
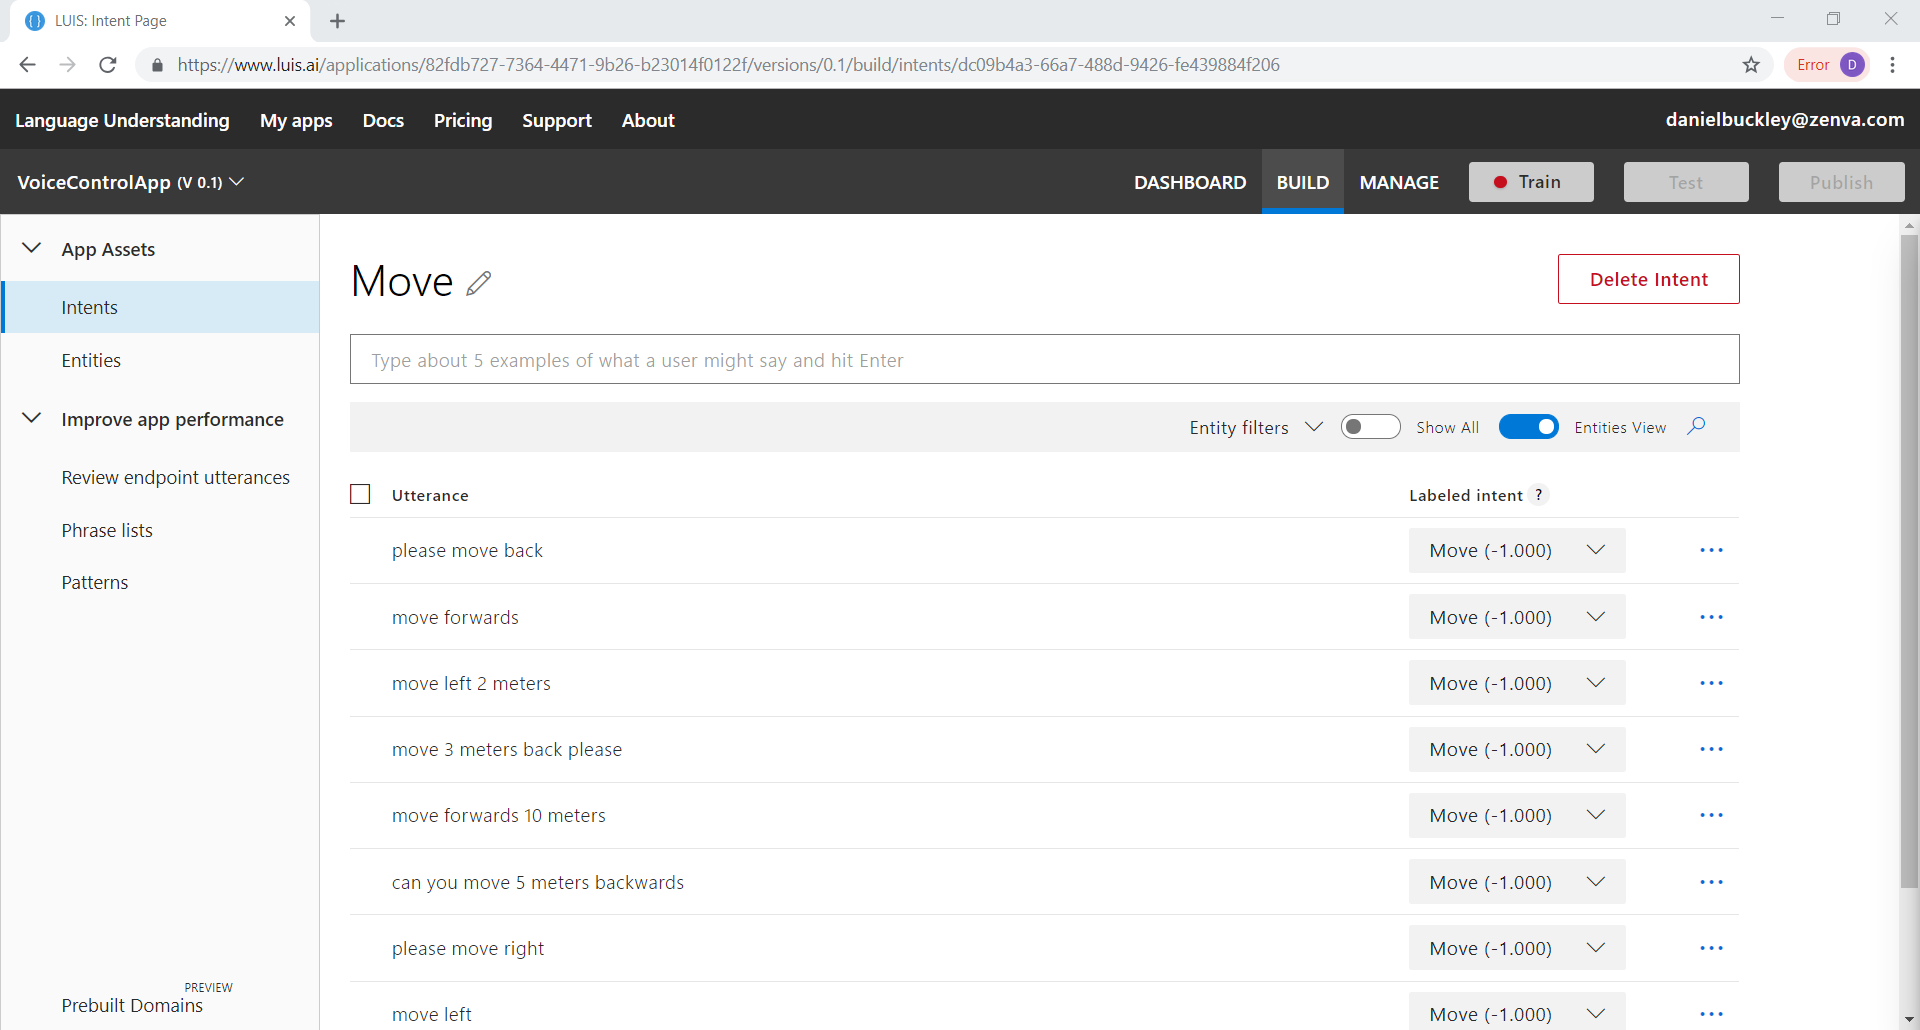
Now for each phase, select the direction and attach a MoveDirection entity to it. For the distance (numbers) attach a MoveDistance entity to it. The more phrases you have and the more different they are – the better the final results will be.
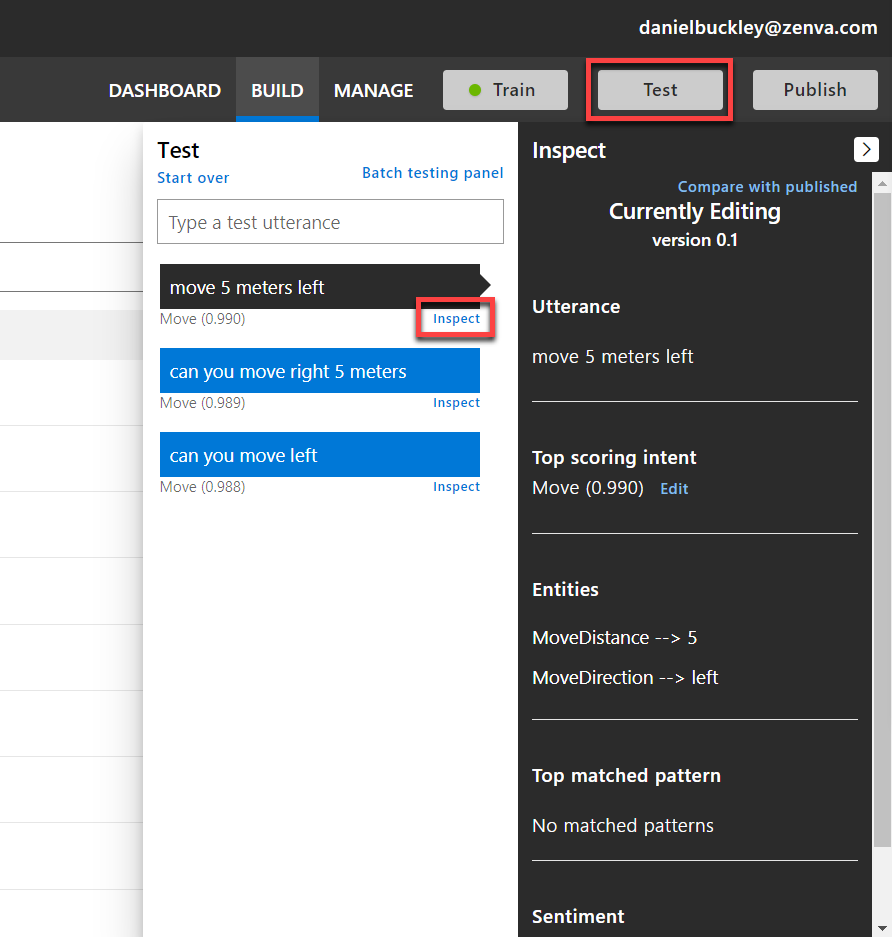
Once that’s done, click on the Train button to train the app. This shouldn’t take too long.

When complete, you can click on the Test button to test out the app. Try entering in a phrase and look at the resulting entities. These should be correct.
Once that’s all good to go, click on the Publish button to publish the app – allowing us to use the API.
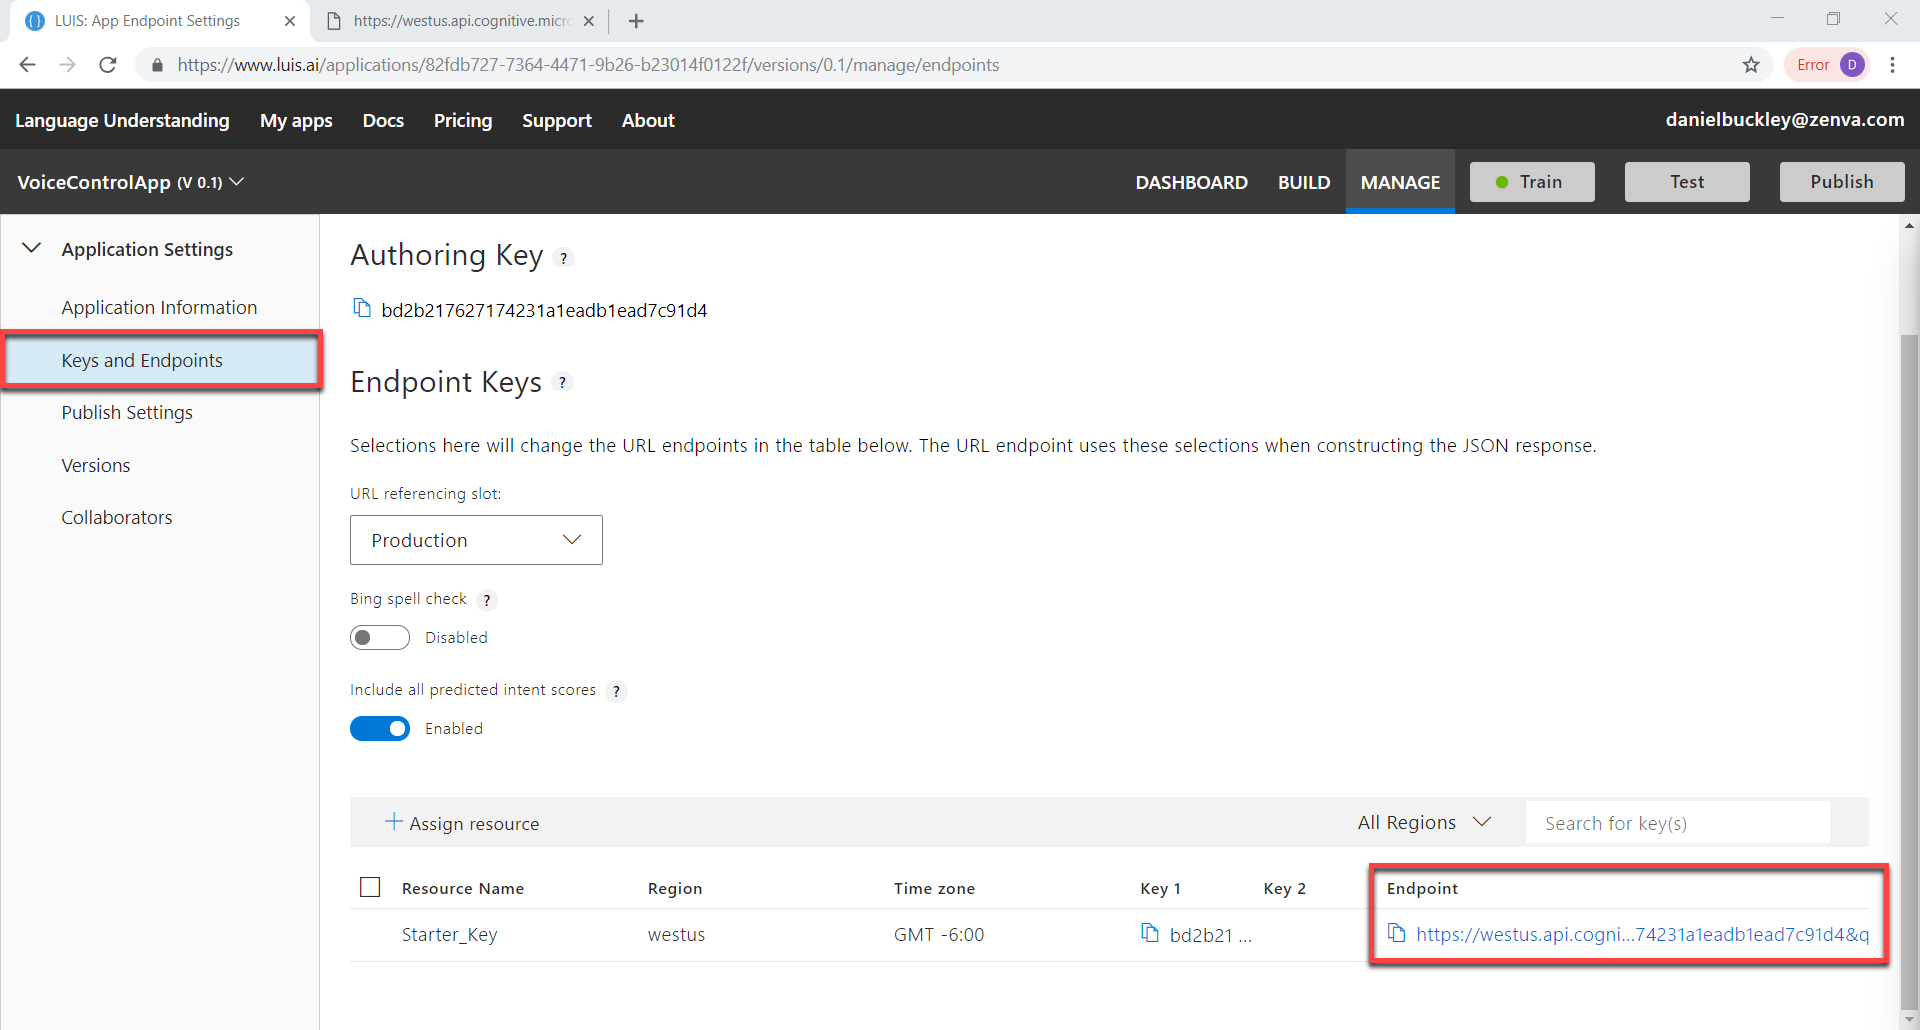
The info we need when using the API, is found by clicking on the Manage button and going to the Keys and Endpoints tab. Here, we need copy the Endpoint url.
Testing the API with Postman
Before we jump into Unity, let’s test out the API using Postman. For the url, paste in the Endpoint up until the first question mark (?).
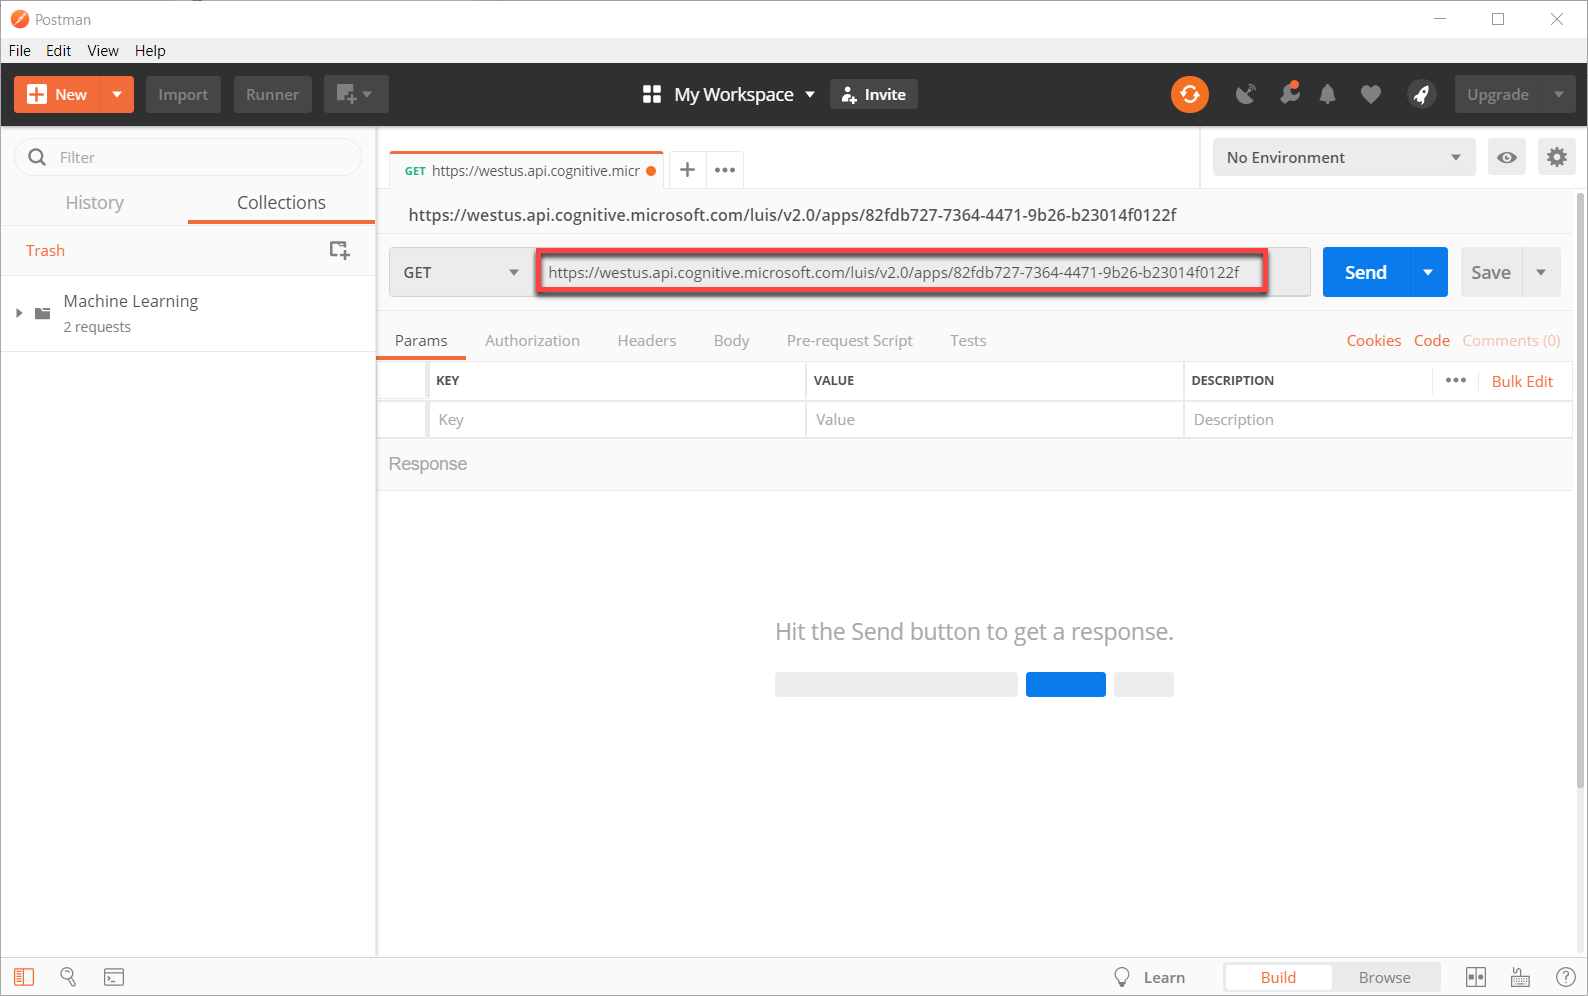
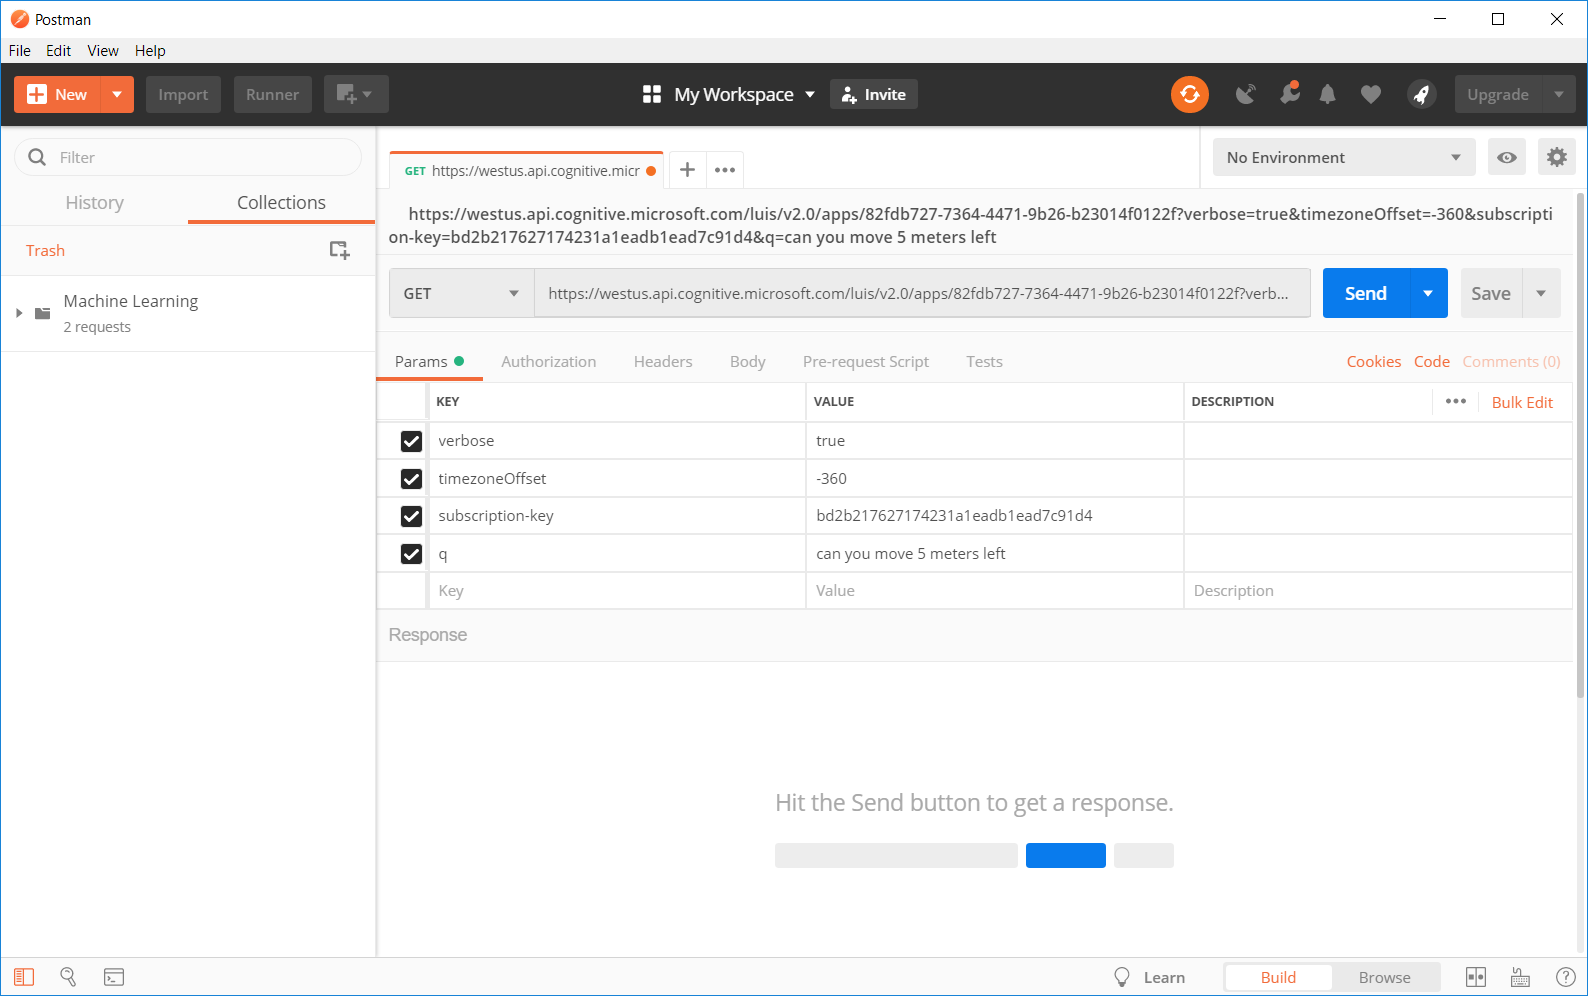
Then for the parameters, we want to have the following:
- verbose – if true, will return all intents instead of just the top scoring intent
- timezoneOffset – the timezone offset for the location of the request in minutes
- subscription-key – your authoring key (at the end of the Endpoint)
- q – the question to ask
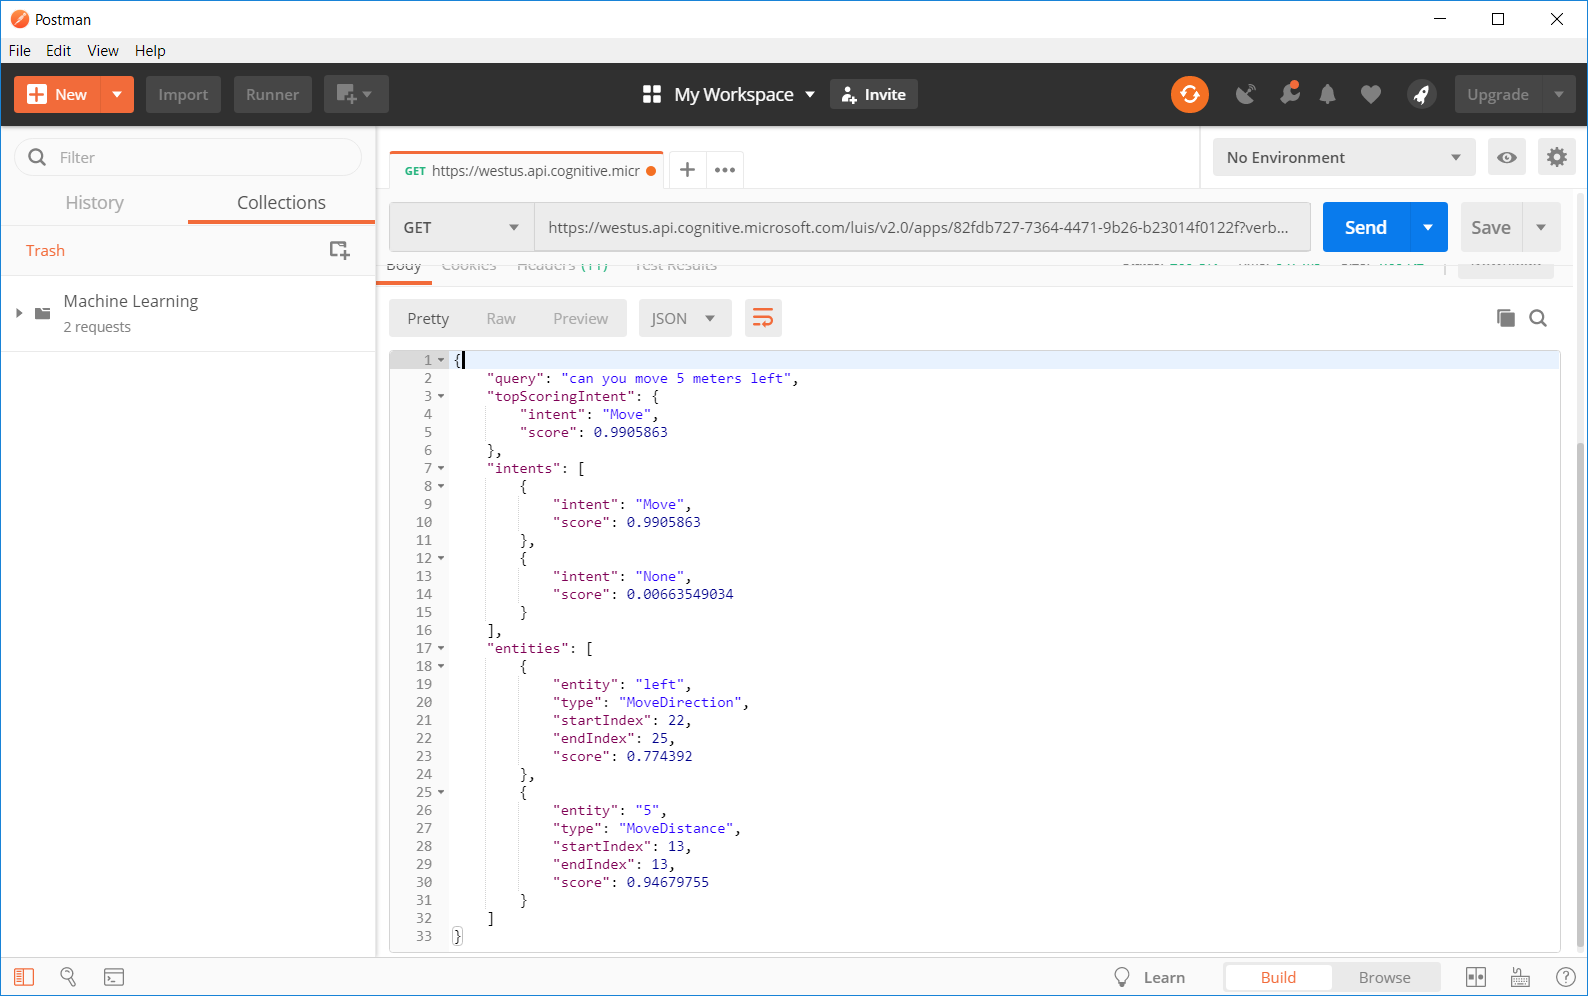
Then if we press Send, a JSON file with our results should be sent.
Speech Services
LUIS is used for converting a phrase to intents and entities. We still need something to convert our voice to text. For this, we’re going to use Microsoft’s cognitive speech services.
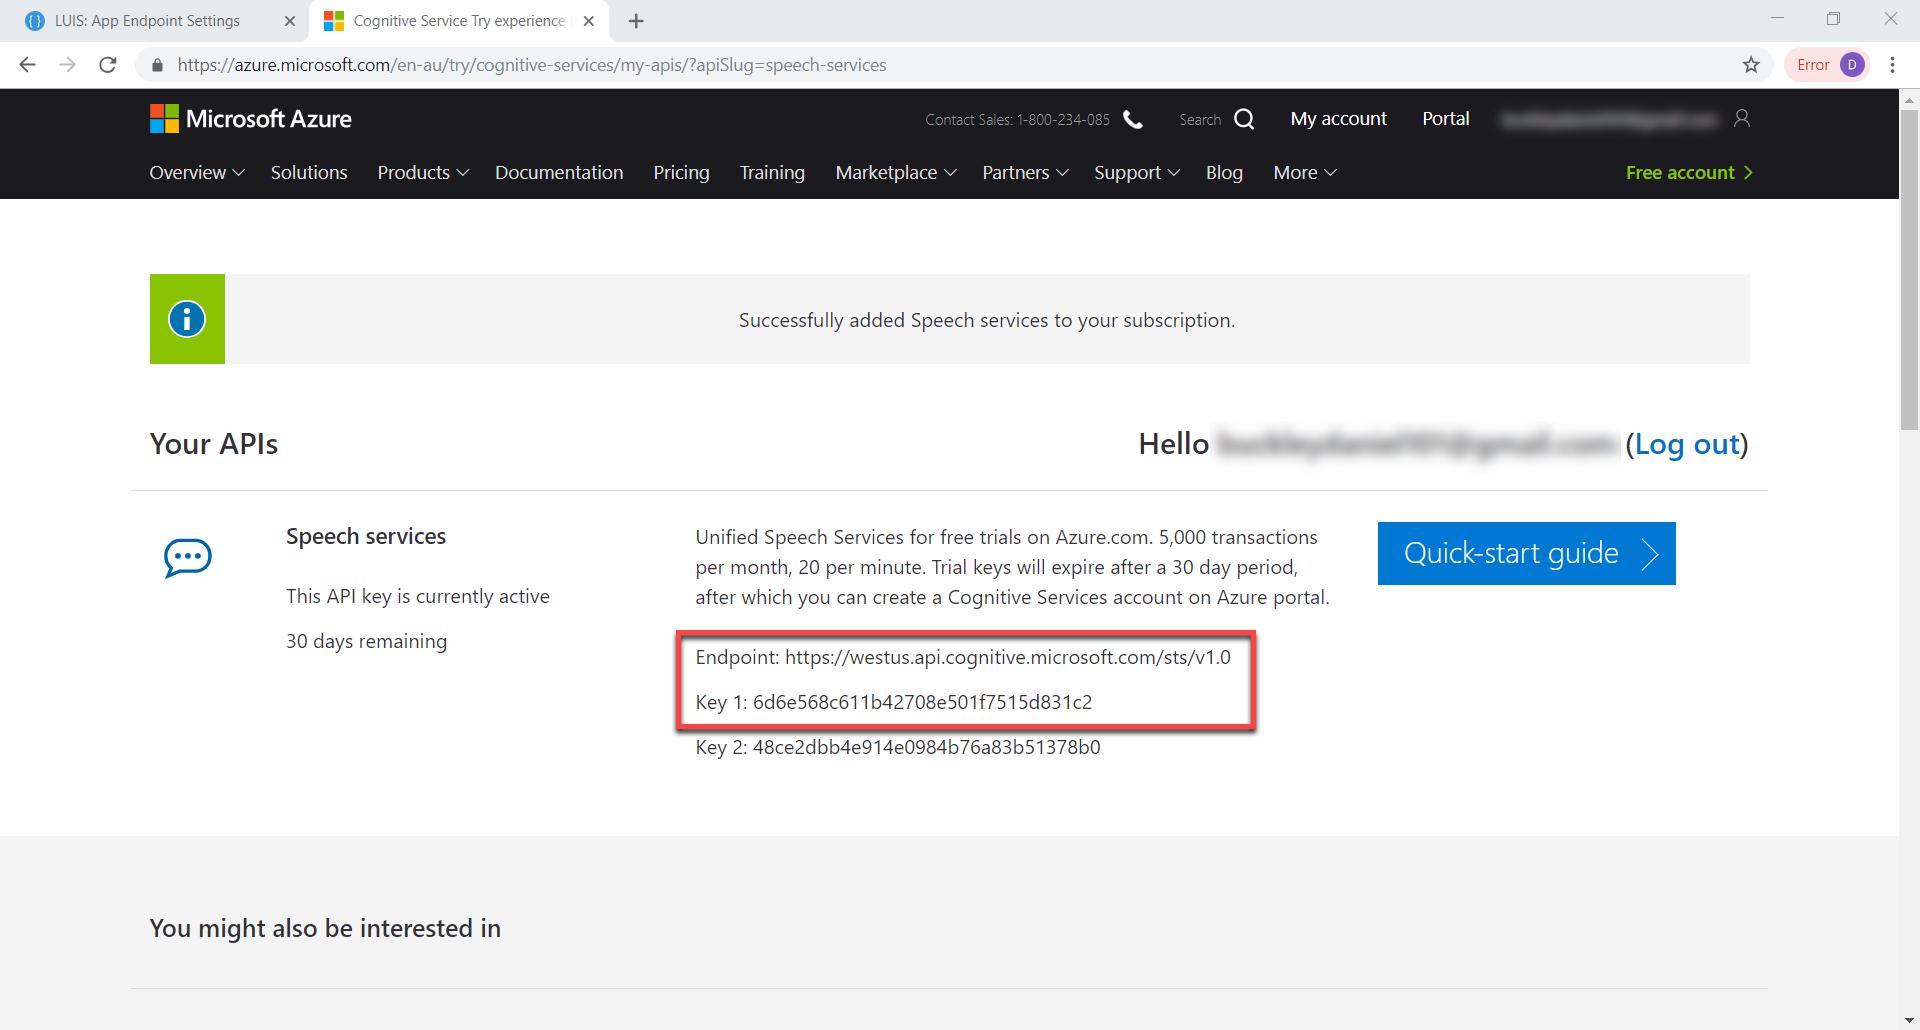
What we need from the dashboard is the Endpoint location (in my case westus) and Key 1.
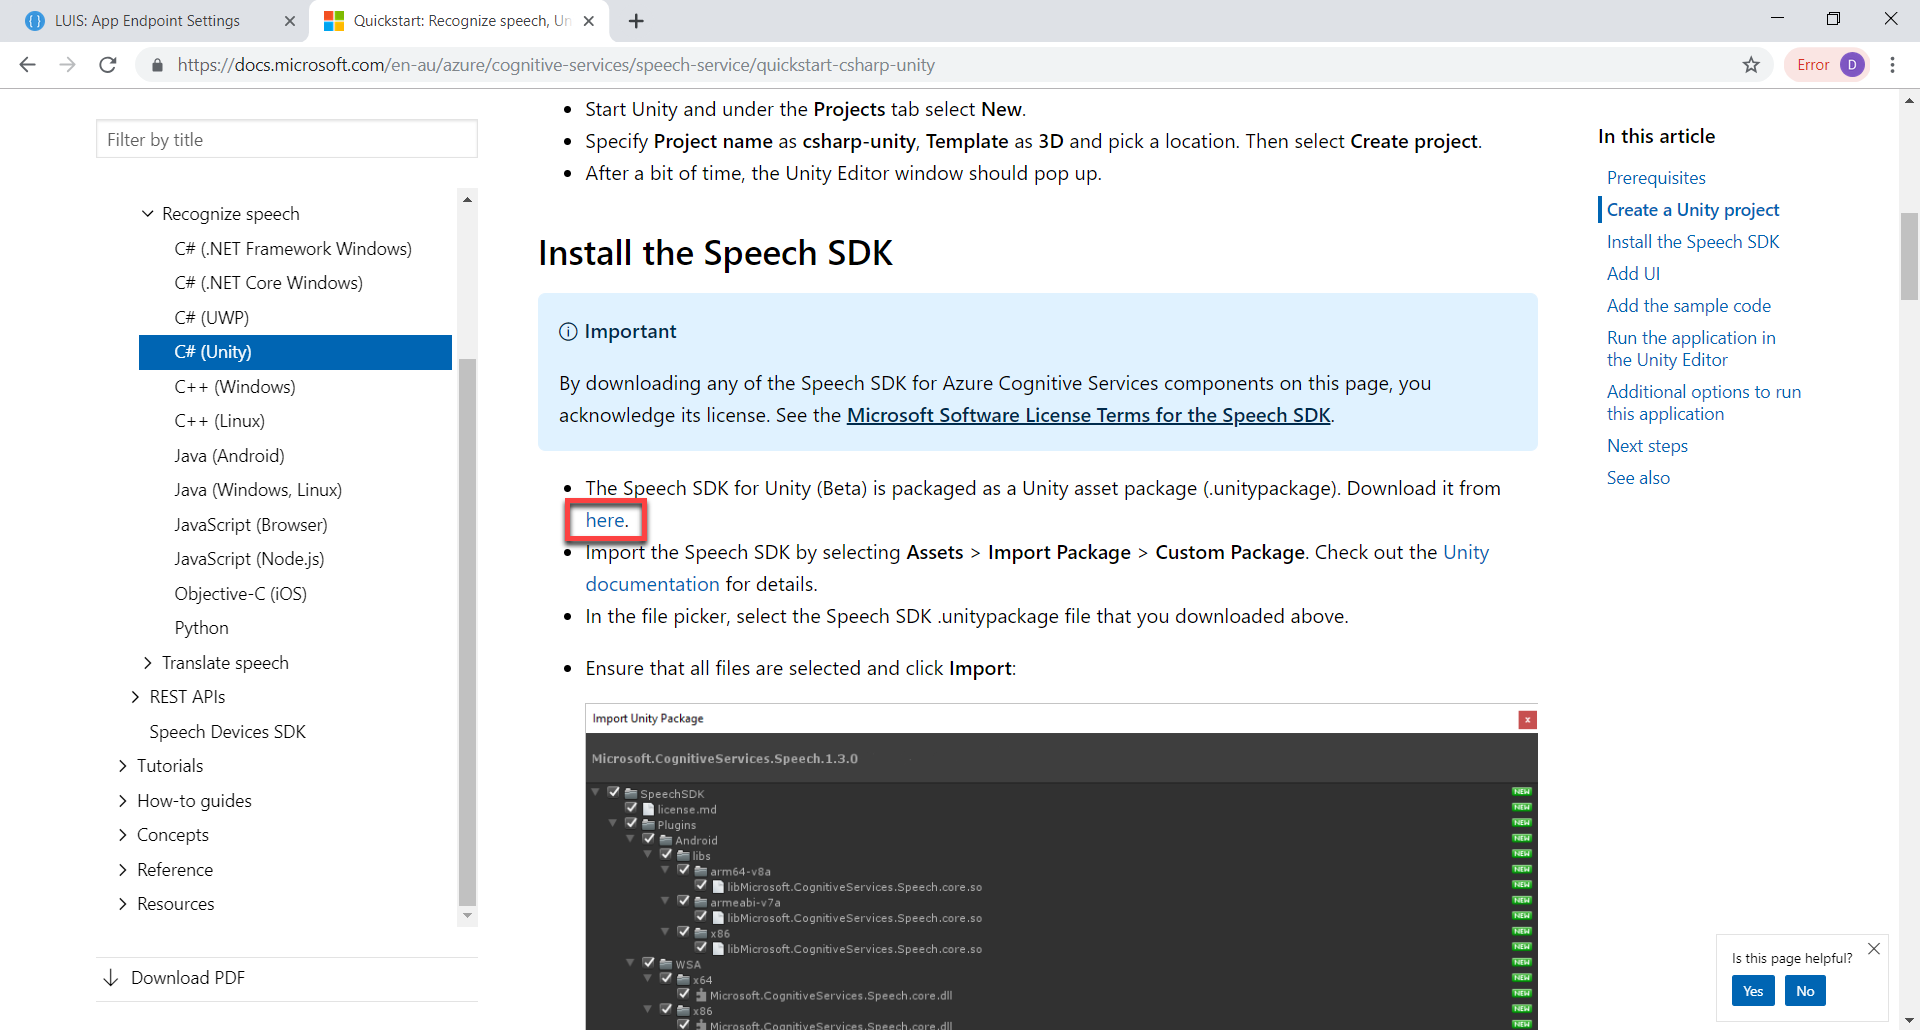
We then want to download the Speech SDK for Unity here. This is a .unitypackage file we can just drag and drop into the project.
Creating the Unity Project
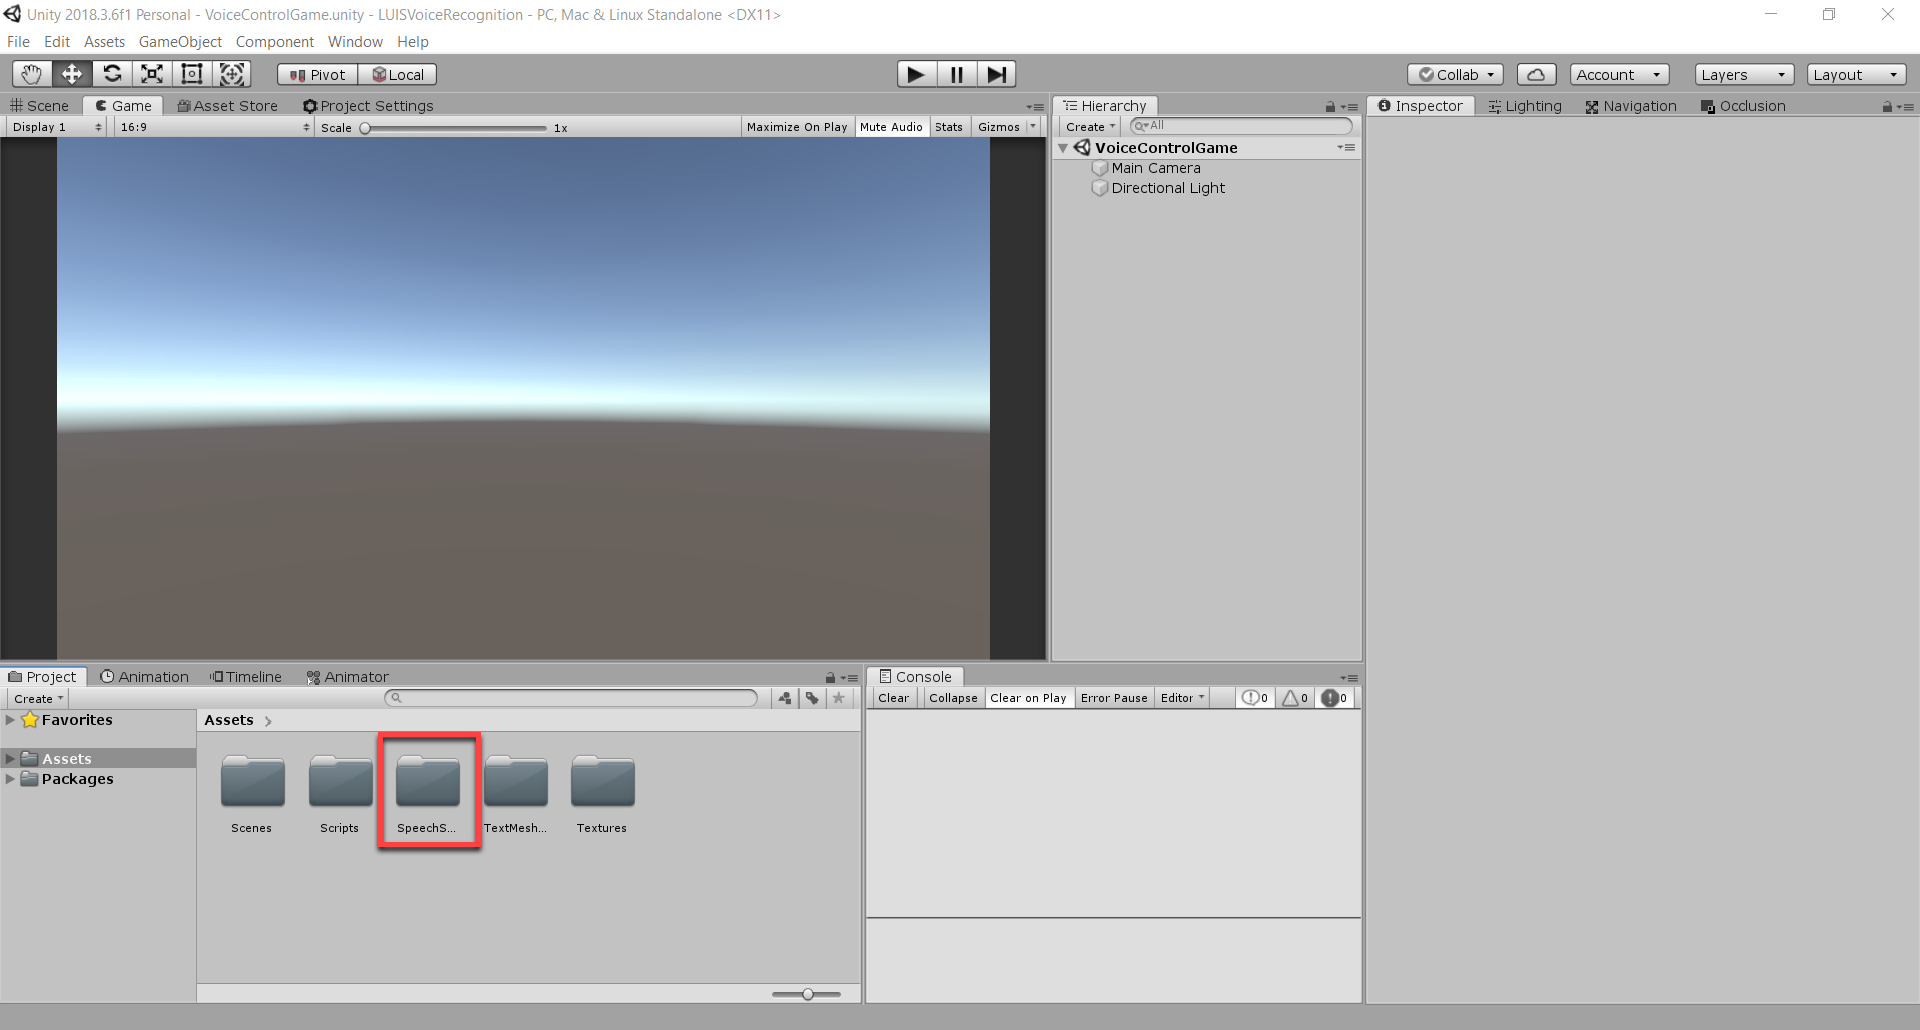
Create a new Unity project or use the included project files (we’ll be using those). Import the Speech SDK package.
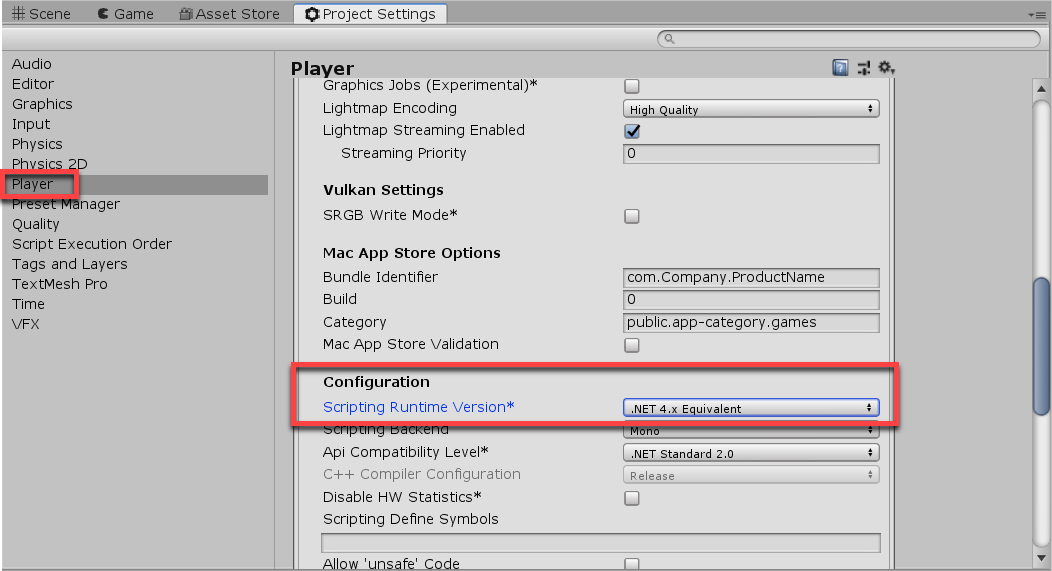
For the SDK to work, we need to go to our Project Settings (Edit > Project Settings…) and set the Scripting Runtime Version to .Net 4.x Equivalent. This is because the SDK and even us will be using some new C# features.
LUIS Manager Script
Create a new C# script (right click Project > Create > C# Script) and call it LUISManager.
We’re going to need to access a few outside namespaces for this script.
using UnityEngine.Networking;
using System.IO;
using System.Text;
For our variables, we have the url and subscription key. These are used to connect to LUIS.
// url to send request to
public string url;

// LUIS subscription key
public string subscriptionKey;
Our resultTarget will be the object we’re moving. It’s of type Mover, which we haven’t created yet so just comment that out for now.
// target to send the request class to
public Mover resultTarget;
We then have our events. onSendCommand is called when the command is ready to be sent. onStartRecordVoice is called when we start to record our voice and onEndRecordVoice is called when we stop recording our voice.
// event called when a command is ready to be sent
public delegate void SendCommand(string command);
public SendCommand onSendCommand;

// called when the player starts to record their voice
public System.Action onStartRecordVoice;

// called when the player stops recording their voice
public System.Action onEndRecordVoice;
Finally, we have our instance – allowing us to easily access the script.
// instance
public static LUISManager instance;

void Awake ()
{
    // set instance to this script
    instance = this;
}
Let’s subscribe to the onSendCommand event – calling the OnSendCommand function.
void OnEnable ()
{
    // subscribe to onSendCommand event
    onSendCommand += OnSendCommand;
}

void OnDisable()
{
    // un-subscribe from onSendCommand event
    onSendCommand -= OnSendCommand;
}
The OnSendCommand function will simply start the CalculateCommand coroutine, which is the main aspect of this script.
// called when a command is ready to be sent
void OnSendCommand (string command)
{
    StartCoroutine(CalculateCommand(command));
}
Calculating the Command
In the LUISManager script, create a coroutine called CalculateCommand which takes in a string.
// sends the string command to the web API and receives a result as a JSON file
IEnumerator CalculateCommand (string command)
{

}
First thing we do, is check if the command is empty. If so, return.
// if command is nothing, return
if (string.IsNullOrEmpty(command))
    yield return null;
Then we create our web request, download handler, set the url and send the request.
// create our web request
UnityWebRequest webReq = new UnityWebRequest();

webReq.downloadHandler = new DownloadHandlerBuffer();
webReq.url = string.Format("{0}?verbose=false&timezoneOffsset=0&subscription-key={1}&q={2}", url, subscriptionKey, command);

// send the web request
yield return webReq.SendWebRequest();
Once we get the web request, we need to convert it from a JSON file to our custom LUISResult class, then inform the mover object.
// convert the JSON so we can read it
LUISResult result = JsonUtility.FromJson<LUISResult>(Encoding.Default.GetString(webReq.downloadHandler.data));

// send the result to the target object
resultTarget.ReadResult(result);
LUIS Result
The LUIS result class is basically a collection of three classes that build up the structure of the LUIS JSON file. Create three new scripts: LUISResult, LUISIntent and LUISEntity.
LUISResult:
[System.Serializable]
public class LUISResult
{
    public string query;
    public LUISIntent topScoringIntent;
    public LUISEntity[] entities;
}
LUISIntent:
[System.Serializable]
public class LUISIntent
{
    public string intent;
    public float score;
}
LUISEntity:
[System.Serializable]
public class LUISEntity
{
    public string entity;
    public string type;
    public int startIndex;
    public int endIndex;
    public float score;
}
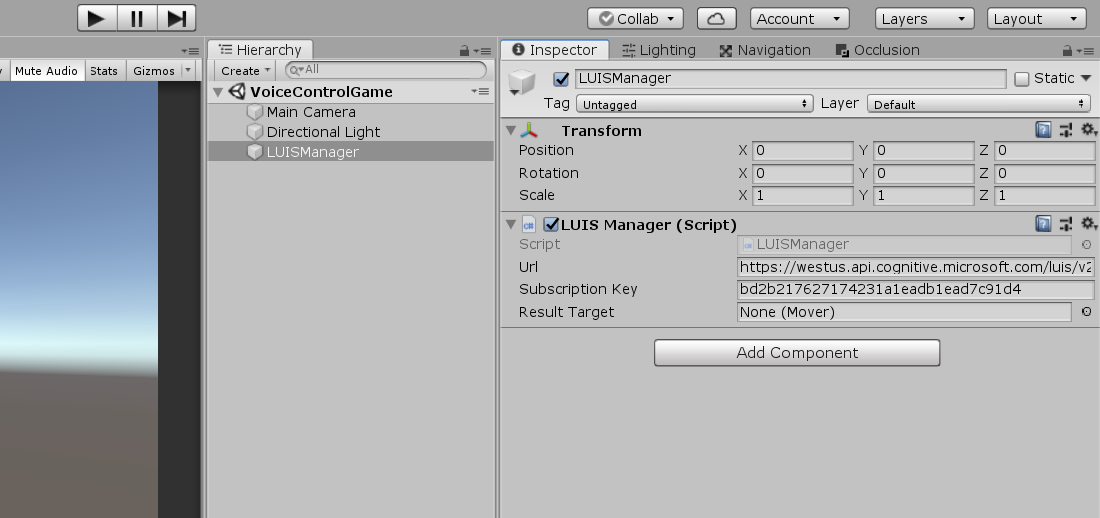
Back in Unity, let’s create a new game object (right click Hierarchy > Create Empty) and call it LUISManager. Attach the LUISManager script to it and fill in the details.
- Url – the url endpoint we entered into Postman (endpoint url up to the first question mark)
- Subscription Key – your authoring key (same one we entered in Postman)
Recording our Voice
The next step in the project, is to create the script that will listen to our voice and convert it to text. Create a new C# script called VoiceRecorder.
Like with the last one, we need to include the outside namespaces we’re going to access.
using System.Threading.Tasks;
using UnityEngine.Networking;
using Microsoft.CognitiveServices.Speech;
Our first variables the sub key and service region for the speech service.
// Microsoft cognitive speech service info
public string subscriptionKey;
public string serviceRegion;
Then we need to know if we’re currently recording, what our current command is to send and is the command ready to be sent?
// are we currently recording a command through our mic?
private bool recordingCommand;

// current command we're going to send
private string curCommand;

// TRUE when a command has been created
private bool commandReadyToSend;
Finally, we got our completion task. This is a part of the new C# task system which we’re going to use as an alternative to using coroutines, as that’s what the Speech SDK uses.
// task completion source to stop recording mic
private TaskCompletionSource<int> stopRecognition = new TaskCompletionSource<int>();
Let’s start with the RecordAudio function. async is basically an alternative to using coroutines. These allow you to pause functions and wait certain amounts of time before continuing. In our case, we need this to allow the SDK time to convert the audio to text.
// records the microphone and converts audio to text
async void RecordAudio ()
{

}
First, let’s say we’re recording and create a config class which holds our data.
recordingCommand = true;

SpeechConfig config = SpeechConfig.FromSubscription(subscriptionKey, serviceRegion);
Then we can create our recognizer. This is what’s going to convert the voice to text.
Inside of the using, we’re going to create an event to set the curCommand when the recognition has completed. Then we’re going to start listening to the voice. When the completion task is triggered, we’ll stop listening and convert the audio – tagging it as ready to be sent.
// create a recognizer
using(SpeechRecognizer recognizer = new SpeechRecognizer(config))
{
    // when the speech has been recognized, set curCommand to the result
    recognizer.Recognized += (s, e) =>
    {
        curCommand = e.Result.Text;
    };

    // start recording the mic
    await recognizer.StartContinuousRecognitionAsync().ConfigureAwait(false);

    Task.WaitAny(new[] { stopRecognition.Task });

    // stop recording the mic
    await recognizer.StopContinuousRecognitionAsync().ConfigureAwait(false);

    commandReadyToSend = true;
    recordingCommand = false;
}

return;
The CommandCompleted function gets called when the command is ready to be sent.
// called when the player has stopped talking and a command is created
// sends the command to the LUISManager ready to be calculated
void CommandCompleted ()
{
    LUISManager.instance.onSendCommand.Invoke(curCommand);
}
In the Update function, we want to check for the keyboard input on the return key. This will toggle the recording.
// frame when ENTER / RETURN key is down
if(Input.GetKeyDown(KeyCode.Return))
{
    // if we're not recording the mic - start recording
    if (!recordingCommand)
    {
        LUISManager.instance.onStartRecordVoice.Invoke();
        stopRecognition = new TaskCompletionSource<int>();
        RecordAudio();
    }
    // otherwise set task completed
    else
    {
        stopRecognition.TrySetResult(0);
        LUISManager.instance.onEndRecordVoice.Invoke();
    }
}
Then underneath that (still in the Update function) we check for when we’re ready to send a command, and do so.
// if the command's ready to go, send it
if(commandReadyToSend)
{
    commandReadyToSend = false;
    CommandCompleted();
}
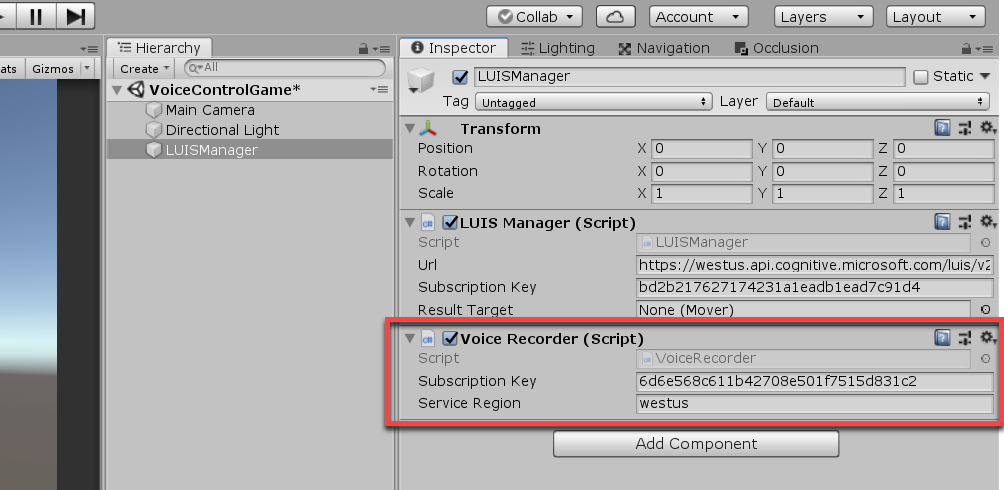
Attach this script also to the LUISManager object.
- Subscription Key – Speech service key 1
- Service Region – Speech service region
Mover Script
Create a new C# script called Mover. This is going to control the player.
Our variables are just our move speed, fall speed, default move distance, the position on the floor for the player and target position.
// units per second to move at
public float moveSpeed;

// units per second to fall downwards at
public float fallSpeed;

// distance to move if not specified
public float defaultMoveDist;

// Y position for this object when on the floor
public float floorYPos;

// position to move to
private Vector3 targetPos;
In the Start function, let’s set the target position to be our position.
void Start ()
{
    // set our target position to be our current position
    targetPos = transform.position;
}
In the Update function, we’ll move us towards the target position and fall downwards until we hit the floor Y position.
void Update ()
{
    // if we're not at our target pos, move there over time
    if(transform.position != targetPos)
        transform.position = Vector3.MoveTowards(transform.position, targetPos, moveSpeed * Time.deltaTime);

    if(targetPos.y > floorYPos)
        targetPos.y -= fallSpeed * Time.deltaTime;
}
ReadResult takes in a LUISResult and figures out a move direction and move distance – updating the target position.
// called when a command gets a result back - moves the cube
public void ReadResult (LUISResult result)
{
    // is there even a result and the top scoring intent is "Move"?
    if(result != null && result.topScoringIntent.intent == "Move")
    {
        Vector3 moveDir = Vector3.zero;
        float moveDist = defaultMoveDist;

        // loop through each of the entities
        foreach(LUISEntity entity in result.entities)
        {
            // if the entity is MoveDirection
            if(entity.type == "MoveDirection")
                moveDir = GetEntityDirection(entity.entity);
            // if the entity is MoveDistance
            else if(entity.type == "MoveDistance")
                moveDist = float.Parse(entity.entity);
        }

        // apply the movement
        targetPos += moveDir * moveDist;
    }
}
GetEntityDirection takes in a direction as a string and converts it to a Vector3 direction.
// returns a Vector3 direction based on text sent
Vector3 GetEntityDirection (string directionText)
{
    switch(directionText)
    {
        case "forwards":
            return Vector3.forward;
        case "backwards":
            return Vector3.back;
        case "back":
            return Vector3.back;
        case "left":
            return Vector3.left;
        case "right":
            return Vector3.right;
    }

    return Vector3.zero;
}
Scene Setup
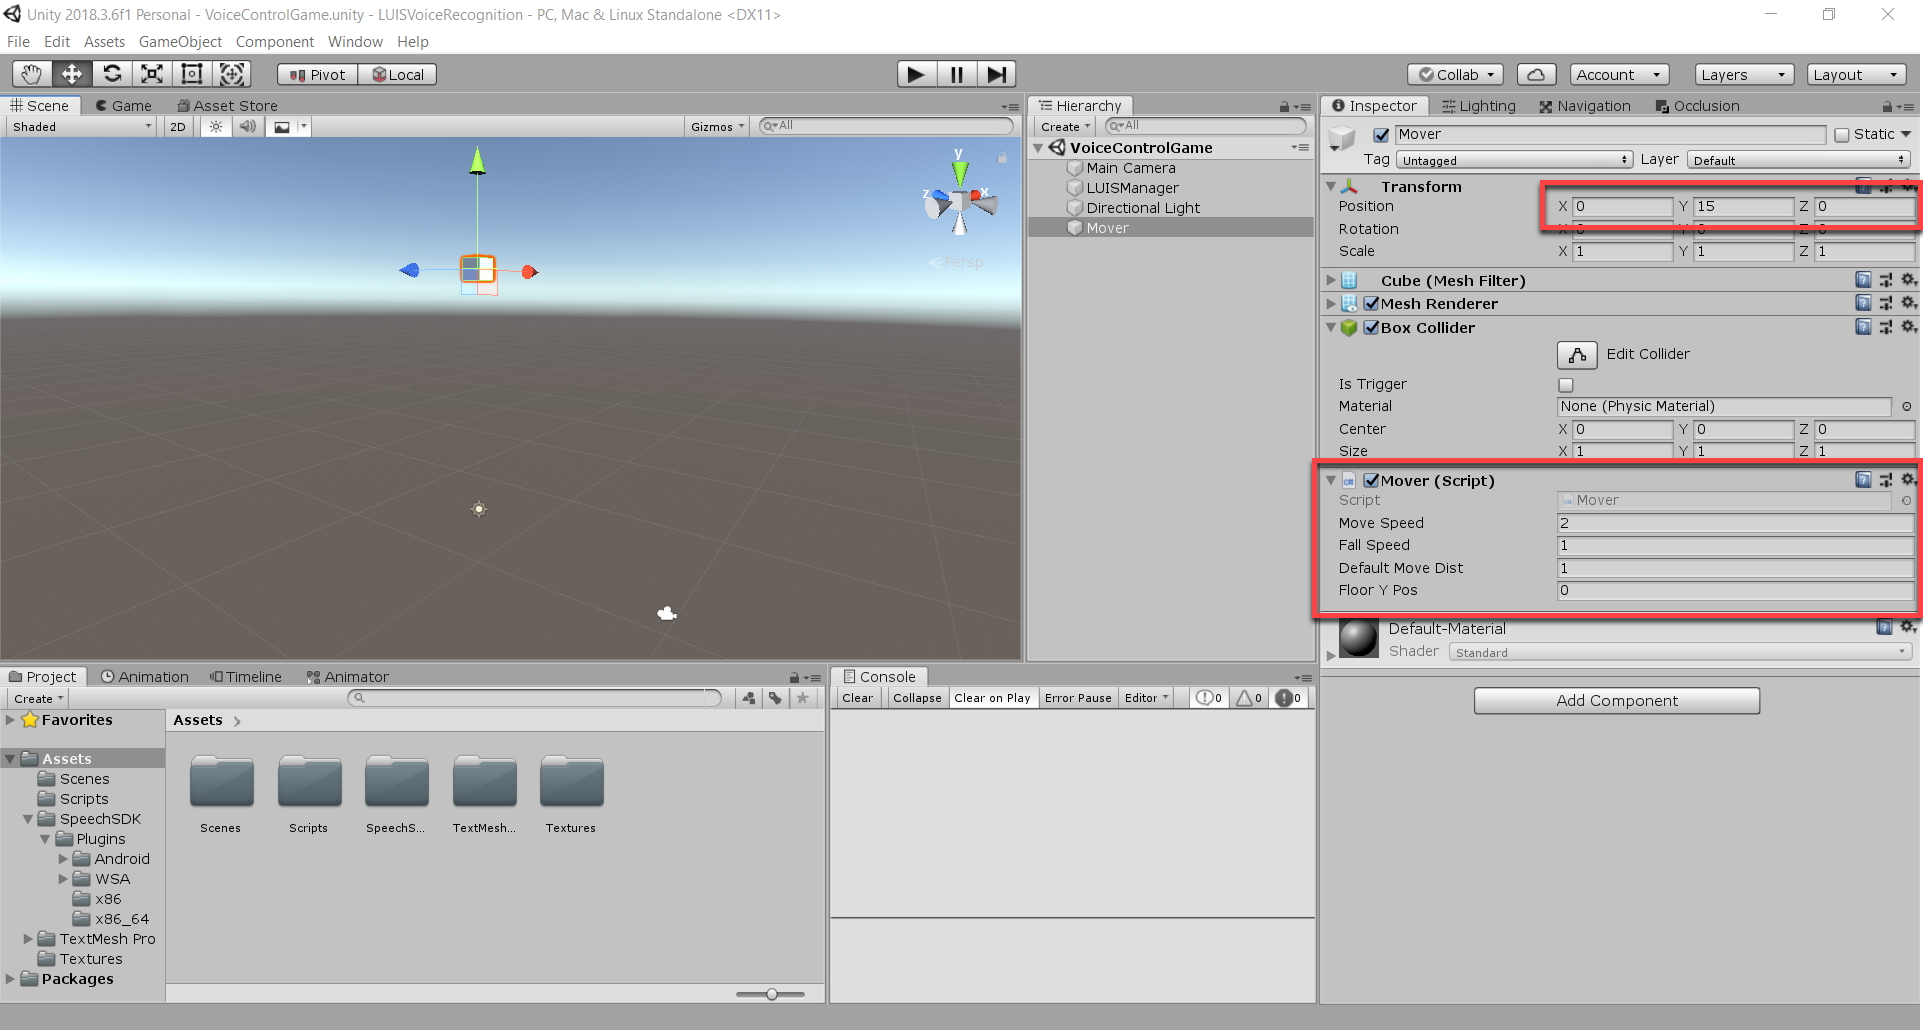
Back in the editor, create a new cube (right click Hierarchy > 3D Object > Cube) and call it Mover. Attach the Mover script and set the properties:
- Move Speed – 2
- Fall Speed – 1
- Default Move Dist – 1
- Floor Y Pos – 0
Also set the Y position to 15.
For the ground, let’s create a new empty game object called Environment. Then create a new plane as a child called Ground.
- Set the scale to 8

Drag in the MarsMaterial on to the plane (Textures folder). Then parent the camera to the mover.
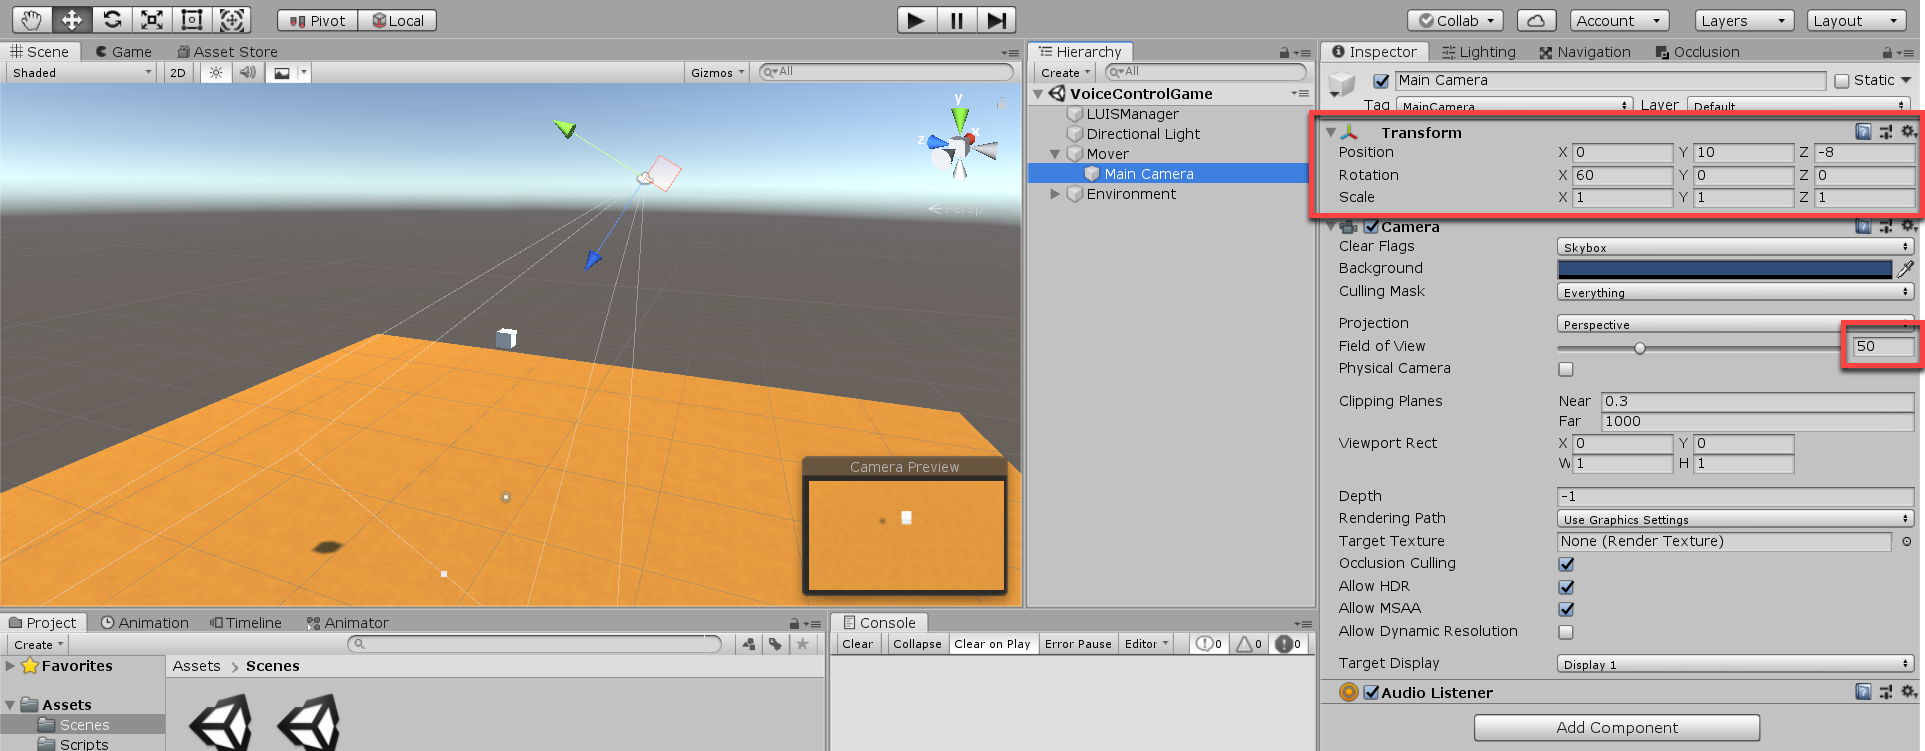
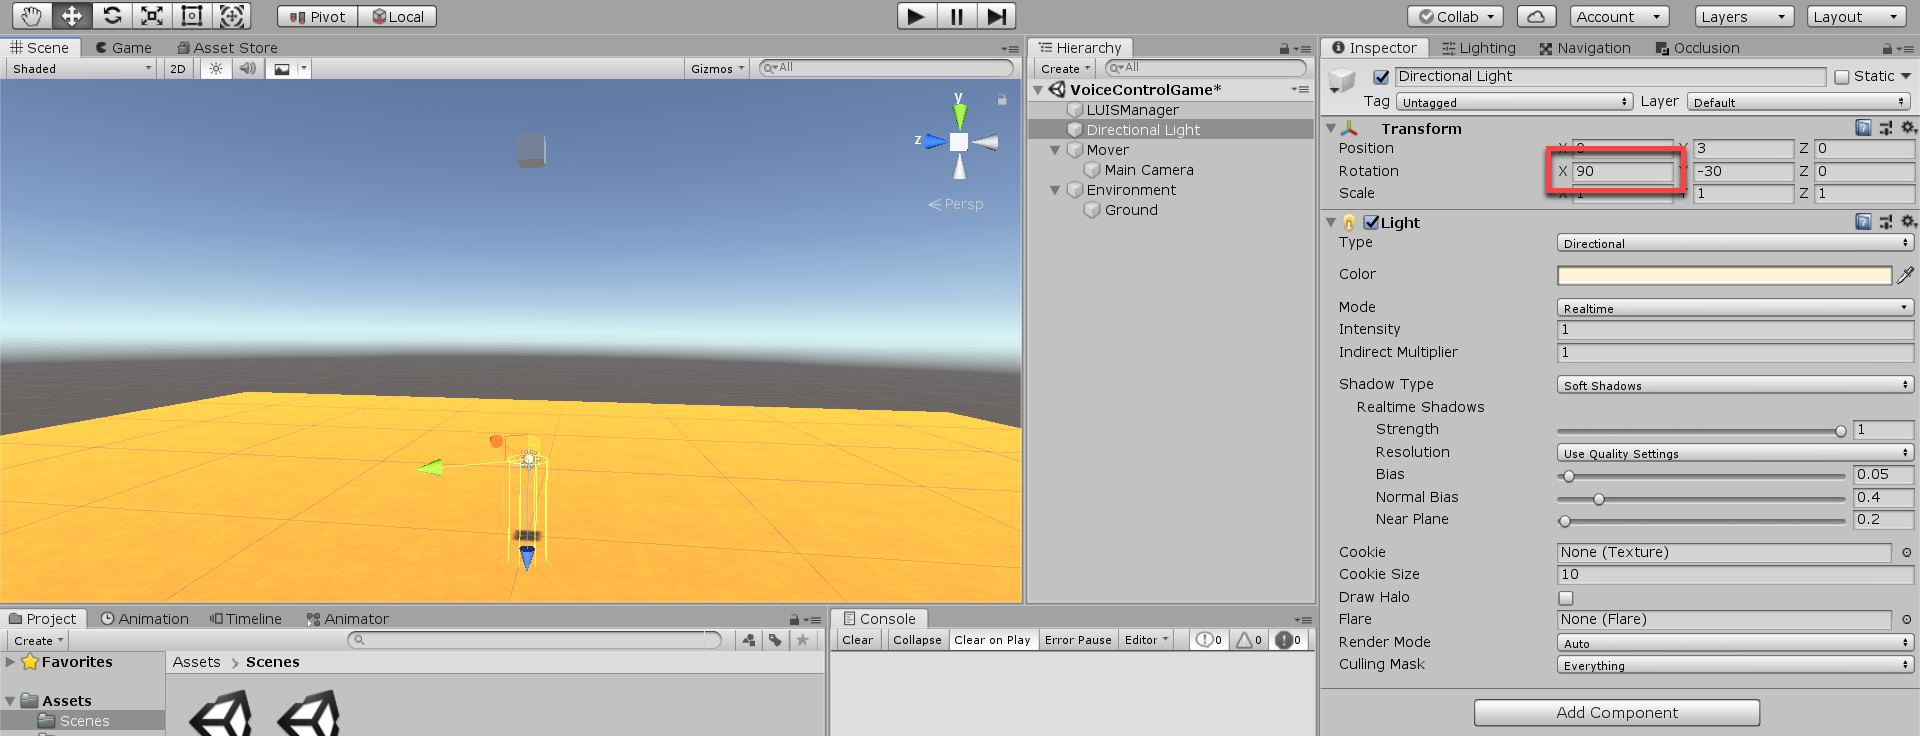
Let’s now rotate the directional light so it’s facing directly downwards. This makes it so we can see where the mover is going to land on the ground – allowing the player to finely position it.
- Set the Rotation to 90, -30, 0
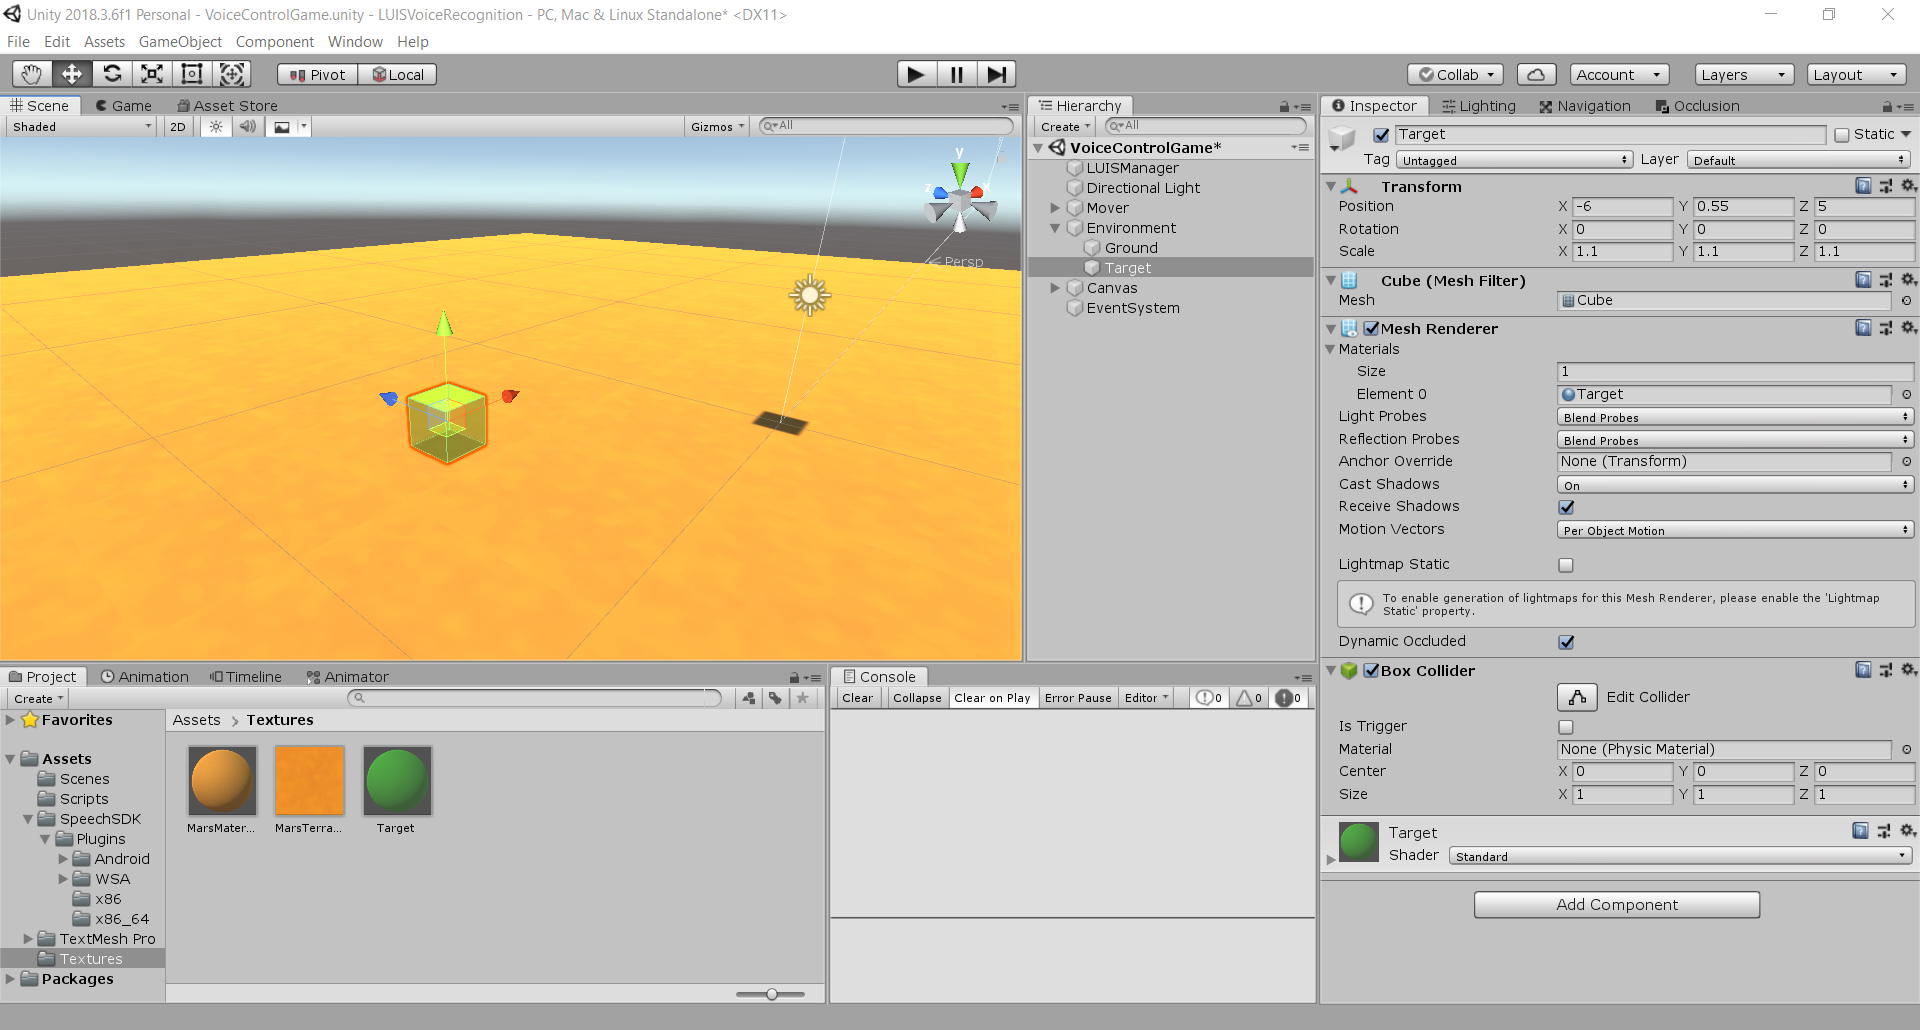
Let’s also add in a target object. There won’t be any logic behind it, just as a goal for the player.
Creating the UI
Create a canvas with two text elements – showing the altitude and current move phrase.
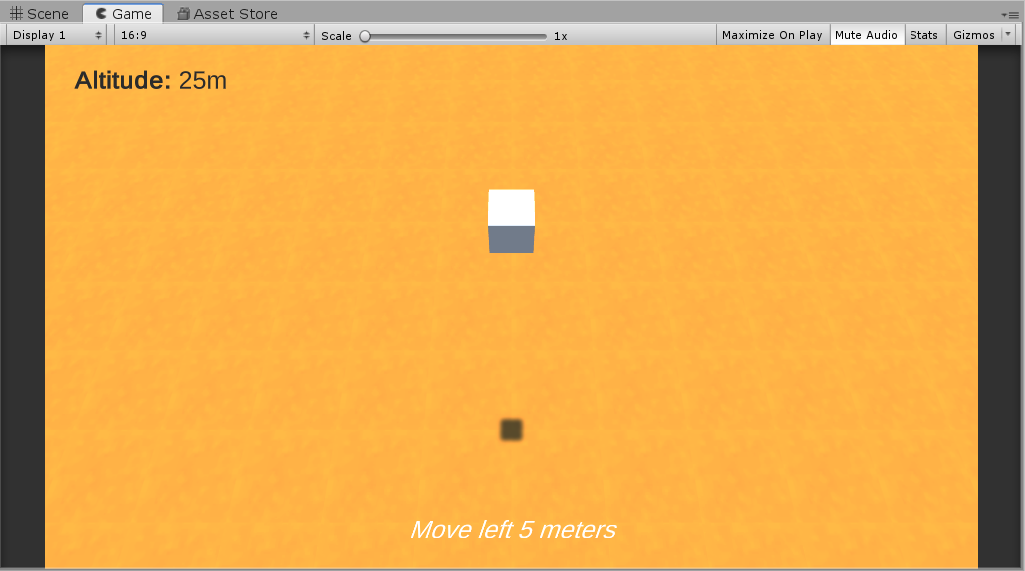
Now let’s create the UI script and attach it to the LUISManager object. Since we’re using TextMeshPro, we’ll need to reference the namespace.
using TMPro;
For our variables, we’re just going to have our info text, speech text and mover object.
// text which displays information
public TextMeshProUGUI infoText;

// text which displays speech to text feedback
public TextMeshProUGUI speechText;

// object which the player can control
public GameObject moverObject;
In the OnEnable function, let’s subscribe to the events we need and un-subscribe to them in the OnDisable function.
void OnEnable ()
{
    // subscribe to events
    LUISManager.instance.onSendCommand += OnSendCommand;
    LUISManager.instance.onStartRecordVoice += OnStartRecordVoice;
    LUISManager.instance.onEndRecordVoice += OnEndRecordVoice;
}

void OnDisable ()
{
    // un-subscribe from events
    LUISManager.instance.onSendCommand -= OnSendCommand;
    LUISManager.instance.onStartRecordVoice -= OnStartRecordVoice;
    LUISManager.instance.onEndRecordVoice -= OnEndRecordVoice;
}
In the Update function, we’re going to just update the info text to display the player’s Y position.
void Update ()
{
    // update info text
    infoText.text = "<b>Altitude:</b> " + (int)moverObject.transform.position.y + "m";
}
Here’s the functions the events call. It basically updates the speech text to show when your recording your voice, calculating it and execute it.
// called when a command is ready to be sent
// display the speech text if it was a voice command
void OnSendCommand (string command)
{
    speechText.text = command;
}

// called when we START recording our voice
void OnStartRecordVoice ()
{
    speechText.text = "...";
}

// called when we STOP recording our voice
void OnEndRecordVoice ()
{
    speechText.text = "calculating...";
}
Make sure to connect the text elements and mover object.

Conclusion
Now we’re done! You can press play and command the cube with your voice! If you missed some of the links you can find them here:

